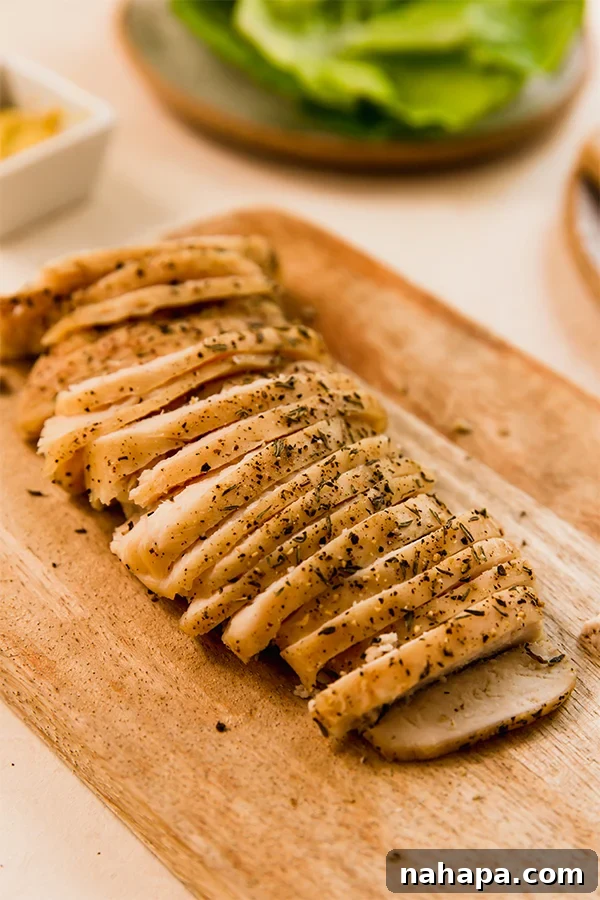
Imagine biting into delicious, savory chicken lunch meat that tastes incredibly fresh, yet you made it yourself with real, wholesome ingredients. This isn’t just a dream; it’s a surprisingly simple reality! Crafting your own chicken deli slices at home is a game-changer, offering a taste that truly rivals store-bought varieties, but without any of the questionable additives. Prepare to discover how effortless it is to create this kitchen marvel with just a handful of minimal ingredients.
Why Choose Homemade Chicken Lunch Meat? Ditching the Deli Aisle Dilemma
For years, the convenience of pre-packaged turkey or chicken lunch meat has been a staple in countless refrigerators. It’s easy, quick, and seems like a reliable option for sandwiches, wraps, and quick snacks. However, have you ever paused to truly examine the ingredient list on your favorite deli meat? Many commercial options are laden with an array of hidden ingredients that can raise an eyebrow: excessive sodium, refined sugars, carrageenan, caramel coloring, nitrates, nitrites, and a host of artificial flavors and preservatives. These additives are often included to extend shelf life, enhance texture, or deepen color, but they do little for your health and can leave you feeling less than optimal.
The good news? The secret to wholesome, flavorful lunch meat is surprisingly simple, and it begins right in your own kitchen! By making your own homemade chicken lunch meat, you gain complete control over every single ingredient. This means you can significantly reduce sodium levels, eliminate refined sugars, say goodbye to artificial colors like caramel coloring, and ensure that every bite is packed with pure, delicious flavor derived from real food. It’s a healthier, more transparent, and ultimately more satisfying choice for you and your family.
Essential Ingredients for Your Perfect Homemade Deli Chicken
Creating succulent chicken lunch meat doesn’t require a long list of exotic items. In fact, the beauty of this recipe lies in its simplicity and the power of a few key ingredients to deliver incredible flavor and texture. Here’s what you’ll need to transform ordinary chicken breast into extraordinary deli slices:
Chicken Breast: The Foundation of Flavor
- Quality Matters: Opt for high-quality chicken breast whenever possible. Organic, free-range chicken often offers superior flavor and texture.
- Fresh or Frozen: You can absolutely use frozen chicken breast, just ensure it’s thoroughly defrosted before you begin the marinating process. Patting it very dry is crucial for the marinade to adhere properly and for even cooking.
- Cut Consistency: For even cooking and slicing, aim for breasts of relatively similar thickness. You can gently pound thicker parts to achieve uniformity if necessary.
Sweetness and Balance: Maple Syrup (or Honey)
- Natural Sweetener: Maple syrup provides a subtle sweetness that balances the savory elements and helps in achieving that classic deli flavor profile. It also contributes to a beautiful, golden-brown crust.
- Alternative: If maple syrup isn’t readily available or you prefer another option, high-quality honey can be used as a 1:1 substitute, offering a similar depth of flavor.
Aromatic Essentials: Onion Powder and Garlic Powder
- Concentrated Flavor: These two powerhouse ingredients are the secret to that familiar, comforting deli meat aroma and taste. Using powders ensures an even distribution of flavor without the moisture content of fresh onions and garlic, which can impact texture.
- Amplify the Savory Notes: They provide a deep, umami base that perfectly complements the chicken.
The Brightening Touch: Apple Cider Vinegar
- Flavor Pop: A small amount of apple cider vinegar works wonders to brighten and elevate all the other flavors in the marinade. It adds a subtle tang that prevents the chicken from tasting flat.
- Subtle Tenderizer: The acidity in apple cider vinegar can also contribute to slightly tenderizing the chicken, resulting in a more pleasant texture.
Classic Seasonings: Black Pepper, Dried Thyme, and Salt
- Black Pepper: Provides a gentle heat and aromatic complexity. For those following an AIP (Autoimmune Protocol) diet, black pepper can be omitted without significantly compromising the overall taste.
- Dried Thyme: A quintessential herb in many savory dishes, dried thyme adds an earthy, slightly floral note that enhances the “deli” character of the chicken.
- Salt: Essential for seasoning and bringing out the natural flavors of the chicken. The amount can be adjusted to your preference, but remember that the reverse brining step will help balance its intensity.
With these simple, real food ingredients, you’re well on your way to creating a homemade chicken lunch meat that’s not only incredibly flavorful but also aligns with your healthy eating goals.
Essential Kitchen Tools for Seamless Preparation
While the recipe itself is straightforward, having the right tools on hand will make the process even smoother and more enjoyable. Here’s a quick list of what you’ll need:
- Baking Sheet: A sturdy baking sheet to hold your chicken during baking.
- Parchment Paper: Crucial for preventing sticking and making cleanup a breeze.
- Mixing Bowls: For combining your marinade ingredients.
- Resealable Bag or Covered Bowl: For marinating the chicken effectively. A high-quality reusable silicone bag is an excellent eco-friendly option.
- Meat Thermometer: Absolutely essential for ensuring the chicken is cooked through to a safe internal temperature (165°F / 74°C) without overcooking and drying it out.
- Sharp Knife: A good, sharp chef’s knife or carving knife is key for achieving those perfect, thin deli-style slices.
- Cutting Board: A stable surface for preparing and slicing your chicken.
Step-by-Step Guide: Crafting Your Own Delicious Homemade Chicken Lunch Meat
Creating your own deli-style chicken is a rewarding process that involves just a few simple stages. Follow these detailed steps to achieve perfectly flavored and tender results every time.
Step 1: Prepare and Marinate for Optimal Flavor Infusion
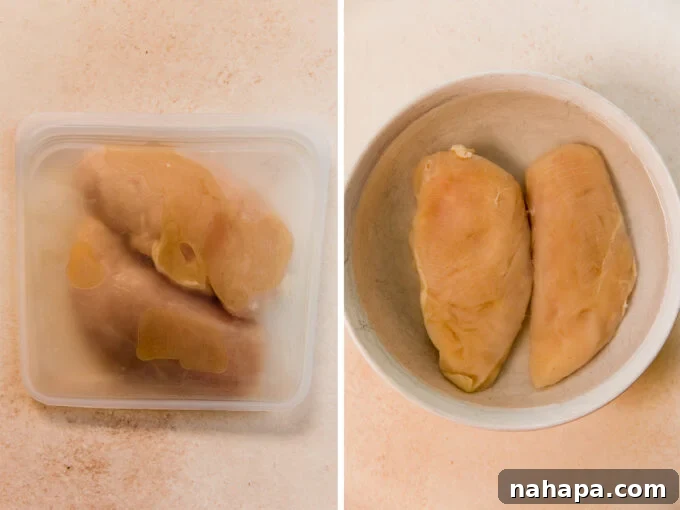
Begin by ensuring your chicken breasts are perfectly prepared. Pat them thoroughly dry with paper towels. This crucial step helps the marinade adhere better to the chicken’s surface, ensuring maximum flavor penetration. Next, in a medium bowl, whisk together your maple syrup (or honey), garlic powder, onion powder, and the initial amount of salt until you have a well-combined mixture. Generously rub this aromatic marinade onto all sides of each chicken breast, making sure it’s evenly coated. Place the marinated chicken in a reusable, airtight bag (like a silicone stasher bag) or a covered bowl. Transfer it to the refrigerator and allow it to marinate for a significant period: 36 to 48 hours. This extended marination time is key to developing deep, complex flavors reminiscent of traditional deli meats.
Step 2: The Reverse Brine for Unbeatable Juiciness and Balanced Seasoning
After the marination period, it’s time for a clever technique called “reverse brining,” which contributes significantly to the tenderness and moisture of your final product. Take a large bowl and fill it with chilled water. Carefully place your marinated chicken breasts into the water. Cover the bowl and let the chicken sit at room temperature for approximately one hour. This process works two ways: it gently draws out some of the excess salt from the surface of the chicken, preventing it from becoming overly salty, and it also helps the chicken retain moisture during cooking, resulting in a remarkably juicy and tender texture.
Step 3: Season and Bake to Perfection
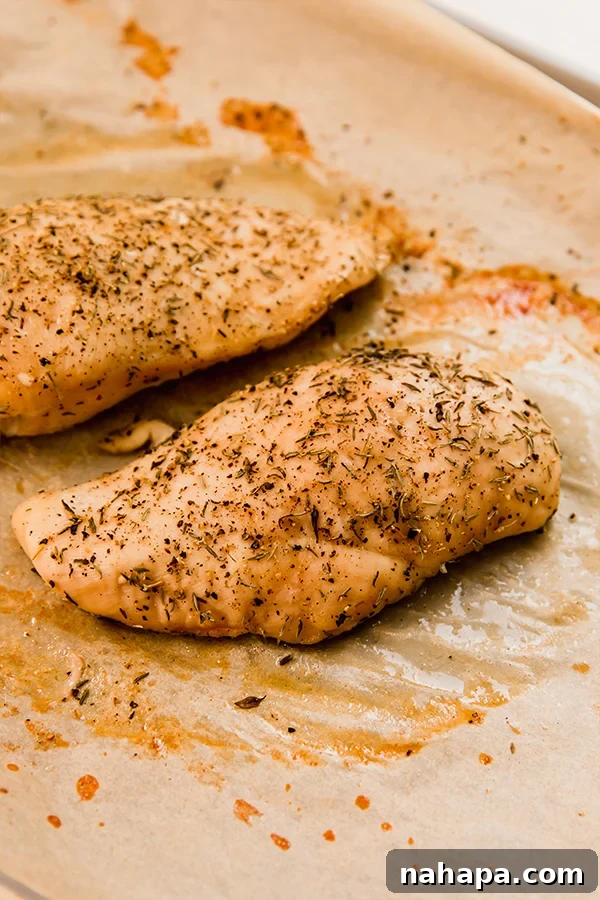
Preheat your oven to a low 250°F (120°C). Line a baking sheet with parchment paper, which will prevent sticking and make cleanup much easier. Remove the chicken from the water bath and pat it very dry once more. Arrange the chicken breasts on the prepared baking sheet. Now, generously rub apple cider vinegar onto all sides of each chicken breast. This adds another layer of tang and helps tenderize the meat. Finally, season the chicken liberally with your desired amount of black pepper (omit for AIP) and dried thyme, ensuring all surfaces are covered. Bake the chicken in the preheated oven for at least an hour, or potentially longer, depending on the thickness of your chicken breasts. The critical factor is to cook until the internal temperature reaches 165°F (74°C) when measured with a meat thermometer at the thickest part. Cooking at a low temperature helps maintain moisture and ensures even doneness.
Step 4: Cool, Slice Thinly, and Savor
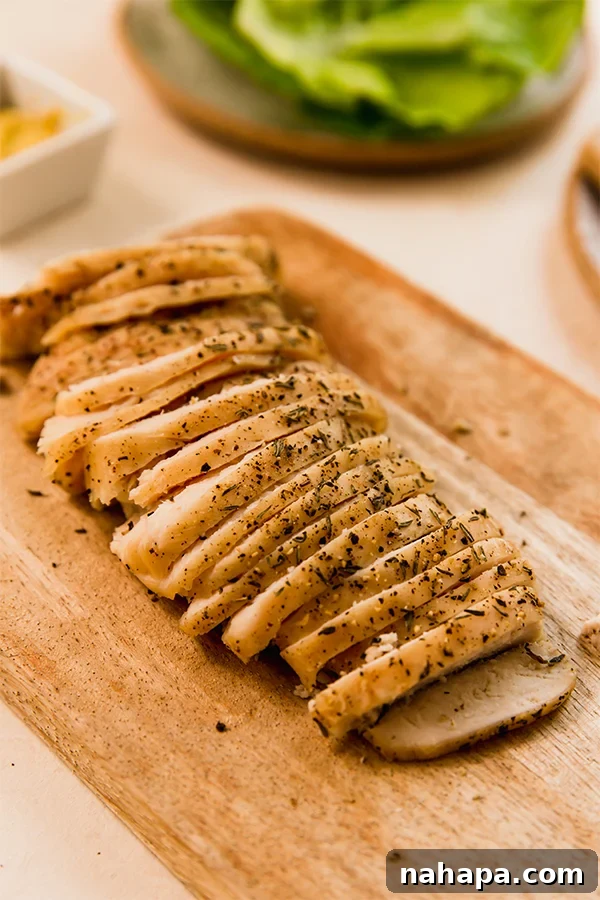
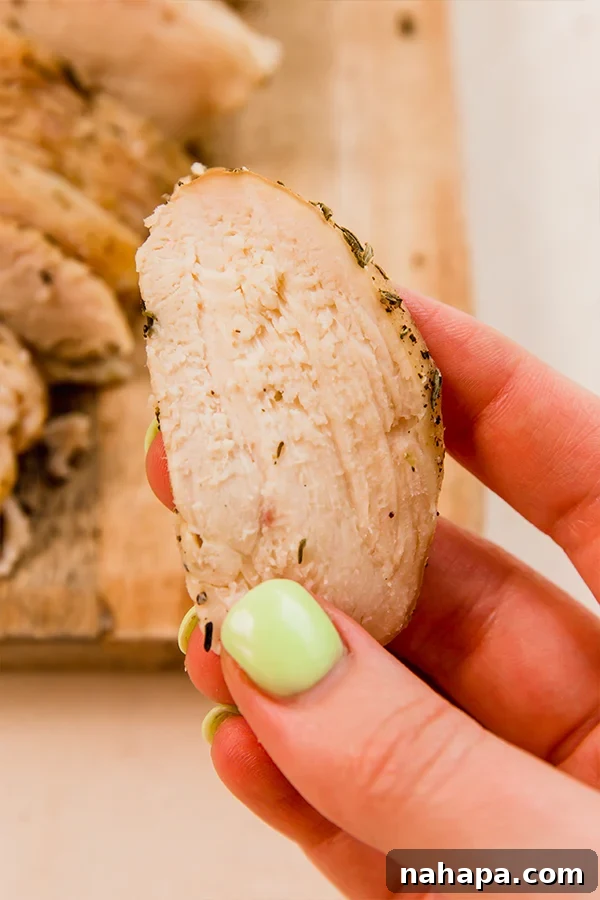
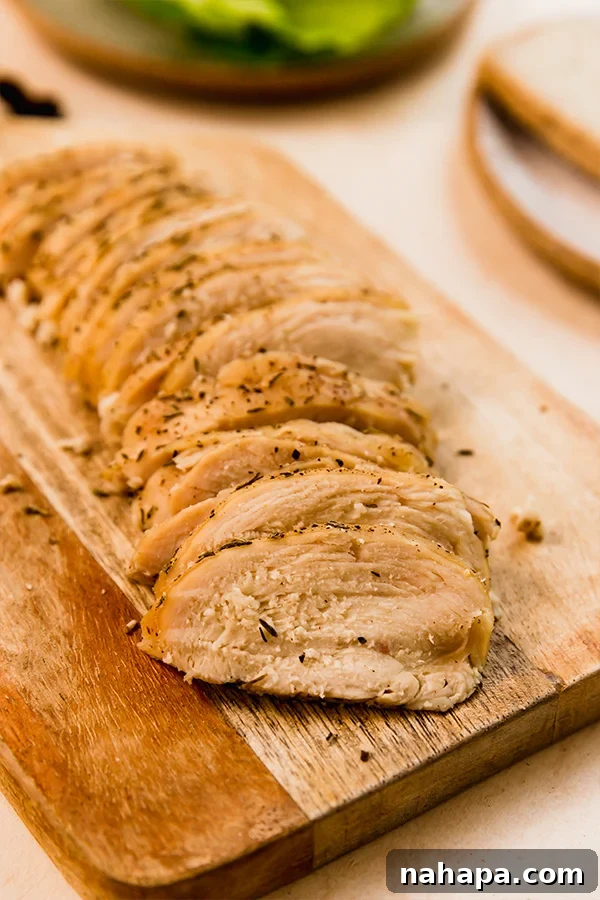
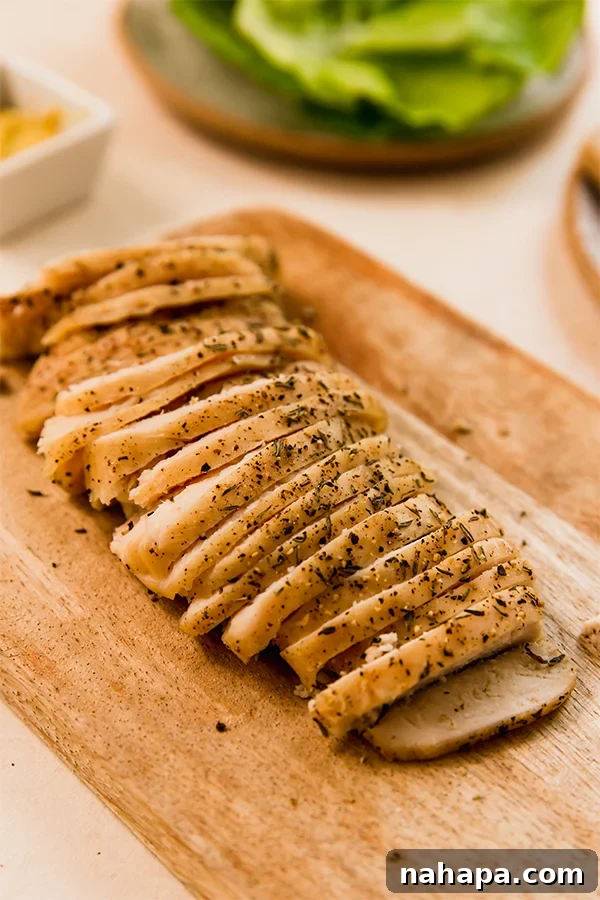
Once your chicken reaches the target internal temperature, remove it from the oven. It’s vital to allow the chicken to rest for at least 30 minutes on the baking sheet or a cutting board before slicing. This resting period allows the juices to redistribute throughout the meat, ensuring maximum tenderness and flavor. Once cooled sufficiently, use a very sharp knife to thinly slice the chicken against the grain. Aim for uniform, deli-thin slices for the best texture and eating experience. Your homemade chicken lunch meat is now ready to be enjoyed! Serve it just like you would any store-bought variety – in sandwiches, wraps, salads, or simply as a protein-packed snack.
Frequently Asked Questions About Homemade Deli Meat
Embarking on your homemade deli meat journey might spark a few questions. Here are answers to some common queries to help you master this delicious craft:
Can you use this method with other proteins like turkey?
Absolutely! This versatile method can be easily adapted for other lean proteins, most notably turkey breast. The principles of marination, reverse brining, and low-temperature baking work beautifully for turkey as well. However, keep in mind that turkey breasts are typically much larger and thicker than chicken breasts. This means you will need to adjust the quantities of your marinade ingredients accordingly (likely increasing them) and significantly extend the baking time. Always rely on an internal meat thermometer to ensure the turkey reaches a safe internal temperature of 165°F (74°C).
How long does this homemade chicken lunch meat stay fresh?
Once cooked and sliced, your homemade chicken lunch meat should be stored in an airtight container in the refrigerator. It will stay fresh and delicious for approximately 3-4 days. For longer storage, you can certainly freeze it! Wrap individual portions tightly in plastic wrap or parchment paper, then place them in a freezer-safe bag or container. When you’re ready to enjoy, simply thaw in the refrigerator overnight. Freezing can extend its shelf life for up to 2-3 months without a significant loss in quality or flavor.
Can you explore different flavorings and seasonings?
One of the greatest advantages of making your own deli meat is the freedom to customize the flavors to your exact preference! While our base recipe offers a fantastic starting point, don’t hesitate to experiment with a variety of seasonings before baking. Here are some exciting ideas to inspire your culinary creativity:
- Blackened Seasoning: For a bold, spicy, and smoky kick, rub your chicken with a generous amount of a good quality blackened seasoning blend.
- Italian Seasoning: Transport your taste buds to the Mediterranean with a mix of dried oregano, basil, rosemary, thyme, and marjoram. Perfect for an Italian-inspired sandwich.
- More Herbs: Elevate the aromatic profile by adding more fresh or dried herbs. Consider sage for a more rustic, earthy flavor, or rosemary for its pungent, piney notes. A mix of Herbs de Provence can also add a delightful complexity.
- Smoky Paprika: Incorporate smoked paprika for a deeper, more robust flavor and a beautiful reddish hue. A pinch of cayenne can be added for a subtle heat.
- Lemon-Herb: Add lemon zest and a squeeze of fresh lemon juice to the marinade, along with fresh dill or parsley, for a bright and zesty flavor.
- Spicy Cajun: If you love heat, a homemade or store-bought Cajun spice blend (ensure it’s free of unwanted additives) will give your chicken a vibrant, spicy edge.
Feel free to mix and match or create your own signature blend. The possibilities are truly endless!
Creative Ways to Enjoy Your Homemade Chicken Lunch Meat
Now that you’ve mastered the art of making your own delicious chicken lunch meat, it’s time to put it to good use! Here are some creative and healthy ideas for incorporating it into your meals:
- Classic Sandwiches & Wraps: The most obvious and beloved use! Pile it high on your favorite gluten-free bread, in lettuce wraps, or large collard green leaves with fresh veggies and a healthy spread.
- Vibrant Salads: Dice or slice it and add to green salads for an instant protein boost. It pairs wonderfully with a variety of dressings and vegetables.
- Protein-Packed Snack: Enjoy a few slices on their own, perhaps with some sliced cucumbers or bell peppers, for a quick and satisfying snack.
- Healthy Charcuterie Board: Elevate your entertaining with homemade deli chicken as part of a clean charcuterie spread, alongside olives, nuts, seeds, and fresh fruit.
- Taco & Quesadilla Filler: Shred or chop it and use it as a lean filling for tacos, quesadillas, or even homemade spring rolls.
- Stir-fries & Bowls: Quickly add it to the end of a stir-fry or as a topping for grain bowls or veggie bowls for extra flavor and protein.
More Healthy & Delicious Meal Ideas You’ll Love
If you’re looking for more inspiration to expand your healthy eating repertoire, be sure to check out these fantastic recipes:
- 10 Gluten Free Lunch Ideas on the Go
- Paleo Chicken Bacon Ranch Wraps
- Easy AIP Lunch Ideas
Homemade Chicken Lunch Meat
Leave a Review
Pin Recipe
Want to save this for later?
Just drop your name and email below. Then we’ll email right to your inbox. ✉️
Ingredients
- 1 lb chicken breast
- 1 tbsp maple syrup
- 1 tbsp garlic powder
- 2 tsp onion powder
- 1-2 tsp salt, see notes
- 2 tsp apple cider vinegar
- 1-2 tsp black pepper
- 1-2 tsp dried thyme
Instructions
-
Pat your chicken breast dry and set it on a clean surface.
-
Combine the maple syrup, garlic powder, onion powder, and salt in a bowl until well mixed. Rub the mixture onto all sides of your chicken. Place the chicken in a reusable bag (like a stasher bag) or a covered bowl. Allow to marinate in the fridge for 36-48 hours.
-
Prepare a bowl filled with chilled water and add your chicken. Cover and allow to sit at room temperature for an hour. This helps to draw out some salt and keep the chicken moist.
-
Preheat the oven to 250 F and line a baking sheet with parchment paper.
-
Pat the chicken dry and add to the parchment paper. Rub the chicken with apple cider vinegar on all sides and season with your desired amount of pepper and thyme on all sides.
-
Bake in the preheated oven for an hour or more depending on the thickness of your chicken breast, until the internal temperature is 165 F.
-
Remove from the oven and allow to rest for 30 minutes before thinly slicing.
-
Serve like you would any other lunch meat on sandwiches, wraps, etc!
Notes
All nutritional information are estimations and will vary. Estimations do not include optional ingredients.
Inspired by torts and tarts and day in the kitchen.