
This post contains affiliate links.
Indulge Guilt-Free: The Ultimate Homemade Paleo Peppermint Patties Recipe
Craving a classic minty chocolate treat without the refined sugars and dairy? Look no further! These homemade peppermint patties are a revelation. They capture the beloved taste and creamy texture of your favorite store-bought candy, but are crafted with only wholesome, nourishing ingredients. Easy to make and incredibly delicious, these paleo-friendly peppermint patties are destined to become a staple in your healthy dessert repertoire.
Whether you’re managing dietary restrictions, looking for a healthier alternative to satisfy your sweet tooth, or simply enjoy making treats from scratch, this recipe is designed for you. Forget the guilt often associated with candy; these patties are packed with natural goodness and are utterly satisfying, making them perfect for holiday gatherings, a thoughtful homemade gift, or a delightful everyday treat.
What Exactly Are Peppermint Patties? A Refined Sugar-Free Twist on a Classic
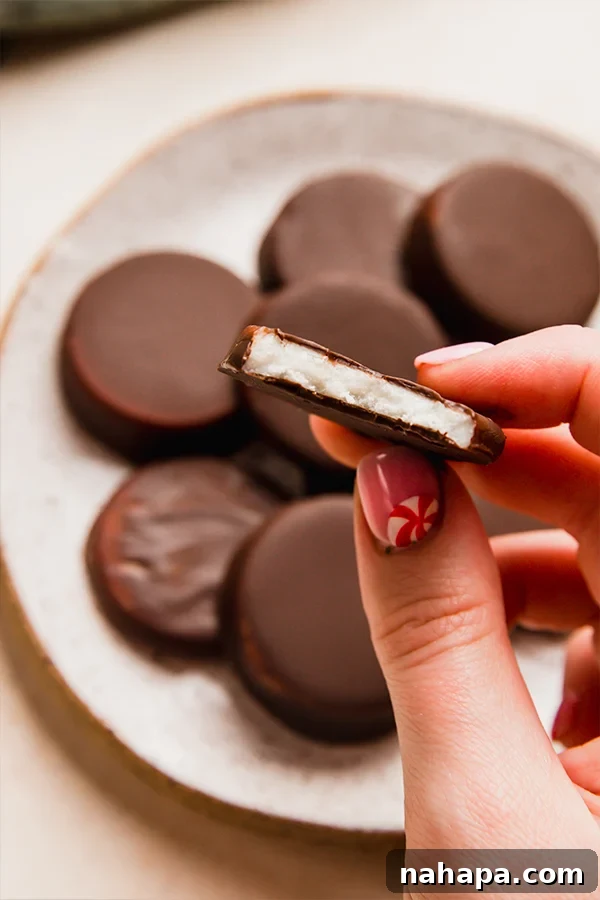
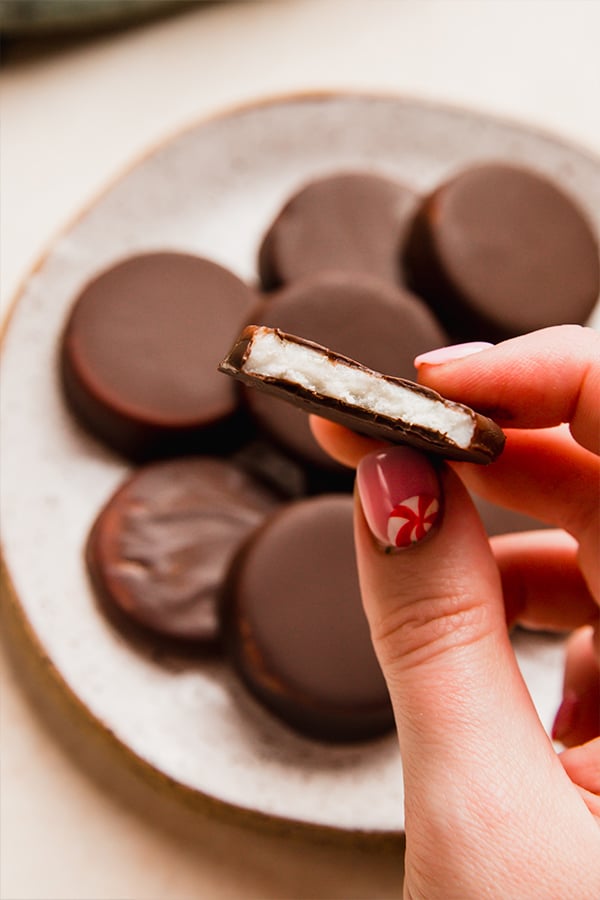
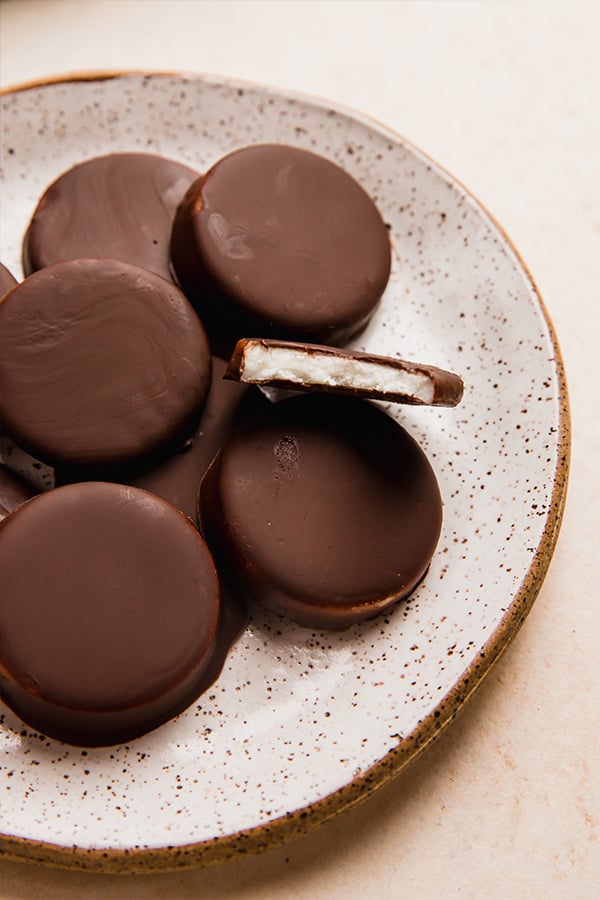
Peppermint patties are a confectionery delight renowned for their distinct layers: a vibrant, sweet, and intensely peppermint-flavored center enveloped in a rich, dark chocolate shell. Traditionally, these treats are loaded with powdered sugar, corn syrup, and sometimes artificial flavors and colors. While undeniably delicious, these ingredients often don’t align with modern health-conscious diets or specific dietary needs.
Our paleo version thoughtfully reinvents this classic, offering the same irresistible taste and texture using natural sweeteners and healthy fats. Imagine biting into a cool, creamy mint filling that melts in your mouth, followed by the satisfying snap of dark chocolate that’s rich and not overly sweet. This isn’t just a treat; it’s an experience that brings back nostalgic memories without any of the conventional candy guilt. My homemade recipe delivers that authentic sensation, proving that healthy eating doesn’t mean compromising on flavor or enjoyment. It’s a simple indulgence that respects your body while tantalizing your taste buds, perfect for anyone seeking a cleaner, yet equally satisfying, sweet option.
Why Opt for Homemade Paleo Peppermint Patties?
In a world full of processed snacks, taking the time to craft your own treats offers numerous benefits. Beyond the sheer joy of creating something delicious, homemade paleo peppermint patties provide a healthful alternative that aligns with various dietary philosophies.
- Uncompromised Dietary Control: When you make your own, you have complete oversight of every ingredient. This eliminates concerns about mysterious additives, artificial flavors, preservatives, or the often-ubiquitous high-fructose corn syrup found in commercial candies.
- Truly Refined Sugar-Free: We swap out inflammatory white sugar for natural, unrefined alternatives like honey or pure maple syrup. These sweeteners not only offer a more complex and nuanced flavor profile but are also absorbed differently by the body, avoiding the sharp blood sugar spikes associated with refined sugars.
- Dairy-Free Delight: This recipe is perfect for individuals with lactose intolerance, dairy allergies, or those committed to a vegan or plant-based lifestyle. Our carefully selected chocolate coating is purely plant-based, ensuring everyone can enjoy this minty treat.
- Wholesome Ingredient Foundation: Coconut butter forms the creamy, melt-in-your-mouth base of the filling. It’s a wonderful source of healthy fats and provides a subtle, naturally sweet coconut flavor that beautifully complements the refreshing peppermint, contributing to both flavor and texture.
- Tailored Customization: The beauty of homemade treats is the ability to personalize them. You can easily adjust the level of sweetness, intensify or mellow the peppermint flavor, or even experiment with different types of dairy-free chocolate (e.g., darker or lighter varieties) to perfectly suit your palate.
- Unmatched Freshness: Nothing compares to the taste and aroma of a freshly made treat. These patties are free from the stale or artificial notes that can sometimes characterize factory-produced candies, offering a superior flavor experience.
- Fun & Rewarding Experience: Making these patties can be a delightful activity, whether you’re baking solo or involving family and friends. The process is simple, and the reward is a batch of exquisite, healthy candies that you can proudly share or enjoy yourself.
The Simple Ingredients You’ll Need for These Wholesome Peppermint Patties
Crafting these delectable paleo peppermint patties requires just a few key ingredients, each chosen meticulously for its flavor, texture, and nutritional contributions. The brilliance of this recipe lies in its simplicity and the high quality of its natural components, proving that a handful of good ingredients can create something truly extraordinary.
Core Ingredients for the Creamy Mint Filling:
- Coconut Butter: This is unequivocally the star of our creamy, luscious center. Unlike its counterpart, coconut oil (which is almost entirely fat), coconut butter is made from the entire, finely ground coconut flesh. This means it contains not only the healthy fats but also the fiber and protein of the coconut, giving it a richer, thicker, and more opaque consistency when solid. This unique composition is crucial for achieving that characteristic firm yet melt-in-your-mouth texture that defines a classic peppermint patty. For optimal results and flavor, I highly recommend using a premium quality brand such as Artisana coconut butter. Before mixing, ensure your coconut butter is gently melted to a smooth, pourable consistency.
- Peppermint Extract: The very essence of our patties, providing that iconic, refreshing minty burst. A good quality, pure peppermint extract is absolutely crucial for achieving an authentic and vibrant flavor. Be mindful that peppermint extract is potent; start with the recommended amount and adjust incrementally to your personal liking. A little truly does go a long way in delivering that invigorating coolness.
- Honey or Maple Syrup: These natural, unrefined sweeteners are our preferred alternatives to white sugar, providing a guilt-free sweetness. Pure honey imparts a distinct floral sweetness and a lovely golden hue, while pure maple syrup offers a richer, more robust, caramel-like note, making it an excellent choice for those adhering to a strictly plant-based or vegan diet. Feel free to choose whichever you prefer, or even combine them for a unique depth of flavor that complements the mint beautifully.
For the Irresistible Dark Chocolate Coating:
- Dairy-Free Dark Chocolate: To ensure these patties are truly dairy-free and paleo, it’s essential to select a high-quality dark chocolate that contains no milk solids. Look for chocolate brands explicitly labeled as “dairy-free,” “vegan,” or those with a high cocoa percentage (70% or higher) where dairy is not an ingredient. Many premium dark chocolates naturally fit this description. I’m personally a huge advocate for Hu Kitchen gems, not only for their exceptional flavor but also for their impeccably clean ingredient list. Remember to melt your chocolate gently and carefully to achieve a smooth, glossy coating without burning or seizing.
Essential Tools for Crafting Perfect Peppermint Patties
While this recipe is straightforward and doesn’t require advanced culinary skills, having the right tools can significantly streamline the process and help you achieve consistently shaped, professional-looking patties. These are the kitchen essentials that will make your peppermint patty journey a breeze.
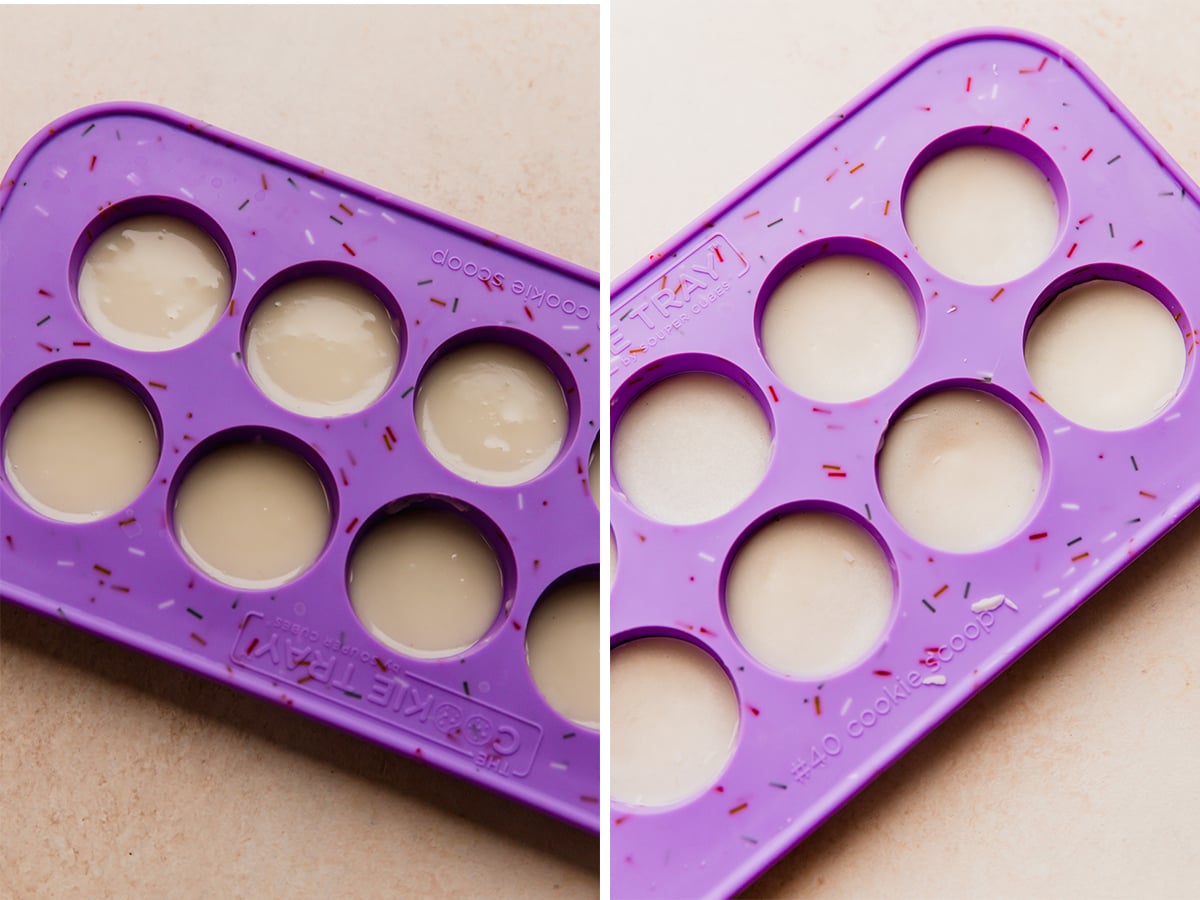
- Silicone Mold: This is arguably the most crucial tool for ensuring your patties have that perfectly uniform, classic shape and size. Silicone molds are a dream to work with because of their non-stick properties and flexibility; the chilled or frozen patties pop out effortlessly without any sticking or breakage. I personally use and highly recommend this specific cookie tray mold from Souper Cubes, as its cavity design is ideal for uniform patties. However, don’t feel limited – any silicone mold with small, round, or even square cavities (think mini muffin molds or even decorative candy molds) will work beautifully.
- Small Mixing Bowl: You’ll need this for efficiently combining your coconut butter, peppermint extract, and sweetener to create the smooth, creamy mint filling.
- Double Boiler (or Microwave-Safe Bowl): Essential for gently and evenly melting both the coconut butter and, more critically, the dairy-free chocolate. A double boiler setup (a heatproof bowl nested over a pot of simmering water) is the preferred method for melting chocolate, as it provides indirect heat, preventing scorching and ensuring a silky-smooth, glossy finish that’s easy to work with.
- Spoon or Small Scoop: This will be your primary tool for accurately portioning the peppermint filling into each cavity of your silicone mold, ensuring consistency in patty size.
- Fork or Dedicated Dipping Tools: These are indispensable for submerging and coating the chilled peppermint centers in the melted chocolate. A fork allows excess chocolate to drip off easily through its tines, creating a thinner, more even coating.
- Parchment Paper-Lined Plate or Baking Sheet: You’ll need this prepared surface for setting the chocolate-coated patties. The parchment paper prevents them from sticking to the plate as the chocolate cools and hardens, making for easy removal once they are firm.
Don’t fret if you don’t have the exact mold I pictured! Creativity is often key in the kitchen. If a specialized silicone mold isn’t available, a standard muffin tin lined with paper or silicone liners can serve as an excellent alternative, albeit for slightly larger patties. The goal is simply to create individual portions that are easy to coat and enjoy. You can even try forming small disks by hand on parchment paper, though this might be a bit messier and yield less uniform results.
Mastering the Art of Homemade Peppermint Patties: A Step-by-Step Guide
Creating these delicious paleo peppermint patties is a surprisingly simple and deeply satisfying process. Follow these detailed, easy-to-understand steps to achieve perfect results every time, transforming wholesome ingredients into an irresistible, guilt-free treat.
-
Prepare the Exquisite Peppermint Filling:
Begin by gathering your ingredients for the filling. In a small mixing bowl, combine the gently melted coconut butter, your chosen natural sweetener (honey or maple syrup), and the vibrant peppermint extract. Whisk these ingredients thoroughly until the mixture is completely smooth, homogenous, and boasts a consistent, creamy texture. It’s crucial that the coconut butter is fully melted and warm enough to easily incorporate the other ingredients, yet not so hot that it causes separation or issues. Achieving a beautifully smooth consistency at this stage is key to ensuring your finished patties have a silky, uniform mint center.
Next, with careful precision, spoon approximately 1 tablespoon of this fragrant peppermint mixture into each individual cavity of your chosen silicone mold. Once filled, gently tap the mold on your countertop a few times. This simple but effective action serves a dual purpose: it helps to release any tiny trapped air bubbles, and it allows the coconut butter mixture to settle evenly within the mold, which is vital for creating uniform, flat-topped patties. Once all cavities are filled, carefully transfer the entire mold to the refrigerator. Allow the filling to chill undisturbed for at least an hour, or until it becomes completely solid and firm to the touch. This firm consistency is absolutely vital for easy, clean handling during the subsequent chocolate dipping process.

-
Set Up Your Chocolate Coating Station:
While your peppermint centers are diligently chilling in the refrigerator, it’s the perfect time to prepare your chocolate coating station. In a separate, heatproof bowl, gently melt your dairy-free chocolate. The gold standard method for melting chocolate is using a double boiler. This technique provides indirect, gentle, and even heat, which is paramount for preventing the chocolate from burning, seizing (becoming thick and grainy), or losing its smooth, glossy sheen. If you don’t have a double boiler, a microwave can be used with caution: heat the chocolate in very short intervals (typically 15-30 seconds), stirring thoroughly after each burst, until it is smooth and fully melted. Crucially, avoid overheating the chocolate.
Simultaneously, prepare a large plate or a baking sheet by lining it meticulously with parchment paper. This will serve as the non-stick surface where your freshly chocolate-coated patties will rest and set, ensuring they don’t adhere and can be easily removed once the chocolate hardens.
-
Dip and Coat the Peppermint Patties to Perfection:
Once the coconut butter disks are unequivocally solid and firm from their time in the refrigerator, carefully and gently remove them from the silicone mold. Thanks to the flexibility of silicone, a gentle push from the bottom of each cavity should allow them to pop out with ease. Handle the centers minimally with your warm hands to prevent premature melting or softening. Speed and efficiency are beneficial here.
Using a fork or a specialized dipping tool, carefully pick up one of the chilled peppermint disks. Submerge it completely into the bowl of melted chocolate, rotating it gently and thoroughly to ensure it is fully coated on all sides. As you lift the patty from the chocolate, allow any excess chocolate to drip naturally back into the bowl. A light, delicate tap against the side of the bowl can further help remove any stubborn extra drips, ensuring a cleaner, thinner coating. Immediately transfer the beautifully chocolate-covered patty to your prepared parchment paper-lined plate or baking sheet.
Continue this dipping process with all of the remaining peppermint disks, ensuring each one is elegantly enrobed in chocolate. Work with a relatively steady pace, as the chocolate will naturally begin to cool and thicken. Should your chocolate become too cool and difficult to work with, simply re-warm it gently using your double boiler or microwave method for a few seconds until it regains its smooth consistency.
-
Chill and Savor Your Creation:
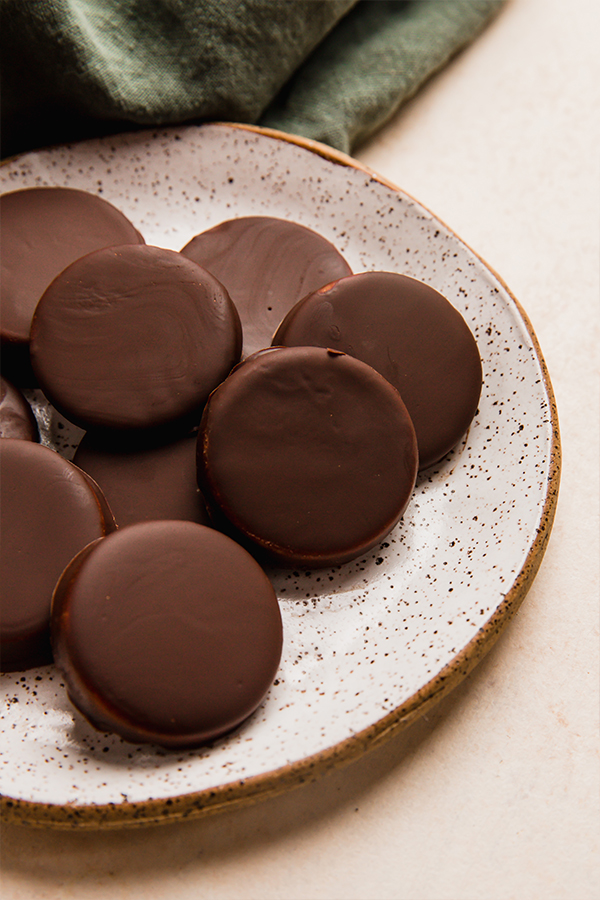
After all the patties have been perfectly coated in their dark chocolate shells, carefully transfer the plate or baking sheet back to the refrigerator. Allow them to chill for at least another hour, or until the chocolate coating is completely firm, hard, and set. This final, patient chilling step is absolutely crucial for achieving that delightful, satisfying “snap” when you bite into them, along with a perfectly firm and creamy mint center.
Serve your magnificent homemade paleo peppermint patties chilled and savor the exquisite balance of refreshing peppermint and rich dark chocolate. These homemade delights are not merely a treat for your palate, but a proud testament to how incredible and indulgent healthy, wholesome ingredients can truly be. Enjoy them as a personal indulgence or share them as a cherished gift.
Tips & Tricks for Peppermint Patty Perfection
Achieving the ideal homemade peppermint patty is within reach with a few expert tips. These suggestions will help you elevate your confectionary game, ensure every batch is a resounding success, and allow for personal touches that make them truly unique.
- Customize Your Creation: While undeniably delicious in their classic form, these peppermint patties are a blank canvas for your culinary creativity. Consider adding a delicate sprinkle of flaky sea salt (such as Maldon) on top of the wet chocolate coating before it sets. This adds a sophisticated sweet and salty contrast that truly enhances the flavor. For a festive touch, especially during holidays, edible glitter or dairy-free sprinkles can be a fun addition. If you enjoy a bit more texture, a light dusting of finely shredded unsweetened coconut can be a delightful addition before the chocolate fully hardens.
- Mastering Optimal Melting Techniques: For both your coconut butter and especially your dairy-free chocolate, a double boiler setup is your best friend in the kitchen. This gentle, indirect heating method is paramount for preventing scorching, seizing, and ensures both ingredients melt into a beautifully smooth, workable consistency. If you must use a microwave, proceed with extreme caution: heat in very short bursts (15-30 seconds at a time), stirring thoroughly and patiently after each interval, until the mixture is just melted and smooth. Overheating either ingredient can irrevocably alter its texture and make it incredibly difficult to work with, potentially ruining your batch.
- Temperature is Your Key Ally: These peppermint patties are undeniably at their best when served thoroughly chilled. The coconut butter filling transforms into a wonderfully firm, yet lusciously creamy texture when cold, and the chocolate coating achieves that incredibly satisfying “snap” upon biting. It’s important to note that if left out at room temperature for extended periods, particularly in warmer climates or humid environments, the coconut butter will soften considerably, and the patties may lose their desired firm shape and texture. Therefore, always store them in the refrigerator to maintain their structural integrity and their delectable texture.
- The Virtue of Patience with Chilling: Rushing the chilling phases – both for the initial peppermint filling and the final chocolate-coated patties – is a common mistake that can lead to less-than-perfect results. Hasty chilling can result in messy dipping, or soft, difficult-to-handle patties that quickly lose their form. A fully firm and stable center, followed by a completely set chocolate coating, ensures a much more pleasant and satisfying eating experience, complete with that satisfying snap and creamy interior.
What if You Don’t Have the Perfect Mold? No Problem!
While a dedicated silicone mold offers the best results for uniform, classic patty shapes, don’t let a lack of specialized equipment deter you from making these delightful treats. The spirit of homemade cooking is often about adaptability and creativity. Any silicone mold you happen to have on hand will likely work wonderfully, whether it’s designed for mini muffins, general candy making, or even ice cubes, as long as the cavities are appropriately sized for individual patties.
Silicone molds are highly recommended due to their inherent flexibility and non-stick properties, which allow for absolutely effortless removal of the chilled filling without any breakage or struggle. If you don’t possess any silicone molds at all, a standard metal muffin tin can serve as an excellent backup solution in a pinch. For the best results when using a metal tin, make sure to generously line each individual cup with a paper muffin liner. This crucial step will prevent any sticking and significantly ease the removal process once the filling has firmly set. You can also unleash your inner artisan and experiment with shaping the mixture by hand into small disks on a parchment-lined surface, though this method might be a bit messier and could yield less uniform shapes compared to using a mold.
Storage Instructions for Maximum Freshness and Longevity
Proper storage is absolutely essential to ensure your homemade paleo peppermint patties retain their delightful texture, vibrant flavor, and overall freshness for as long as possible. Following these guidelines will allow you to enjoy your efforts long after they’re made.
- Refrigeration for Short-Term Storage: For immediate enjoyment and to maintain their optimal consistency, store your peppermint patties in an airtight container in the refrigerator. When stored correctly, they will remain wonderfully fresh and firm for up to 3-4 days. The consistent cold temperature is key, as it ensures the coconut butter filling remains solid and prevents the rich chocolate coating from softening or melting.
- Freezing for Extended Storage: These homemade patties freeze beautifully, making them an excellent option for meal prepping healthy treats or simply having a stash ready for future cravings. To freeze effectively, arrange the patties in a single layer within an airtight, freezer-safe container, or place them in a freezer bag. If stacking multiple layers, separate them with sheets of parchment paper to prevent them from sticking together. When properly frozen, they can be stored in the freezer for an impressive period of up to one month, retaining their quality.
- Optimal Serving from Freezer: When you’re ready to indulge in a frozen patty, simply transfer it from the freezer to the refrigerator for about an hour. This allows the patty to thaw gently and reach that perfect chilled, yet not rock-hard, consistency that makes them so enjoyable. Alternatively, if you prefer a firmer, almost ice cream-like bite, you can certainly enjoy them directly from the freezer – it’s a delightful experience in itself!
Frequently Asked Questions About Paleo Peppermint Patties
Here are answers to some common questions that arise when making these delicious homemade paleo peppermint patties, helping you troubleshoot and customize your experience.
Can I make these peppermint patties vegan?
Absolutely! This recipe is inherently vegan-friendly if you make one simple substitution: use pure maple syrup instead of honey for the sweetener. Additionally, ensure that your chosen dairy-free chocolate is also certified vegan, as some dark chocolates, while dairy-free, might contain other animal-derived ingredients. Always check the ingredient list thoroughly for hidden animal products.
Is coconut butter the same as coconut oil?
No, they are distinct products derived from the coconut, each with unique properties. Coconut oil is primarily composed of fat, extracted from the coconut meat. In contrast, coconut butter is made from the entire coconut meat (flesh) that has been finely ground, meaning it includes the fiber and some protein in addition to the fat. This gives coconut butter a much thicker, creamier, and more opaque consistency when solid, which is absolutely essential for creating the firm, yet melt-in-your-mouth structure of these peppermint patties.
How can I adjust the peppermint flavor intensity?
The intensity of peppermint flavor is a matter of personal preference. We recommend starting with 1 teaspoon of pure peppermint extract as specified in the recipe. If, after tasting the mixture or a test patty, you desire a stronger minty kick, you can add an additional ¼ to ½ teaspoon of extract, stirring well and tasting as you go. Remember that the peppermint flavor often intensifies slightly as the patties chill and the flavors meld.
My chocolate seized. What went wrong?
Chocolate seizing (when it becomes thick, lumpy, and unworkable) usually occurs for one of two primary reasons: it has come into contact with even a tiny amount of water or steam, or it has been overheated. To prevent this, ensure all your melting equipment (bowls, spatulas) is completely dry before starting. Melt the chocolate gently, preferably using a double boiler, which provides indirect heat. If using a microwave, heat in very short, controlled bursts and stir frequently to distribute the heat evenly and prevent overheating.
Can I use a different sweetener other than honey or maple syrup?
Honey and pure maple syrup are specifically recommended for this recipe due to their paleo-friendly nature and their ideal liquid consistency, which blends seamlessly into the coconut butter base. Other liquid sweeteners, such as agave nectar, might work as a substitute, but they could subtly alter the flavor profile and potentially the final consistency of the filling. Granulated sweeteners (like erythritol or stevia blends) are generally not suitable for the filling as they will not dissolve properly and will result in a grainy, rather than smooth, texture.
Are these peppermint patties suitable for the AIP (Autoimmune Protocol) diet?
The original recipe hints at an AIP alternative, and indeed, with a slight modification, these can be made AIP-compliant. The primary change required is replacing the dairy-free chocolate with an AIP-friendly carob chocolate. Carob offers a similar dark, rich flavor without the cocoa, which is not permitted on AIP. You can find excellent recipes for AIP-compliant carob chocolate here. Always verify that all other ingredients you use also strictly adhere to AIP guidelines.
More Wholesome Peppermint Delights You’ll Love!
If you’re a devoted fan of these paleo peppermint patties and crave more refreshing, refined sugar-free, and dairy-free peppermint-inspired recipes, you’re in for a treat! Explore our collection of delightful confections that deliver incredible flavor without compromise.
- Copycat Peppermint Joe Joe’s: A healthier, gluten-free, and dairy-free take on the beloved classic holiday sandwich cookie.
- Paleo Thin Mint Cookies: Your favorite iconic Girl Scout cookie, reimagined and made with wholesome ingredients for a paleo lifestyle, even with an AIP option.
- Peppermint Protein Ninja Creami: A refreshing, high-protein frozen dessert that’s perfect for a post-workout treat or a healthy indulgence.
- Paleo Peppermint Bark: Another quintessential holiday favorite, crafted with clean, natural ingredients for a guilt-free festive treat.
Recipe Card: Homemade Paleo Peppermint Patties
Homemade Peppermint Patties {Paleo}
Yields: 6 servings
Prep Time: 20 minutes
Total Time: 20 minutes (plus inactive chilling time)
Author: Michelle
Print Recipe
Pin Recipe
Ingredients
- ½ cup coconut butter, melted (see notes)
- 1 tsp honey (or substitute pure maple syrup for a vegan option)
- 1 tsp pure peppermint extract
- 1 cup dairy-free dark chocolate, melted
Instructions
- Prepare the Filling Mixture: In a small bowl, combine the melted coconut butter, honey (or maple syrup), and peppermint extract. Stir thoroughly until the mixture is completely smooth and well combined.
- Form the Patties: Spoon approximately 1 tablespoon of the prepared peppermint mixture into each cavity of a silicone mold (like this one is ideal). Gently tap the mold on your countertop a few times to ensure the mixture settles evenly and to release any trapped air bubbles.
- Chill the Filling: Carefully transfer the filled mold to the refrigerator. Allow the peppermint centers to chill and set for at least 1 hour, or until they are completely solid and firm to the touch. This step is crucial for easy handling during coating.
- Melt the Chocolate: While the centers are chilling, prepare your melted dairy-free chocolate. The best method for a smooth, glossy coating is using a double boiler. Line a large plate or baking sheet with parchment paper to prevent sticking.
- Coat the Patties: Once the coconut butter disks are fully solid, carefully remove them from the silicone mold. Using a fork or a candy dipping tool, gently immerse each peppermint disk into the melted chocolate, rotating it to ensure it’s fully coated. Lift the patty, allowing any excess chocolate to drip back into the bowl.
- Set the Chocolate: Immediately place each chocolate-coated patty onto the prepared parchment paper. Repeat this process with all the remaining peppermint disks. If the chocolate starts to thicken, gently re-warm it.
- Final Chill: Transfer the plate with the coated patties back into the refrigerator. Allow them to chill for at least 1 hour, or until the chocolate coating is completely firm and set. Serve chilled and savor this delectable homemade treat!
Notes
- The optimal method for melting both coconut butter and dairy-free chocolate is using a double boiler. This indirect heating process prevents scorching and ensures a beautifully smooth, workable texture for both ingredients.
- For individuals following the AIP (Autoimmune Protocol) diet, substitute the dairy-free chocolate with an AIP-compliant carob chocolate. Ensure all other ingredients adhere to AIP guidelines.
- Please note that all provided nutrition facts are estimated values and will naturally vary based on the specific brands, quantities, and types of ingredients you use in your preparation.
Estimated Nutrition Information (per serving)
- Calories: 350 kcal
- Carbohydrates: 29.6g
- Protein: 4g
- Fat: 25.3g
- Fiber: 4.7g
All nutrition facts are estimated and will vary based on ingredients used.
Did you Make this Delicious Recipe?
We’d love to see your creations!
Tag @unboundwellness on Instagram and hashtag #unboundwellness!