
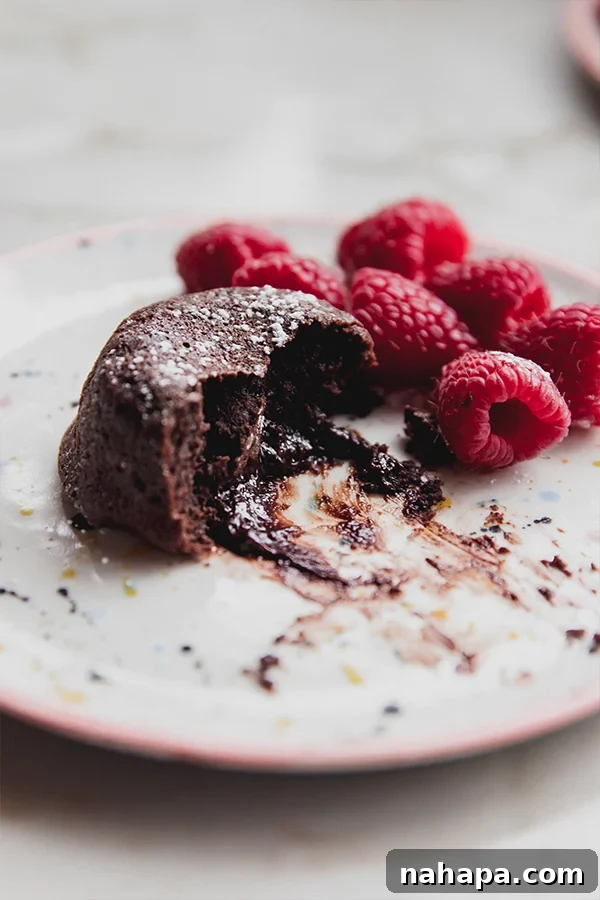
Indulge in the Ultimate Gluten-Free Chocolate Lava Cakes: A Decadent Delight
Prepare to have your taste buds enchanted by these incredible gluten-free chocolate lava cakes! Crafted with rich, dairy-free chocolate, they deliver an authentic flavor and a captivating appearance that will impress even the most discerning dessert lovers. Forget about compromising on taste or texture; this recipe ensures a truly luxurious experience, proving that a gluten-free lifestyle doesn’t mean sacrificing indulgence.
What Exactly is a Chocolate Lava Cake?
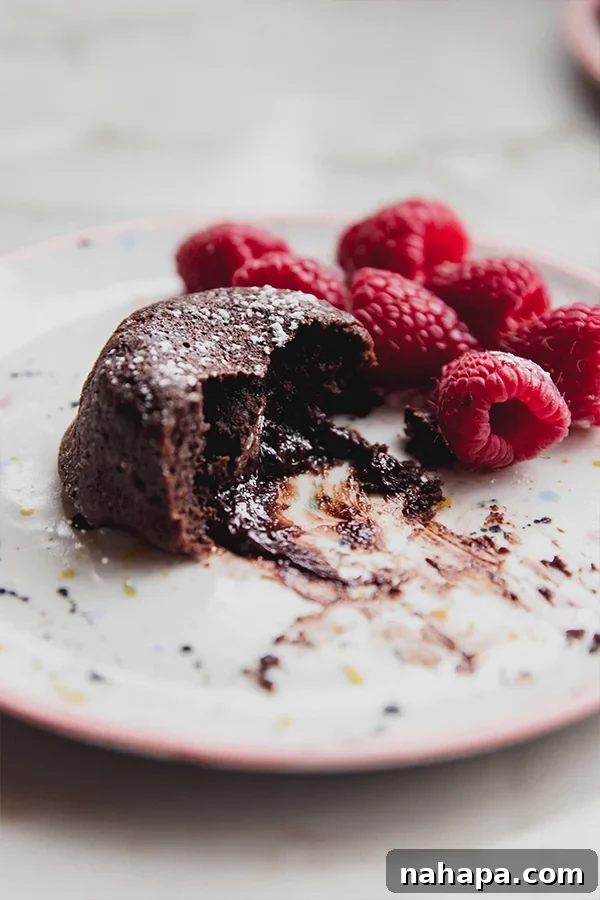
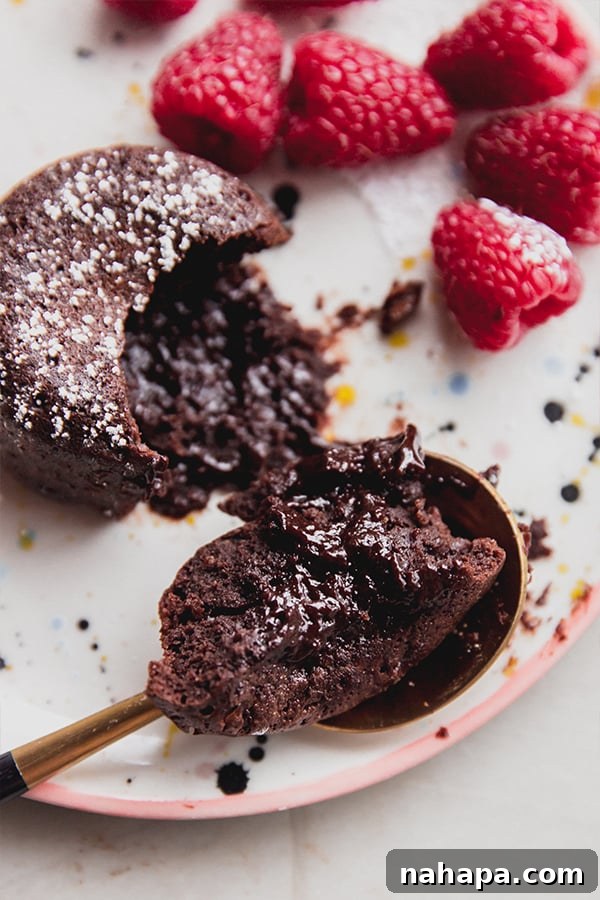
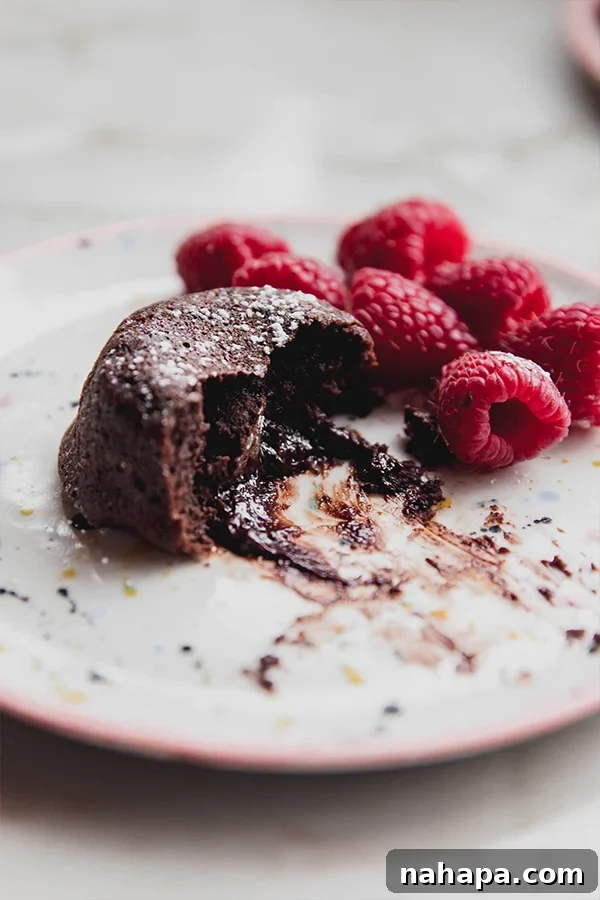
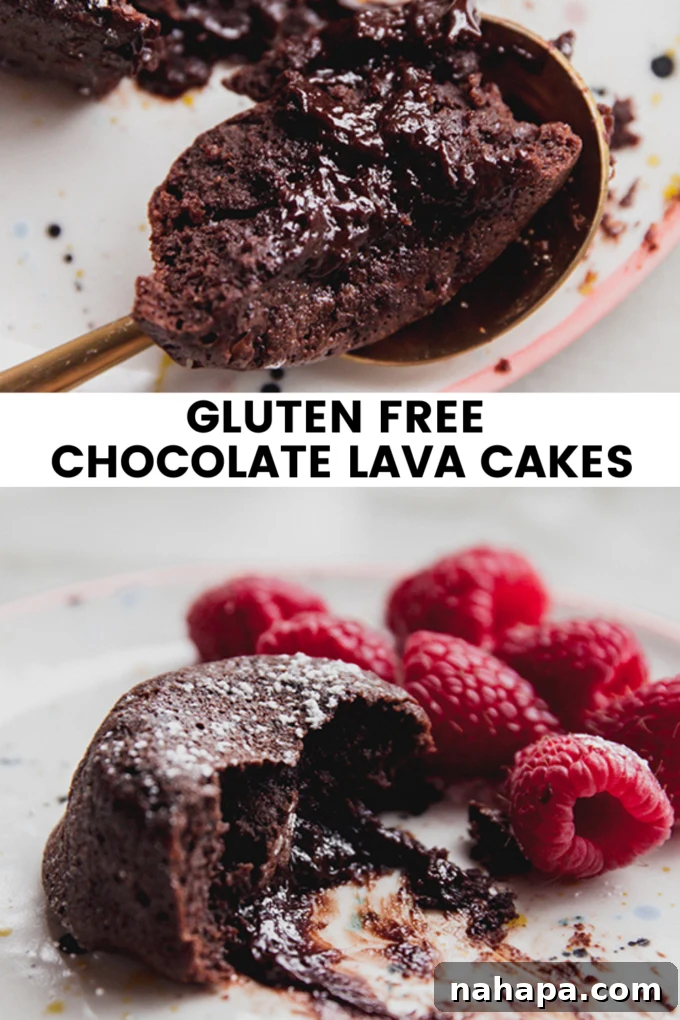
If you’re new to the world of molten chocolate cakes, prepare for a delightful discovery. A chocolate lava cake is a small, individual chocolate cake characterized by a firm, fudgy exterior that gives way to a gloriously warm, liquid chocolate center. When you slice into it, the molten chocolate flows out, much like lava from a volcano, creating a truly dramatic and irresistible dessert experience. It’s this mesmerizing contrast between the tender cake and the oozing, rich chocolate that makes lava cakes an enduring favorite.
Historically, lava cakes have been a staple on menus in upscale restaurants and cozy bistros, often reserved for special occasions. However, with this recipe, you can effortlessly recreate that gourmet experience in your own kitchen, making any day feel like a celebration. While they are famously associated with romantic holidays like Valentine’s Day, their timeless appeal means they can be enjoyed year-round, adding a touch of elegance and comfort to any meal.
I’ve dreamed of perfecting a gluten-free version of this classic for years, and after much experimentation, I’ve finally cracked the code! Both my husband and I are utterly smitten with this recipe, and I’m confident you will be too. It’s a testament to how incredible gluten-free baking can be when done right.
Why These Gluten-Free Chocolate Lava Cakes Will Become Your Favorite
There are countless reasons to adore this particular recipe, making it a must-try for any chocolate enthusiast or those navigating dietary restrictions. Here’s why these lava cakes stand out:
- A Classic Reinvented, Gluten-Free: Chocolate lava cake is a beloved dessert for a reason—its rich flavor and molten core are simply irresistible. This recipe masterfully adapts the classic, making it completely gluten-free without sacrificing an ounce of its deliciousness. You get all the decadent flavor and signature “lava” flow, perfectly safe for those with gluten sensitivities.
- Dairy-Free Indulgence: Not only are these cakes gluten-free, but they also utilize dairy-free chocolate and ghee (or coconut oil), making them suitable for individuals avoiding dairy. This ensures a broad appeal, allowing more people to enjoy this spectacular treat without discomfort.
- The Perfect Valentine’s Day Treat (and Beyond!): While traditionally a romantic gesture for Valentine’s Day, these individual desserts are fantastic for any holiday, dinner party, or simply as a comforting end to a busy week. Their impressive presentation and luxurious taste make them ideal for entertaining, yet their simplicity means you can whip them up for a spontaneous weeknight dessert.
- Effortless Elegance: Despite their sophisticated appearance, these lava cakes are surprisingly easy to make. The steps are straightforward, and the baking time is quick, meaning you can go from craving to indulging in under 30 minutes. This makes them perfect for busy individuals who still want to enjoy a homemade, high-quality dessert.
- Minimal Ingredients, Maximum Flavor: The ingredient list is concise, focusing on quality components that contribute to the cake’s deep chocolate flavor and perfect texture. You won’t find any obscure or hard-to-find items here, just simple ingredients combining to create something truly magical.
The Essential Ingredients for Gluten-Free Chocolate Lava Cakes
Crafting these molten marvels requires a handful of carefully selected ingredients, each playing a crucial role in achieving the perfect balance of flavor and texture. Here’s a closer look at what you’ll need:
- Dairy-Free Chocolate Chips: The star of the show! High-quality dairy-free chocolate chips are essential for that intense chocolate flavor and smooth, molten center. Opt for a brand you love the taste of, as it will be prominent in the final product. Dark chocolate works beautifully for a richer experience, but semi-sweet is also an excellent choice.
- Ghee (Clarified Butter): Ghee provides a wonderful buttery flavor and richness without the dairy solids. If ghee isn’t available or tolerated, virgin coconut oil is an excellent dairy-free and vegan alternative. For those who tolerate dairy, traditional unsalted butter can also be used as a direct substitute.
- Coconut Sugar and Maple Syrup: This combination of natural sweeteners provides a nuanced sweetness that complements the chocolate without overpowering it. Coconut sugar adds a subtle caramel note and a pleasant texture, while maple syrup contributes a hint of moisture and depth. Using natural sweeteners also aligns with a more wholesome approach to baking.
- Eggs and Extra Egg Yolks: Eggs are critical for structure and richness in lava cakes. The addition of extra egg yolks contributes to the intensely fudgy texture and the luxurious, molten consistency of the center. They act as a binder and emulsifier, ensuring a smooth and cohesive batter.
- Vanilla Extract: A splash of pure vanilla extract enhances the chocolate flavor, adding warmth and aromatic complexity. Don’t skip this ingredient; it truly makes a difference.
- Almond Flour: As a gluten-free base, almond flour provides a tender crumb and a delicate flavor. It’s used in a small amount, contributing to the cake’s structure without making it dense. For those needing a nut-free option, this is a relatively easy substitution.
- Arrowroot Starch: This gluten-free starch helps create a light texture and aids in achieving the perfect “jiggle” for the molten center. Tapioca starch (also known as tapioca flour) is a fantastic alternative if arrowroot is not readily available, as they behave similarly in baking.
- Pinch of Salt: A tiny bit of salt balances the sweetness and elevates the chocolate flavor, making it even more pronounced and delicious. Never underestimate the power of salt in sweet recipes!
- Powdered Sugar and Fresh Berries (for serving): These are optional but highly recommended garnishes. A dusting of powdered sugar adds an elegant touch and a hint of extra sweetness, while fresh raspberries or strawberries provide a beautiful color contrast and a refreshing tartness that cuts through the richness of the chocolate.
How to Make These Irresistible Gluten-Free Chocolate Lava Cakes
Creating these decadent desserts is a simple process that yields impressive results. Follow these steps for perfect lava cakes every time:
- Step One: Prepare Your Baking Vessels and Melt the Chocolate. Begin by preheating your oven to 400°F (200°C). Generously grease a 6-section muffin tin or individual oven-safe ramekins. This crucial step prevents sticking and ensures your cakes release perfectly. Next, combine the dairy-free chocolate chips and ghee (or your chosen substitute) in a heatproof bowl. Melt them gently using a double boiler method, or carefully in the microwave in 20-second intervals, stirring after each, until the mixture is completely smooth and liquid. Allow the melted chocolate to cool slightly while you prepare the remaining ingredients.
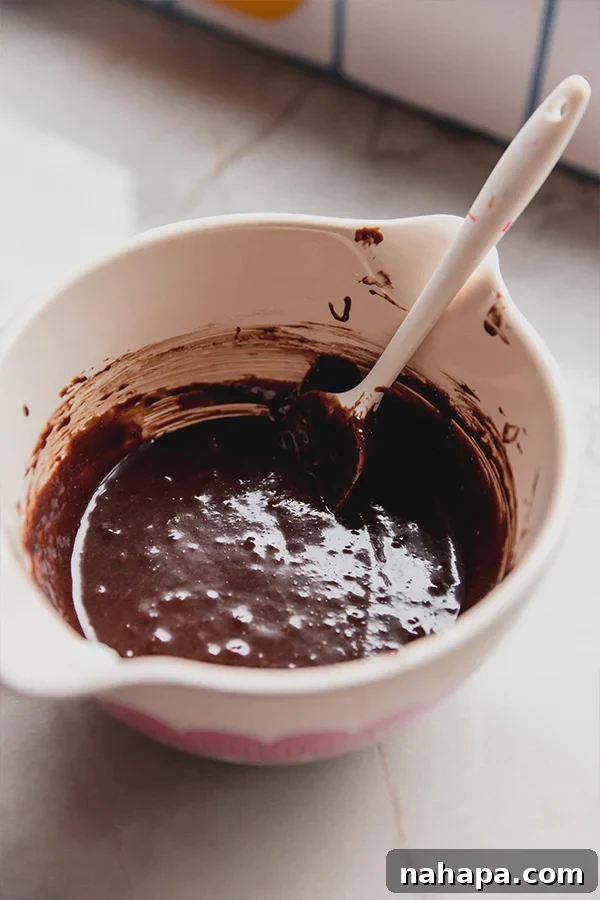
- Step Two: Combine Wet and Dry Ingredients. Into the slightly cooled chocolate mixture, whisk in the coconut sugar and maple syrup until they are fully incorporated and the mixture is smooth. This sweet base is crucial for flavor. Then, add the whole eggs, extra egg yolks, and vanilla extract. Whisk thoroughly until the mixture is well combined and slightly lightened. Finally, gently fold in the almond flour, arrowroot starch, and a pinch of salt. Stir just until the dry ingredients are fully incorporated into the wet mixture, being careful not to overmix. Overmixing can lead to a tougher cake texture.
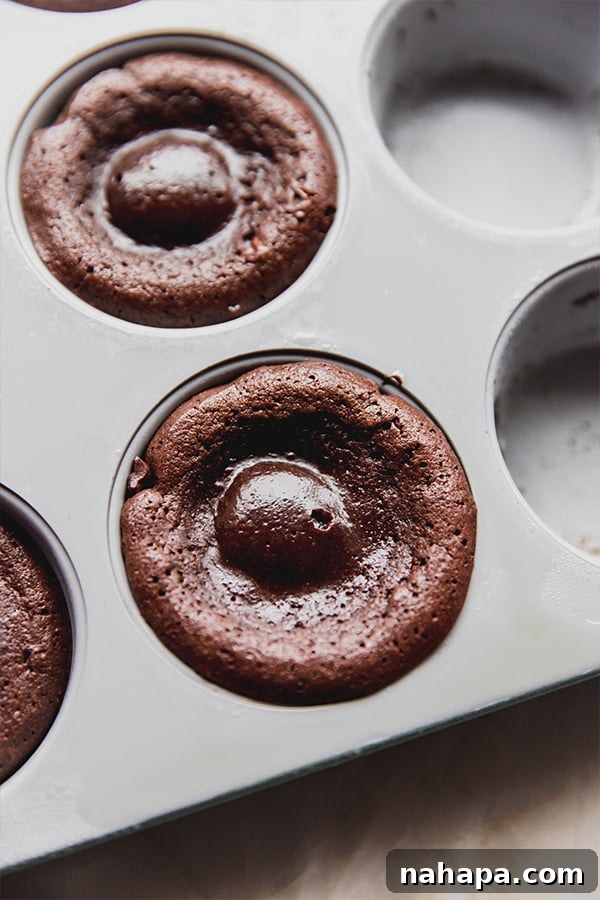
- Step Three: Bake to Perfection. Carefully pour the prepared batter evenly into your greased muffin tin sections or ramekins. Aim to fill them about two-thirds full. Transfer the tin or ramekins to the preheated oven and bake for 8-12 minutes. The exact baking time will vary depending on the size and material of your baking vessel. The key is to bake until the edges of the cakes are set and firm, but the center is still visibly jiggly when gently shaken. This “jiggle” indicates the molten core is ready. Keep a close eye on them, especially after the 8-minute mark, to achieve your desired level of moltenness.
- Step Four: Cool, Unmold, and Serve. Once baked, remove the lava cakes from the oven and allow them to cool in their molds for just 1-2 minutes. This brief cooling period helps them firm up slightly, making them easier to handle. Then, very carefully, invert each lava cake onto a clean serving plate or cutting board. Serve immediately while warm, topped with a generous dusting of powdered sugar if desired. These cakes are exquisite on their own but are also perfectly complemented by a side of fresh berries, a dollop of dairy-free whipped cream, or a scoop of your favorite dairy-free vanilla ice cream. The warm cake with cold toppings creates an irresistible sensory experience.
Expert Tips & Tricks for Flawless Lava Cakes
Achieving the perfect molten center is an art, but these tips will guide you to success:
- Master the Cook Time: This is the most critical factor! The difference between a gooey, molten center and a fully cooked cake is often just a minute or two. I personally prefer my lava cake to be slightly more cooked through, with a thicker, fudgy “lava,” rather than completely liquid. If you share this preference, lean towards the longer end of the baking time (10-12 minutes). For a very liquid center, stick closer to 8 minutes. Always use your oven light to observe the cakes after the 8-minute mark. Look for set edges and a gently quivering center. Practice makes perfect in finding your ideal molten consistency.
- Prepare Your Ramekins Properly: Don’t skimp on greasing your ramekins or muffin tin! A thorough coating of non-stick spray or butter/ghee is essential to ensure the cakes release cleanly after baking. You can also dust them with a little cocoa powder after greasing for an extra layer of chocolate flavor and an even easier release.
- Quality Ingredients Matter: Since there are so few ingredients, the quality of each really shines through. Use good quality dairy-free chocolate and fresh eggs for the best flavor and texture.
- Add Extra Flavor: Elevate your lava cakes with simple additions. A teaspoon of espresso powder mixed into the batter will deepen the chocolate flavor beautifully. For a refreshing twist, try a few drops of food-grade mint extract or finely chopped peppermint patties for a mint chocolate lava cake. A pinch of cayenne pepper can also add an exciting, subtle heat.
- Don’t Overmix: Mix the batter just until the ingredients are combined. Overmixing can develop the gluten in flours (even almond flour to some extent) and incorporate too much air, leading to a tougher, less tender cake.
Frequently Asked Questions About Gluten-Free Chocolate Lava Cakes
Here are answers to some common questions you might have about this delightful recipe:
Can you make this recipe without eggs?
I understand the desire for an egg-free option, and I’ve actually tried many times to create an egg-free lava cake that achieves the same perfect molten consistency. Unfortunately, in my experience, this particular recipe heavily relies on the structure and richness provided by the eggs and egg yolks to achieve its signature texture. While there are egg-free lava cake recipes out there, they typically use different binding agents and often result in a slightly different texture. For this specific recipe, eggs are key.
Can you make this recipe nut-free?
Yes, absolutely! While I haven’t personally tested it, you should be able to successfully swap out the almond flour for an equivalent amount of oat flour or cassava flour. Since the recipe calls for only a small amount of flour overall, these substitutions are typically very forgiving. Oat flour will give a slightly earthier flavor, while cassava flour is quite neutral. Both should work well to maintain the cake’s structure without introducing nuts.
Can I prepare these in advance?
For the best results, lava cakes are ideally baked and served immediately. However, you can prepare the batter in advance and store it in the refrigerator for up to 24 hours. When ready to bake, give the batter a quick stir and proceed with pouring into ramekins and baking as instructed. You may need to add a minute or two to the baking time if starting with cold batter.
How should I store leftover lava cakes?
While best enjoyed fresh, leftover lava cakes can be stored in an airtight container at room temperature for up to 1 day or in the refrigerator for up to 3 days. To reheat, gently warm them in the microwave for 15-30 seconds or in a preheated oven at 350°F (175°C) for 5-7 minutes, just until the center is warm and gooey again. Be careful not to overcook!
More Delicious Gluten-Free Chocolate Desserts You’ll Love
If you’re a fan of rich chocolate treats and looking for more gluten-free options, be sure to explore these other fantastic recipes:
- Chocolate Strawberry Crunch Bites
- Chocolate Covered Strawberry Gummies
- The Best Paleo Chocolate Cake
Gluten-Free Chocolate Lava Cakes
6
mini lava cakes
15 mins
10 mins
25 mins
Unbound Wellness
Leave a Review
Pin Recipe
Ingredients
- 4 oz dairy free chocolate chips
- 3 tbsp ghee, (sub coconut oil, or even butter if tolerated)
- ⅓ cup coconut sugar
- 1 tbsp maple syrup
- 2 eggs
- 2 egg yolks
- 1 tsp vanilla extract
- 2 tbsp almond flour
- 1 tsp arrowroot starch
- Pinch of Salt
- Powdered sugar and berries to serve
Instructions
-
Preheat the oven to 400°F (200°C) and generously spray a 6-section muffin tin or individual oven-safe ramekins.
-
Melt the chocolate and ghee using a double boiler method, or in the microwave in 20-second intervals until totally liquid and smooth. Allow to cool slightly.
-
Whisk in the coconut sugar and maple syrup until fully combined. Add the eggs, egg yolks, and vanilla extract and whisk again until smooth. Finally, add the almond flour, arrowroot starch, and salt. Stir gently until just combined, being careful not to overmix.
-
Pour the batter evenly into the greased muffin tin or ramekins. Transfer to the oven and bake for 8-12 minutes (time varies depending on the size of your vessel) or until the outside of the cake is set, but the inside is still jiggly.
-
Remove from the oven and allow to cool for 1-2 minutes in their molds. Very carefully flip your lava cakes onto a clean plate or cutting board.
-
Serve each lava cake separately, topped with powdered sugar if desired and accompanied by a side of fresh berries, whipped cream (dairy-free if preferred), or ice cream. Enjoy immediately!
Notes
Serving: 1 mini lava cake
,
Calories: 312kcal
,
Carbohydrates: 31.1g
,
Protein: 5.3g
,
Fat: 18.7g
,
Fiber: 2g
There you have it—a comprehensive guide to creating the most delectable gluten-free chocolate lava cakes! This recipe offers the perfect blend of ease, elegance, and pure indulgence. Whether you’re celebrating a special occasion or simply treating yourself, these molten chocolate delights are guaranteed to satisfy your deepest chocolate cravings without any gluten. Enjoy every fudgy bite!