This post contains affiliate links.
Crafting a Wholesome Paleo Gingerbread House for Allergy-Friendly Holiday Fun
The holiday season is a magical time, filled with cherished traditions, festive decorations, and, of course, delicious treats. Among the most beloved customs is the art of building and decorating a gingerbread house. It’s a delightful activity that brings joy to both young and old, sparking creativity and spreading cheer. However, for many families navigating food sensitivities and dietary restrictions, traditional gingerbread kits can be a source of frustration rather than fun.
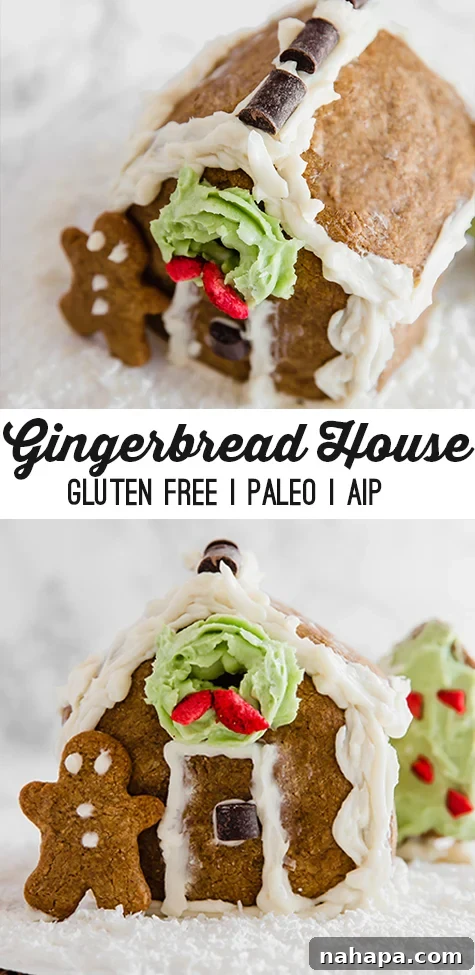
That’s where this incredible paleo gingerbread house recipe comes into play! Designed with inclusivity in mind, this recipe ensures that everyone can partake in the holiday magic. It’s not just a recipe; it’s an invitation to create lasting memories without compromising on health or taste. This particular gingerbread house is a true game-changer for those seeking allergy-friendly options, proudly boasting its credentials as entirely nut-free, gluten-free, dairy-free, and AIP-friendly. Imagine the delight of seeing your loved ones enjoy a festive treat that caters to their specific needs, all while tasting absolutely amazing.
The journey to creating a truly inclusive gingerbread house began with a desire to embrace new family traditions. As new beginnings unfold, the dream of establishing fun, wholesome Christmas activities for our growing family became a heartwarming inspiration. The idea of a homemade gingerbread house, free from common allergens, felt like the perfect way to combine festivity with mindful eating. Gone are the days of feeling left out or resorting to less-than-ideal alternatives. With this recipe, a delightful, dietary-conscious holiday centerpiece is not just possible, but surprisingly easy to achieve.
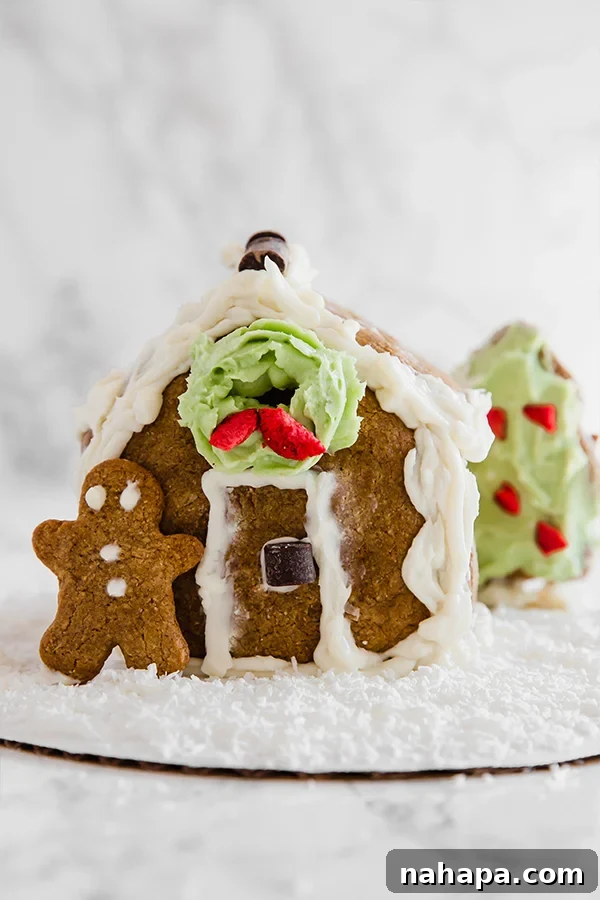
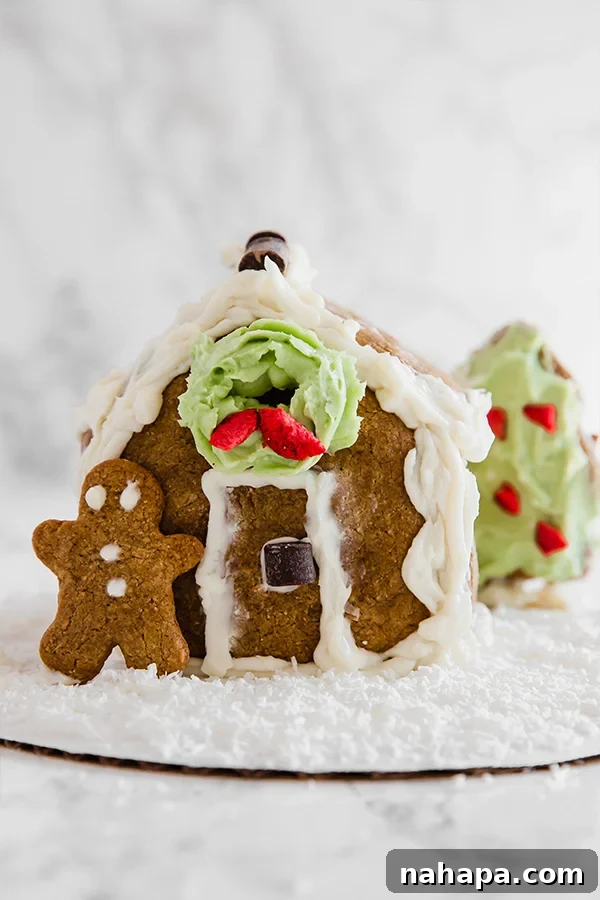
Initially, the prospect of constructing a gingerbread house from scratch, especially one that adheres to such strict dietary guidelines, seemed daunting. Visions of crumbling walls and collapsing roofs filled my thoughts. Yet, much to my surprise and utter relief, this recipe proved to be an incredibly straightforward and rewarding endeavor. The gingerbread walls, crafted with care, turn out wonderfully sturdy and hold their shape beautifully, providing a robust foundation for your holiday masterpiece. Beyond their structural integrity, they are absolutely delicious, imbued with the classic warm spices of gingerbread that everyone loves. Assembling and decorating this simple gingerbread house becomes a joyous and stress-free activity, guaranteeing a stunning and delectable result.
Your Step-by-Step Guide to a Homemade Paleo Gingerbread House
Creating your own allergy-friendly gingerbread house is an enjoyable process, broken down into manageable steps that ensure success, even for first-time builders. Let’s dive into how you can bring this festive creation to life.
1. Prepare the Wholesome Dough
- Gather Your Ingredients: Start by bringing together all your dry ingredients. In a large mixing bowl, meticulously sift together the tigernut flour, tapioca starch, baking soda, gelatin, cinnamon, and ginger. Sifting is a crucial step as it helps to aerate the flours and ensures a smooth, lump-free dough, contributing to the final texture and stability of your gingerbread pieces.
- Incorporate Wet Ingredients: Next, pour in the rich maple syrup and the deep, flavorful blackstrap molasses. These not only add natural sweetness but also impart that characteristic dark color and complex gingerbread flavor. Mix these wet ingredients thoroughly with the dry mixture until everything is well combined and a thick batter forms.
- Add the Fat and Form the Dough: Finally, cut in the palm shortening. Use a sturdy spoon or a pastry blender to work the shortening into the mixture until a cohesive, pliable cookie dough forms. The dough should be firm enough to handle without being sticky, ensuring your gingerbread house pieces will be strong and easy to work with.
2. Expertly Cut Your Gingerbread Shapes
- Prepare Your Workspace: Lightly dust a clean, flat surface with a generous amount of tapioca starch. This prevents the dough from sticking and allows for easy manipulation. Place your gingerbread dough onto the floured surface.
- Roll with Precision: Lightly flour your rolling pin and carefully roll out the dough to an even thickness of approximately 1/4 inch. Consistency in thickness is key for even baking and structural integrity.
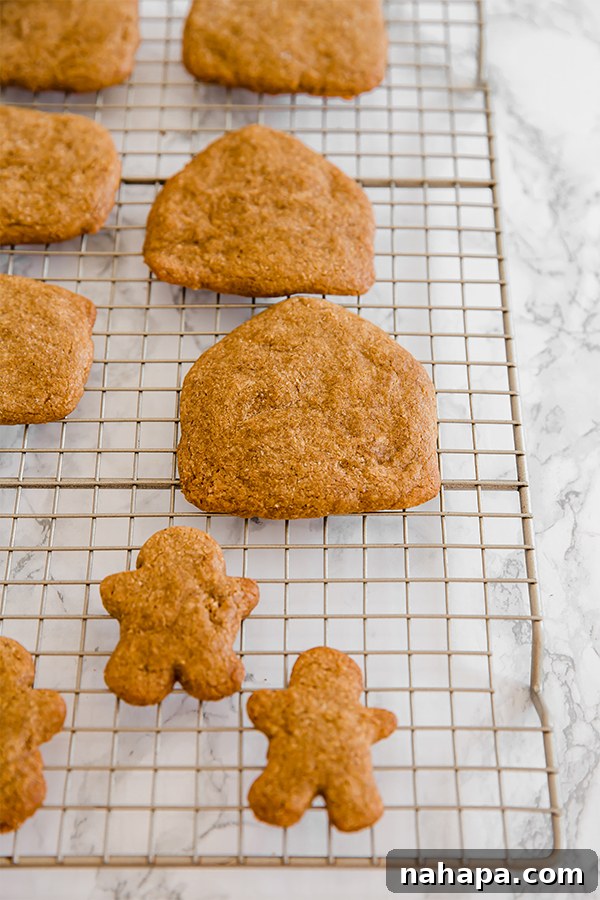
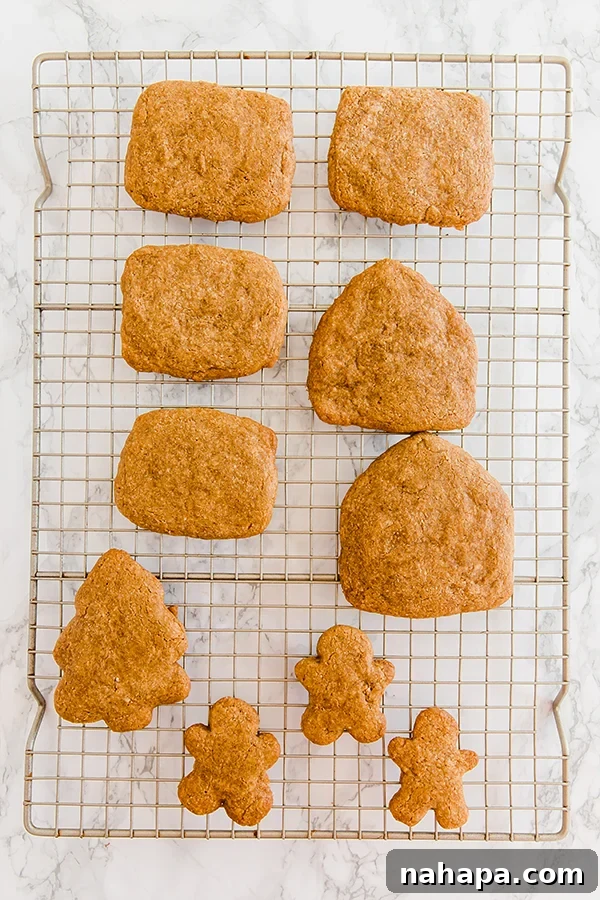
- Shape Your House and Decorations: Utilize gingerbread house cookie cutters to cut out four identical rectangles for the walls and roof panels. For the front and back of the house, cut two pentagons (or simple rectangles with a triangle on top for a peaked roof). Don’t let any dough go to waste! With the leftover dough, use smaller cookie cutters to create an array of charming gingerbread men, snowmen, Christmas trees, stars, or any other festive shapes you desire. These will be perfect for decorating your house and adding character to your festive scene.
3. Bake to Perfection and Cool Completely
- Arrange on Baking Sheet: Gently transfer all your carefully cut gingerbread pieces to a large baking sheet lined with parchment paper. Ensure they are spaced evenly to allow for proper air circulation and even baking.
- Bake Until Golden: Place the baking sheet into your preheated oven and bake for about 12 minutes, or until the edges are lightly golden and the cookies are firm to the touch. The exact baking time may vary slightly depending on your oven, so keep a close eye on them.
- Cool for Strength: Once baked, carefully remove the gingerbread pieces from the oven and transfer them to a wire cooling rack. It is absolutely essential to allow them to cool completely and thoroughly before attempting to assemble the house. This cooling process is vital for the gingerbread to firm up and gain its structural strength, preventing any unfortunate collapses during assembly.
4. Assemble Your Gingerbread Masterpiece
- Prepare for Assembly: Once your gingerbread pieces are completely cool and sturdy, it’s time for the exciting assembly phase. Place your desired cake stand or sturdy base on a flat surface.
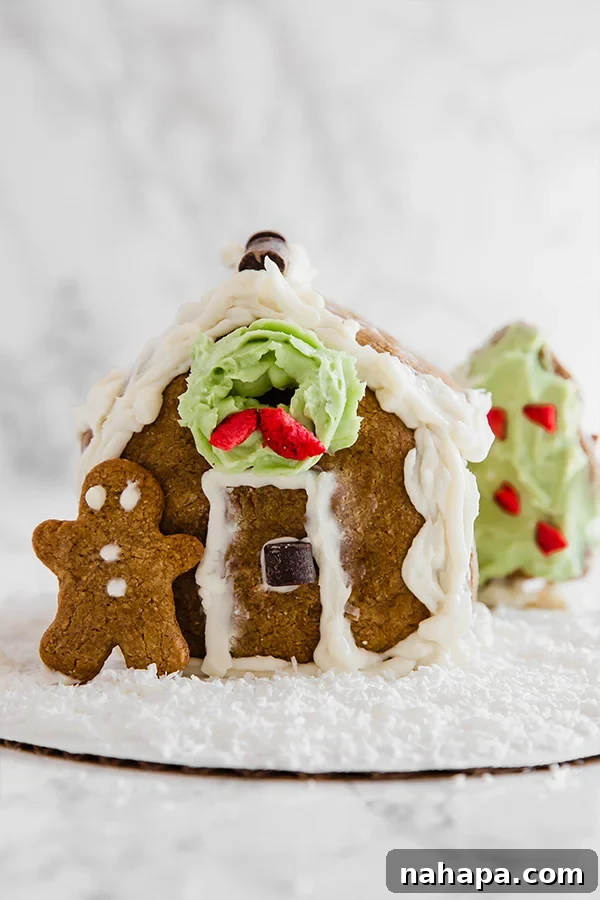
- Frosting as Glue: Using your homemade paleo frosting (recipe below) and a piping bag, apply a generous line of frosting along the edges of one wall piece. Carefully adhere it to the cake stand and connect it to another wall piece, creating a corner. Repeat this process, constructing the frame of your house one wall at a time. The frosting acts as both adhesive and a beautiful decorative element.
- Attach the Roof: Once the walls are firmly in place, pipe frosting along the top edges of the wall panels where the roof will rest. Carefully place the roof pieces on top, ensuring they meet at the peak and align neatly with the walls.
- Harden and Decorate: To ensure a strong, stable structure, transfer the assembled house to the refrigerator for 10-15 minutes. This allows the frosting to firm up and set, acting as a solid “glue.” Once hardened, your gingerbread house is ready for the fun part: decorating! Let your imagination soar with additional icing and a variety of delightful, allergy-friendly decorations.
Crafting the Perfect Paleo Icing
No gingerbread house is complete without a luscious icing to hold it together and adorn it with festive details. This paleo icing recipe is simple, delicious, and perfectly suited for your dietary needs.
Homemade Paleo Icing
- Whip Until Fluffy: In a clean mixing bowl, combine the palm shortening and maple syrup. Using an electric hand mixer or a stand mixer, whisk these two ingredients together on medium-high speed until the mixture becomes wonderfully light, airy, and fluffy. This process incorporates air, giving the icing a delightful texture perfect for piping and spreading.
- Add Natural Color (Optional): For a pop of festive color, you can easily incorporate natural food colorings. For a vibrant green, add a small amount of matcha powder. For a beautiful holiday red, a touch of pomegranate juice works wonders. Start with a small amount and gradually add more until you achieve your desired hue, mixing well after each addition.
Store-Bought Icing Options
For those times when convenience is key, there are excellent store-bought icing alternatives available that cater to paleo and allergy-friendly diets. Brands like Simple Mills often offer options that are free from common allergens and made with wholesome ingredients. Always remember to carefully check the ingredient list to ensure it aligns with your specific dietary requirements.
Essential Tools for Your Gingerbread Creation
Having the right tools can make all the difference in creating a beautifully crafted gingerbread house. Here are a few recommendations to ensure a smooth and enjoyable building experience:
- Gingerbread Cookie Cutters: While you can freehand cut your shapes, a dedicated gingerbread house cookie cutter set makes the process incredibly easy and ensures uniform pieces. Many sets include various shapes for walls, roofs, and even smaller decorative elements. If you don’t have a specific cutter, a simple printout of a gingerbread house mold PDF can be used as a template, allowing you to score and cut the dough with a sharp knife. Don’t forget to gather other festive cookie cutters like gingerbread men, Christmas trees, snowmen, and stars to add more charm to your scene.
- Piping Bags and Tips: For precise application of frosting, especially during assembly and intricate decorating, piping bags are indispensable. You can opt for reusable silicone bags or disposable ones. Pairing them with various frosting tips (like a star tip for wreaths or a small round tip for fine details) allows for endless creative possibilities. If you’re without specialized piping equipment, a sturdy zip-top bag with a small corner snipped off can serve as a makeshift piping bag.
- Cardboard Cake Stand: A stable foundation is paramount for your gingerbread house. These cardboard cake stands are readily available at craft stores or online and provide a firm, flat surface. They are far superior to a dinner plate, which might cause your icing to slip and slide, leading to structural instability. A sturdy base ensures your house remains intact and can be easily moved or displayed.
Key Ingredients Explained
Understanding the role of each ingredient in this paleo and AIP-friendly gingerbread house recipe can help you appreciate its unique formulation and ensure successful results.
- Tigernut Flour, Tapioca Starch, and Gelatin: These three ingredients form the backbone of our gluten-free, nut-free, and AIP-compliant gingerbread dough.
- Tigernut Flour (link): Despite its name, tigernut flour is not made from nuts but from small root vegetables (tubers), making it an excellent allergy-friendly alternative. It provides a slightly sweet, earthy flavor and contributes to the dough’s structure.
- Tapioca Starch (link): Derived from the cassava root, tapioca starch acts as a binder and thickener, helping to give the gingerbread cookies their desirable texture and helping them hold shape. It also contributes to the crispness.
- Gelatin Powder (link): Gelatin is crucial for providing structure and stability to the dough, especially in the absence of traditional gluten-forming flours. It helps the cookies become sturdy enough to build a house, preventing them from being too crumbly.
Note: This specific combination of flours and gelatin has been tested to yield the best results for a sturdy gingerbread house. Substitutions for these core ingredients are not recommended as they may drastically alter the texture and structural integrity.
- Maple Syrup (link) and Blackstrap Molasses (link): These natural sweeteners are essential for both flavor and appearance. Maple syrup offers a delicate sweetness, while blackstrap molasses is vital for that signature deep, rich gingerbread flavor and the dark brown color. It also contributes to the moistness of the cookies.
- Ginger (link) & Cinnamon: These warm spices are the heart and soul of any gingerbread recipe. They provide the iconic, comforting aroma and taste that define this holiday treat, making your gingerbread house truly irresistible.
Creative Decorations of Your Choice
Now for the most exciting part – bringing your gingerbread house to life with imaginative decorations! Here are some allergy-friendly ideas to get your creative juices flowing:
- Snowy Scenes: Create a winter wonderland effect using marshmallows (ensure they are gelatin-free for vegan options) or shredded coconut to mimic glistening snowdrifts on the roof and around the base of your house.
- Edible Accents: Use chocolate chips (ensure they are dairy-free and soy-free if needed) as charming shingles for the roof, door handles, or stepping stones leading to the entrance. Dried fruit, such as freeze-dried strawberries, can add a festive pop of color – I love using them for a vibrant bow on a gingerbread wreath!
- Holiday Lights: Fresh pomegranate seeds are not only delicious but also resemble tiny, jewel-toned Christmas lights, perfect for lining the roof or windows.
- Nature-Inspired Touches: Crushed dried berries or finely chopped nuts (if not adhering to a nut-free diet) can be used to simulate autumn leaves or rustic textures. Edible flowers (check for safety and allergies) can also add an elegant touch.
- Candy Cane Appeal: Small pieces of organic, naturally colored candy canes can add a classic holiday stripe around windows or as fence posts.
- More Icing Designs: Don’t underestimate the power of icing! Use different piping tips to create intricate patterns, delicate lace, window frames, or even tiny figures on your house.
- Bring in the Greenery: You can create edible “bushes” or “trees” around your house using dollops of green-colored icing (with matcha!) or by sticking small pieces of freeze-dried kiwi or green apple.
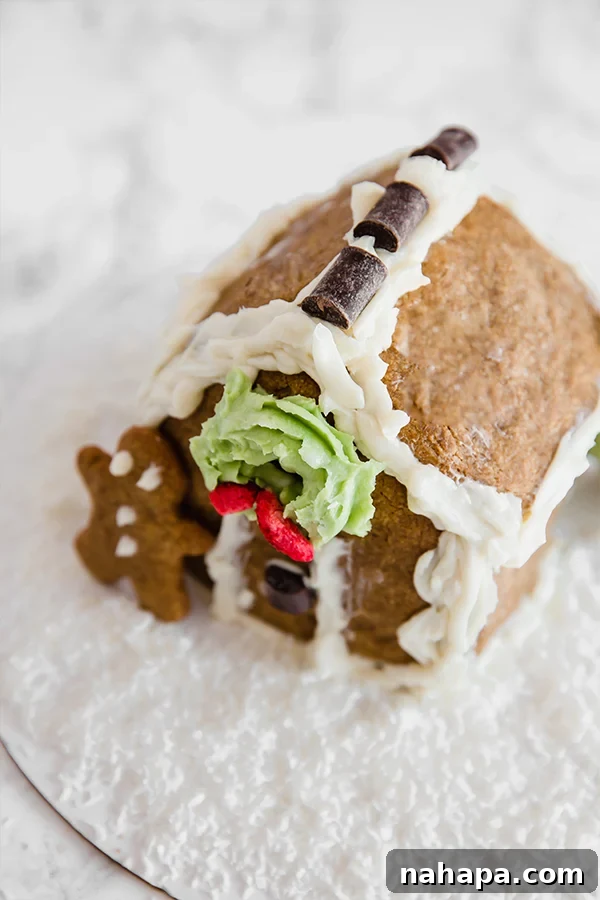
This paleo gingerbread house is more than just a dessert; it’s a centerpiece for holiday gatherings and a symbol of inclusive celebration. Enjoy the process of baking and decorating, and delight in sharing this wholesome, delicious, and allergy-friendly creation with your loved ones this holiday season!
You’ll also love these allergy-friendly holiday treats…
- Wholesome Christmas Cut-out Sugar Cookies
- Delicious Paleo Gingerbread Donut Holes
Paleo Gingerbread House (AIP)
1
30 mins
15 mins
45 mins
Michelle
Leave a Review
Pin Recipe
Ingredients
For the gingerbread house
- ¾ cup tigernut flour
- ¾ cup tapioca starch
- 1 tbsp gelatin powder
- ¼ tsp baking soda
- 1 tsp ginger powder
- 1 tsp cinnamon
- ¼ cup maple syrup
- 2 tbsp blackstrap molasses
- ⅓ cup palm shortening
For the frosting
- ½ cup palm shortening
- 2 tbsp maple syrup
- ½ tsp matcha powder, optional, for green color
Instructions
-
Preheat the oven to 350 F and line a large baking sheet with lightly greased parchment paper.
-
Using a large mixing bowl, sift the tigernut flour, tapioca starch, baking soda, gelatin, cinnamon and ginger together.
-
Stir in the maple syrup and blackstrap molasses and mix well. Cut in the palm shortening and stir until a cookie dough is formed.
-
Lightly flour a clean surface with tapioca starch and add the dough. Flour a rolling pin and roll out the dough to about 1/4″ thickness. Use cookie cutters (like this) to cut even rectangles for walls and roofs, and two pentagons for the front and back of the house. Cut out other cookie shapes like gingerbread men, snowmen, trees, and other cookie shapes as desired with the leftover dough.
-
Move all of the cookies to the baking sheet and evenly space. Bake in the preheated oven for 12 minutes or until cooked through.
-
Carefully transfer to a cooling rack and allow to fully cool before assembling the house.
-
To assemble the house, pipe frosting (see below) onto all of the edges of the frame of the house and place on a cake stand, adhering the walls to each other and placing the roof on top. Transfer to the fridge and allow the icing to harden for 10-15 minutes before continuing to decorate with more icing and decorations of choice.
For the frosting
-
Combine the palm shortening and maple syrup in a mixing bowl. Whisk with an electric hand mixer (or stand mixer) until light and fluffy.
-
Add coloring of choice like matcha powder for green icing or pomegranate juice for red.
Notes
Serving:
1full gingerbread house
,
Calories:
2812kcal
,
Carbohydrates:
207.5g
,
Protein:
18.3g
,
Fat:
196.8g
,
Fiber:
4.6g
Did you Make this Recipe?
Tag @unboundwellness on Instagram and hashtag #unboundwellness!