
This post contains affiliate links.
The Ultimate Guide to Dairy-Free Hot Cocoa Bombs: Easy DIY Recipe & Customization Ideas
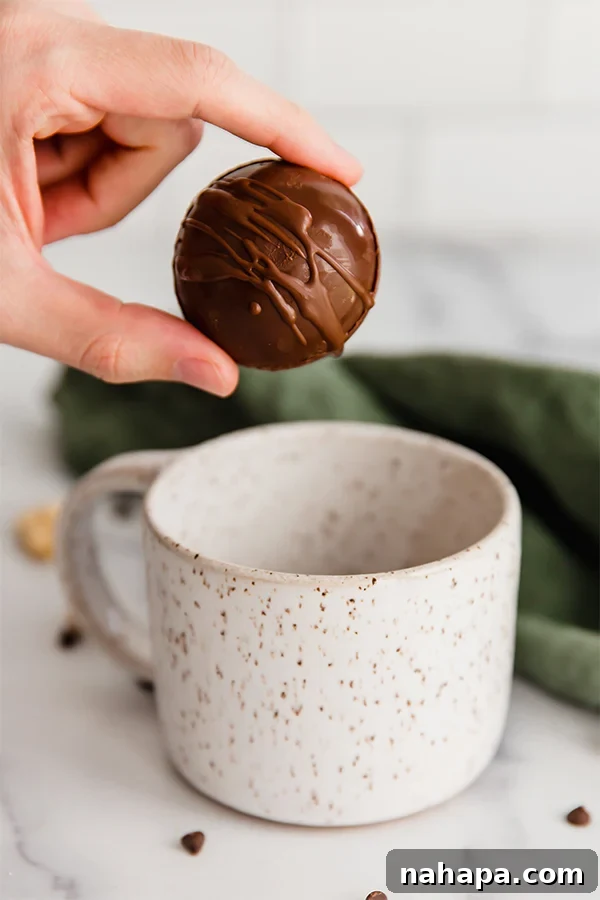
Imagine a magical sphere of chocolate, perfectly crafted to melt into a decadent cup of hot cocoa, revealing a hidden treasure of marshmallows and cocoa mix. Hot cocoa bombs have taken the world by storm, transforming a simple warm drink into an enchanting experience. This comprehensive guide will walk you through creating your own homemade hot cocoa bombs, with a special focus on a dairy-free and refined sugar-free version, ensuring everyone can enjoy this delightful treat. Get ready to impress your friends and family with these visually stunning and incredibly delicious creations!
What Are Hot Cocoa Bombs?
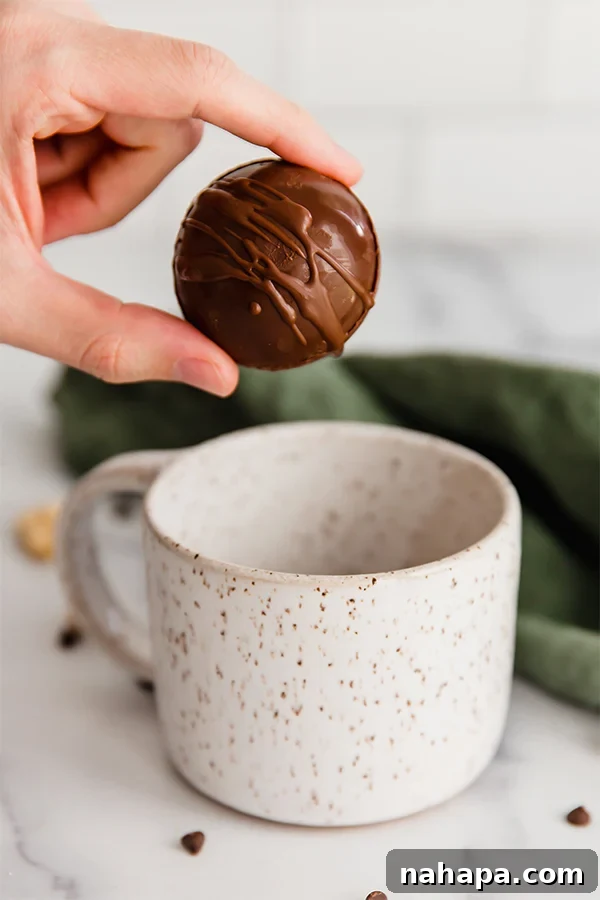
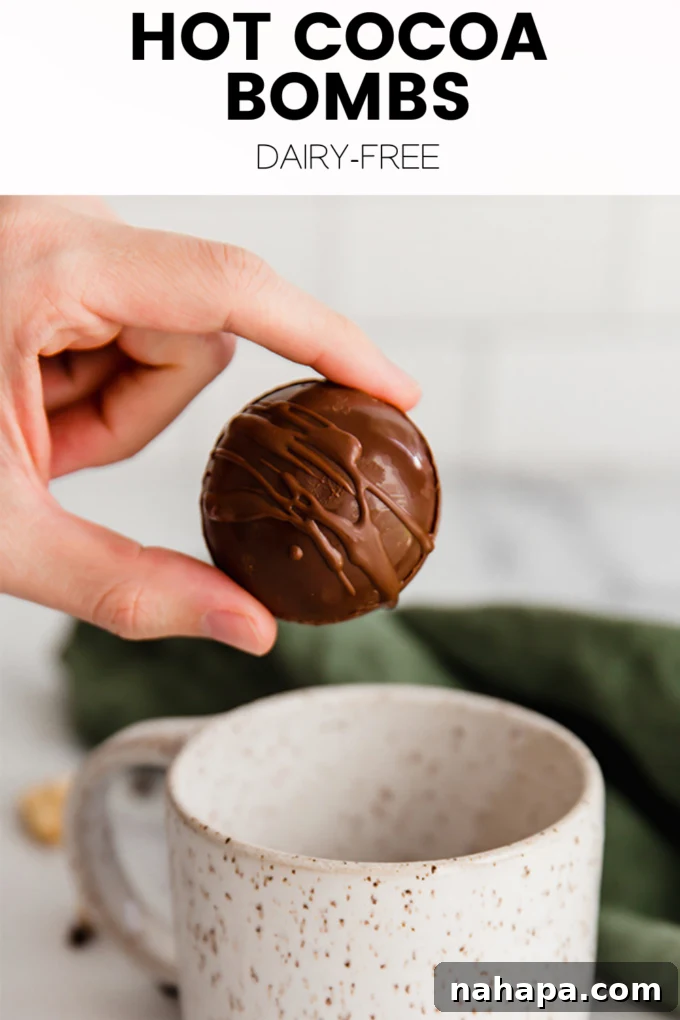
Hot cocoa bombs are essentially hollow chocolate shells, typically spherical, filled with hot chocolate mix and an assortment of miniature marshmallows or other delightful surprises. The magic happens when you place a hot cocoa bomb into a mug and pour steaming hot milk over it. The chocolate shell gradually melts away, releasing the contents into the milk. The marshmallows float to the surface, and a quick stir transforms everything into a rich, creamy, and wonderfully comforting cup of hot chocolate. It’s a captivating culinary experience that combines visual delight with irresistible flavor.
Their surge in popularity, particularly on social media, stems from their whimsical nature and the sheer joy they bring. Beyond their aesthetic appeal, hot cocoa bombs offer a fantastic opportunity for customization. This particular recipe takes it a step further by focusing on an allergen-friendly approach, utilizing dairy-free chocolate and marshmallows free from refined sugar. This makes them a perfect option for those with dietary sensitivities or anyone looking for a more wholesome twist on this beloved confection. Our version ensures that the joy of a warm, chocolatey beverage is accessible to all, without compromising on taste or fun.
The Essential Ingredients and Tools for Perfect Hot Cocoa Bombs
Creating beautiful and functional hot cocoa bombs requires a few key ingredients and specialized tools. Choosing high-quality components will significantly impact both the taste and ease of preparation. Here’s a detailed look at what you’ll need:
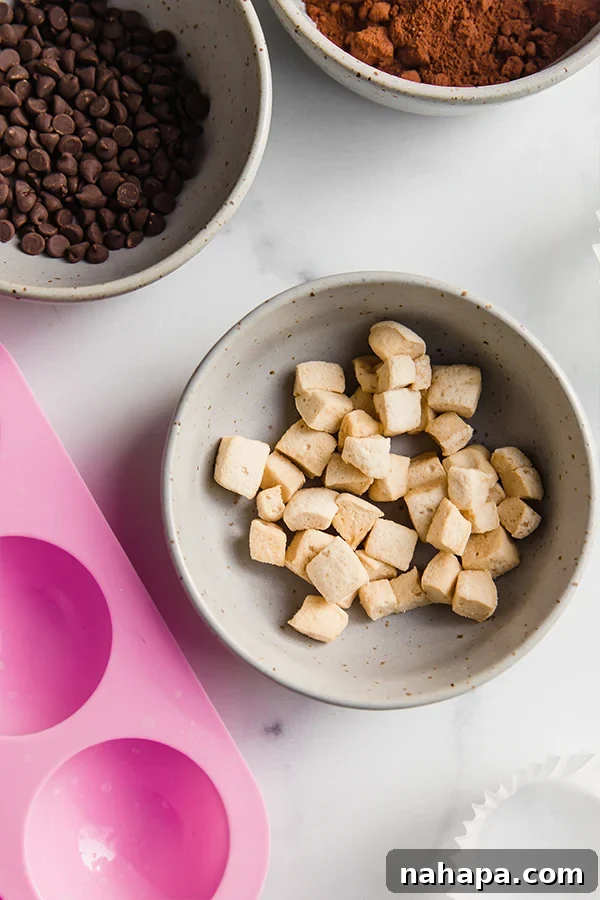
- Dairy-Free Chocolate Chips or Bars: The foundation of your hot cocoa bomb. For a truly dairy-free experience, opt for high-quality dairy-free chocolate chips or bars. Brands like Enjoy Life offer excellent options that melt smoothly and taste delicious. If you’re following an Autoimmune Protocol (AIP) diet, you can substitute with homemade carob chips for a compliant alternative. Ensure your chosen chocolate is free from common allergens if catering to specific needs. The quality of your chocolate directly influences the flavor and the integrity of your bomb shells, so choose wisely.
- Coconut Oil: A small amount of coconut oil helps the chocolate melt more smoothly, makes it easier to spread, and contributes to a beautiful, glossy finish on your chocolate shells. It also helps the shells release more easily from the molds.
- High-Quality Hot Cocoa Mix: While any hot cocoa mix will work, using a premium or homemade blend elevates the experience. If you prefer to make your own, consider a DIY collagen hot cocoa mix for added health benefits and control over ingredients. The amount of mix you use per bomb can be adjusted to your taste preference.
- Refined Sugar-Free Marshmallows: These are the delightful surprise inside! For a more wholesome bomb, choose marshmallows made without refined sugar. Brands like Sweet Apricity are excellent choices for their clean ingredients. Since these marshmallows can be quite large, cutting them into smaller, mini-sized pieces ensures they fit neatly inside the bomb and distribute well upon melting.
- Silicone Hot Cocoa Bomb Mold: This is an indispensable tool. Silicone molds are preferred over rigid plastic ones because they allow for easy demolding without breaking the delicate chocolate shells. This recipe is designed for standard half-sphere molds (approximately 2.5-3 inches in diameter), but you can scale the ingredients for larger or smaller molds. You can find reliable molds here.
- Small Cake Decorating Brushes: These brushes are crucial for applying a thin, even layer of melted chocolate to the molds. Their small size and soft bristles allow for precise application, ensuring your shells are strong enough to hold their shape but not so thick as to be difficult to melt. A set of these brushes can be found here.
- Milk of Your Choice: Whether you prefer dairy milk or a plant-based alternative, the choice is yours. For a truly dairy-free experience, coconut milk, almond milk, or oat milk are excellent options that provide a creamy texture and complement the chocolate flavor beautifully.
- Optional Tools: A double boiler or microwave-safe bowl for melting chocolate, small saucepan for the double boiler method, and cupcake liners for holding the chocolate shells as you work.
Crafting Your Own Hot Cocoa Bombs: A Step-by-Step Guide
Making hot cocoa bombs is a fun and rewarding process that becomes quite straightforward with the right technique. Follow these steps for perfect, dairy-free delights:
1. Prepare Your Workspace and Melt the Chocolate
- Gather all your ingredients and tools. Ensure your hot cocoa bomb molds are clean and dry.
- Combine 1 ½ cups of dairy-free chocolate chips (or chopped chocolate bars) with 1 tablespoon of coconut oil in a heat-safe bowl.
- Melt the chocolate using one of two methods:
- Double Boiler Method: Place the bowl over a small saucepan filled with about an inch of simmering water, ensuring the bottom of the bowl does not touch the water. Stir continuously until the chocolate is smooth and fully melted. This method provides gentle, even heat, preventing scorching.
- Microwave Method: Microwave the chocolate and coconut oil in 30-second intervals, stirring well after each interval, until completely melted and smooth. Be careful not to overheat the chocolate, as this can cause it to seize.
2. Coat the Molds with the First Chocolate Layer
- Using 2 hot cocoa bomb molds (which will yield 6 half-sphere shells, enough for 3 bombs), carefully spoon about 1 tablespoon of melted chocolate into each cavity.
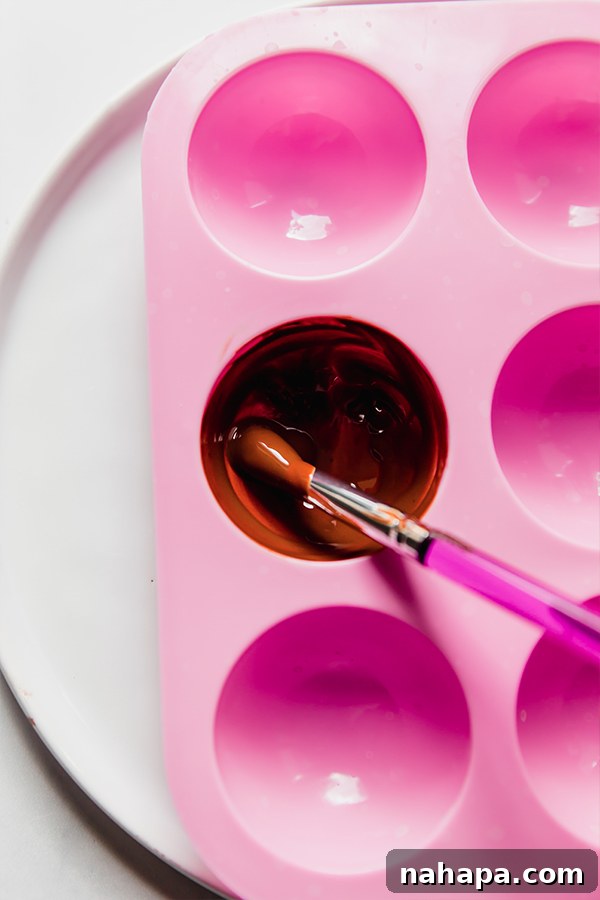
- Employ a small cake decorating brush to spread the chocolate evenly across the entire surface of each mold, creating a thin, consistent layer. Pay special attention to the edges to ensure full coverage.
- Transfer the molds to the freezer for 5 minutes to allow the chocolate to harden. This rapid cooling helps the chocolate set quickly and makes for a sturdy base.
3. Apply the Second Layer for Strength and Durability
- Remove the molds from the freezer. You’ll notice the chocolate has hardened.
- Add another layer of melted chocolate to each cavity. Use your decorating brush to ensure complete coverage, reinforcing the shell. This second layer is crucial for making the shells strong enough to handle without breaking and for preventing them from cracking when filled. Pay extra close attention to building up the chocolate around the rims of the molds, as these edges will form the seal.
- Return the molds to the freezer for an additional 5-10 minutes, or until the chocolate is fully hardened and opaque.
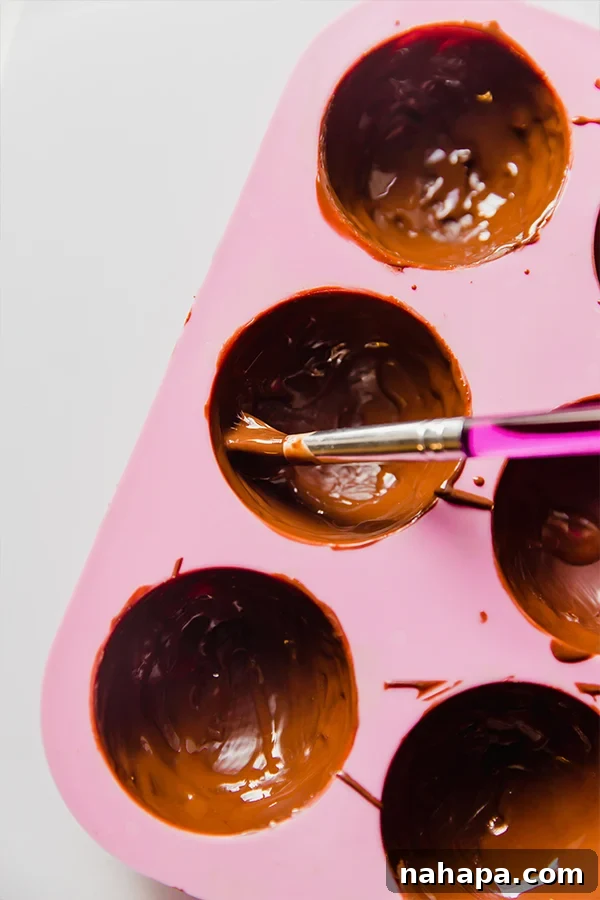
4. Fill Half of the Chocolate Shells
- While the second layer is hardening, prepare your filling station. Arrange 6 cupcake liners on a flat surface. Have your hot cocoa mix and mini marshmallows (or cut large marshmallows) readily available.
- Once the chocolate shells are fully hardened, carefully remove them from the silicone molds. Gently push from the bottom of each cavity to pop out the chocolate halves. Handle them by the edges to avoid fingerprints or melting.
- Place half of the chocolate shell halves (e.g., 3 out of 6 if making 3 bombs) into individual cupcake liners.
- Fill each of these half-shells with about 1 tablespoon of hot cocoa mix. Then, generously top with your mini marshmallows. Don’t be shy – a good amount of marshmallows makes for a delightful surprise!
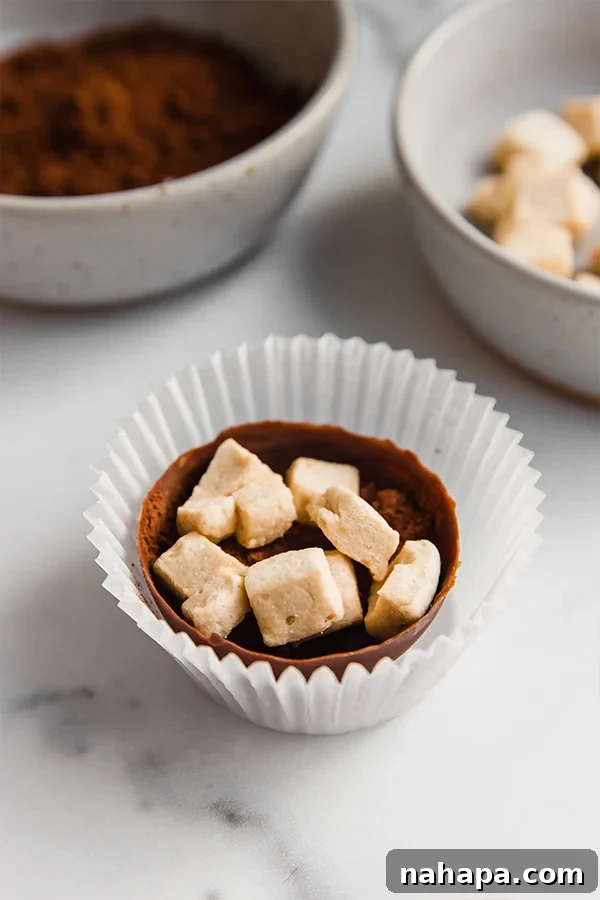
5. Seal the Hot Cocoa Bombs
- To join the two halves, you’ll need a slightly melted surface. Microwave a plate for 90-120 seconds until it’s warm to the touch (not hot enough to burn, but warm enough to melt chocolate).
- One by one, carefully pick up an empty chocolate shell half. Place its open rim onto the warm plate for just 2-3 seconds, allowing the edge to lightly melt.
- Immediately and carefully place this melted-edge shell onto one of your filled chocolate halves, gently twisting and pressing the edges together to create a secure seal. If needed, use your small decorating brush to smooth out any excess chocolate around the seam or to patch up small gaps.
- Repeat this process for all your hot cocoa bombs. Once assembled, place them in the fridge for a few minutes to fully harden and secure the seal.
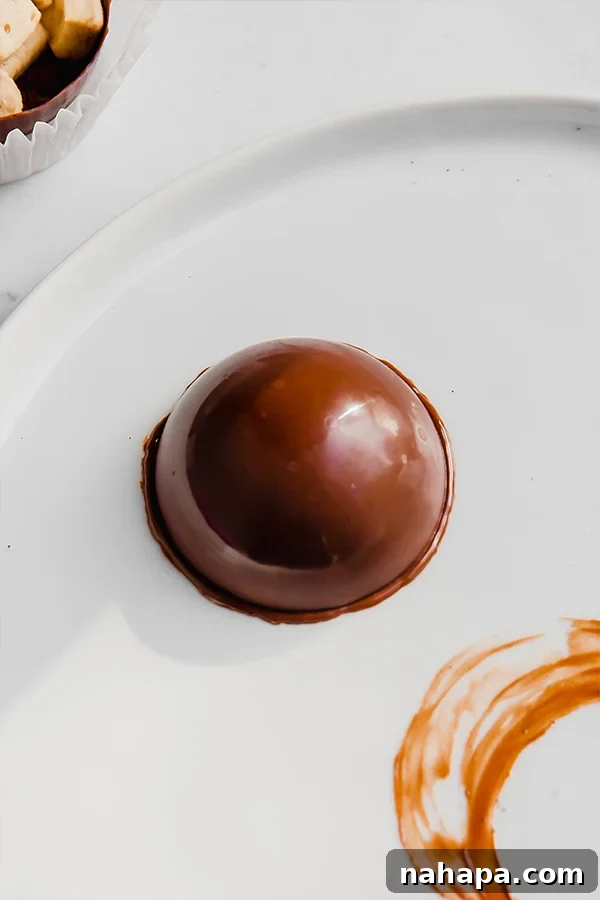
6. Decorate and Serve Your Masterpieces
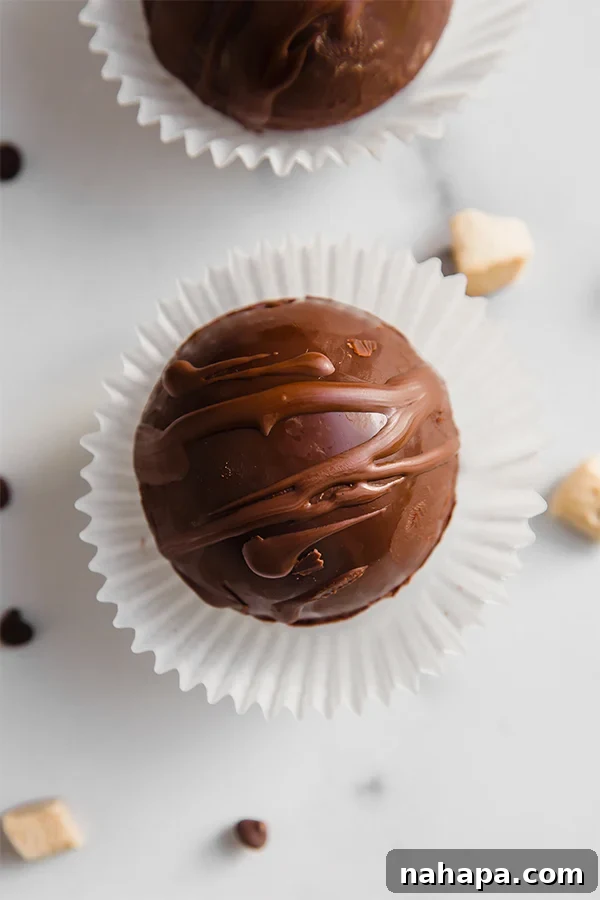
- Once the bombs are hardened, you can add extra decorations if desired. Drizzle them with more melted dairy-free chocolate, sprinkle with edible glitter, crushed candy canes, or a dusting of cocoa powder. Return them to the fridge for a final few minutes to set any decorations.
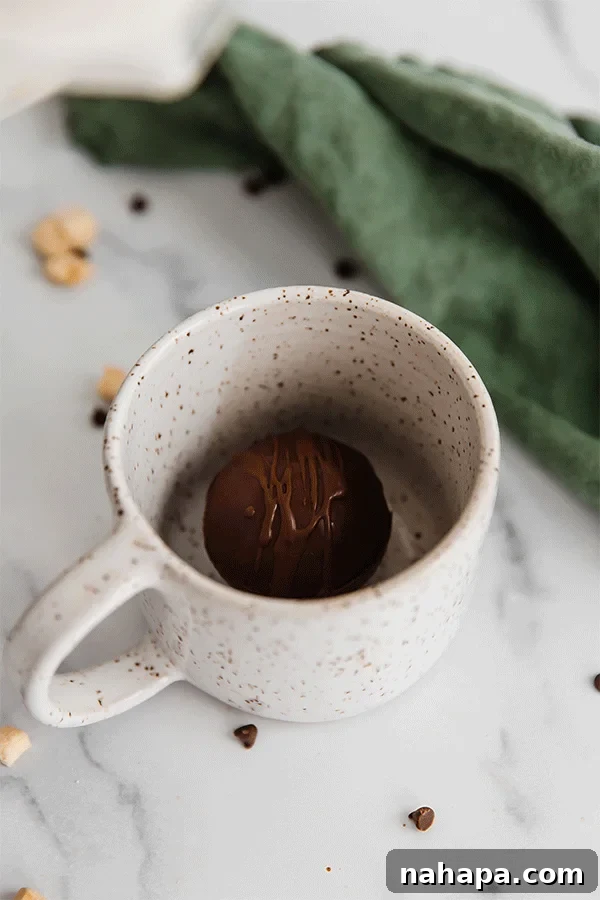
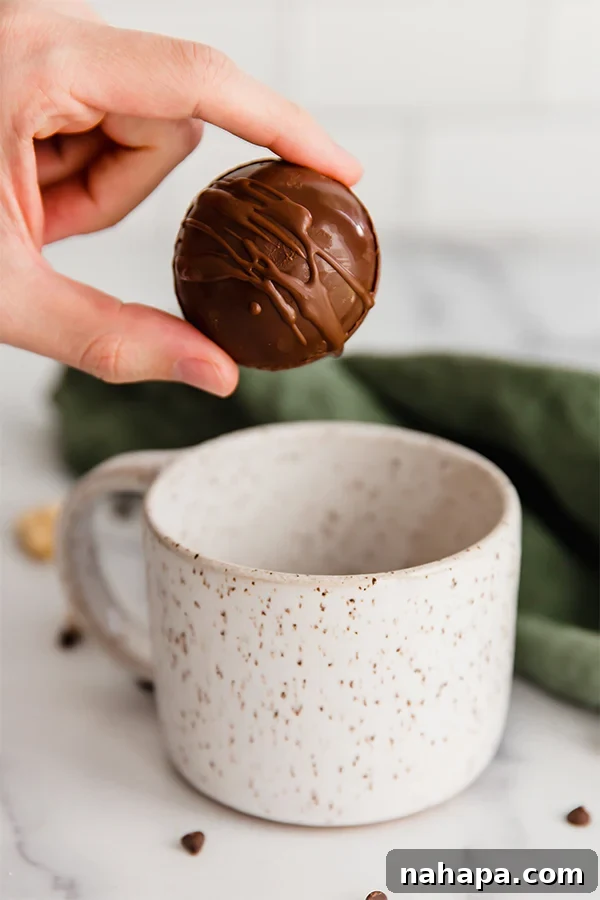
- When you’re ready to enjoy, place a hardened hot cocoa bomb into your favorite mug.
- Pour 8-10 ounces of hot milk (dairy-free or regular) slowly over the bomb until the mug is full and the chocolate shell has completely melted.
- Watch the magic unfold as the marshmallows pop to the top! Stir gently to combine the hot cocoa mix with the milk.
- Allow to cool slightly before sipping and savoring your homemade masterpiece!
Expert Tips and Troubleshooting for Hot Cocoa Bomb Success
While making hot cocoa bombs is relatively straightforward, a few tips and tricks can ensure your success and help you troubleshoot common issues:
- Work Quickly and Keep Chocolate Chilled: Chocolate can be temperamental, especially if your kitchen is warm. It melts easily with the heat from your hands or ambient room temperature. To prevent premature melting, work as quickly as possible. Keep your melted chocolate at a workable temperature, and frequently transfer your molds and assembled bombs to the fridge or freezer to chill and harden the chocolate. A cold kitchen or working surface can be a huge advantage.
- Don’t Fear Breakage – It’s Forgiving! If a chocolate shell breaks while removing it from the mold or during handling, don’t despair! This recipe is surprisingly forgiving. You can always remelt the broken pieces, add more melted chocolate to the molds, and start again for that specific shell. Alternatively, if a small crack appears, you can use a dab of melted chocolate and your decorating brush to patch it up, then return it to the fridge to set. Perfection isn’t always necessary, and practice makes perfect!
- Even Chocolate Layers are Key: The thickness of your chocolate shells matters. Too thin, and they might break easily; too thick, and they’ll take longer to melt in your mug. Aim for a consistent, medium-thin layer by carefully brushing the chocolate. The two-layer approach helps achieve this balance.
- Achieving a Perfect Seal: When melting the rim of an empty shell on the hot plate, ensure the plate is warm, not scorching hot. Too hot, and the chocolate will melt too quickly and messily. Just a few seconds are enough to create a slightly tacky edge that will bond seamlessly with the filled half. Press gently but firmly when joining the halves.
- Preventing Seizing: When melting chocolate, ensure no water gets into your chocolate, especially if using the double boiler method. Even a tiny drop of water can cause chocolate to “seize,” turning it into a grainy, clumpy mess. If this happens, you might be able to rescue it by stirring in a tablespoon of coconut oil or another fat, but it’s best to prevent it.
- Mold Release Technique: For easy release, make sure the chocolate is fully hardened. Flex the silicone mold gently from the outside edges, then push up from the bottom of each cavity. Avoid twisting or bending the mold too aggressively, which could crack the chocolate.
Unleash Your Creativity: Exciting Hot Cocoa Bomb Flavor Variations
The beauty of homemade hot cocoa bombs lies in their endless customization possibilities. Once you master the basic technique, you can experiment with various flavors to create unique and exciting variations:
- Peppermint Delight: Infuse your bombs with a refreshing holiday twist. Add a couple of drops of food-grade peppermint extract to your melted chocolate before coating the molds. For the filling, include crushed candy canes or small pieces of dairy-free peppermint bark alongside the marshmallows. A drizzle of white dairy-free chocolate and a sprinkle of crushed candy canes on top make for a festive finish.
- Coffee Lover’s Boost: For those who enjoy a mocha-like experience, add a teaspoon of instant coffee or espresso powder into the hot cocoa mix when filling the shells. You can also include a few chocolate-covered coffee beans inside or as a garnish. This adds a sophisticated depth of flavor.
- Salted Caramel Dream: Elevate your hot cocoa with the irresistible combination of sweet and salty caramel. Drizzle some dairy-free caramel sauce inside the chocolate shell before filling, and add a pinch of sea salt to the hot cocoa mix. A final drizzle of caramel and a sprinkle of flaky sea salt on the finished bomb will make it truly special.
- Cookie Crumble Craze: Transform your hot cocoa into a cookie-infused treat. Crush your favorite dairy-free cookies (like chocolate sandwich cookies or ginger snaps) and mix them in with the marshmallows. You can also use cookie crumbs as a decorative topping, either on their own or mixed with a chocolate drizzle.
- Spicy Chili Chocolate: For an adventurous palate, add a tiny pinch of cayenne pepper or chili powder to your hot cocoa mix. This provides a subtle warmth and depth that complements the chocolate beautifully.
- Orange Zest Zing: A hint of citrus can brighten up chocolate. Incorporate a little grated orange zest or a drop of orange extract into your melted chocolate for a delightful orange-chocolate aroma and flavor.
- Nutty Indulgence: Add a tablespoon of finely chopped dairy-free nuts (like almonds, hazelnuts, or pecans) into the bomb alongside the marshmallows for an added crunch and nutty flavor. A drop of almond extract in the chocolate can further enhance this.
- S’mores Sensation: Recreate the campfire classic! Fill your bombs with graham cracker crumbs, mini marshmallows, and tiny pieces of dairy-free chocolate bar.
- White Chocolate Wonder: Instead of dark or milk dairy-free chocolate, use dairy-free white chocolate for the shells. Fill with a white cocoa mix or simply marshmallows and experiment with vibrant food coloring in the white chocolate for fun, colorful bombs.
- Pumpkin Spice Fall Favorite: For an autumn-inspired drink, add a pinch of pumpkin pie spice to your hot cocoa mix.
Storage and Gifting Your Homemade Hot Cocoa Bombs
Once you’ve crafted your beautiful hot cocoa bombs, proper storage and thoughtful gifting methods ensure they remain perfect until enjoyed or given away.
How to Store Hot Cocoa Bombs
To prevent your chocolate shells from melting and to maintain their integrity, it’s crucial to store hot cocoa bombs in a cool, dry place. The best method is to keep them chilled. Place each bomb in an individual cupcake liner, which helps protect the delicate chocolate and prevents them from sticking to each other. Store these in an airtight container in the refrigerator. When stored correctly, homemade hot cocoa bombs can last for 2-3 weeks, though they are best enjoyed within the first week for optimal freshness.
What’s the Best Way to Pack Hot Cocoa Bombs to Gift Them?
Hot cocoa bombs make fantastic homemade gifts, perfect for holidays, birthdays, or just as a thoughtful gesture. Because they are delicate, careful packaging is essential for transport and presentation.
- Individual Protection: Always place each hot cocoa bomb in its own cupcake liner. This provides a cushion and prevents direct contact, which could lead to scratches or melting.
- Secure Packaging: The best way to transport multiple bombs is in a cupcake box. These boxes have inserts that securely hold each bomb in place, minimizing movement. For individual bombs, a small, sturdy gift box lined with tissue paper works well.
- Airtight Seal: To keep them fresh and protect them from moisture and odors, consider wrapping individual bombs (within their liners) in cellophane bags before placing them in a gift box. Tie the bags with a decorative ribbon for an elegant touch.
- Add a Tag: Include a small tag with instructions on how to use the hot cocoa bomb (e.g., “Place in a mug, pour hot milk over, stir, and enjoy!”). You can also mention the dairy-free and refined sugar-free aspects if gifting to someone with dietary preferences.
- Handle with Care: Always remind the recipient (or yourself!) that these are delicate and should be handled gently and kept cool, especially during transport.
Frequently Asked Questions About Hot Cocoa Bombs
Can I make hot cocoa bombs ahead of time?
Absolutely! Hot cocoa bombs are an excellent make-ahead treat. Once assembled and decorated, store them properly in an airtight container in the refrigerator. They can last for 2-3 weeks, making them perfect for preparing for parties, gifts, or a quick treat whenever the craving strikes.
How much milk should I use per hot cocoa bomb?
Generally, one standard-sized hot cocoa bomb is perfect for an 8-10 ounce mug of hot milk. You can adjust the amount of milk slightly based on your preferred chocolate intensity. More milk will result in a milder flavor, while less milk will yield a richer, more concentrated hot cocoa.
What if my chocolate shells are too thick or thin?
If your chocolate shells are too thick, they might take longer to melt, or the resulting hot cocoa could be overly rich. If they are too thin, they are prone to breaking. Aim for a consistent, medium-thin layer, applied in two coats, as instructed in the recipe. Practice makes perfect when it comes to brushing chocolate evenly.
Can I use regular chocolate and marshmallows?
Yes, you certainly can! This recipe is specifically tailored for dairy-free chocolate and refined sugar-free marshmallows to accommodate dietary needs and preferences. However, the technique remains the same, so feel free to substitute with your preferred regular chocolate chips and marshmallows if dairy-free and refined sugar-free options are not a concern for you.
My hot cocoa bomb isn’t melting properly. What went wrong?
Several factors could cause this. Ensure your milk is steaming hot, not just warm. If the chocolate shells are too thick, they will take longer to melt. Sometimes, adding a little extra hot milk and stirring gently can help speed up the process. Also, make sure the bomb is fully submerged in the hot milk.
How to Make Hot Cocoa Bombs {Dairy-Free}
6
hot cocoa bombs
45
mins
45
mins
Michelle
Leave a Review
Pin Recipe
Ingredients
- 1 ½ cups dairy-free chocolate chips, I use Enjoy Life chocolate chips. Use homemade carob chips for AIP.
- 1 tbsp coconut oil
- 6 tbsp hot cocoa mix
- 25-35 mini marshmallows, I use Sweet Apricity marshmallows and cut them into smaller pieces.
Instructions
- Combine the chocolate chips and coconut oil and melt over a double boiler method, or in the microwave until fully liquid and smooth.
- Using 2 hot cocoa bomb molds, carefully spoon in about 1 tbsp of melted chocolate. Use a small cake decorating brush to brush the chocolate, covering the entire mold into a thin, even layer. Transfer to the freezer for 5 minutes to harden.
- Remove from the freezer and add another layer of chocolate to the molds to thicken the chocolate further. Use the brush to pay extra close attention to the edges to make sure they’re fully covered and reinforced. Return to the freezer for another 5-10 minutes until fully hardened.
- Prepare a station with 6 cupcake liners, the hot cocoa mix, and marshmallows.
- Carefully remove one of the chocolate shell halves from the mold by gently flexing the silicone. Transfer it to a cupcake liner. Fill with about 1 tbsp of cocoa mix, and top generously with marshmallows. Repeat this step for half of the total chocolate shells you’ve made.
- Microwave a plate for 90-120 seconds until warm. One by one, carefully remove an empty chocolate shell half and place its open rim onto the warm plate for 2-3 seconds to lightly melt the chocolate edge. Immediately and carefully place this melted-edge shell onto one of the filled shells, gently pressing to ensure it’s melted and sealed together. Clean up the edges with the decorating brush if needed. Repeat with all of the shells and place them in the fridge to harden.
- Drizzle with extra melted chocolate on top and decorate (if desired, with sprinkles, etc.) and place in the fridge again for a few minutes to set the decorations.
- When ready to serve, add the hardened cocoa bomb to a mug. Pour hot milk over it until the mug is full and the cocoa bomb has melted completely. Carefully stir and allow to cool slightly before enjoying!
Did you Make this Recipe?
Tag @unboundwellness on Instagram and hashtag #unboundwellness!
Conclusion: Crafting Joy in Every Cup
Making your own dairy-free hot cocoa bombs is more than just a recipe; it’s an invitation to creativity, a delightful sensory experience, and a wonderful way to bring joy to yourself and others. From the satisfying process of molding chocolate shells to the magical reveal of marshmallows swirling in a steamy mug, every step is infused with fun. This guide has provided you with all the knowledge and techniques needed to master this enchanting treat, offering a wholesome, allergen-friendly version that doesn’t compromise on flavor or excitement.
Whether you’re looking for a cozy winter evening indulgence, a unique homemade gift, or a fun activity with loved ones, these hot cocoa bombs are sure to impress. Don’t be afraid to experiment with the many flavor variations and decorative touches suggested. Embrace the process, customize to your heart’s content, and get ready to sip on some truly special, homemade hot cocoa. Share your creations, spread the warmth, and enjoy the magic!
You’ll Also Love These Related Recipes:
- Hot Cocoa Cheesecake
- Hot Chocolate Brownie Bites
- DIY Collagen Hot Cocoa Mix & Peppermint Marshmallows