
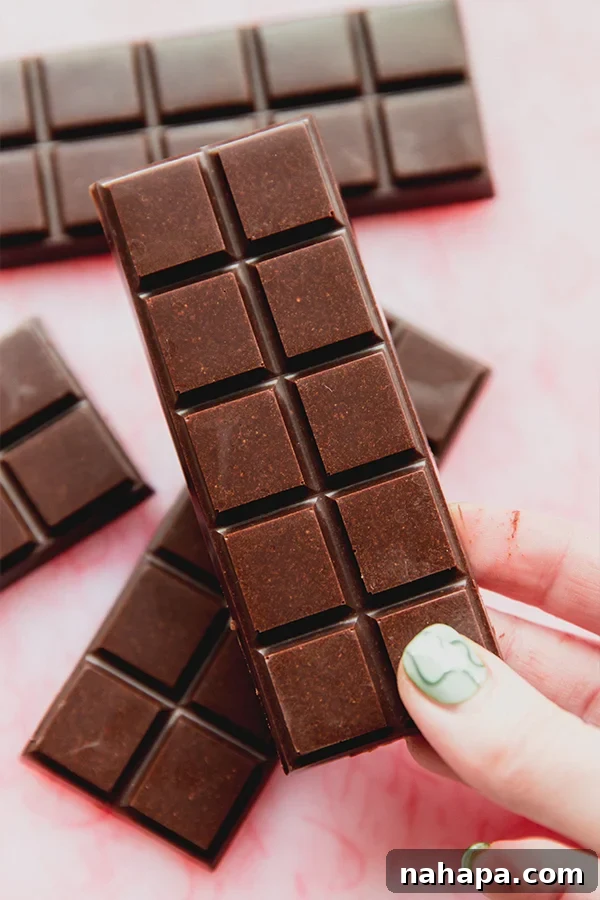
Craving the creamy, melt-in-your-mouth goodness of traditional milk chocolate but following a vegan or dairy-free lifestyle? Your search ends here! This incredible homemade coconut milk chocolate bar is a game-changer, offering a luscious, smooth alternative that perfectly mimics your childhood favorite. It’s not just dairy-free and vegan; it’s also incredibly simple to whip up right in your own kitchen.
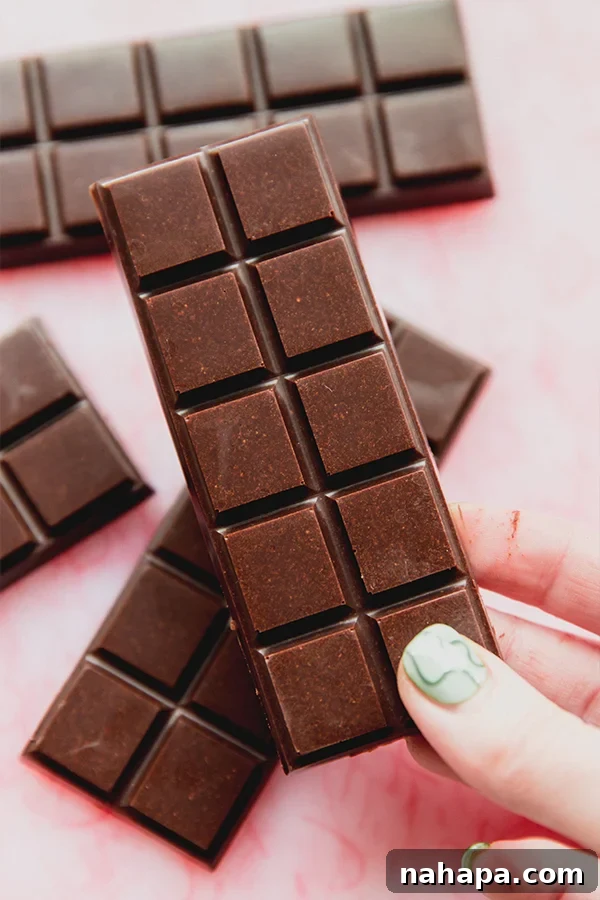
Growing up, milk chocolate was my absolute go-to treat. The thought of giving it up was one of my biggest anxieties when I transitioned to a dairy-free diet. While dark chocolate offers a delightful richness and numerous dairy-free options exist on the market, they often lack that distinctive creamy sweetness and nostalgic texture of genuine milk chocolate. Many commercial dairy-free “milk” chocolates rely on ingredients that might not align with specific dietary needs or preferences. But what if you could create that perfect, velvety dairy-free milk chocolate experience at home, using wholesome ingredients you trust? Now, you absolutely can!
This recipe provides the ultimate solution, delivering a smooth, sweet, and unbelievably satisfying dairy-free milk chocolate experience. The secret ingredient? Coconut milk powder. It’s what imparts that rich, creamy texture and subtly sweet flavor, making this homemade creation an unparalleled vegan alternative that’s surprisingly easy to master. Forget the gritty textures or overly intense flavors often associated with homemade chocolates; this recipe guarantees a luscious, smooth bar that rivals its dairy counterparts.
Why You’ll Love Indulging in This Homemade Coconut Milk Chocolate Bar
Prepare to fall in love with this recipe for so many reasons. It’s more than just a sweet treat; it’s a culinary revelation for anyone seeking delicious dairy-free options.
- The Dreamy Dairy-Free “Milk” Chocolate: If you’re a milk chocolate connoisseur who needs to avoid dairy, this recipe is a true revelation. It captures the creamy, sweet essence of milk chocolate, allowing you to enjoy your favorite flavor without any compromise. The unique combination of cacao butter and coconut milk powder creates a texture that melts beautifully in your mouth.
- Effortlessly Simple Homemade Chocolate: Don’t be intimidated by the idea of making your own chocolate. This recipe requires only a handful of readily available ingredients and a straightforward process. You don’t need fancy equipment, just a double boiler setup (which can be improvised with items you likely already own) and a little patience. It’s a fantastic project for beginners and seasoned home cooks alike.
- Wholesome Ingredients, Transparent Goodness: When you make chocolate at home, you control exactly what goes into it. This recipe uses natural sweeteners and high-quality cacao products, free from artificial additives, preservatives, or questionable emulsifiers often found in store-bought options.
- Customizable to Your Taste: This recipe serves as a perfect base for endless customization. Want a hint of spice? Add a pinch of chili powder or cinnamon. Love nuts? Fold in some chopped almonds or pecans. Prefer a citrusy twist? A touch of orange zest can elevate the flavor profile. The possibilities are truly boundless!
- A Perfect Treat for All Occasions: Whether you’re enjoying a quiet evening at home, looking for a thoughtful homemade gift, or preparing for a holiday, these chocolate bars fit the bill. They’re impressive enough for guests yet simple enough for an everyday indulgence.
The Essential Ingredients for Your Homemade Coconut Milk Chocolate Bar
Each ingredient in this recipe plays a crucial role in achieving the perfect texture and flavor. Sourcing quality ingredients will make a noticeable difference in your final product.
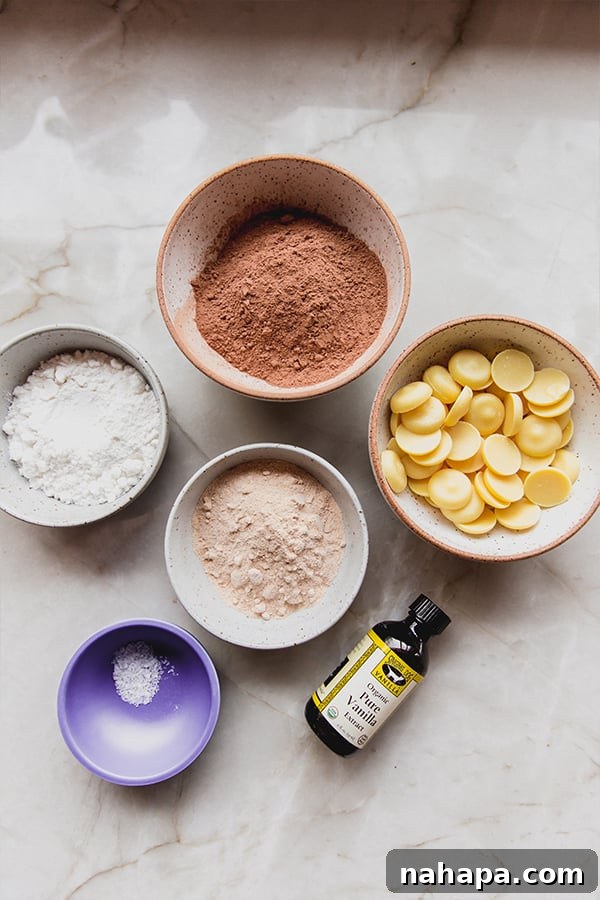
- Cacao Butter Wafers: This is the foundation of your chocolate’s smooth, rich texture. Cacao butter is the pure fat extracted from the cacao bean, providing that distinctive chocolate aroma and a velvety mouthfeel. While you could theoretically use coconut oil, cacao butter is vastly superior for chocolate making. It’s less greasy, sets firmer at room temperature, and imparts a much richer, more authentic chocolate flavor. Look for food-grade cacao butter wafers or chunks; they melt easily and are widely available online or at specialty health food stores.
- Date Sugar: Date sugar is an absolute key player in achieving the ideal sweetness and texture for this dairy-free milk chocolate. Unlike granulated sugars that can leave a grainy mouthfeel, date sugar is finely ground whole dried dates, which allows it to dissolve much more evenly into the chocolate mixture. This prevents the grittiness that coconut sugar or other coarser sweeteners might cause, ensuring a wonderfully smooth bar. While maple syrup can be used as a liquid sweetener, it may affect the final setting and firmness of your chocolate, making it a bit softer. For the best results, stick with date sugar.
- Cocoa Powder: This provides the intense chocolate flavor and deep color. You can choose between natural cocoa powder (which is more acidic and yields a sharper chocolate flavor) or Dutch-processed cocoa powder (which has been neutralized, resulting in a darker color and milder, less bitter chocolate flavor). For a classic milk chocolate taste, a good quality natural cocoa powder works wonderfully, balancing the sweetness of the date sugar.
- Coconut Milk Powder: This is where the “milk” in your dairy-free milk chocolate comes from! Coconut milk powder is dehydrated coconut milk, which, when incorporated into the melted cacao butter, creates a creamy, dairy-like texture without any actual dairy. It lends a delicate sweetness and richness that is essential for replicating the milk chocolate experience. I highly recommend this particular coconut milk powder for its fine texture and excellent flavor profile.
- Vanilla Extract and Salt: A touch of pure vanilla extract enhances the overall chocolate flavor, adding warmth and depth. Just like in baking, a small pinch of fine sea salt is crucial for balancing the sweetness and intensifying the chocolate notes, preventing the bar from tasting flat.
How to Craft Your Own Homemade Coconut Milk Chocolate Bar
Making your own chocolate might sound intimidating, but it’s surprisingly straightforward. Follow these steps for a smooth and delicious result.
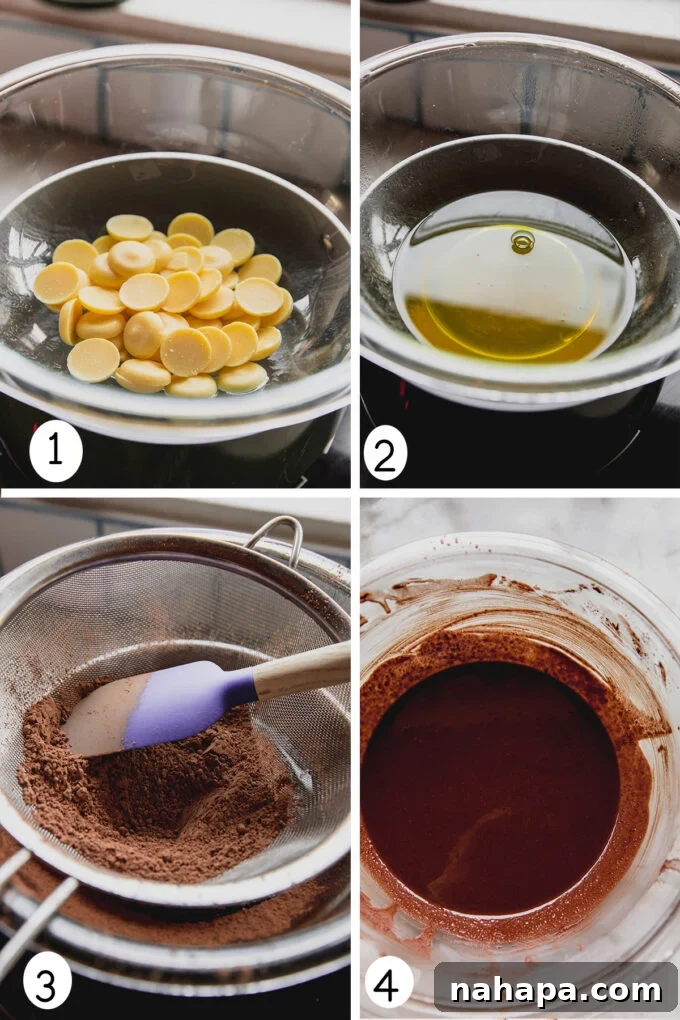
- Step One: Prepare Your Double Boiler. Begin by heating a pot of water on the stove over medium heat. Bring the water to a gentle simmer, ensuring it’s not boiling vigorously. Place a heat-safe glass or metal bowl directly over the pot of simmering water, creating a double boiler. The bottom of the bowl should not touch the water. Add your cacao butter wafers to this bowl.
- Step Two: Melt the Cacao Butter. Allow the cacao butter to slowly melt, stirring occasionally, until it’s completely liquid and smooth. The gentle heat of the double boiler prevents scorching and ensures even melting. Once melted, reduce the heat of the double boiler to low.
- Step Three: Incorporate Dry Ingredients. Carefully sift the cocoa powder into the melted cacao butter. Sifting is crucial here to prevent clumps and ensure a smooth chocolate. Whisk continuously until the cocoa powder is fully combined and there are no visible streaks. Next, sift in the coconut milk powder and date sugar. Again, whisk vigorously until all dry ingredients are thoroughly incorporated and the mixture is smooth and liquid, free of any lumps.
- Step Four: Add Flavor Enhancers. Remove the bowl from the double boiler using oven mitts, as it will be hot. Stir in the vanilla extract until well combined.
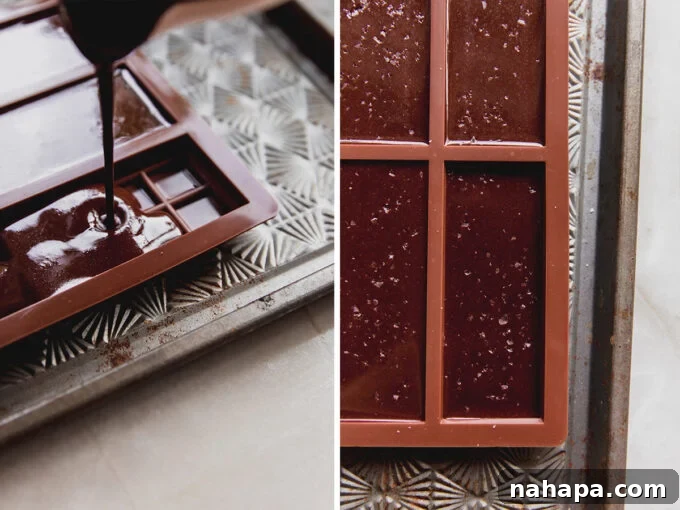
- Step Five: Mold and Chill. Pour the liquid chocolate mixture into your chosen silicone molds. Placing your mold on a baking sheet beforehand makes it much easier to transfer. Gently tap the baking sheet a few times to release any air bubbles. Sprinkle a pinch of flaky sea salt over the top of the chocolate bars for an exquisite flavor contrast. Transfer the baking sheet with the molds to the refrigerator and chill for at least 2-3 hours, or until the chocolate is completely solid and firm to the touch.
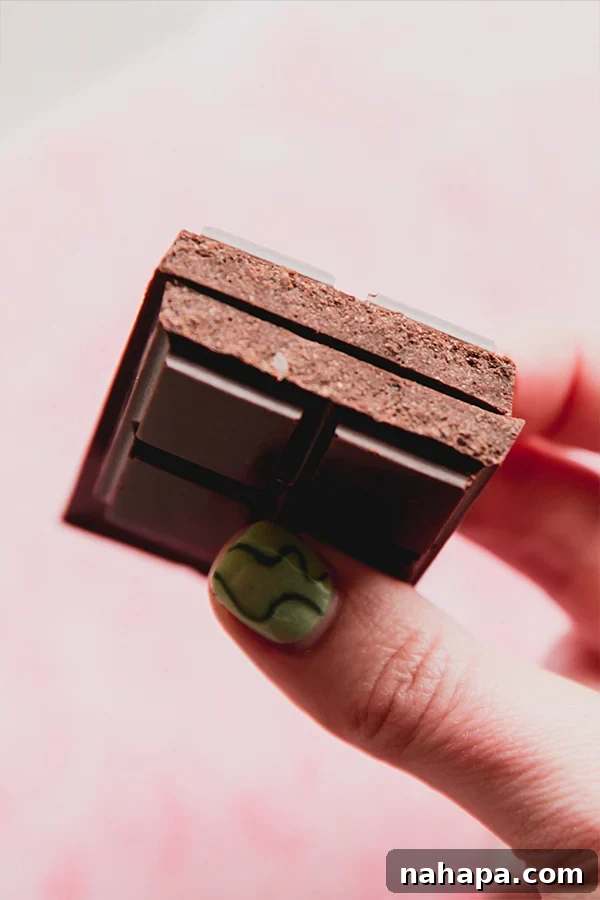
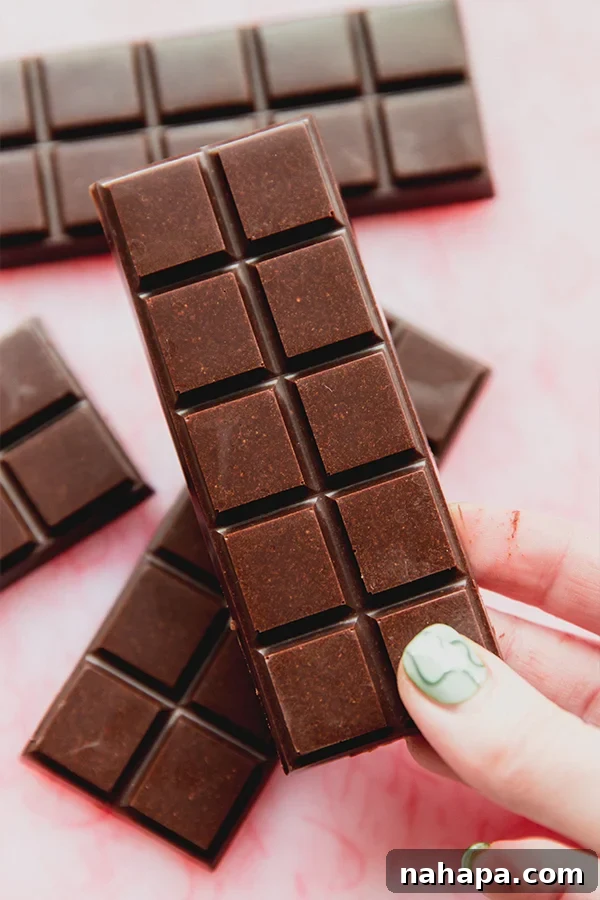
- Step Six: Unmold and Enjoy! Once fully set, carefully remove the chocolate bars from their molds. They should pop out easily. Store your homemade coconut milk chocolate bars in an airtight container in the refrigerator to maintain their freshness and firmness.
Expert Tips & Smart Tricks for Perfect Homemade Chocolate
Achieving perfectly smooth and delicious homemade chocolate is easier with a few insider tips:
- Always Sift Your Dry Ingredients: This cannot be stressed enough! Cocoa powder, coconut milk powder, and date sugar can easily clump, especially when exposed to warmth. Sifting them thoroughly before adding them to your melted cacao butter is crucial for preventing a gritty texture and ensuring a wonderfully smooth, uniform chocolate bar. A fine-mesh sieve works best.
- Choose Your Mold Wisely: The beauty of homemade chocolate is its versatility. You can use any silicone mold you like! I prefer a standard chocolate bar mold for easy portioning, but don’t limit yourself. For holidays, consider festive shapes like bunnies for Easter or trees for Christmas. Small truffle molds or even mini cupcake liners can also work for bite-sized treats.
- Maintain Low Heat: When working with chocolate and cacao butter, low, gentle heat is your best friend. High heat can cause the mixture to seize (become thick and crumbly) or burn, affecting both flavor and texture. A double boiler is ideal because it provides indirect heat, making it easier to control the temperature.
- Temperature Matters for Shine: For an extra glossy finish and a satisfying snap, you can attempt a basic tempering method. After melting, let the chocolate cool slightly to around 88-90°F (31-32°C) while stirring continuously, then quickly reheat to just above that before pouring into molds. This isn’t strictly necessary for taste but enhances the aesthetic and texture.
- Experiment with Flavor Boosts: Once you’ve mastered the basic recipe, feel free to get creative! Add a few drops of peppermint extract for a mint chocolate bar, a sprinkle of cayenne pepper for a spicy kick, or incorporate finely chopped nuts, seeds, or dried fruit into the mixture before pouring into molds.
Health Benefits of Your Homemade Dairy-Free Chocolate
Beyond being incredibly delicious, making your own coconut milk chocolate offers some noteworthy health advantages:
- Rich in Antioxidants: Cacao powder is packed with antioxidants, which help combat free radicals in the body and contribute to overall well-being.
- Natural Sweetener: Date sugar provides natural sweetness along with fiber and nutrients, a healthier alternative to refined sugars.
- Dairy-Free Goodness: For those with lactose intolerance or dairy allergies, this chocolate provides a safe and delicious way to enjoy a classic treat. It’s also suitable for vegans.
- Healthy Fats from Cacao Butter: Cacao butter contains healthy fats that are beneficial for energy and satiety.
Common Questions About Homemade Chocolate
Here are answers to some frequently asked questions:
- How long does homemade coconut milk chocolate last? When stored in an airtight container in the refrigerator, these chocolate bars can last for up to 2-3 weeks.
- Can I use a different sweetener? Date sugar is highly recommended for its fine texture and ability to prevent grittiness. Other granulated sugars like coconut sugar might work but could result in a less smooth texture. Liquid sweeteners like maple syrup may alter the setting consistency and require adjustments to other ingredients.
- Why is my chocolate gritty? Grittiness usually occurs if the dry ingredients (cocoa powder, coconut milk powder, date sugar) were not sifted properly or did not fully dissolve. Ensure thorough sifting and whisking.
- Can I use coconut oil instead of cacao butter? While possible, cacao butter is strongly preferred for its superior texture and flavor. Coconut oil will result in a chocolate that melts very quickly at room temperature and may have a different mouthfeel.
You’ll also love these other delightful dairy-free treats:
- Chocolate Almond Butter Bars
- Paleo Buckeyes
- Gluten Free Chocolate Lava Cakes
Homemade Coconut Milk Chocolate Bar (Vegan & Dairy-Free)
Leave a Review
Pin Recipe
Want to save this recipe for later?
Simply bookmark this page or save it to your favorite recipe collection!
Ingredients
- 1 cup cacao butter wafers
- ⅔ cup cocoa powder
- ¼ cup coconut milk powder
- ⅓ cup date sugar
- 1 tsp vanilla extract
- Pinch of sea salt
Instructions
- Heat a pot of water over the stove and bring to a low simmer. Add a heat-safe glass (or metal) bowl over the pot of water to create a double boiler.
- Add the cacao butter wafers to the bowl, stirring until melted and smooth. Reduce the heat of the double boiler to low and sift in the cocoa powder. Whisk until fully combined. Sift in the coconut milk powder and date sugar, whisking vigorously until combined and the mixture is smooth with no lumps.
- Carefully remove the bowl from the heat using oven mitts. Stir in the vanilla extract.
- Place your chosen silicone mold (I use this one) on a baking sheet and pour the chocolate mixture into the mold. Sprinkle with a pinch of salt. Transfer to the fridge until totally solid, about 2-3 hours.
- Remove from the mold and enjoy! Store the chocolate chilled in an airtight container in the fridge for up to 2-3 weeks.
Notes
Nutrition Facts (Estimated per serving):
- Serving: 1 piece (1/10 of recipe)
- Calories: 243kcal
- Carbohydrates: 10.2g
- Protein: 1.2g
- Fat: 23.8g
- Fiber: 1.7g
Did you Make this Recipe?
Tag @unboundwellness on Instagram and hashtag #unboundwellness!
There you have it – a truly satisfying, creamy, and decadent homemade coconut milk chocolate bar that allows you to enjoy the classic taste of milk chocolate without any dairy. It’s simple, customizable, and a delightful treat for any occasion. Don’t let dietary restrictions limit your enjoyment of chocolate. Embrace the joy of crafting your own delicious, wholesome treats at home!