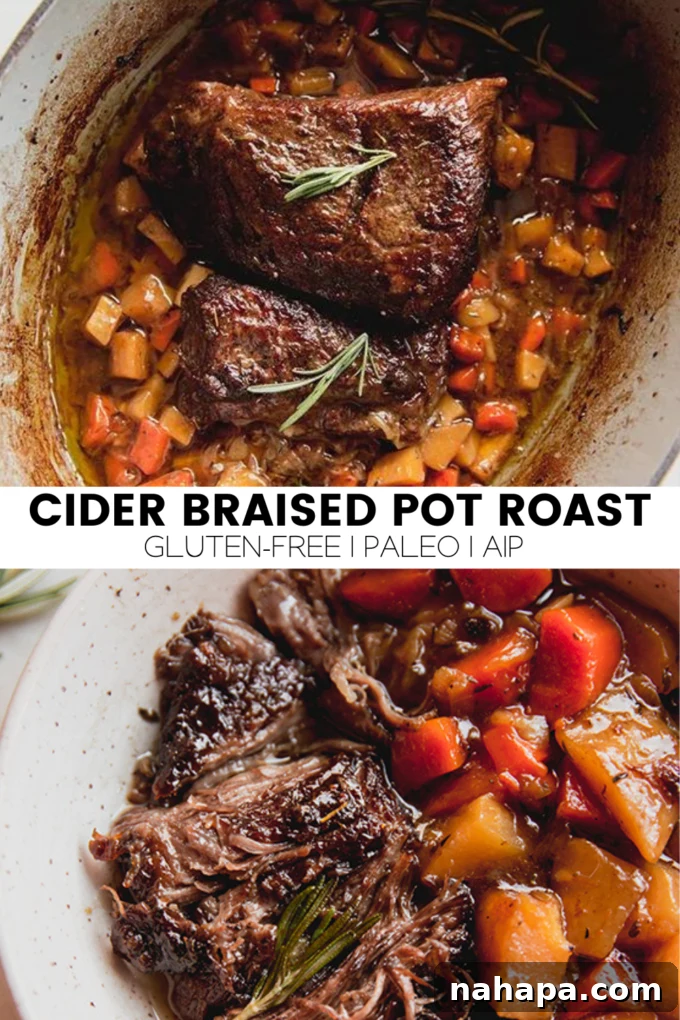
Welcome to the ultimate guide for preparing a truly exceptional meal: Apple Cider Braised Pot Roast. This isn’t just any pot roast; it’s a culinary masterpiece, perfectly crafted to be a comforting one-pot wonder, ideal for those chilly evenings when you crave warmth and flavor. Beyond its delightful taste, this recipe proudly caters to specific dietary needs, being entirely gluten-free and easily adaptable for the Autoimmune Protocol (AIP) diet by simply omitting black pepper. Get ready to transform a simple chuck roast into an incredibly tender, fall-apart sensation infused with the sweet and tangy notes of apple cider and caramelized aromatics.
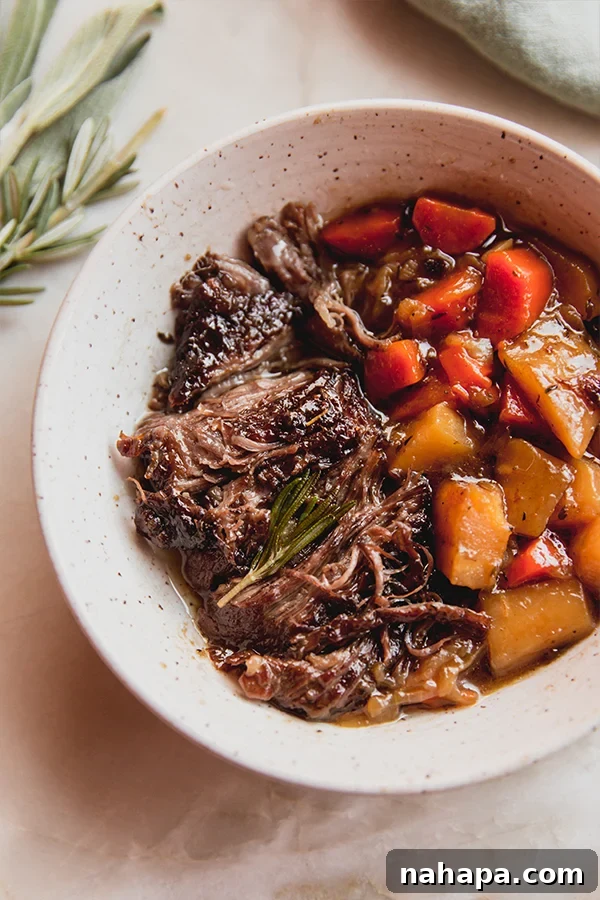
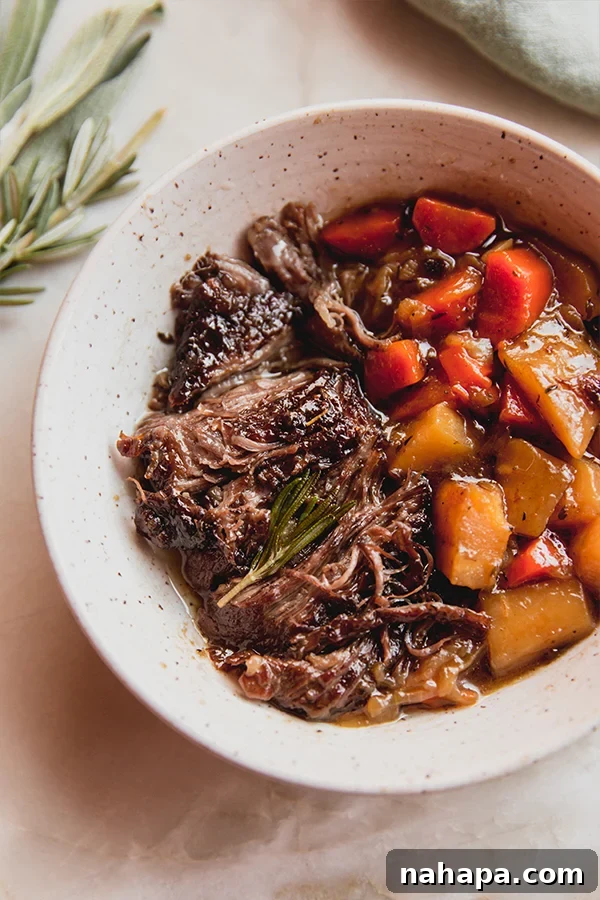
Pot roast holds a special place in the canon of classic winter dishes, beloved for its ability to deliver rich, hearty flavors and incredible tenderness through slow cooking. While countless variations exist, braising a pot roast with apple cider introduces a remarkable twist that will quickly become a cherished favorite. This method creates a uniquely balanced flavor profile that marries the savory depth of beef with a subtle, natural sweetness from the cider, complemented by the caramelized sweetness of onions and shallots, and the earthy robustness of root vegetables. It’s a symphony of seasonal tastes that evokes the very essence of autumn and winter.
Our recipe utilizes arrowroot starch as a thickening agent, ensuring a perfectly velvety gravy without the need for traditional flour, making it inherently gluten-free, and therefore accessible to those with gluten sensitivities or celiac disease. For those adhering to the Autoimmune Protocol (AIP) diet, this dish is a fantastic option; simply remove the black pepper from the seasoning blend, and you’re all set to enjoy a meal that is both nourishing and compliant with your dietary requirements. This thoughtful adaptation means more people can experience the joy and satisfaction of a homemade pot roast.
Why This Apple Cider Braised Pot Roast Will Become Your New Favorite
This Apple Cider Braised Pot Roast recipe offers more than just a meal; it provides an experience. Here’s why you’ll absolutely fall in love with this comforting and flavorful dish:
- The Epitome of Comfort Food: When the weather turns crisp and the days grow shorter, there’s nothing quite like a warm, hearty pot roast to soothe the soul. This dish delivers that quintessential comforting experience, making it perfect for family gatherings, Sunday dinners, or simply a cozy night in. The inviting aroma filling your kitchen alone is enough to bring a sense of warmth and well-being, signaling a wholesome meal is on its way.
- A Unique and Irresistible Flavor Profile: While traditional pot roasts are undeniably delicious, the addition of apple cider elevates this recipe to new culinary heights. The cider introduces a delicate balance of sweetness and acidity that tenderizes the meat beautifully and infuses it with a subtle fruity note. This is further enhanced by deeply caramelized onions and shallots, which contribute a complex, rich sweetness that perfectly complements the savory beef and earthy vegetables. It’s a flavor combination that’s both familiar and exciting, offering a delightful twist on a classic.
- Dietary Inclusivity with No Compromise on Taste: We understand the importance of catering to various dietary needs without sacrificing flavor or texture. By using arrowroot starch instead of wheat flour, this pot roast remains completely gluten-free, making it accessible for those with celiac disease or gluten sensitivities. Furthermore, the simple modification of omitting black pepper makes it suitable for the Autoimmune Protocol (AIP) diet, ensuring that this comforting meal can be enjoyed by a broader audience seeking delicious, compliant options.
- Effortless One-Pot Preparation: Say goodbye to stacks of dirty dishes! This recipe is designed as a true one-pot meal, minimizing cleanup and maximizing convenience. All the magic happens in a single Dutch oven or heavy-bottomed pot, from searing the meat to braising it to perfection with the vegetables. This makes it an ideal choice for busy weeknights when time is precious, or relaxed weekends when you want to enjoy the cooking process without the aftermath.
- Incredibly Tender, Fall-Apart Meat: The long, slow braising process is the secret to achieving that melt-in-your-mouth texture that defines a perfect pot roast. The chuck roast, an economical cut known for its rich marbling and connective tissue, slowly breaks down in the flavorful apple cider liquid over several hours. This results in meat so tender it literally falls apart with a fork, absorbing all the aromatic juices and flavors.
- Nutrient-Rich and Wholesome: Packed with essential proteins from the beef and a generous medley of root vegetables like parsnips and carrots, this pot roast is a well-rounded and nutritious meal. It’s a delicious way to incorporate wholesome ingredients into your diet, providing sustained energy and vital nutrients necessary for a balanced lifestyle, especially during colder months.
The Star Ingredients: What Makes This Pot Roast Shine
Each component of this Apple Cider Braised Pot Roast plays a crucial role in building its incredible depth of flavor and texture. Let’s delve into the key ingredients and understand their contribution to this spectacular dish:
- Chuck Roast: This is the backbone of our pot roast. Chuck roast, typically sourced from the shoulder of the cow, is an economical cut that is ideally suited for slow cooking methods like braising. It’s rich in connective tissue and intramuscular fat, which, when cooked slowly over several hours, breaks down into gelatin. This transformation yields an incredibly tender, juicy, and flavorful result that literally falls apart with a fork, making it the perfect choice for a succulent pot roast. Opt for a 3-4 pound cut with good marbling for the best flavor and texture.
-
Aromatic Seasoning Blend: A carefully chosen blend of dried herbs and spices elevates the beef, creating a fragrant and flavorful crust during searing and infusing the entire dish with warmth.
- Salt & Pepper: Essential for enhancing all other flavors and bringing out the natural deliciousness of the beef. (AIP Note: Omit black pepper for strict Autoimmune Protocol compliance.)
- Dried Parsley: Adds a subtle herbaceous, slightly earthy note that brightens the overall profile of the dish.
- Dried Thyme: Provides a classic savory, woodsy aroma that pairs beautifully and harmoniously with beef and hearty root vegetables.
- Dried Sage: Offers a warm, slightly peppery, and earthy flavor that is quintessentially autumnal, contributing to the comforting essence of the pot roast.
- Garlic Powder: A foundational flavor that deepens the savory profile of the roast, adding a pungent aromatic depth without overpowering.
- Arrowroot Starch: Our secret to a luscious, gluten-free gravy. Unlike wheat flour, arrowroot starch is a fantastic gluten-free alternative that thickens liquids beautifully, creating a silky, glossy sauce that coats every piece of meat and vegetable. It’s also a naturally AIP-friendly thickening agent.
- Shallots and Yellow Onion: These aromatic powerhouses form the sweet, savory base of our braising liquid. Sliced thin and slowly caramelized with coconut sugar, they develop an incredible depth of flavor that is both sweet and pungent, adding complex layers of savory sweetness to the overall dish. Their slow cooking unlocks their full flavor potential.
- Parsnips and Carrots: These vibrant root vegetables not only add essential nutrients, beautiful color, and natural sweetness but also contribute to the dish’s earthy robustness and comforting texture. They become wonderfully tender as they braise alongside the beef, absorbing all the rich flavors of the liquid. Feel free to add other root vegetables you enjoy, such as chopped celery root or even potatoes (if tolerated and not strictly AIP).
- Coconut Sugar: A touch of coconut sugar is instrumental in achieving that beautiful caramelization on the onions and shallots. It enhances their natural sweetness and adds a subtle, molasses-like depth to the dish without being overly saccharine. It’s a natural, unrefined sweetener that complements the tanginess of the apple cider perfectly.
- White Balsamic Vinegar: This ingredient is key for deglazing the pan after searing the beef and sautéing the aromatics. Its mild acidity helps scrape up all those delicious browned bits (known as “fond”) from the bottom of the pot, incorporating them into the braising liquid for an unparalleled depth of flavor. It also adds a bright, tangy counterpoint to the richness of the beef, balancing the flavors.
- Avocado Oil: Used for searing the beef and sautéing the vegetables, avocado oil has a high smoke point, making it ideal for these high-heat applications. It’s a neutral-flavored oil that won’t overpower the delicate flavors of the dish, allowing the natural ingredients to shine.
- Chicken Broth: The primary liquid for our braise, chicken broth adds savory richness and ensures there’s enough liquid to tenderize the chuck roast and cook the vegetables thoroughly. Use a high-quality, low-sodium broth for the best results, as this will significantly impact the final flavor.
- Apple Cider: The star of the braising liquid, apple cider is what gives this pot roast its distinctive sweet and tangy character. The natural sugars in the cider caramelize slightly, and its acidity helps to break down the tough fibers in the meat, making it incredibly tender and flavorful. Choose unsweetened, unfiltered apple cider for the most authentic and robust flavor.
- Fresh Rosemary: A sprig of fresh rosemary added towards the end of cooking, or as a vibrant garnish, provides a beautiful, aromatic finish. Its piney, fragrant notes complement the rich beef and sweet apple cider exquisitely, adding a fresh, herbaceous burst.
How to Prepare This Mouthwatering Apple Cider Braised Pot Roast
Crafting this delicious pot roast is a straightforward process, primarily involving a Dutch oven and your oven. Follow these detailed steps for a perfectly tender, aromatic, and flavorful meal that will impress everyone at your table:
- Step One: Prepare the Roast. Begin by allowing your 3-4 lb chuck roast to sit at room temperature for about 30 minutes. This step is crucial as it ensures more even cooking and helps achieve a superior sear. Pat the roast completely dry with paper towels – moisture on the surface hinders proper browning. Season generously on all sides with half of your chosen herb and spice blend (including salt, pepper if using, dried parsley, dried thyme, dried sage, and garlic powder). Then, lightly and evenly coat the seasoned roast with 1 ½ tablespoons of arrowroot starch, patting it gently into the meat. This starch will contribute to a beautiful crust and help thicken the braising liquid later.
- Step Two: Sear the Meat for Flavor. Heat 2 tablespoons of avocado oil in a large Dutch oven or heavy-bottomed pot over medium-high heat until the oil is shimmering. Carefully place the seasoned chuck roast into the hot oil. Sear for 2-4 minutes on each side, undisturbed, until a deep golden-brown crust forms. This browning (known as the Maillard reaction) is essential for developing rich, complex flavors that form the foundation of your pot roast. Once thoroughly seared, remove the roast from the pot and set it aside on a clean plate.
- Step Three: Build the Aromatic Base. Reduce the heat to medium-low. Add 1 tablespoon of white balsamic vinegar to the hot pot, immediately using a wooden spoon to scrape up any browned bits (fond) from the bottom. This deglazing step incorporates those highly flavorful bits into your sauce. Add the thinly sliced shallot and yellow onion to the pot and sauté gently for 8-10 minutes, stirring occasionally, until they soften and become translucent. This slow sautéing process brings out their natural sweetness.
- Step Four: Caramelize the Aromatics. Sprinkle 1 teaspoon of coconut sugar over the softened onions and shallots, along with a pinch of extra salt. Continue to sauté for another 5-8 minutes, stirring frequently, until the onions and shallots are beautifully caramelized to a rich golden-brown hue. This step adds a crucial layer of sweet and savory depth to your braising liquid.
- Step Five: Add the Vegetables and Remaining Seasonings. Stir in the chopped parsnips and carrots (and any other desired root vegetables you’re using) and sauté for another 5 minutes, allowing them to soften slightly and absorb some of the aromatic flavors from the pot. Season these vegetables with the remaining half of your herb and spice blend, ensuring even distribution.
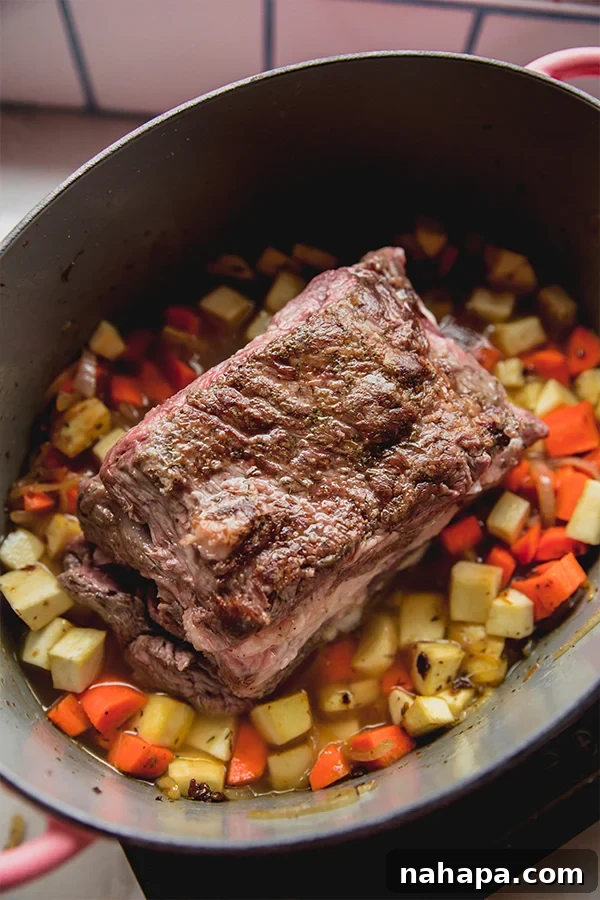
- Step Six: Assemble and Braise. Push the sautéed vegetables to the sides of the pot, creating a clear space in the center for the seared chuck roast. Return the roast to this designated spot in the pot. Pour 2 cups of chicken broth, ½ cup of apple cider, and the remaining 1 tablespoon of white balsamic vinegar over the roast and vegetables. Ensure the liquid comes at least halfway up the sides of the roast. Bring the liquid to a gentle simmer on the stovetop, then cover the Dutch oven tightly with its lid.
- Step Seven: Slow Roasting for Tenderness. Transfer the covered Dutch oven to your preheated oven at 400°F (200°C). Roast for an initial 30 minutes. After this period, reduce the oven temperature to 300°F (150°C) and continue to roast for an additional 3 hours for a 3-pound roast, or approximately 3 hours and 30 minutes for a 4-pound roast. The key to an incredibly tender pot roast is this low and slow cooking, which allows the tough connective tissue in the chuck roast to slowly break down. The internal temperature of the roast should ideally reach 185-195°F (85-90°C) for optimal tenderness and a fall-apart texture.
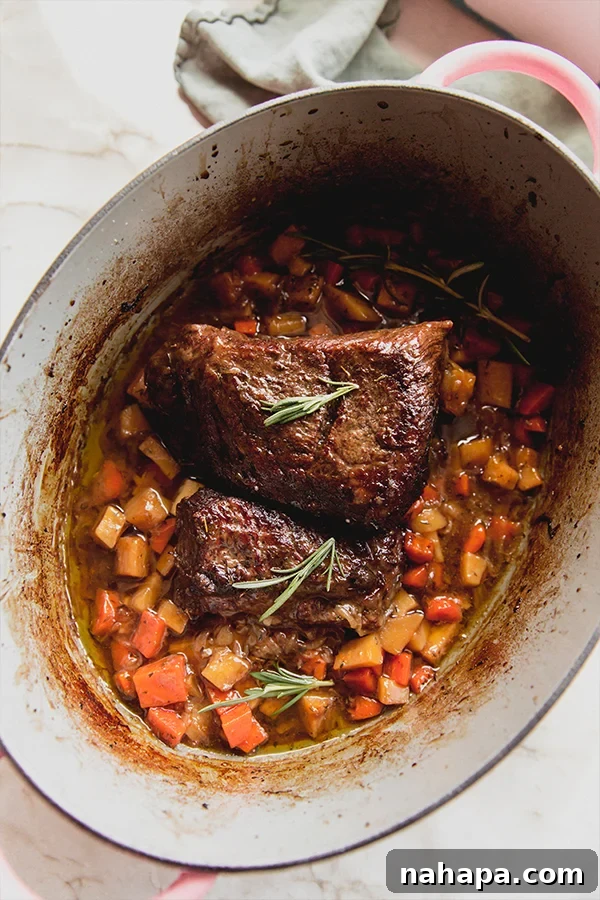
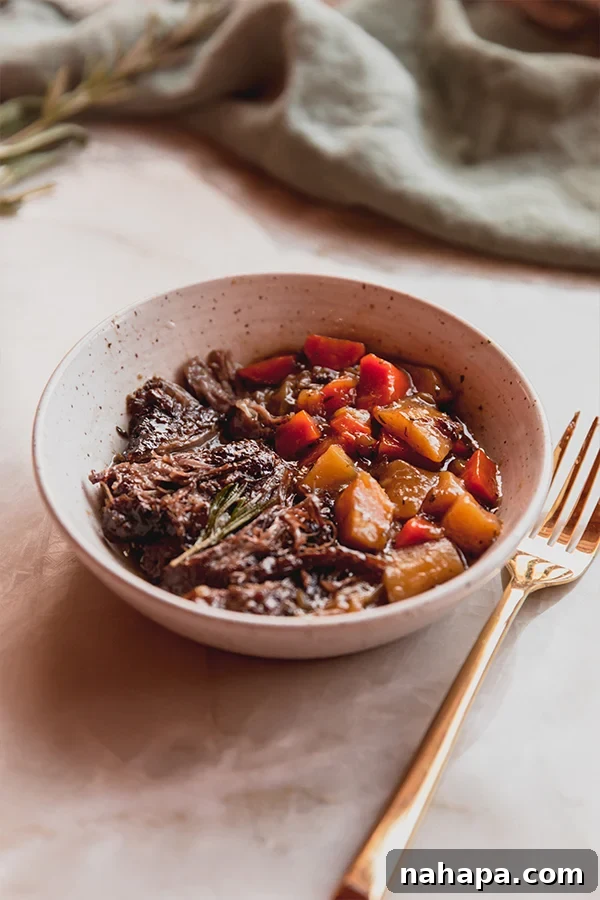
- Step Eight: Rest and Serve. Once cooking is complete, carefully remove the Dutch oven from the oven. Keep the lid on and allow the pot roast to rest for 10-15 minutes on the countertop. This crucial resting period allows the juices within the meat to redistribute evenly, ensuring every bite remains moist, succulent, and full of flavor. After resting, remove the lid. The meat should be so tender that it easily shreds with a fork. Serve generous portions hot, spooning some of the rich, flavorful cooking liquid and tender vegetables over the meat. Garnish with fresh rosemary for an aromatic and visually appealing finish.
Expert Tips & Tricks for the Best Apple Cider Braised Pot Roast
Achieving a perfect pot roast is simple when you know a few expert techniques. Here are some additional tips to ensure your Apple Cider Braised Pot Roast turns out perfectly every time:
- Never Skip Resting the Meat: This is perhaps the most critical step for a truly juicy pot roast. Allowing the meat to rest after cooking redistributes the internal juices evenly throughout the roast. If you slice or shred the meat immediately, these precious juices will escape, leaving you with dry meat. A 10-15 minute rest period ensures every bite is succulent and tender.
- Bring Roast to Room Temperature: Taking the chuck roast out of the fridge at least 30 minutes, or up to an hour, before you begin searing allows it to come to room temperature. This is important because it ensures more even cooking throughout the entire roast. Starting with cold meat can lead to an unevenly cooked interior and a less effective sear. It also aids in achieving a better, crispier, and more flavorful crust during searing.
- Experiment with Vegetable Variety: While parsnips and carrots are classic and fantastic additions, don’t hesitate to customize your vegetable medley based on what you have on hand or what you enjoy. Potatoes (Russet, Yukon Gold, or red), sweet potatoes, chopped celery, pearl onions, or even quartered mushrooms can be wonderful additions. Just be mindful of their cooking times; heartier root vegetables should be added at the same time as the parsnips and carrots, while softer vegetables like mushrooms might be added later in the cooking process.
- Don’t Rush the Searing Process: A proper, deep sear on the chuck roast is non-negotiable for developing the maximum amount of flavor. Allow the meat to brown thoroughly on each side, resisting the urge to move it too soon. This creates a rich, caramelized crust that contributes significantly to the final depth of taste in your braising liquid. Patience here pays off in flavor.
- Deglaze for Maximum Flavor: The step of adding white balsamic vinegar to scrape up the “fond” (the browned bits and caramelized drippings) from the bottom of the pot is crucial. These bits are packed with concentrated flavor and will enrich your braising liquid immensely, adding layers of complexity to the overall sauce.
- Use a Heavy-Bottomed Pot or Dutch Oven: A quality Dutch oven or heavy-bottomed pot provides even heat distribution, which is absolutely essential for successful slow braising. This prevents hot spots and ensures your roast cooks uniformly without scorching on the bottom, leading to a consistently tender and delicious result.
- Adjust Seasoning to Taste: Always taste your braising liquid before covering the pot and placing it in the oven. Adjust salt and other seasonings as needed. Remember, the flavors will concentrate during the long cooking process, so it’s better to start a little lighter and adjust later if necessary.
- Monitor Liquid Levels: While braising, it’s a good practice to periodically check the liquid level in your pot. Ensure there’s always enough liquid to partially submerge the roast (at least halfway). If it gets too low, add a little more chicken broth or apple cider to prevent the roast from drying out and to keep the braising environment moist.
Storage & Reheating Instructions
Leftover Apple Cider Braised Pot Roast is arguably even better the next day as the flavors have more time to meld and deepen. It’s an excellent candidate for meal prep!
- Storage: Allow the pot roast to cool completely to room temperature before storing. Transfer the pot roast along with its generous amount of cooking liquid and vegetables to an airtight container. It will keep beautifully in the refrigerator for 3-4 days.
- Freezing: For longer storage, this pot roast freezes exceptionally well. Portion cooled leftovers into freezer-safe containers or heavy-duty freezer bags, ensuring ample cooking liquid is included to keep the meat moist. It can be stored in the freezer for up to 3 months. Thaw overnight in the refrigerator before reheating for best results.
- Reheating: To reheat, transfer the desired amount to an oven-safe dish. If the dish seems dry, add a splash of extra chicken broth or cooking liquid. Cover tightly with foil to prevent drying and reheat in a preheated oven at 300°F (150°C) until warmed through, typically 20-30 minutes for refrigerated portions, or longer if reheating from frozen (ensure it reaches an internal temperature of 165°F/74°C). Smaller portions can also be gently reheated on the stovetop over low heat, stirring occasionally.
What to Serve with Your Delightful Pot Roast
This Apple Cider Braised Pot Roast is a complete and satisfying meal on its own, thanks to the succulent beef and tender root vegetables infused with rich flavors. However, you can easily round out the meal and enhance the dining experience with a few simple, complementary sides:
- Creamy Mashed Potatoes or Cauliflower Mash: A classic and beloved pairing, fluffy mashed potatoes are absolutely perfect for soaking up every last drop of the rich braising liquid. For an AIP-friendly or lower-carb alternative, a creamy cauliflower mash is an excellent and equally delicious choice.
- Crusty Bread or Rolls: A warm, crusty loaf of bread or soft dinner rolls are ideal for dipping into the flavorful gravy, ensuring no delicious liquid goes to waste. Choose gluten-free bread options if needed to maintain dietary compliance.
- Simple Green Salad: A light, fresh green salad with a bright vinaigrette dressing can provide a refreshing contrast to the richness and heartiness of the pot roast, cleansing the palate between bites.
- Roasted Asparagus or Green Beans: Lightly roasted or steamed green vegetables, such as tender asparagus spears or crisp green beans, offer a pop of vibrant color, fresh texture, and additional nutrients, complementing the robust flavors of the pot roast.
- Rice or Quinoa: For a more substantial and filling meal, serve the pot roast alongside a bed of fluffy white rice, nutritious brown rice, or protein-rich quinoa. These grains absorb the delicious sauce beautifully.
You’ll Also Love These Related Recipes:
- Slow Cooker Pot Roast
- Italian Pot Roast
- The Easiest Oven Baked Chuck Roast
Apple Cider Braised Pot Roast Recipe
This heartwarming Apple Cider Braised Pot Roast is a perfect one-pot meal for cool weather. It’s naturally gluten-free and can be easily adapted for the Autoimmune Protocol (AIP) diet, offering a unique blend of savory and subtly sweet flavors that will delight your senses.
Ingredients
- 3-4 lb chuck roast, excess fat trimmed
- Salt and pepper, divided (Omit pepper for AIP)
- 2 tsp dried parsley, divided
- 2 tsp dried thyme, divided
- 1 tsp dried sage
- 1 tsp garlic powder, divided
- 1 ½ tbsp arrowroot starch
- 2 tbsp avocado oil
- 2 tbsp white balsamic vinegar, divided
- 1 shallot, sliced thin
- 1 yellow onion, halved and sliced thin
- 1 tsp coconut sugar
- 2 parsnips, peeled and chopped
- 2 carrots, peeled and chopped
- 2 cups chicken broth
- ½ cup apple cider
- Fresh rosemary, for topping (optional)
Instructions
- Preheat your oven to 400°F (200°C).
- Take the chuck roast out of the refrigerator and let it sit on the counter for 30 minutes to come to room temperature. Pat it thoroughly dry with paper towels. Season both sides of the roast with half of the salt, pepper (if using), dried parsley, dried thyme, dried sage, and garlic powder. Then, evenly coat both sides with arrowroot starch.
- Heat the avocado oil in a large Dutch oven or heavy-bottomed pot over medium-high heat until it shimmers. Carefully add the seasoned chuck roast and sear for 2-4 minutes per side, until a deep golden-brown crust forms. Remove the seared roast and place it on a clean plate.
- Reduce the heat to medium-low. Add 1 tablespoon of white balsamic vinegar to the pot and use a wooden spoon to scrape up any browned bits (fond) stuck to the bottom. This adds immense flavor.
- Add the sliced shallot and yellow onion to the pot. Sauté for 8-10 minutes, stirring occasionally, until they are softened and translucent.
- Sprinkle the coconut sugar over the softened onions and shallots, along with a pinch of extra salt. Continue to sauté for another 5-8 minutes, stirring frequently, until they are beautifully caramelized and golden.
- Stir in the chopped parsnips and carrots. Sauté for another 5 minutes, allowing them to soften slightly. Season the vegetables with the remaining half of your herb and spice blend.
- Push the vegetables to the sides of the pot, creating a clear space in the center. Return the seared chuck roast to this space. Pour the chicken broth, apple cider, and the remaining 1 tablespoon of white balsamic vinegar over the roast and vegetables. Ensure the liquid level reaches at least halfway up the sides of the roast. Cover the Dutch oven tightly with its lid.
- Transfer the covered Dutch oven to the preheated oven. Roast at 400°F (200°C) for 30 minutes. Then, reduce the oven temperature to 300°F (150°C) and continue roasting for another 3 hours for a 3-pound roast, or about 3 hours and 30 minutes for a 4-pound roast. The meat should be incredibly tender, reaching an internal temperature of 185-195°F (85-90°C).
- Once cooking is complete, remove the Dutch oven from the oven. Keep the lid on and let the pot roast rest for 10-15 minutes on the countertop. This allows the juices to redistribute for maximum tenderness and moisture.
- After resting, remove the lid. The meat should be easily shredded with a fork. Serve hot with a generous spooning of the rich cooking liquid and vegetables. Garnish with fresh rosemary, if desired.
Notes
All nutritional information provided is an estimation and may vary based on specific ingredients and preparation methods. Optional ingredients are not included in these estimations.