
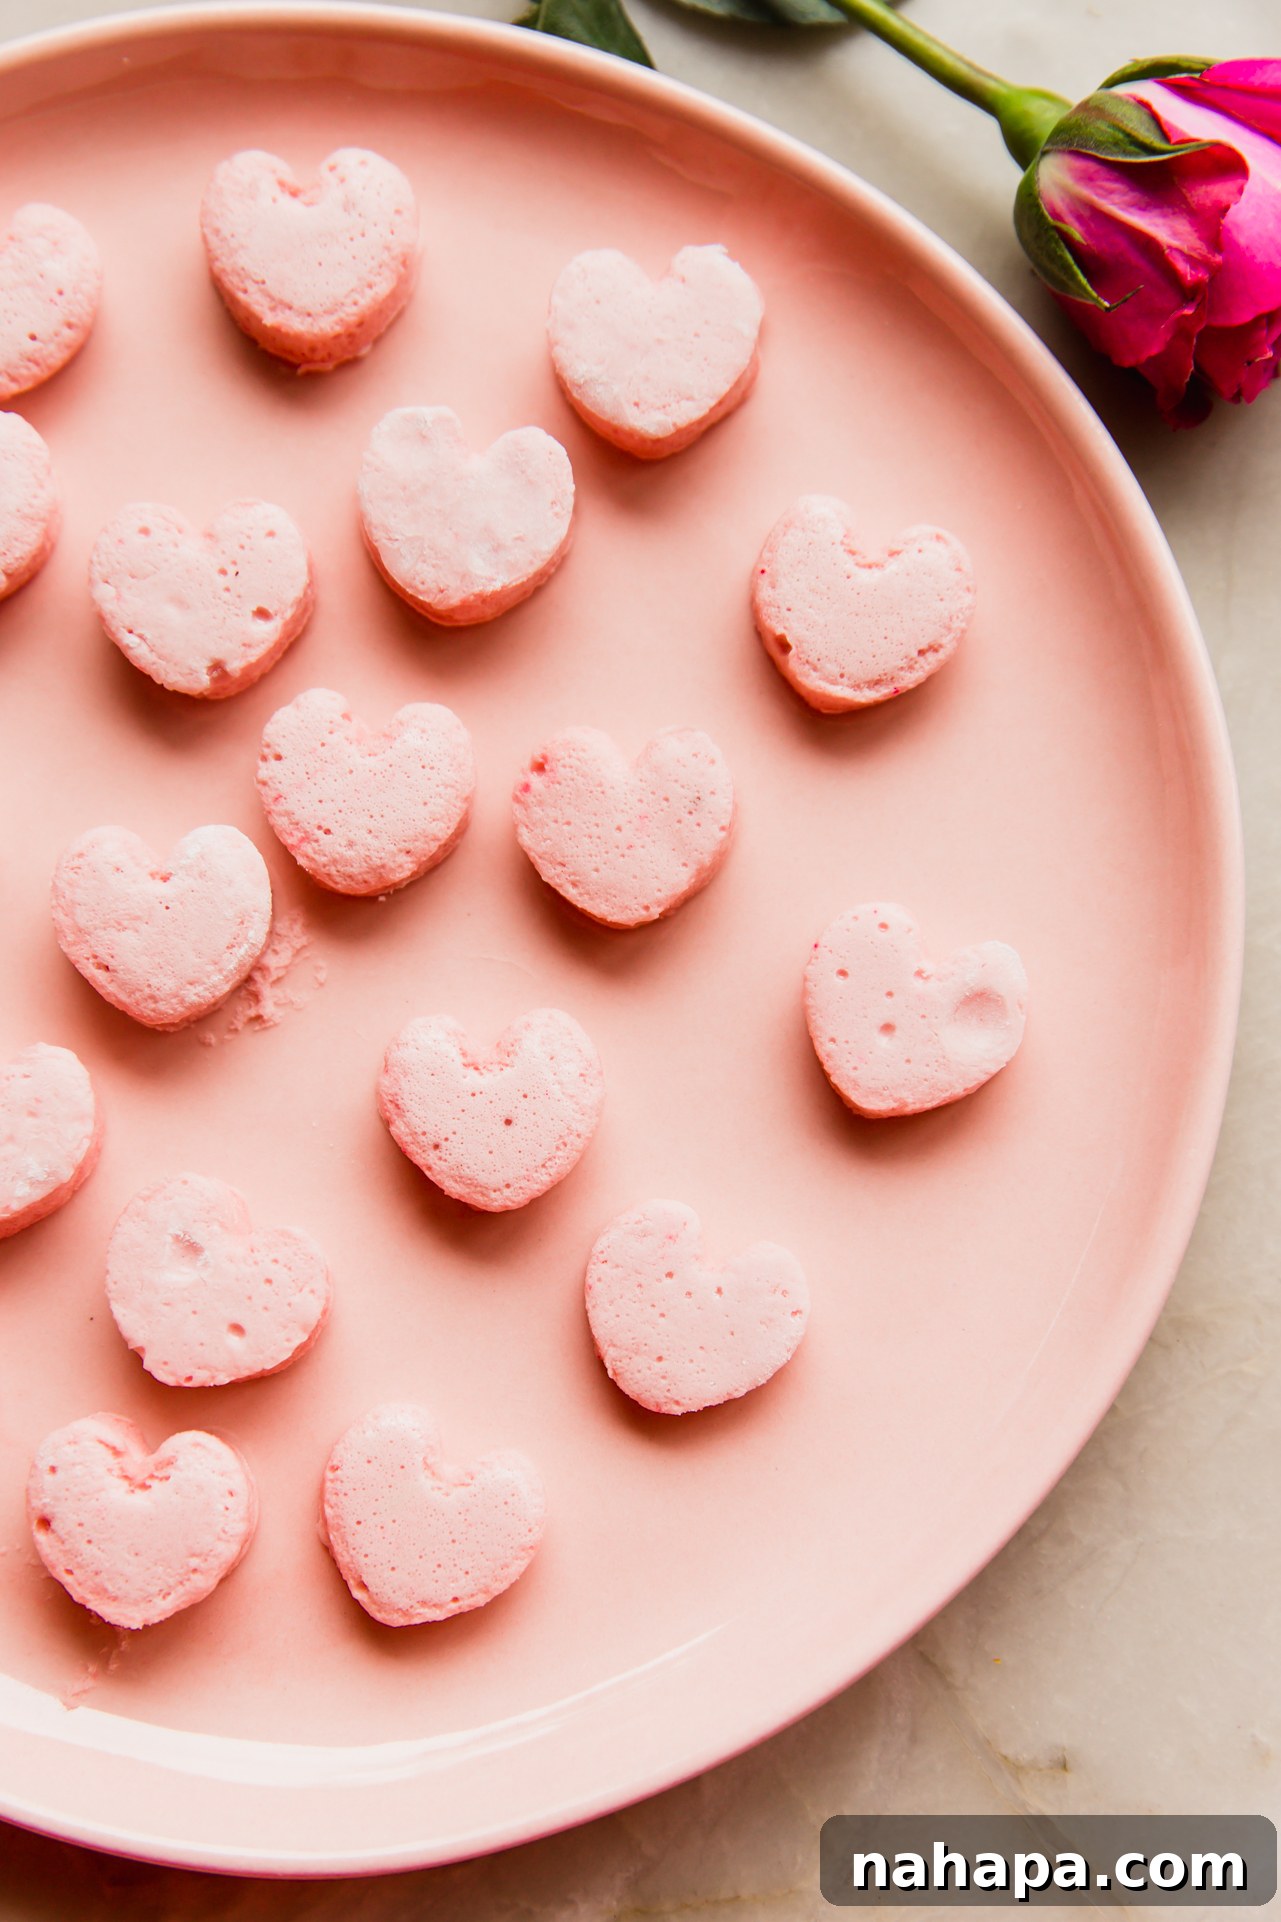
Delicious Homemade Pink Marshmallows: Corn Syrup-Free & Naturally Dyed Recipe
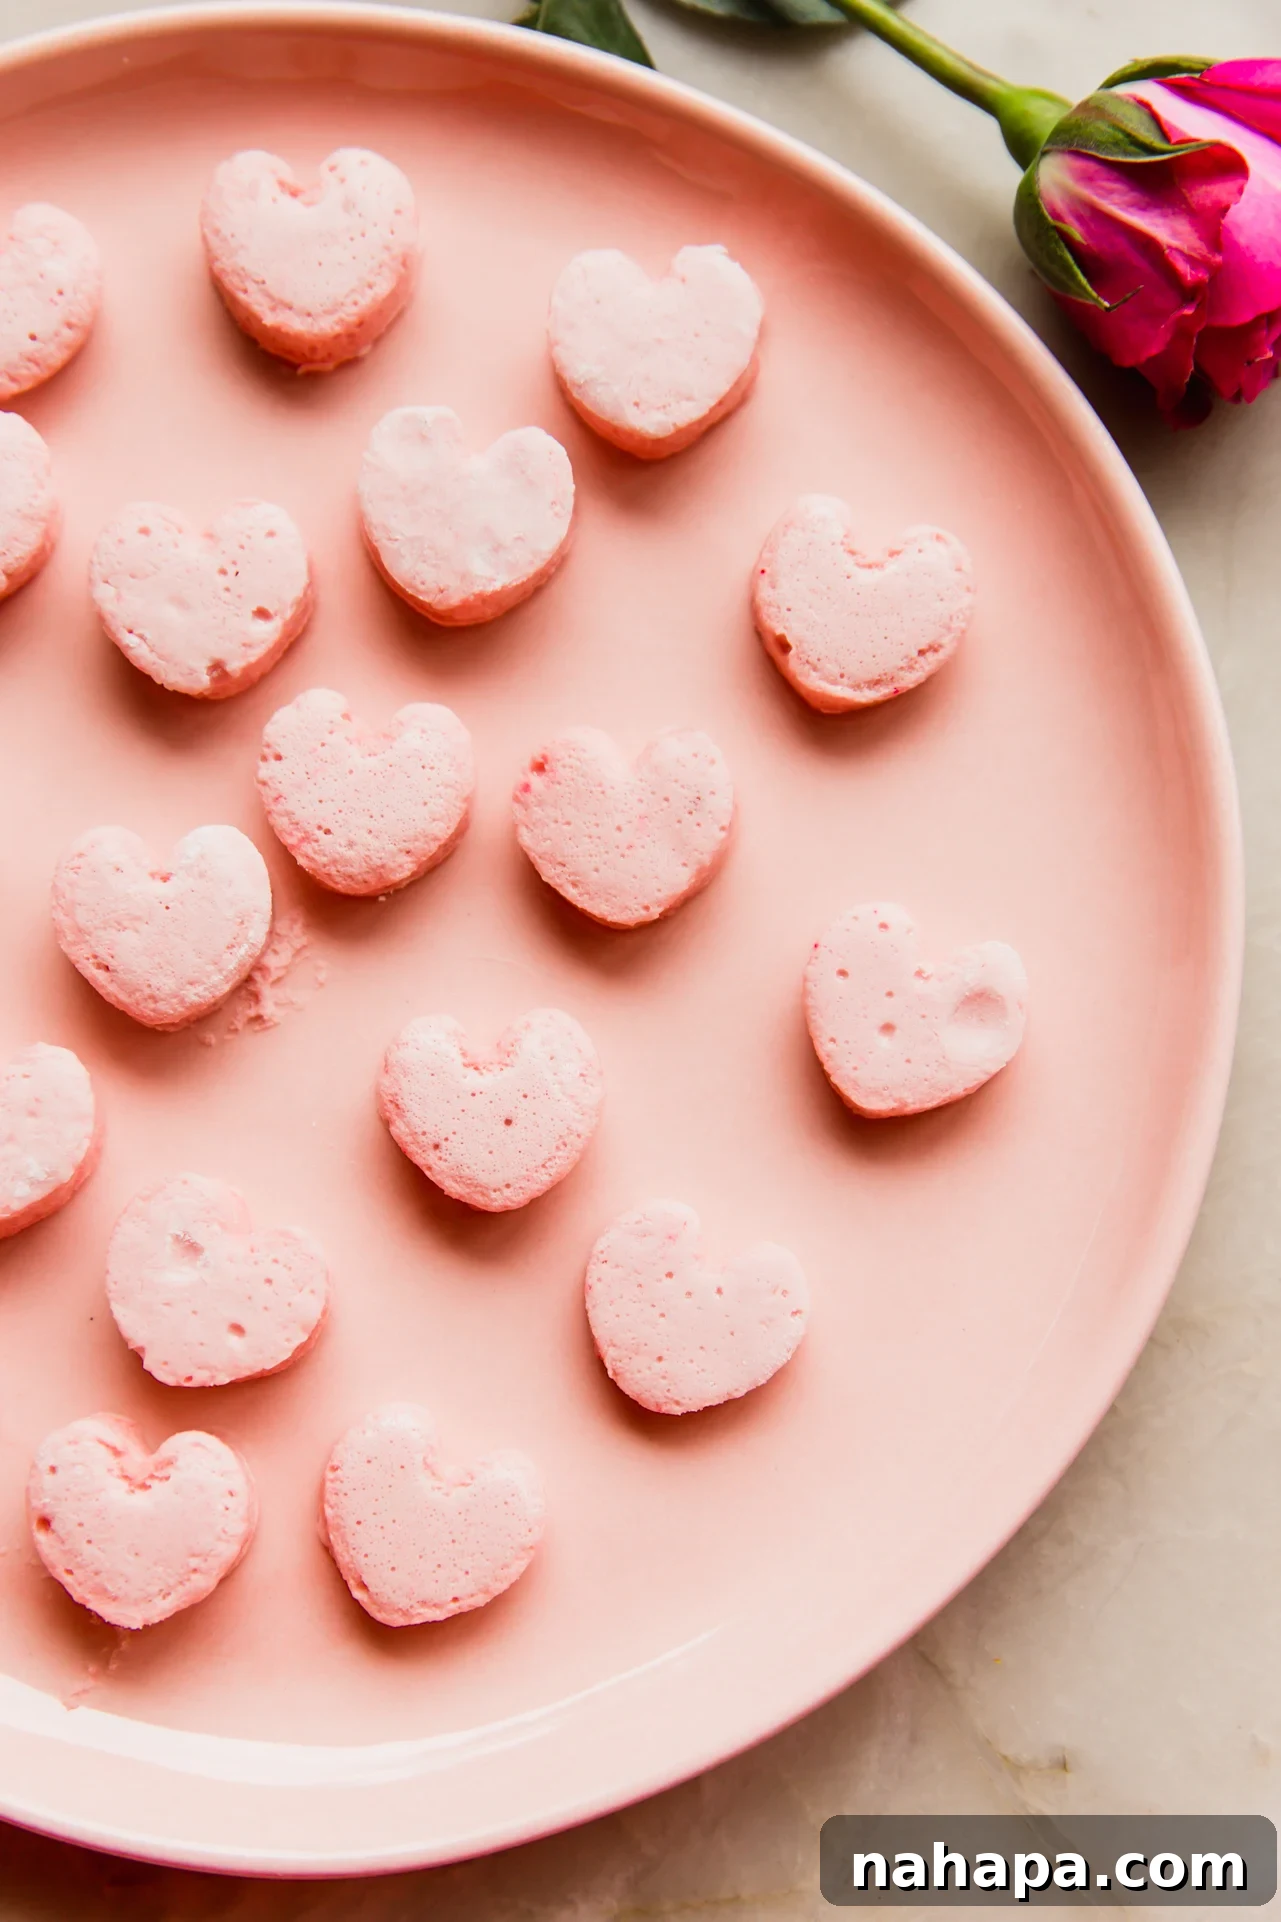
Prepare to fall in love with these delightful vanilla homemade pink marshmallows, a sweet treat that’s as beautiful as it is delicious! What makes them truly special? They are completely corn syrup-free and boast a gorgeous, vibrant pink hue achieved solely through natural dyes. Say goodbye to artificial colors and processed sugars, and hello to a wholesome, homemade confection that everyone can enjoy without compromise.
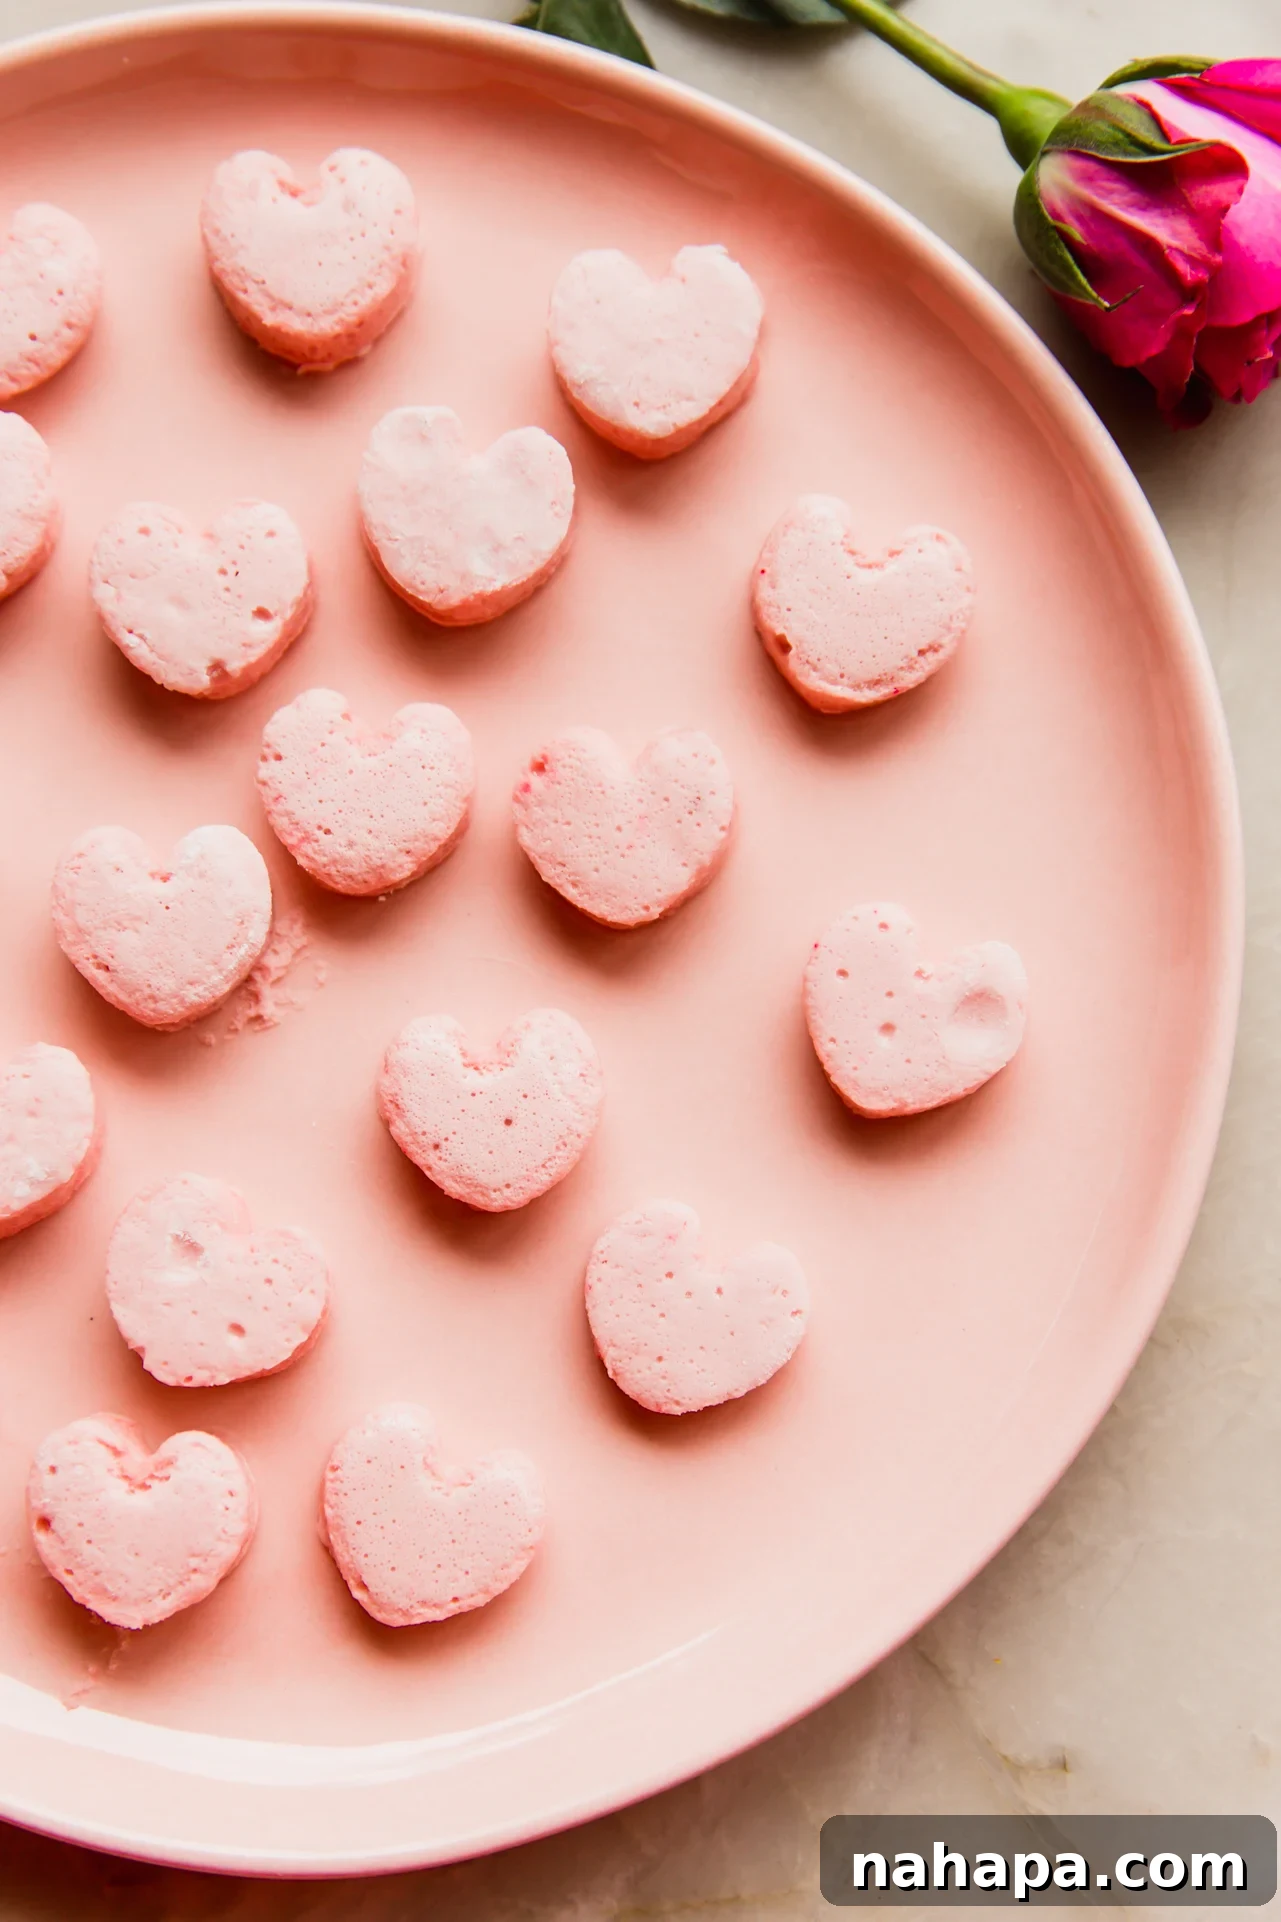
February, with its spirit of love and connection, is the perfect month to embrace homemade treats. These soft, pillowy pink marshmallows offer a wonderfully heartfelt way to say “I love you” to friends, family, or yourself! Unlike conventional marshmallows, our recipe thoughtfully replaces corn syrup with natural honey, making them a fantastic option for those with corn intolerances or anyone seeking a more natural sweetener. Honey not only provides a unique flavor but also contributes to a slightly chewier, more delightful texture. Whether served on their own as a delightful snack, toasted gently over a fire, or paired with other enchanting desserts, these marshmallows are incredibly versatile. Imagine them floating in a warm mug of our Italian Hot Chocolate, or alongside our refreshing Strawberry Pink Drink Sorbet for a truly memorable Valentine’s dessert or a charming addition to any festive occasion.
Table of Contents
- Why You’ll Love These Homemade Pink Marshmallows
- Essential Recipe Ingredients
- Substitutions and Modifications
- How to Make Homemade Pink Marshmallows: Step-by-Step Guide
- Expert Tips & Tricks for Perfect Marshmallows
- Creative Serving Suggestions
- Recipe FAQs
- Other Delightful Dessert Recipes to Explore
- Printable Recipe Card
With Valentine’s Day approaching, or any time you want to add a touch of charm, there’s no better moment to dive into the delightful world of all things pink and heart-shaped! These homemade pink marshmallows are designed to bring joy and a healthy dose of sweetness to your day, proving that delicious treats can also be mindful.
Why You’ll Love These Homemade Pink Marshmallows
Homemade marshmallows are a special treat, but these pink beauties offer even more to adore. They stand out from store-bought varieties for several compelling reasons, focusing on both health-consciousness and superior flavor and texture.
- Naturally Dye-Free for Vibrant Color: Most commercial pink marshmallows rely on artificial red food dyes to achieve their color, which many people prefer to avoid due to potential sensitivities or dietary preferences. Our recipe proudly uses natural beet powder, which not only delivers a stunning, soft pink hue but also means you’re enjoying a treat free from synthetic additives. Beet powder is a fantastic natural coloring agent that provides beautiful results without imparting any noticeable beet flavor when used in the right quantity, making these marshmallows safe and enjoyable for everyone, especially children. It’s a simple, plant-based way to add a pop of cheerful color to your desserts, giving you peace of mind with every single bite.
- Honey Instead of Corn Syrup: For those who, like me, experience corn intolerance or simply prefer to avoid highly processed ingredients, these honey marshmallows are a game-changer. Traditional marshmallow recipes often call for corn syrup, a common ingredient that can be a concern for many health-conscious individuals. By substituting it with natural honey, we create a marshmallow that is not only inherently delicious but also more accessible and potentially gentler on the digestive system. Honey lends a delicate, unique sweetness and a slightly different, wonderfully chewy yet yielding texture that truly sets these homemade marshmallows apart. It’s a healthier, more wholesome alternative that doesn’t compromise on the classic marshmallow experience, providing a cleaner ingredient profile without sacrificing flavor or fun.
- Incredibly Delicious & Superior Texture: Beyond the health-conscious aspects, homemade marshmallows simply taste and feel superior to their mass-produced counterparts. They are incredibly fresh, more tender, and boast a melt-in-your-mouth quality that is profoundly satisfying and hard to resist. The nuanced combination of pure vanilla and natural honey creates a depth of flavor that is truly exquisite, far surpassing the often one-dimensional sweetness of store-bought options. Each bite is a delightful experience of soft, airy sweetness.
- Perfect for Any Occasion: While perfectly suited for romantic celebrations like Valentine’s Day, their charming pink color and delightful flavor make them suitable for a myriad of other occasions. Imagine them gracing dessert tables at baby showers, adding a whimsical touch to birthday parties, elevating a sophisticated tea party, or simply being enjoyed during a cozy night in. They add a touch of elegance, creativity, and homemade warmth to any gathering or personal indulgence.
- Easy to Make at Home: Despite their gourmet appearance and taste, homemade marshmallows are surprisingly accessible for home bakers. With clear instructions and a little patience, even novice candy makers can achieve fantastic results, transforming simple ingredients into a truly impressive confection.
Essential Recipe Ingredients
Crafting these delectable pink marshmallows requires just a handful of simple, high-quality ingredients, each playing a vital role in achieving that perfect fluffy texture, balanced flavor, and beautiful natural pink color. Understanding the purpose of each component will help you appreciate the magic of marshmallow making. For precise measurements and quantities, please refer to the comprehensive recipe card provided below.
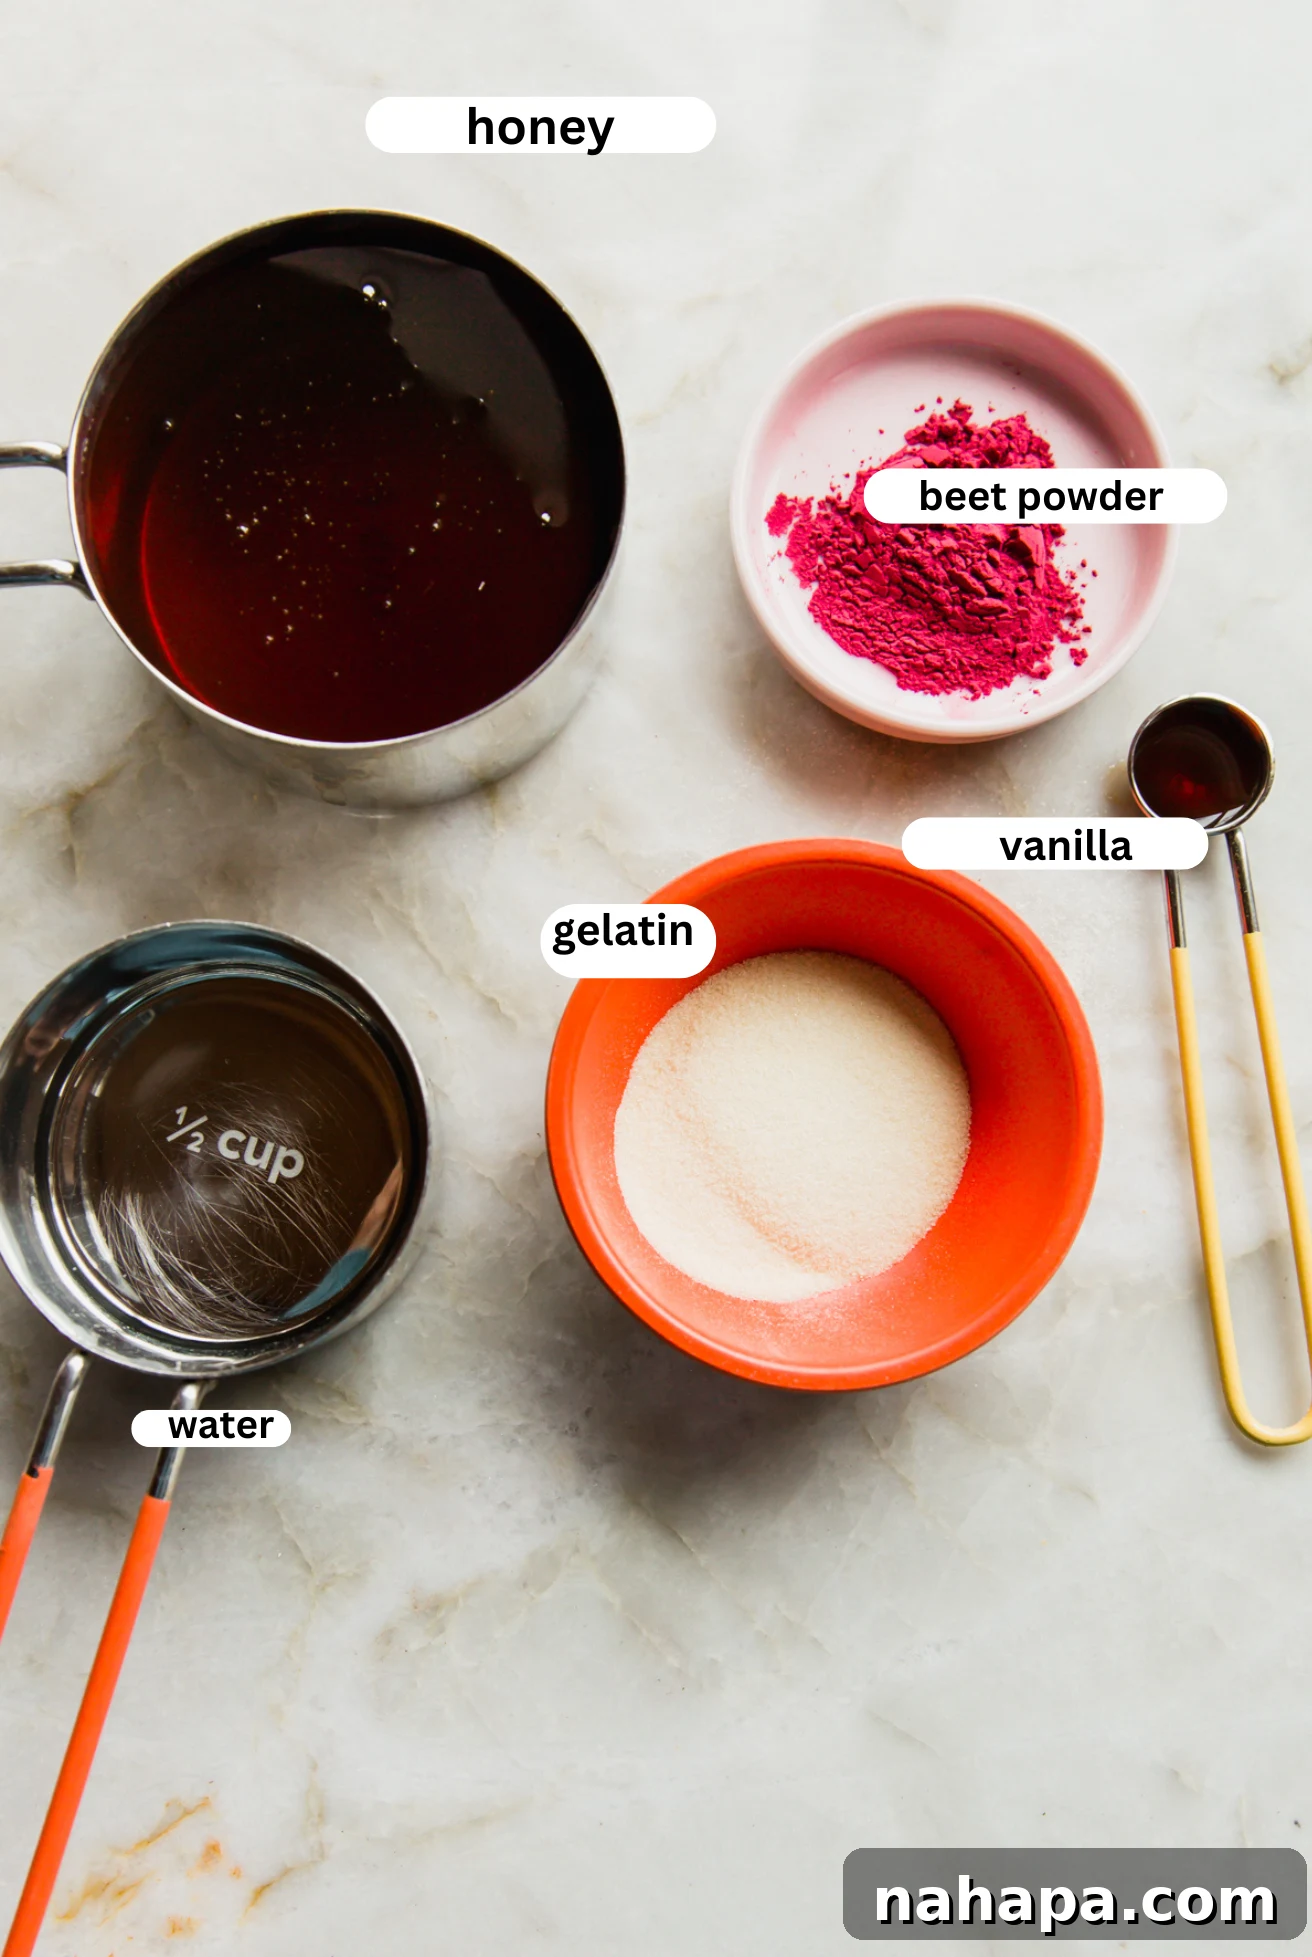
- Honey: This is our foundational sweetener and the star substitute for corn syrup. Honey not only provides a rich, complex sweetness with floral undertones but also significantly contributes to the unique chewiness and slightly softer texture of these marshmallows. Using a good quality, raw or organic honey will yield the best flavor profile.
- Beet Powder: The secret behind our beautiful, natural pink color! Beet powder is made from dried, finely ground beets and offers a vibrant, true pink hue without the need for any artificial dyes. When used in appropriate amounts, it imparts the desired color without any noticeable earthy or beet flavor, making it a healthy and effective way to add visual appeal.
- Vanilla Extract: A crucial flavor enhancer that elevates the overall sweetness and adds a classic, warm, and inviting aroma to the marshmallows. Pure vanilla extract is highly recommended over artificial vanilla for the most authentic and delicious results.
- Unflavored Gelatin: This is the essential gelling agent that gives marshmallows their characteristic springy, bouncy, and airy texture. Without gelatin, you wouldn’t have marshmallows! Ensure you use a high-quality, unflavored powdered gelatin for optimal setting and a smooth final consistency.
- Water: Plays a dual role in this recipe. It’s essential for “blooming” the gelatin (hydrating it before mixing) and for dissolving the honey to create a smooth, consistent sugar syrup.
- Arrowroot Starch: Used primarily for dusting the baking pan and generously coating the finished, cut marshmallows. This natural starch is vital for preventing the sticky marshmallow mixture from adhering to surfaces, making them easy to handle, cut, and store. It’s a fantastic, gluten-free alternative to traditional cornstarch.
Substitutions and Modifications
While this recipe is carefully crafted to achieve optimal results, there are a few thoughtful adjustments and substitutions you can consider to suit your dietary needs, ingredient availability, or personal taste preferences. Keep in mind that any modification may subtly alter the final texture or flavor profile of your homemade pink marshmallows.
- Strawberry Powder for Color: If beet powder isn’t readily available, or if you’d prefer to infuse your marshmallows with a delightful fruity flavor, strawberry powder is an excellent natural alternative for achieving a beautiful pink hue. Pure, unsweetened freeze-dried strawberry powder will not only provide a lovely color but also impart a subtle, sweet strawberry essence, which can be a wonderful complement to the vanilla and honey. Ensure you use pure powder, not a sweetened drink mix, to control the sugar content.
- Maple Syrup as a Sweetener: My preferred choice for this recipe is honey due to its unique flavor and excellent performance in marshmallow recipes. However, if you are looking to avoid honey or simply prefer the taste of maple, you can explore using maple syrup. It is crucial, however, to follow a marshmallow recipe specifically formulated for maple syrup, as its chemical composition and sugar concentration differ from honey. Maple syrup may require slightly different cooking temperatures or whipping times to achieve the desired consistency and set properly. Additionally, because maple syrup has a naturally darker amber color compared to lighter honey, you might find you need to adjust the amount of beet powder to achieve your desired vibrant pink shade. Always prioritize recipes designed for the specific sweetener you choose for the best chance of success.
- Alternative Flavor Extracts: Feel free to experiment with other flavor extracts to personalize your marshmallows. A few drops of almond extract can provide a delicate nutty undertone, while a tiny splash of rosewater can introduce a truly romantic and sophisticated floral note. Always add these extracts in small amounts at the same step as the vanilla extract, tasting as you go to avoid overpowering the natural flavors.
- Different Dusting Powder: If arrowroot starch is unavailable, powdered sugar (confectioners’ sugar) can also be used effectively for dusting the pan and coating the finished marshmallows. For an even lighter touch and to reduce sweetness, some bakers prefer a 50/50 mix of powdered sugar and cornstarch (if corn is not a dietary concern).
How to Make Homemade Pink Marshmallows: Step-by-Step Guide
Making homemade marshmallows might seem like a daunting task, but with these clear, step-by-step instructions and accompanying photos, you’ll find the process incredibly rewarding. The key is to be prepared, patient, and precise. Remember to read through the entire recipe card for full instructions, specific quantities, and important notes before you begin your marshmallow adventure.
Step One: Prepare the Gelatin and Honey Base. Begin by thoroughly preparing your marshmallow base. In the clean bowl of your stand mixer (or a large, sturdy bowl if you’re using a powerful electric hand mixer), pour about half a cup of water. Evenly sprinkle the unflavored gelatin powder over the water. Stir gently with a spoon or whisk to ensure all the gelatin is fully moistened and combined, preventing clumps. Allow it to “bloom” or hydrate for several minutes while you move to the next step. Meanwhile, in a medium-sized, heavy-bottomed pot, slowly heat the honey mixed with the remaining half cup of water. The key here is patience and precision; bring the mixture to a specific temperature range of 235-240°F (112-115°C) over low to medium-low heat. Use a reliable candy thermometer to monitor the temperature accurately. Once the desired temperature is reached, remove it from the heat immediately to prevent it from overheating.
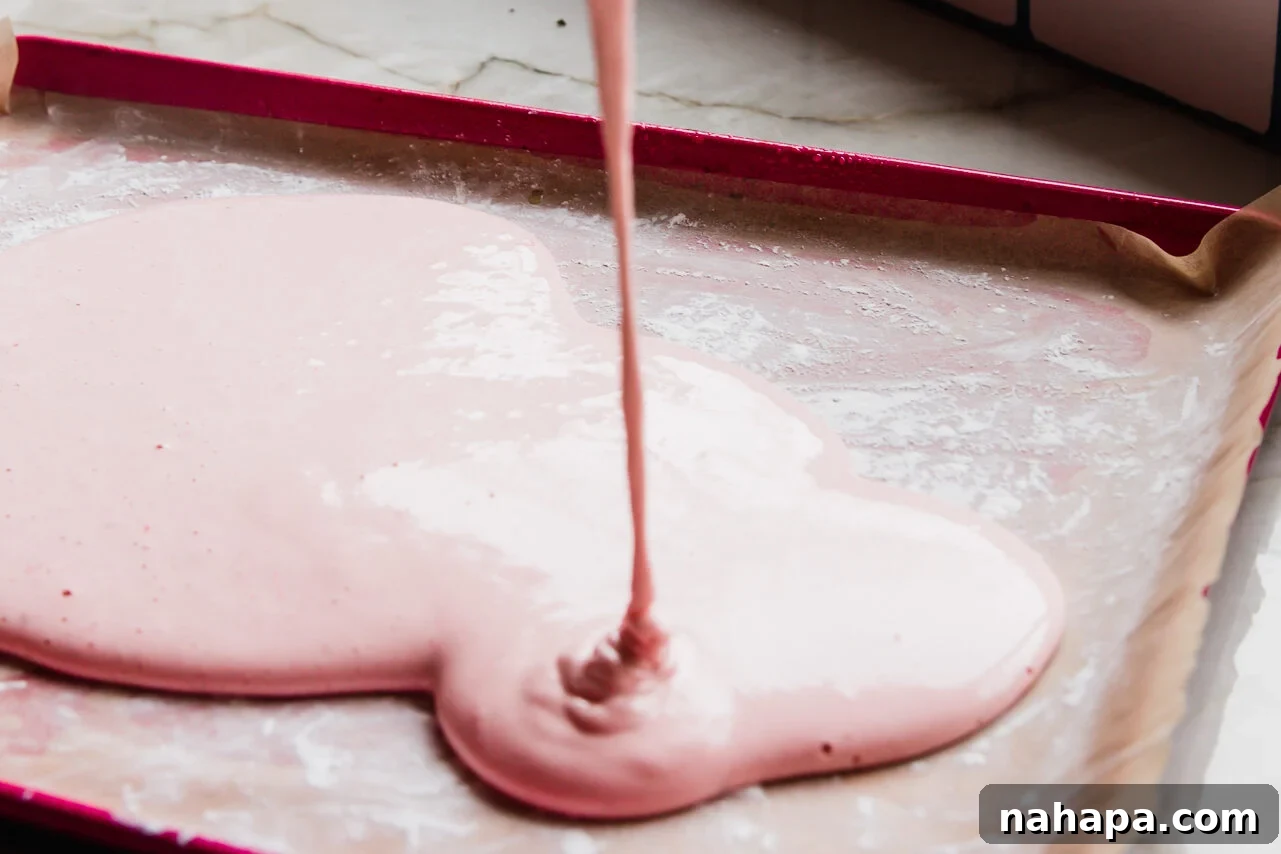
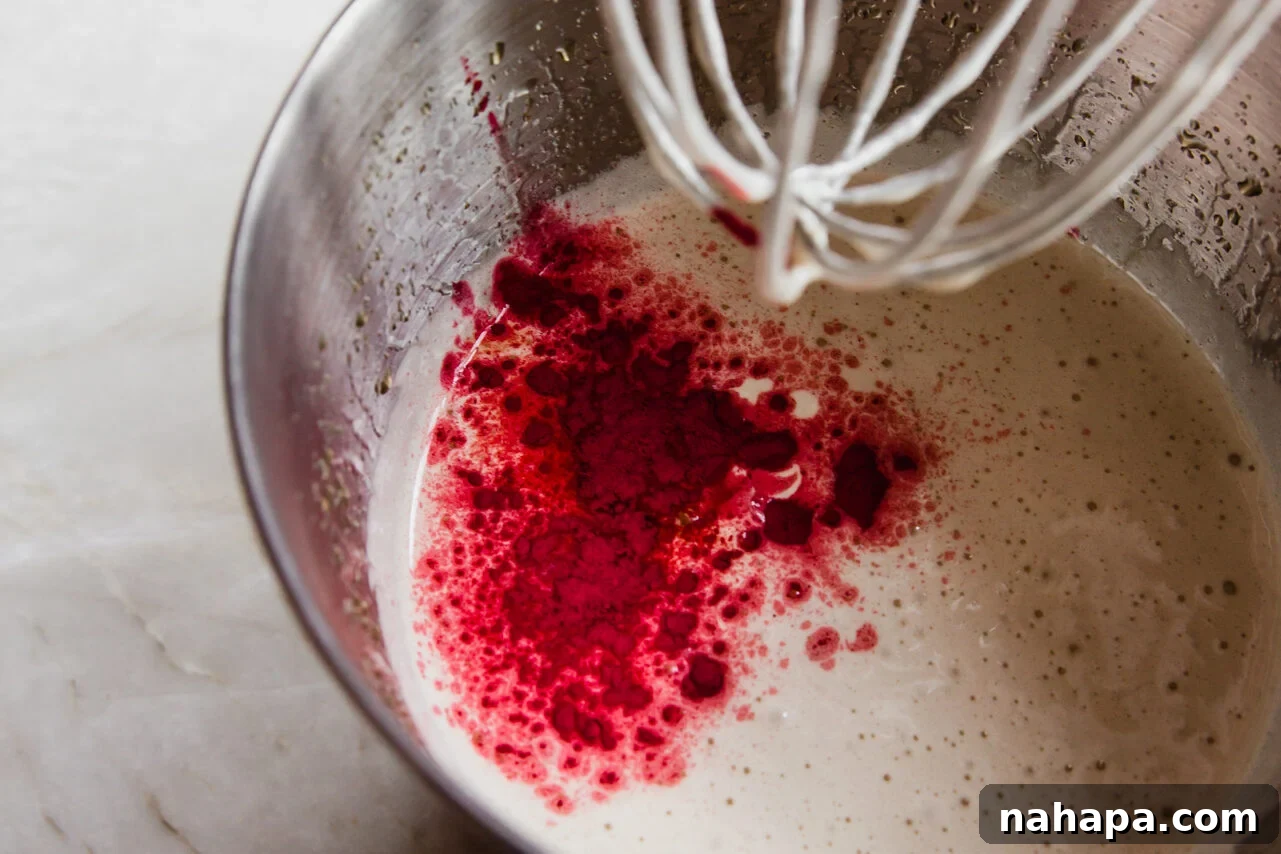
Step Two: Whip to Stiff Peaks and Add Color. With your stand mixer (or electric hand mixer) running on high speed, carefully and slowly pour the hot honey syrup into the gelatin mixture in a thin, steady stream. Be cautious as the mixture will be very hot. Continue whisking on high speed until the mixture undergoes a remarkable transformation: it will become very thick, glossy, airy, and voluminous, forming distinct stiff peaks when the whisk is lifted. This whipping process usually takes anywhere from 10 to 15 minutes, or potentially longer if you’re using a hand mixer. Once stiff peaks have unequivocally formed, reduce the mixer speed to its lowest setting. Add the vanilla extract and gradually incorporate the beet powder, about 1/2 tsp at a time, until you achieve your desired shade of vibrant pink. Whip for just a few seconds more, ensuring the color is fully and evenly distributed throughout the marshmallow fluff without over-whipping, which can affect the texture.
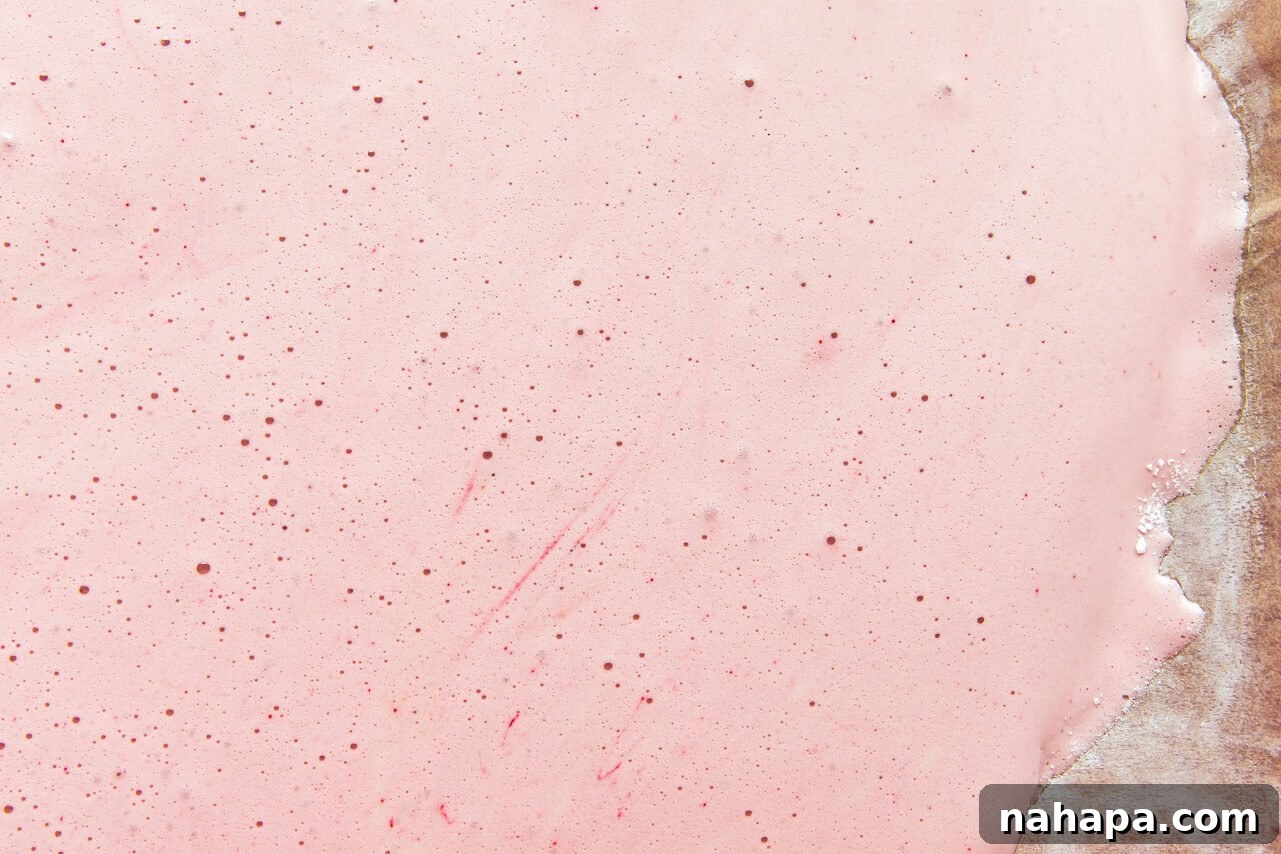
Step Three: Set and Chill for Perfect Texture. Immediately after whipping and coloring, promptly pour the prepared marshmallow mixture onto the baking sheet you meticulously prepared earlier (lined with parchment paper and generously coated with arrowroot starch). Use an oiled offset spatula or a lightly dampened hand to gently spread the mixture evenly across the pan, aiming for a consistent thickness. Avoid pressing down too hard, as this can compress the air you just whipped into it. Once smoothed, place the entire baking sheet into the refrigerator. Allow it to chill and harden undisturbed for a minimum of 3-4 hours, or until the marshmallows are firm to the touch yet still wonderfully soft and springy when gently pressed. Adequate chilling is absolutely crucial for the gelatin to properly set, ensuring easy cutting and achieving that desirable, classic marshmallow texture.
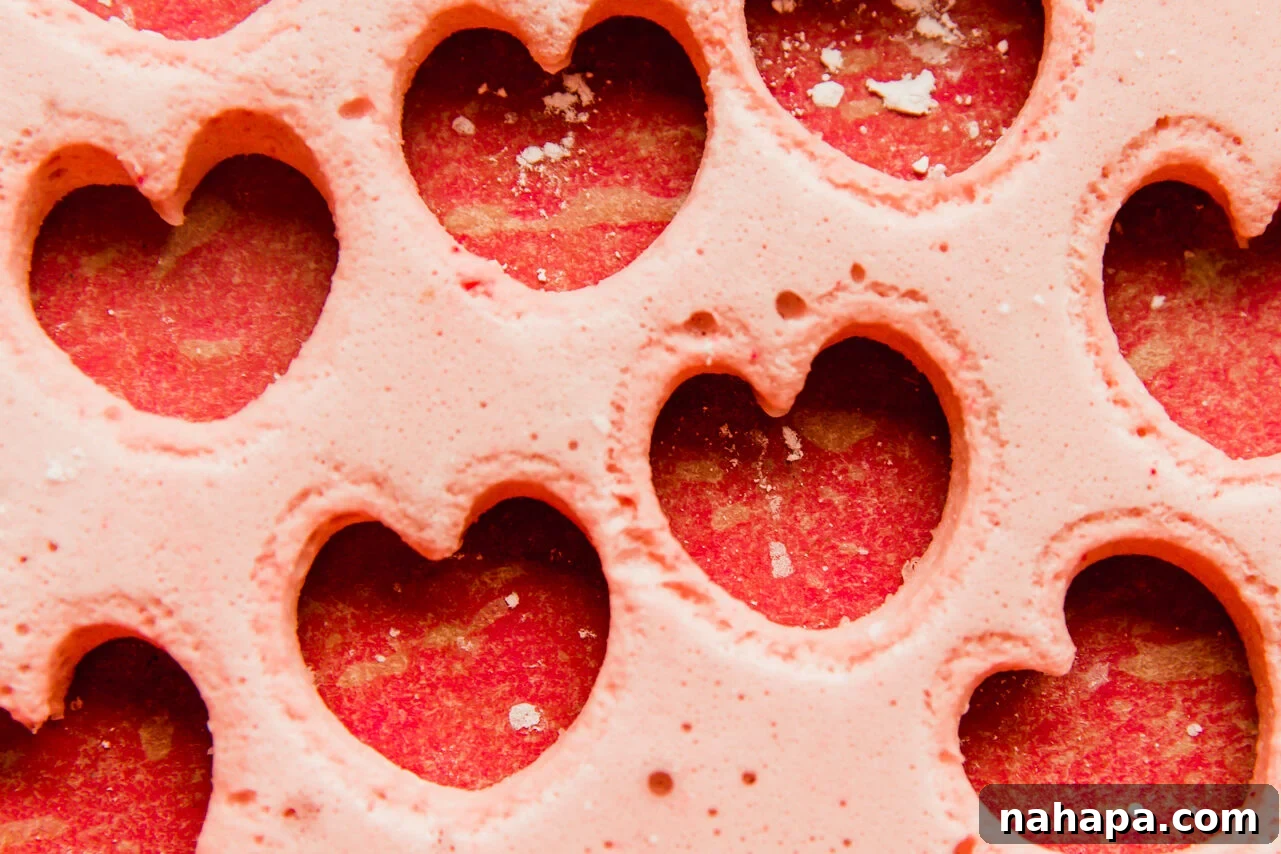
Step Four: Cut, Serve, and Store with Care. Once the marshmallow slab is fully set and firm, remove it from the refrigerator. For traditional squares, use a sharp knife that has been lightly oiled with a neutral oil (like avocado or grapeseed oil) or dusted generously with arrowroot starch to prevent any sticking. For a special touch, particularly perfect for Valentine’s Day or other festive celebrations, use a small heart-shaped cookie cutter. Before each cut, dip the cookie cutter into a bowl of arrowroot starch to ensure clean, non-stick shapes and crisp edges. After cutting, lightly dust all sides of the individual marshmallows with additional arrowroot starch. This final dusting is key to preventing them from sticking to each other during storage. Serve these delightful heart-shaped treats fresh for the best experience, or store them in an airtight container in the refrigerator for up to a week, where they will maintain their wonderful texture and flavor.
Expert Tips & Tricks for Perfect Marshmallows
Achieving perfectly fluffy, bouncy, and delicious homemade pink marshmallows is incredibly satisfying and easier than you might think, especially when armed with a few expert tips. Follow these guidelines to ensure your natural pink marshmallows turn out beautifully every single time, delighting everyone who tries them:
- Utilize a Candy Thermometer: Your Best Friend in Candy Making. This tool is absolutely non-negotiable for success in candy making, particularly when preparing marshmallows. The precise temperature of your honey syrup (hitting that sweet spot between 235-240°F or 112-115°C) is critically important for the marshmallow’s final texture, stability, and ability to set. A candy thermometer ensures you hit that exact range, preventing a sticky, runny mess or a brittle, hard result. If you plan on making marshmallows regularly, consider it a wise and essential investment for your kitchen.
- Opt for a Stainless Steel Pot: Safety First. While elegant glass pots are lovely for many culinary tasks, they are not suitable for candy making, especially when dealing with high-temperature sugar syrups. Glass can be prone to uneven heating, which makes it difficult to control the syrup temperature, and in extreme cases, it can even shatter. Always stick with a heavy-bottomed stainless steel pot for heating your honey mixture, as it provides consistent heat distribution, reduces the risk of burning, and is much safer for high-temperature cooking.
- Avoid Over-Whipping the Marshmallow Mixture: Precision is Key. This is a very common pitfall that can lead to lumpy, grainy, or overly dense marshmallows. The goal is to incorporate enough air to create a light, fluffy texture, but knowing when to stop is crucial. Once your marshmallow mixture reaches the stage where firm, stiff peaks form when you lift the whisk, immediately stop whipping. Continuing to whip beyond this point will introduce too much air, break down the delicate protein structure, and result in an undesirable, often crumbly or lumpy, texture. When adding the beet powder for color, simply fold it in gently or whip on the absolute lowest speed for just a few short seconds to incorporate it thoroughly without deflating the beautiful fluff you’ve created.
- Prepare Your Pan Thoroughly: The Foundation of Success. Before you even begin cooking, ensure your baking sheet is perfectly prepared. Line it meticulously with parchment paper that extends beyond the edges, creating “handles” that will aid in lifting the marshmallow slab later. Then, generously dust the parchment with a thick, even layer of arrowroot starch. This double layer of protection is absolutely essential to prevent the notoriously sticky marshmallow mixture from adhering to the pan, making it infinitely easier to remove and cut later on.
- Patience During Setting: Good Things Take Time. Resist the tempting urge to cut into your marshmallows before they are fully set. Rushing this crucial chilling step will inevitably result in a sticky, gooey mess that is difficult to handle and won’t hold its shape. The recommended 3-4 hours of chilling in the refrigerator allow the gelatin to properly firm up and stabilize, giving you those clean, springy cubes or perfectly defined shapes you desire.
- Dusting is Your Friend: For Easy Handling and Storage. Once you’ve cut your marshmallows, lightly dust all sides of each individual piece with additional arrowroot starch. This simple step is vital for preventing them from sticking to each other during storage and gives them that classic, appealing powdery marshmallow finish, making them much more enjoyable to handle and eat.
- Humidity Matters: Choose Your Day Wisely. Marshmallows are sensitive to humidity. On very humid days, they can become excessively sticky and difficult to work with. If possible, choose a dry day to make your marshmallows for the best results.
Creative Serving Suggestions
These homemade pink marshmallows are incredibly versatile and can elevate a variety of desserts and beverages with their delicate flavor, soft texture, and charming color. Their unique honey-vanilla profile makes them a delightful addition to almost any sweet occasion, adding a touch of elegance and homemade flair. Here are some of my favorite ways to enjoy them:
- Luxurious Hot Beverages: Transform your favorite warm drinks into a gourmet experience. Float a few fluffy, heart-shaped marshmallows atop a mug of rich, creamy Italian Hot Chocolate for an extra luxurious and visually appealing treat. They slowly melt, adding a gentle sweetness and an irresistible vanilla aroma. They are equally fantastic when added to coffee, chai lattes, or even a soothing cup of herbal tea.
- Refreshing Sorbets & Ice Creams: Create a delightful contrast of textures and temperatures by pairing these soft marshmallows with a vibrant, chilled dessert. They are excellent with a fruity creation like our Strawberry Pink Drink Sorbet, where their chewy texture plays beautifully against the cold, smooth sorbet. They would also be a lovely and unexpected topping for a scoop of classic vanilla bean ice cream or a dairy-free coconut sorbet.
- Puddings and Parfaits: Layer them into a delicious, creamy dessert for added texture, sweetness, and a pop of color. Imagine them nestled within our Dairy Free Strawberries & Cream Pudding. They also work wonderfully in individual fruit parfaits, alternating with layers of yogurt (dairy or non-dairy), fresh berries, and granola.
- S’mores with a Gourmet Twist: Elevate your traditional s’mores experience to a whole new level! The natural honey sweetness and delicate vanilla flavor of these homemade marshmallows will make for an unforgettable campfire (or indoor fireplace) treat, especially when paired with high-quality dark chocolate and crisp graham crackers. Their superior melting quality creates an exceptionally gooey and flavorful s’more.
- Decorative Topping for Baked Goods: Use these pretty pink marshmallows as an eye-catching garnish for cakes, cupcakes, or pies. Their soft color adds a charming and elegant touch to any baked good, making it instantly more appealing for special occasions. They can be placed fresh or lightly toasted with a kitchen torch just before serving.
- Creative Dessert Charcuterie Boards: Arrange them artfully on a dessert charcuterie board alongside fresh fruits, chocolates, nuts, and dipping sauces. Their vibrant color makes them a focal point and an irresistible component for a customizable sweet spread.
- Simply Enjoyed On Their Own: Honestly, these homemade pink marshmallows are so exquisitely delicious on their own, you might find yourself reaching for them straight from the fridge! They make a perfect little sweet bite for an afternoon treat or a satisfying indulgence anytime you crave something sweet and wholesome.
Recipe FAQs
Here are answers to some of the most common questions about making and storing homemade marshmallows, ensuring you have all the information you need for a successful batch:
When stored properly in an airtight container, these homemade pink marshmallows will stay wonderfully fresh and delicious for up to one week in the refrigerator. Beyond that, while still safe to eat, their texture might start to change slightly.
The best way to store your homemade marshmallows is in an airtight container or a high-quality resealable bag. It is essential to keep them in the refrigerator to maintain their fresh, soft, and springy texture and to prevent any unwanted stickiness or melting. For an extra layer of protection against clumping, you can lightly dust them with additional arrowroot starch or powdered sugar before placing them in the container.
To effectively prevent your marshmallows from sticking to the parchment paper, it is absolutely crucial to generously coat the parchment paper with arrowroot starch (or a mixture of powdered sugar and arrowroot starch) before pouring the hot marshmallow mixture. This creates a vital non-stick barrier that ensures easy removal of the slab and clean, effortless cuts later on.
Yes, it is definitely possible to overwhip the marshmallow mixture, and it’s a common mistake! The key is to monitor the consistency closely. Stop whipping once stiff peaks form and the mixture appears glossy, thick, and voluminous. If you continue to whip beyond this optimal point, the mixture can become dense, grainy, or lumpy, losing its characteristic light and airy texture. When incorporating the color, use the mixer on the lowest speed for just a few seconds to avoid deflating the carefully whipped fluff.
Yes, absolutely! While a stand mixer makes the process considerably easier due to its continuous, hands-free whipping capability, a powerful electric hand mixer can certainly be used to achieve excellent results. Just be prepared for a longer whipping time (it might take up to 20 minutes) and the need to hold the mixer steady throughout the process. Ensure you use a large, sturdy, heat-proof mixing bowl for best results and to prevent splashing.
If your marshmallows don’t set as expected, the most common culprit is not reaching the correct temperature for the honey syrup. The 235-240°F (112-115°C) range is vital for the gelatin to activate and the sugars to reach the right concentration. Ensure your candy thermometer is accurate and that you are checking the temperature carefully. Insufficient gelatin or extremely high humidity in your kitchen can also be contributing factors. Double-check your measurements for both water and gelatin, and ensure proper chilling time. Don’t worry, even a slightly softer batch will still taste delicious!
Yes, these marshmallows are perfect for making ahead! Since they store well in the refrigerator for up to a week, you can easily prepare them a few days before your event, saving you time and stress on the day of your gathering. Just remember to dust them generously with arrowroot starch and store them in an airtight container.
Other Delightful Dessert Recipes to Explore
If you’ve enjoyed the process of making and tasting these delightful homemade pink marshmallows, you might love exploring some of our other healthy, naturally sweetened, and incredibly delicious dessert creations. Each recipe is crafted with care to bring you joy without compromising on natural ingredients or amazing flavor. Expand your baking repertoire with these sweet inspirations:
- Cherry Shirley Temple Sorbet: A wonderfully nostalgic and refreshing frozen treat, bursting with bright cherry flavor – perfect for a summer’s day or a vibrant palate cleanser.
- Chocolate Covered Strawberry Gummies: A fun, fruity, and naturally sweetened snack that combines the goodness of strawberries with a hint of chocolate – a guilt-free indulgence.
- Gluten Free Chocolate Lava Cakes: Indulgent, rich, and featuring a molten chocolate center, these are perfect for a special occasion or when you crave a truly decadent, yet gluten-free, dessert.
- Strawberry Pink Drink Sorbet: A vibrant, creamy, and cool treat that beautifully complements these marshmallows, offering another refreshing pink-themed dessert option.
- Italian Hot Chocolate: The ultimate rich, thick, and dairy-free hot chocolate, perfect for chilly evenings and an exquisite pairing with your homemade pink marshmallows.
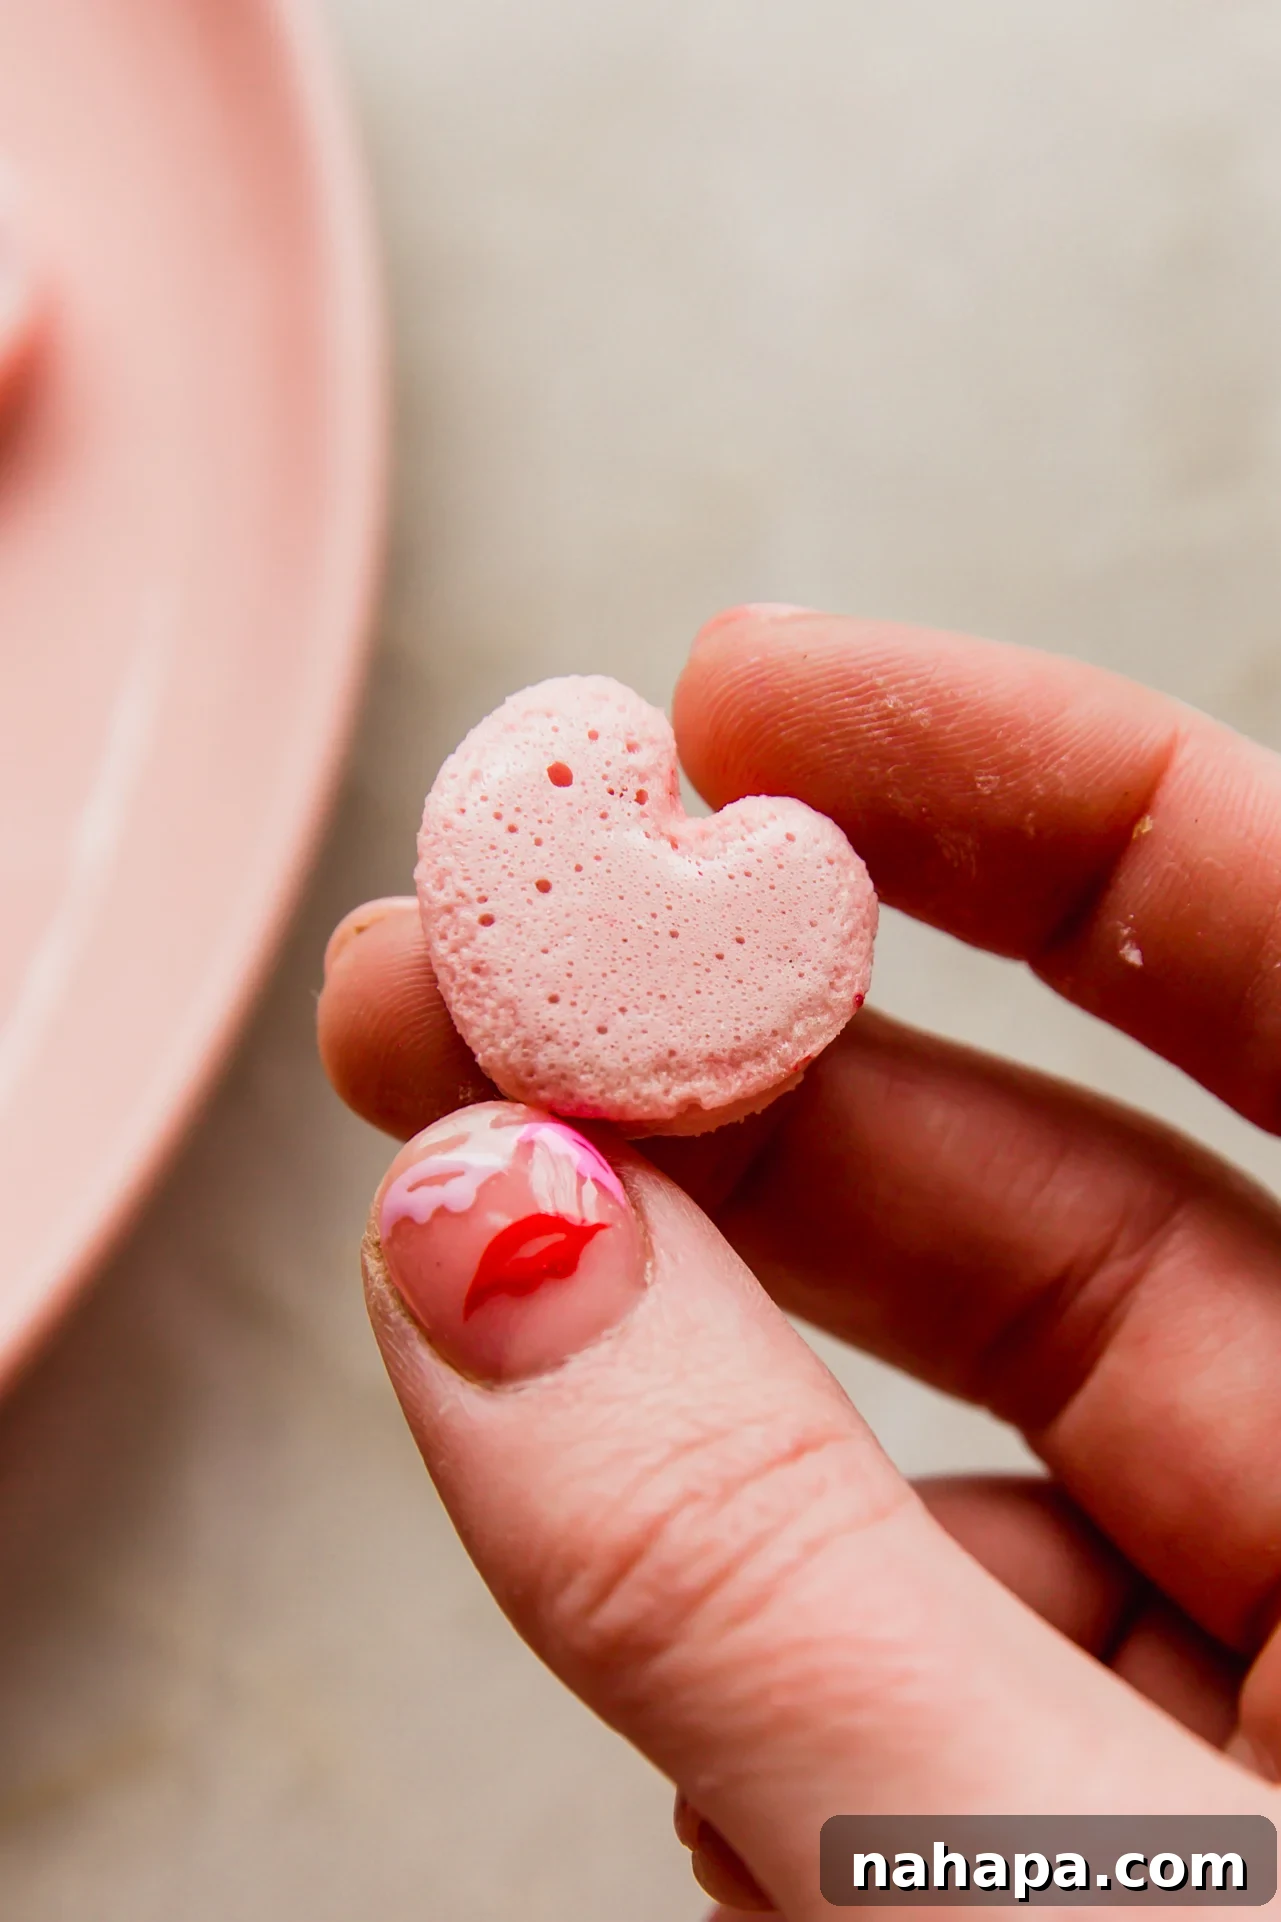
Printable Recipe Card: Homemade Pink Marshmallows
For your convenience and ease of use, here is the complete, detailed recipe with all ingredients and step-by-step instructions in a concise format. Get ready to create a batch of these irresistible, naturally pink, honey-sweetened marshmallows that will impress everyone!
Homemade Pink Marshmallows
These vanilla homemade pink marshmallows are naturally dyed! They’re corn syrup-free and artificial food-dye-free, making them a perfect wholesome treat.
Yield: 12 servings
Prep Time: 20 mins
Total Time: 20 mins (Does not include 3-4 hours chilling time)
Author: Michelle
Leave a Review
Pin Recipe
Ingredients
- 2 tsp arrowroot starch
- 1 cup water, divided
- 3 tbsp unflavored gelatin powder
- 1 cup honey
- 1 tsp vanilla extract
- ½ – 1 tsp beet powder
Instructions
- Prepare a large sheet pan by lining it meticulously with parchment paper and then generously coating the parchment with arrowroot starch. Set this prepared pan aside.
- Pour 1/2 cup of water into the base of your stand mixer bowl (or a large, sturdy, heat-proof bowl if using an electric hand mixer). Evenly sprinkle the gelatin powder over the water. Stir gently with a spoon or whisk to ensure the gelatin is fully moistened and combined, preventing any clumps. Allow it to “bloom” for approximately 5 minutes while you prepare the honey syrup.
- Using a medium-sized, heavy-bottomed pot, combine the honey with the remaining 1/2 cup of water. Slowly and gently heat this mixture over low to medium-low heat. Bring the temperature of the syrup to precisely 235-240°F (112-115°C), monitoring it with a reliable candy thermometer. Once the target temperature is reached, remove the pot from the heat immediately.
- With your stand mixer (or electric hand mixer) running on high speed, carefully and slowly pour the hot honey mixture into the gelatin mixture in a thin, steady stream. Continue whisking on high speed until the mixture becomes very thick, fluffy, glossy, and forms distinct stiff peaks when the whisk is lifted. This process typically takes 10-15 minutes, but may take longer with a hand mixer.
- Once stiff peaks have fully formed, reduce the mixer speed to its lowest setting. Add the vanilla extract and gradually incorporate the beet powder, 1/2 tsp at a time, until your desired shade of vibrant pink is achieved. Whip for just a couple of seconds more to ensure the color is fully and evenly incorporated without deflating the marshmallow fluff.
- Promptly pour the prepared marshmallow mixture onto the baking sheet you prepared earlier. Use an oiled offset spatula or a lightly dampened hand to gently spread the mixture evenly across the pan, aiming for a consistent thickness.
- Place the baking sheet into the refrigerator to harden. Allow it to chill for a minimum of 3-4 hours, or until the marshmallow slab is firm to the touch but still wonderfully soft and springy when pressed.
- Once thoroughly set, remove the marshmallow slab from the refrigerator. Lightly oil a sharp knife or a heart-shaped cookie cutter with a neutral oil, or dust it generously with arrowroot starch. Slice the marshmallows into traditional squares or use the cookie cutter to create charming heart shapes. Dust the cut marshmallows lightly with additional arrowroot starch to prevent them from sticking together. Serve fresh or store them in an airtight container in the fridge for up to a week.
Notes
Hand Mixer Method: If you only have an electric hand mixer, use a large, sturdy, heat-proof mixing bowl. Be prepared for a longer whipping time (it might take up to 20 minutes) and the need to hold the mixer steady throughout the process. The technique and end result will be similar to using a stand mixer.
Essential Tools: Key tools for successful marshmallow making include a precise candy thermometer, a powerful stand mixer (or electric hand mixer), and optionally, a heart cookie cutter for decorative shapes.
Nutrition Information (Estimated)
Serving: 12 marshmallows
- Calories: 1137 kcal
- Carbohydrates: 285.7g
- Protein: 19.3g
- Fiber: 1g
- Sugar: 279g
All nutrition facts are estimated and will vary based on exact ingredients and preparation. This information is provided for general guidance only.
Did You Make This Recipe?
We’d absolutely love to see your beautiful creations! Share your homemade pink marshmallows on Instagram by tagging @unboundwellness and using the hashtag #unboundwellness! Your culinary adventures inspire us!