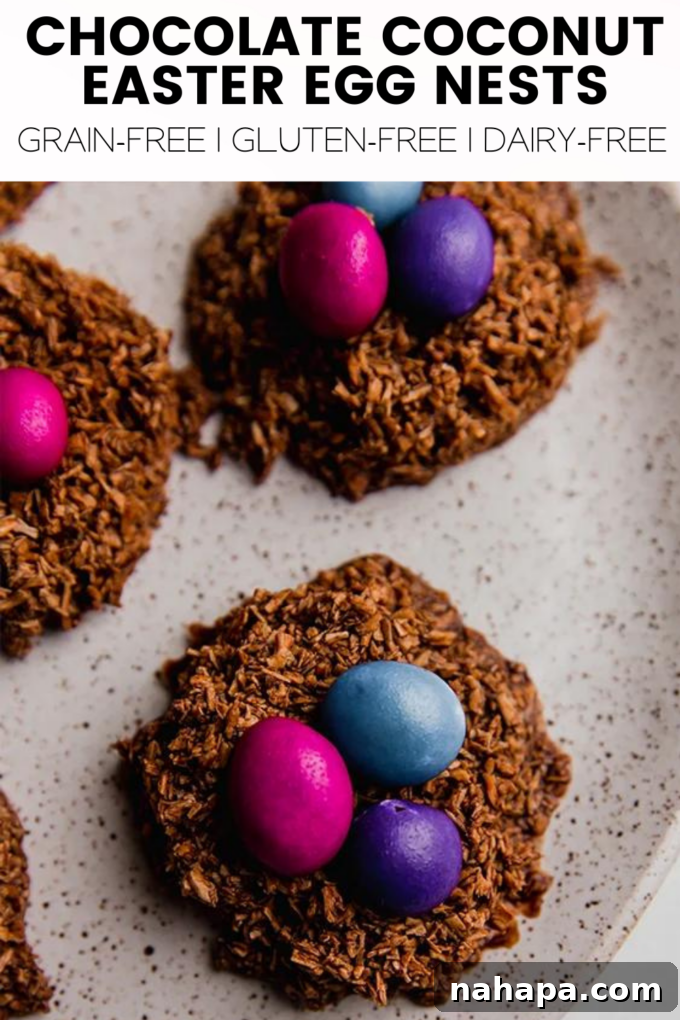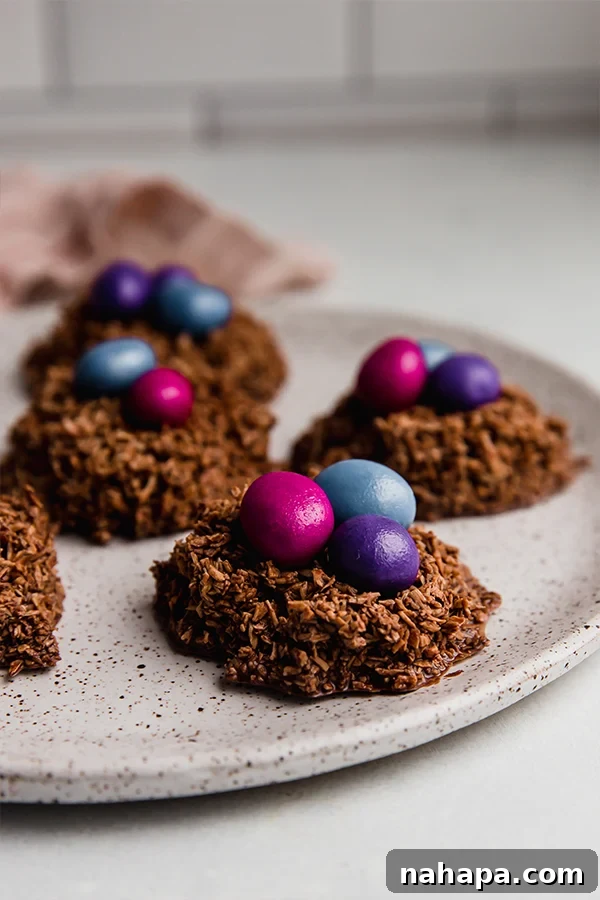
Easter is a time for joy, family, and, of course, delightful treats! While traditional Easter desserts often involve elaborate baking and potentially less-than-healthy ingredients, we’re thrilled to present a revolutionary alternative: these incredible Chocolate Coconut Easter Egg Nests. Imagine a treat that’s not only adorable and festive but also incredibly easy to make, requires no baking, and caters to common dietary needs. That’s exactly what these nests offer!
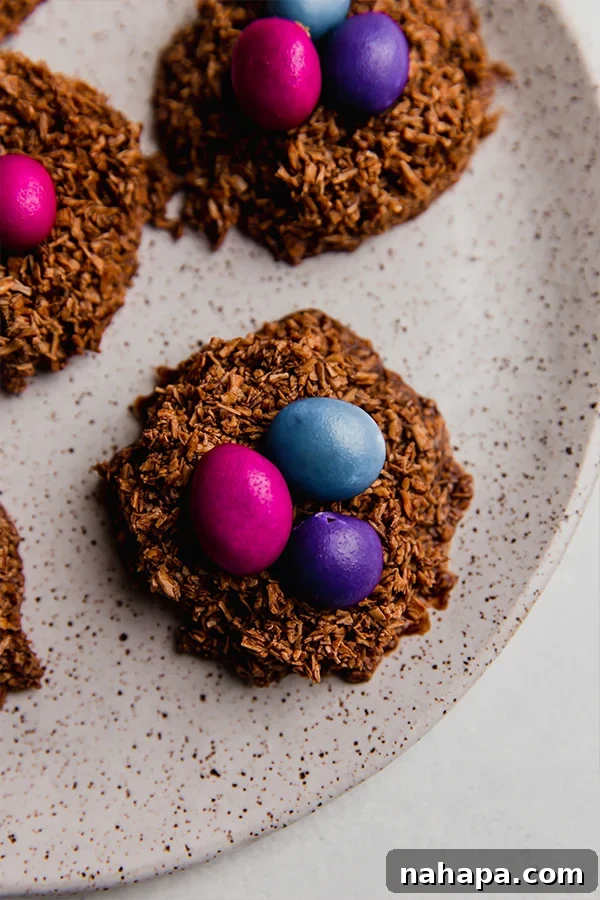
Embrace the Simplicity: No-Bake Easter Magic
Remember the childhood delight of creating “egg nests” – those charming no-bake cookies typically crafted from pretzel sticks, crispy cereal, or chow mein noodles? Bound together with melted chocolate or peanut butter and adorned with colorful jelly beans or mini chocolate eggs, they were a staple of spring celebrations. While my own toddler is still a bit young to fully participate in the kitchen adventures, the nostalgia for these whimsical treats inspired me to create a modern, more inclusive version.
This recipe reimagines the classic, focusing on wholesome ingredients to deliver a grain-free, dairy-free, and gluten-free dessert. Instead of traditional binders, we use the natural goodness of shredded coconut combined with rich, dairy-free chocolate. The result is a treat that captures all the fun and festivity of its predecessors but with a lighter, more natural touch. It’s perfect for those seeking healthier options without compromising on taste or the enchanting spirit of Easter.
Why These Chocolate Coconut Easter Egg Nests Will Be Your New Favorite
Beyond their charming appearance, these nests offer a multitude of reasons to become your go-to Easter confection:
- Effortlessly No-Bake: Skip the oven and complex techniques. This recipe is designed for maximum ease, making it ideal for busy schedules or when you want to get the kids involved (in the decorating phase, of course!).
- Allergen-Friendly Goodness: Naturally gluten-free and dairy-free, these nests are a thoughtful option for those with sensitivities or allergies, ensuring everyone can enjoy a sweet treat.
- Healthier Indulgence: By opting for shredded coconut and thoughtful chocolate choices, we create a dessert that feels indulgent but incorporates more whole-food ingredients compared to many conventional Easter candies.
- Quick & Easy: With minimal prep and active time, you can whip up a batch of these beautiful nests in under an hour, not including chilling time.
- Irresistibly Delicious: The combination of toasted coconut and smooth chocolate is a match made in heaven, offering a delightful texture and rich flavor that appeals to all ages.
- Festive & Fun: Their nest-like shape, topped with colorful “eggs,” makes them an instant hit on any Easter dessert table or as a charming gift.
The Simple Ingredients You’ll Need
Creating these delightful Easter egg nests requires just a few key ingredients, each playing a crucial role in achieving the perfect balance of flavor and texture. We focus on quality and accessibility, ensuring you can find everything you need with ease.
- 1 ½ cups Shredded Coconut: For this recipe, I highly recommend using unsweetened desiccated shredded coconut. Unsweetened coconut allows the natural sweetness of the chocolate and candy “eggs” to shine without becoming overly sugary. It also toasts beautifully, adding a depth of flavor and a satisfying chewiness. While sweetened coconut can be used if preferred, be mindful that the overall sweetness of the nests will increase. You can also opt for larger coconut flakes for a more rustic texture, but finely shredded coconut helps the nests hold their shape better.
- 1 cup Dairy-Free Chocolate Chips: The quality of your chocolate makes a big difference here. I’m a big fan of Enjoy Life chocolate chips, which are widely available and free from many common allergens, including dairy, nuts, and soy. However, feel free to use your favorite brand of high-quality dairy-free chocolate chips or even a chopped dairy-free chocolate bar. Dark chocolate chips will offer a richer, less sweet profile, while semi-sweet will provide a classic balance. Ensure your chosen chocolate melts smoothly for easy coating.
- 2 teaspoons Coconut Oil: A small amount of coconut oil is essential for achieving a smooth, glossy melted chocolate consistency. It helps the chocolate coat the coconut evenly and contributes to the nests’ firm texture once chilled. Refined coconut oil has a neutral flavor, which is generally preferred, but unrefined (virgin) coconut oil can be used if you enjoy its subtle coconut aroma and taste.
- 18-20 Unreal Candy Gems: These vibrant candy gems are a fantastic choice for our “Easter eggs.” They offer a similar look and crunch to traditional candy-coated chocolates but are made with simpler, non-GMO ingredients and often without artificial colors. The Unreal peanut candy gems tend to have the best shape for resembling small eggs. If you need a nut-free option, their quinoa gems are an excellent alternative. Alternatively, you can explore other allergen-friendly candy-coated chocolates or colorful sprinkles.
Crafting Your Chocolate Coconut Easter Egg Nests: A Step-by-Step Guide
Get ready to create magic in your kitchen! This no-bake recipe is incredibly straightforward, perfect for novice cooks and seasoned dessert makers alike.
1. Prepare and Toast the Coconut for Enhanced Flavor
- Preheat your oven to 350°F (175°C). Line a large baking sheet with parchment paper. This prevents sticking and makes cleanup a breeze.
- Spread the shredded coconut in an even layer across the prepared baking sheet. It’s important not to overcrowd the sheet; use two if necessary to ensure even toasting.
- Toast in the preheated oven for 8-10 minutes, or until the coconut turns a beautiful light golden brown and smells fragrant. Keep a close eye on it, as coconut can go from perfectly toasted to burnt very quickly! Stir it once or twice during toasting to ensure uniformity.
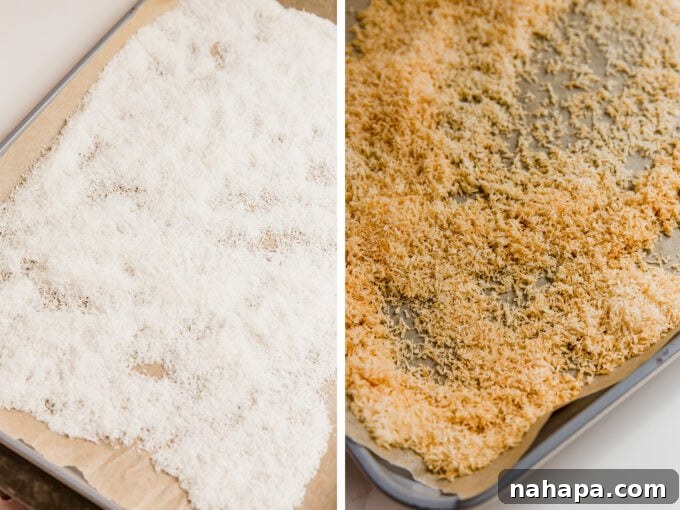
- Once toasted, remove the coconut from the oven and transfer it to a large mixing bowl. Allow it to cool completely before proceeding. Cooling ensures the chocolate won’t seize and will coat the coconut properly.
2. Master the Art of Melting Chocolate
- In a microwave-safe bowl, combine your dairy-free chocolate chips and coconut oil.
- Microwave for 30 seconds. Remove the bowl and stir thoroughly. The chocolate may not look melted at first, but stirring helps distribute the heat.
- Repeat this process, microwaving in 30-second intervals and stirring after each, until the chocolate is completely smooth and melted. Be careful not to overheat, as this can burn the chocolate.
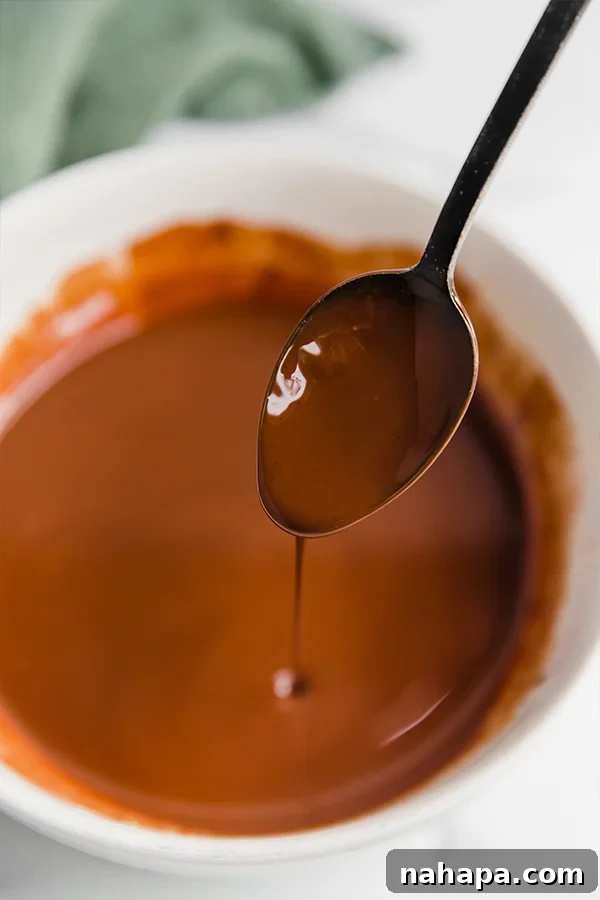
- Alternatively: If you prefer not to use a microwave, melt the chocolate and coconut oil in a double boiler over simmering water. Place the bowl over a saucepan with an inch or two of simmering water, ensuring the bottom of the bowl doesn’t touch the water. Stir constantly until melted and smooth.
3. Combine and Form Your Nests
- Pour the luscious melted chocolate mixture directly over the cooled, toasted coconut in the large mixing bowl.
- Using a spatula or spoon, gently but thoroughly toss the coconut until every strand is fully coated in chocolate. Work quickly, as the chocolate will start to set.
- Line another large plate or baking sheet with parchment paper. This is where your nests will cool.
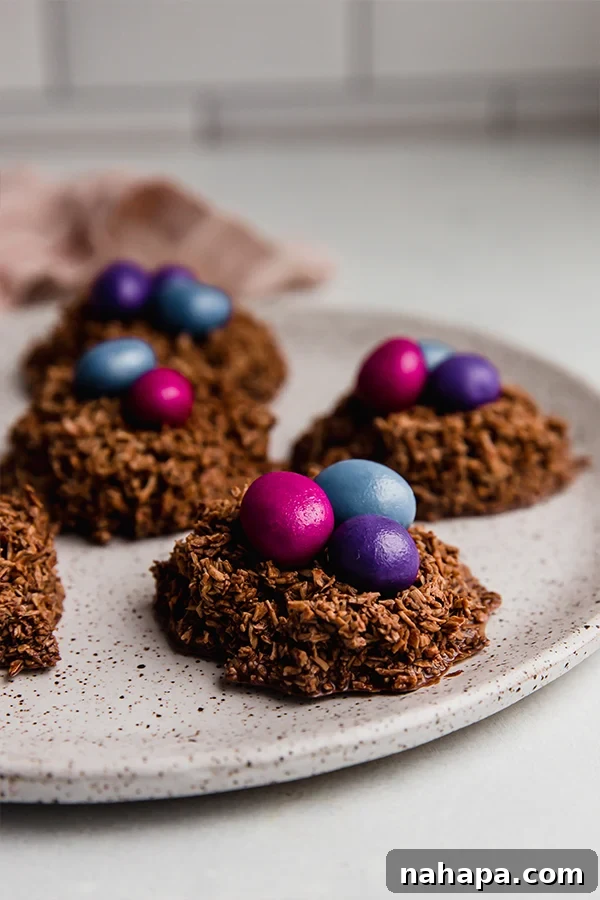
- Using a cookie scoop (a 1.5-inch or 2-inch scoop works perfectly) or your hands, scoop out portions of the chocolate-coated coconut. Form them into rounded, dome-like shapes, resembling small birds’ nests. Avoid flattening them; the rounded shape is key to their charm. Place them onto the prepared parchment-lined plate.
4. Add the Festive “Eggs”
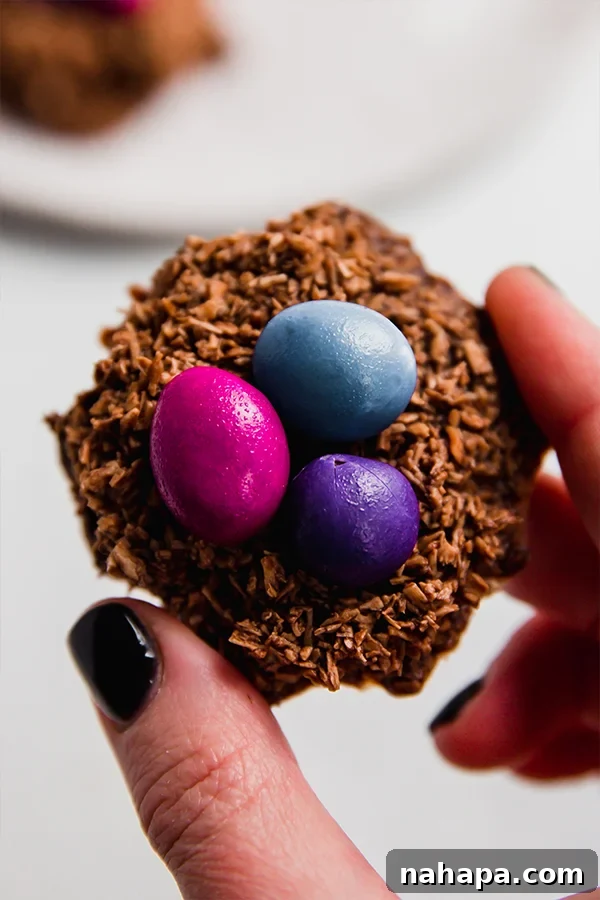
- Carefully place 2-3 Unreal candy gems on top of each chocolate coconut nest. Gently arrange them in the center, pressing them in lightly so they adhere to the chocolate while it’s still soft. This is a great step to involve younger helpers!
5. Chill to Perfection
- Transfer the plate of freshly formed egg nests to the refrigerator.
- Allow them to chill and harden for 30-45 minutes, or until they are completely solid and firm to the touch.
- Once set, serve chilled. These nests are delightful when cool and firm.
Customizing Your Easter Egg Nests: Ideas & Variations
While the classic chocolate coconut combination is undeniably delicious, there are many ways to put your own spin on these festive treats.
Choosing Your Coconut: Sweetened vs. Unsweetened
As mentioned, I prefer unsweetened desiccated shredded coconut for a more balanced flavor profile, allowing the chocolate and candy gems to provide the primary sweetness. However, if you have a sweeter tooth or are using a very dark, bitter chocolate, you can certainly use sweetened shredded coconut. Alternatively, a blend of both can offer a happy medium. Coconut flakes will yield a chewier, more substantial nest, adding a different textural dimension.
Creative “Egg” Topping Alternatives
Unreal candy gems are fantastic for their vibrant colors and straightforward ingredients. However, if you’re looking for different options or can’t find them, consider these:
- Freeze-Dried Berries: For a more natural and tart option, freeze-dried raspberries or blueberries make wonderful, healthy “eggs.” They add a pop of color and a delightful crunch.
- Mini Chocolate Eggs: Look for dairy-free and gluten-free mini chocolate eggs if you prefer a traditional chocolate egg look.
- Nut-Free Mini Candies: Explore other small, colorful candies that fit your dietary needs.
- Sprinkles: A sprinkle of natural, colored sprinkles can add a playful touch.
- Edible Decorations: Think edible glitter, small sugar flowers, or even small pieces of dried mango or apricot for a tropical twist.
Flavor Boosts for Your Nests
- A Pinch of Sea Salt: A tiny sprinkle of flaky sea salt over the melted chocolate or finished nests can elevate the flavors, creating a delightful sweet-and-salty contrast.
- Vanilla Extract: Add ½ teaspoon of vanilla extract to the melted chocolate for a warm, aromatic depth.
- Espresso Powder: For a sophisticated touch, a ¼ teaspoon of instant espresso powder mixed into the melted chocolate will enhance its richness without making it taste like coffee.
- Citrus Zest: A little orange or lemon zest mixed with the chocolate can provide a bright, zesty note perfect for spring.
Storing Your Chocolate Coconut Easter Egg Nests
These nests are best stored in an airtight container in the refrigerator. They will stay fresh for up to 5-7 days. While they can be enjoyed at room temperature, their texture is best when kept chilled and firm. If stacking them, you might want to place a layer of parchment paper between them to prevent sticking. They can also be frozen for longer storage (up to 1 month) in an airtight container; just allow them to thaw slightly in the refrigerator before serving.
Frequently Asked Questions (FAQ)
Can I make these ahead of time?
Absolutely! These nests are perfect for making in advance. Prepare them a day or two before your Easter celebration and store them in the refrigerator. This allows the flavors to meld and the nests to firm up nicely.
Is it possible to make these without toasting the coconut?
While you can technically skip toasting, I strongly recommend against it. Toasting the coconut significantly enhances its flavor, adding a warm, nutty depth that is truly transformative for this recipe. It also improves the texture, giving the nests a more satisfying bite.
What if my chocolate seizes when melting?
Chocolate seizing (becoming thick and grainy) often happens if it comes into contact with even a tiny amount of water or is overheated. To prevent this, ensure all your utensils and bowls are completely dry. If using a microwave, melt in short bursts and stir frequently. If using a double boiler, make sure no steam or water splashes into the chocolate. If it does seize, sometimes adding a teaspoon of hot, neutral oil (like more coconut oil or vegetable oil) and stirring vigorously can help rescue it, though it might alter the texture slightly.
Can I use a different type of oil instead of coconut oil?
Yes, you can. Another neutral-flavored oil, such as avocado oil or refined sunflower oil, could be used in a pinch. However, coconut oil is preferred as it helps the chocolate set firmly when chilled, giving the nests a better structure.
Are these suitable for young children?
Yes, these are generally a great treat for kids, especially with the allergen-friendly ingredients. Always supervise young children with small candy pieces to prevent choking hazards. The soft, chewy texture of the coconut makes them easy to eat.
Other Easter Treats You’ll Adore
If you loved these Chocolate Coconut Easter Egg Nests, you might enjoy exploring more delightful and healthier Easter recipes:
- Marshmallow Easter Eggs
- Chocolate Covered Cookie Dough Easter Eggs
- Almond Butter Chocolate Eggs
We hope these Chocolate Coconut Easter Egg Nests bring a touch of joy and deliciousness to your spring celebrations. They’re a simple, satisfying, and utterly charming way to enjoy the season without any baking fuss. Happy Easter!
Chocolate Coconut Easter Egg Nests
Yield: 6 servings
Author: Michelle
Ingredients
- 1 ½ cup shredded coconut (unsweetened, desiccated)
- 1 cup dairy-free chocolate chips (e.g., Enjoy Life brand)
- 2 tsp coconut oil
- 18-20 Unreal candy gems (or alternative colorful candy)
Instructions
- Preheat the oven to 350°F (175°C) and line a large baking sheet with parchment paper. Add the shredded coconut in an even layer and toast in the preheated oven for 8-10 minutes or until lightly golden and fragrant. Remove from the oven and allow to cool completely before adding to a large mixing bowl.
- Combine the chocolate chips and coconut oil in a microwave-safe bowl. Microwave for 30 seconds, remove and stir. Repeat, microwaving in 30-second intervals, and stir until completely melted and smooth. Alternatively, melt using a double boiler.
- Pour the melted chocolate over the toasted coconut and toss gently to fully coat all the shredded coconut in chocolate.
- Prepare a large plate lined with parchment paper. Use a cookie scoop (or your hands) to scoop out portions of the chocolate-coated coconut, forming them into rounded dome shapes (don’t flatten them!) that resemble small nests. Place them onto the prepared plate.
- Carefully place 2-3 candy gems on top of each egg nest. Arrange them in the center and lightly push them in to secure them.
- Transfer the egg nests to the fridge to harden for 30-45 minutes or until totally solid and firm. Serve chilled.
Notes
All nutritional information are estimations and will vary. Estimations do not include optional ingredients.
Nutrition Information (Estimated per serving)
- Serving: 1 serving
- Calories: 392 kcal
- Carbohydrates: 31.7 g
- Protein: 4.3 g
- Fat: 30.8 g
- Fiber: 5.8 g
All nutrition facts are estimated and will vary.
Did you Make this Recipe?
Tag @unboundwellness on Instagram and hashtag #unboundwellness!