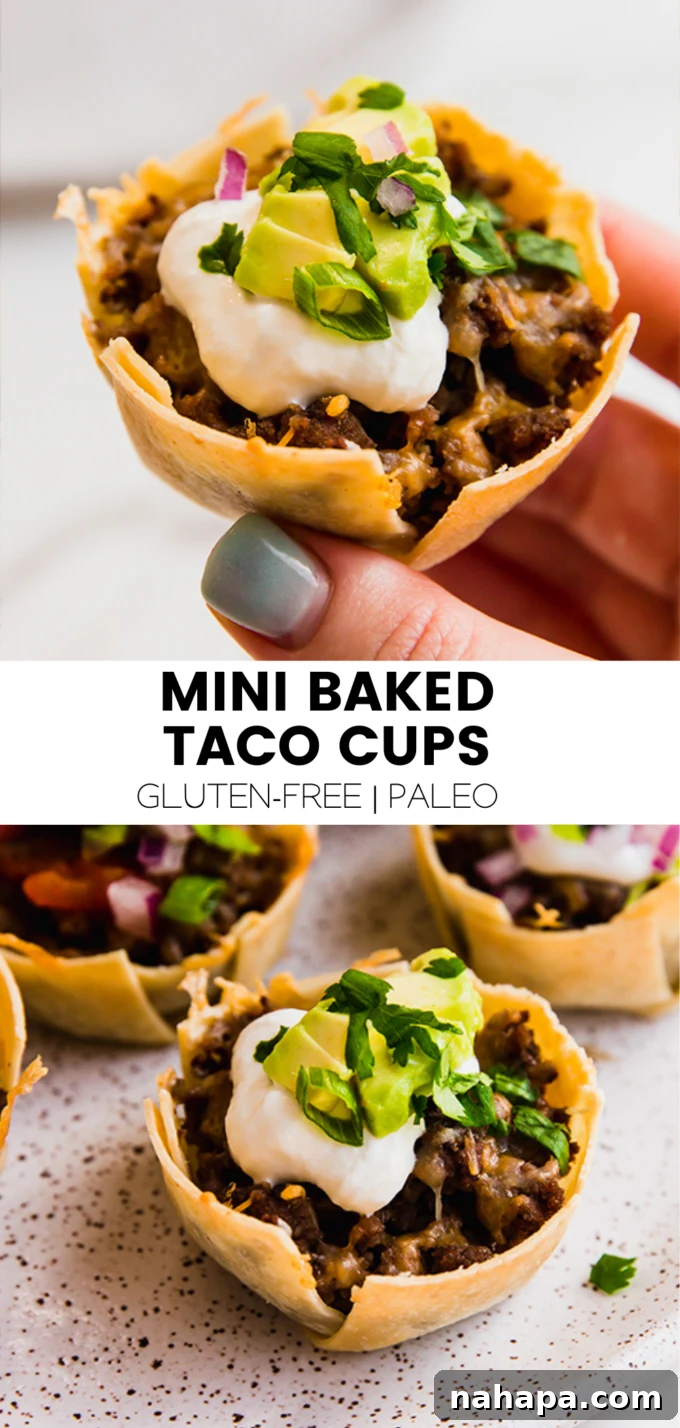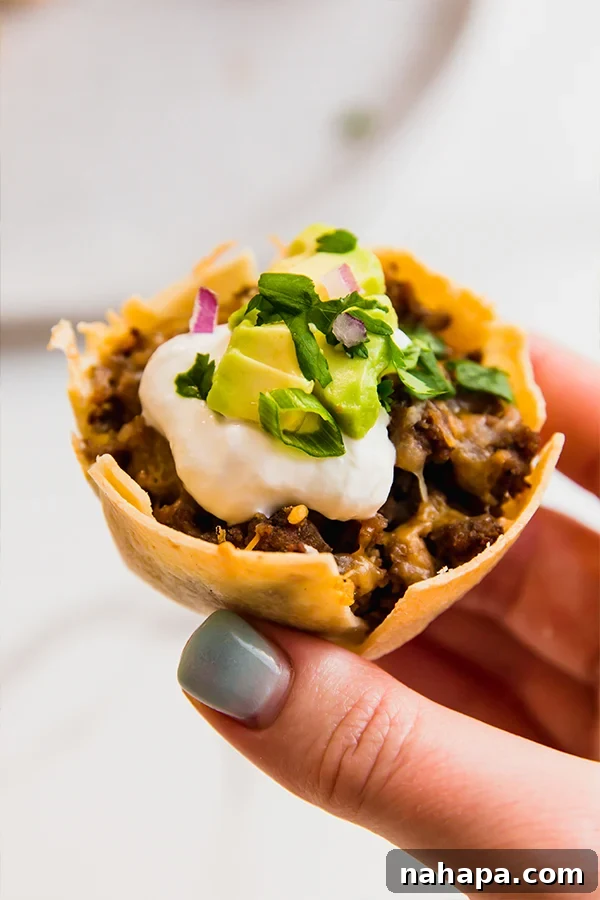
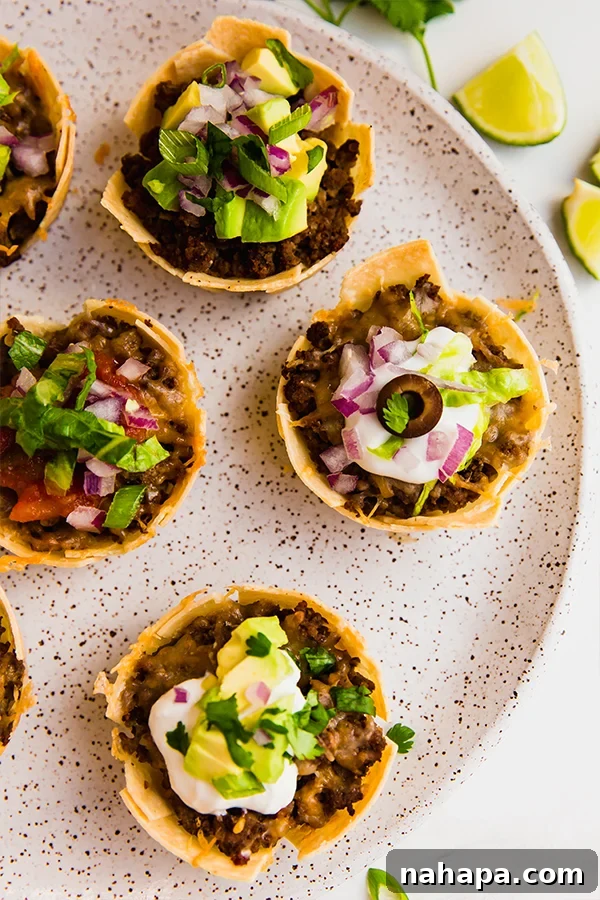
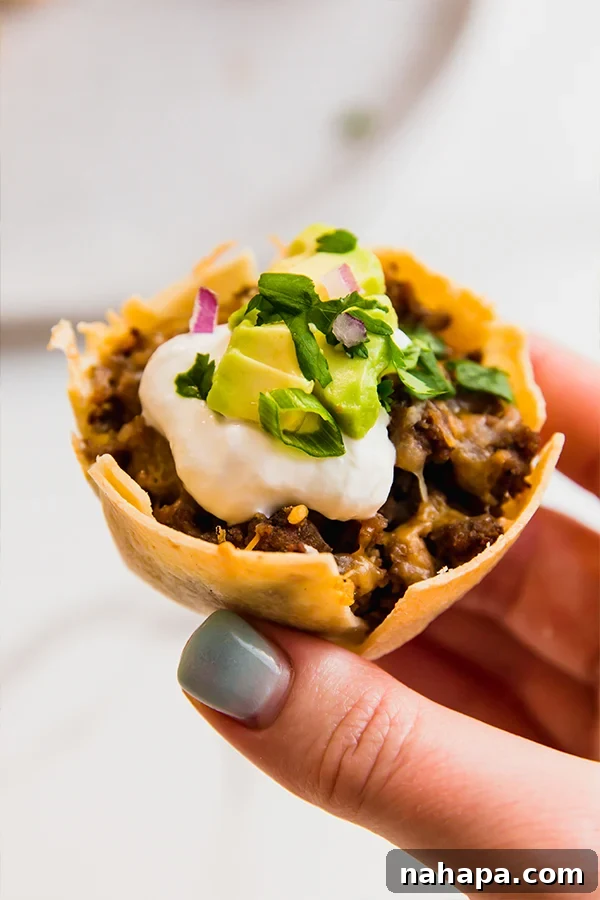
Welcome to your new favorite way to enjoy taco night: irresistible **Mini Taco Cups**! These delightful, bite-sized baked tacos are designed for maximum flavor and minimal fuss. Crafted with perfectly crispy tortilla shells, a savory ground beef filling, and a world of flexible toppings, they transform any meal into a fun fiesta. Whether you’re planning a casual family dinner, a lively party appetizer, or a simple yet satisfying snack, these gluten-free taco cups are guaranteed to be a crowd-pleaser.
Discover the Magic of Mini Taco Cups: Your Go-To Appetizer & Meal Solution
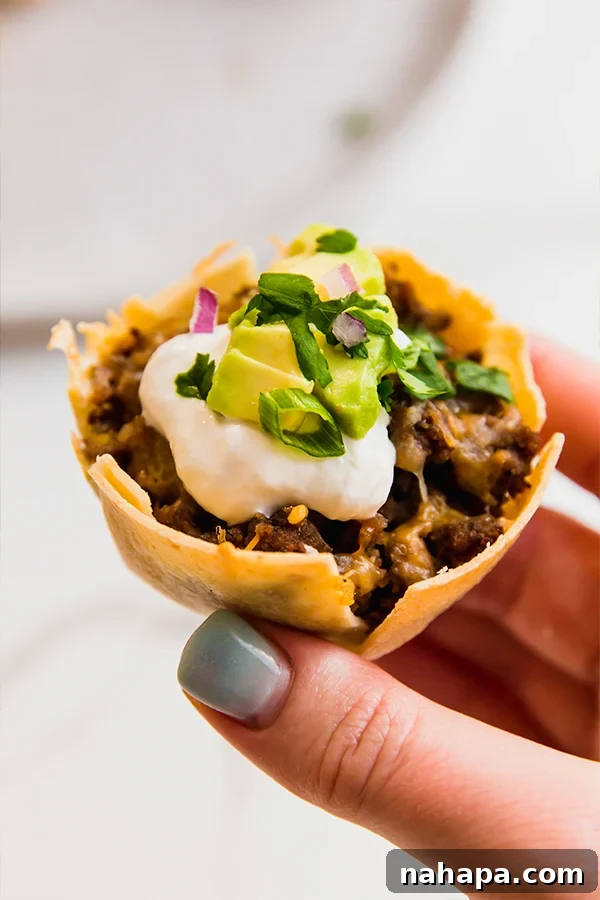
What exactly makes **mini taco cups** so special? Imagine all the deliciousness of a traditional taco, but in a convenient, mess-free, and incredibly fun package. These charming appetizers are created by transforming simple tortillas into crisp, individual cups using a muffin tin. Each cup is then generously filled with perfectly seasoned ground beef, often crowned with melted cheese, and baked until golden and irresistible. The beauty of this recipe lies in its simplicity and versatility, making it a perfect fit for any occasion. From school lunches to game day spreads, these easy-to-eat taco bites offer a fresh and exciting spin on classic Mexican flavors.
Why You’ll Absolutely Love These Oven Baked Taco Cups
Beyond their adorable appearance, there are countless reasons why these **oven baked taco cups** will become a staple in your kitchen:
- Effortlessly Gluten-Free: By opting for grain-free tortillas, this recipe naturally caters to gluten-free dietary needs without sacrificing taste or texture.
- Highly Customizable: The possibilities are endless! Adapt the filling, cheese, and toppings to suit every palate, dietary preference, or even themed party.
- Kid-Friendly Fun: Their mini size makes them a huge hit with children. They’re easy for little hands to hold and can be customized with their favorite ingredients, encouraging them to enjoy wholesome meals.
- Quick & Easy Preparation: With just a few simple steps and readily available ingredients, you can whip up a batch of these delicious taco cups in under 30 minutes.
- Perfect for Parties: Serve them as a finger food appetizer at gatherings, and watch them disappear! They’re less messy than traditional tacos, making them ideal for mingling.
- Great for Meal Prep: Prepare a larger batch and store them for quick lunches or dinners throughout the week. They reheat beautifully, offering convenience on busy days.
Essential Ingredients for Your Delicious Mini Taco Cups
Crafting the perfect **homemade taco cups** begins with a few key ingredients. While the core elements provide a solid foundation, remember that customization is part of the fun!
The Core Ingredients for Crispy Taco Cups:
- Tortillas: The foundation of our crispy cups! For a truly gluten and grain-free experience, I highly recommend using Siete Foods almond flour tortillas. Their flexibility and flavor are excellent. Alternatively, homemade cassava flour tortillas work wonderfully, providing a soft yet sturdy base that crisps up beautifully in the oven. If gluten isn’t a concern, traditional corn or even small flour tortillas can be used, ensuring they fit well into a muffin tin.
- Ground Beef: This savory filling forms the heart of our taco cups. You’ll want to brown the ground beef thoroughly, breaking it into small crumbles as it cooks. The key to a flavorful filling is a good taco seasoning. You can use your favorite store-bought blend for convenience or whip up a homemade version with chili powder, cumin, paprika, garlic powder, onion powder, and a pinch of cayenne for a kick.
- Shredded Cheese: While optional, a sprinkle of shredded cheese adds a creamy, melty layer that perfectly complements the seasoned beef. Cheddar, Monterey Jack, or a Mexican blend are popular choices. If you’re aiming for a dairy-free option, plant-based shredded cheese alternatives perform surprisingly well, or you can simply omit it entirely and let the other flavors shine.
Unleash Your Creativity: Toppings for the Ultimate Taco Experience
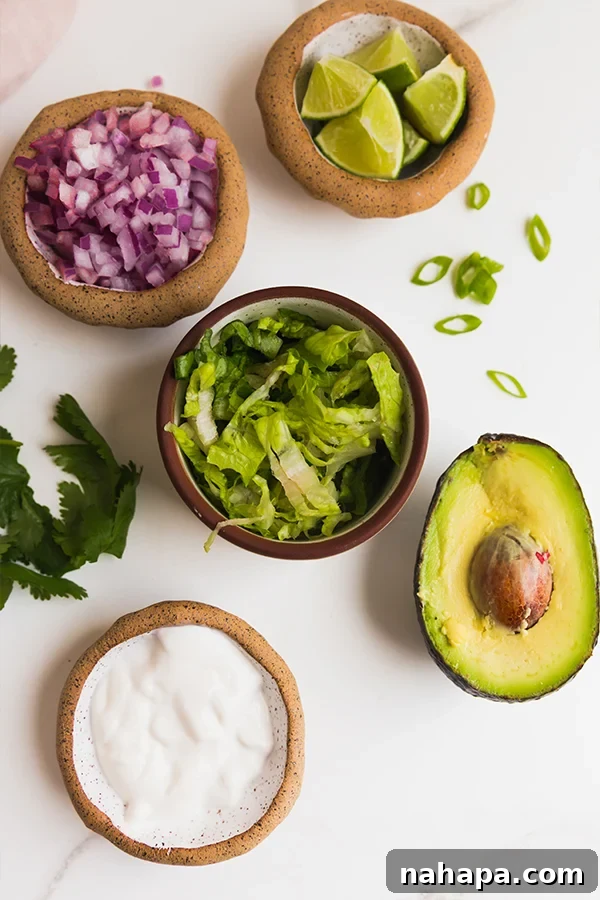
The beauty of **taco bites** lies in their customizable toppings. Think of your mini taco cups as a blank canvas, ready for a vibrant array of colors and flavors. You can stick to the classics or venture into more adventurous combinations. Here are some fantastic ideas to get you started:
- Black Olives: Sliced black olives add a briny, savory note and a pleasing texture.
- Sour Cream or Dairy-Free Alternative: A dollop of cool, tangy sour cream or a dairy-free yogurt-based alternative provides a creamy contrast to the warm, spicy filling.
- Salsa: From mild pico de gallo to fiery habanero salsa, this fresh condiment brings bright, zesty flavors.
- Diced Avocado or Guacamole: Creamy avocado adds healthy fats and a smooth texture. A chunky guacamole can elevate the flavor profile even further.
- Red Onion: Finely diced red onion offers a sharp, pungent bite that cuts through the richness.
- Green Onion (Scallions): Sliced green onions provide a milder onion flavor and a fresh, herbaceous garnish.
- Cilantro: Freshly chopped cilantro is a classic taco topping, adding a bright, citrusy, and aromatic finish.
- Lime Juice: A squeeze of fresh lime juice just before serving brightens all the flavors and adds a necessary zing.
- Shredded Lettuce: Crisp, cool shredded lettuce adds a refreshing crunch and a touch of lightness.
- Optional Additions: Consider pickled jalapeños for heat, corn salsa for sweetness, a dash of hot sauce for extra spice, or even crumbled cotija cheese for an authentic touch.
Setting up a “taco cup topping bar” is a fantastic idea for parties, allowing everyone to personalize their own taco creations!
Step-by-Step Guide: How to Make Oven Baked Gluten-Free Taco Cups
Making these **easy taco appetizers** is straightforward and fun. Follow these detailed steps to create perfectly crispy and delicious mini taco cups every time.
Step 1: Prepare the Oven and Brown the Ground Beef
Begin by preheating your oven to 375°F (190°C). Lightly grease a standard muffin tin with cooking spray or a small amount of oil. This ensures your taco cups won’t stick and will release easily. Next, place your ground beef in a large skillet over medium heat. Break up the meat with a spoon as it cooks, browning it evenly until no pink remains. Drain any excess fat. Stir in 1-2 teaspoons of your chosen taco seasoning, or your homemade blend, mixing thoroughly until the beef is well coated and fragrant. Set the seasoned beef aside.
Step 2: Craft Your Crispy Tortilla Shells
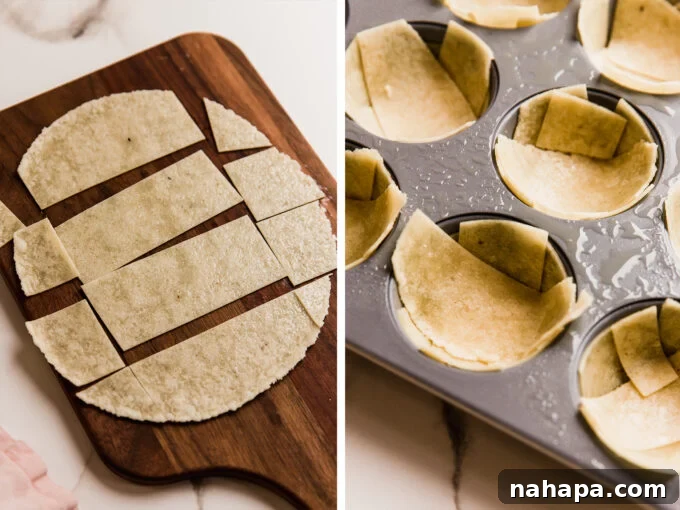
Take your grain-free tortillas and carefully slice them into strips. The exact number of strips will depend on the size of your tortillas and muffin tin cups. Aim for pieces that are large enough to line the muffin tin wells, covering the bottom and sides to form a cup. You might need to overlap strips slightly to ensure there are no gaps. Gently press the tortilla pieces into each muffin cup, molding them to the shape of the tin. If you find any small holes or gaps, use smaller tortilla scraps to patch them up, ensuring a full, robust shell.
Step 3: Fill and Optionally Cheese Your Taco Cups
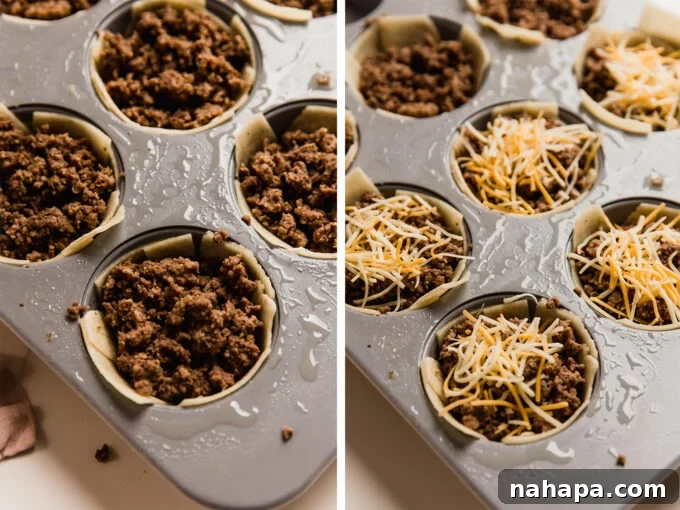
Now it’s time to fill your tortilla shells! Using a large spoon, scoop the seasoned ground beef mixture into each tortilla-lined muffin cup. Fill each cup approximately three-quarters of the way full. Be careful not to overfill, as this can make the cups difficult to crisp and potentially lead to spillage during baking. If desired, sprinkle a generous amount of shredded cheese over the beef in each cup. The cheese will melt beautifully, adding an extra layer of flavor and richness.
Step 4: Bake to Crispy Perfection
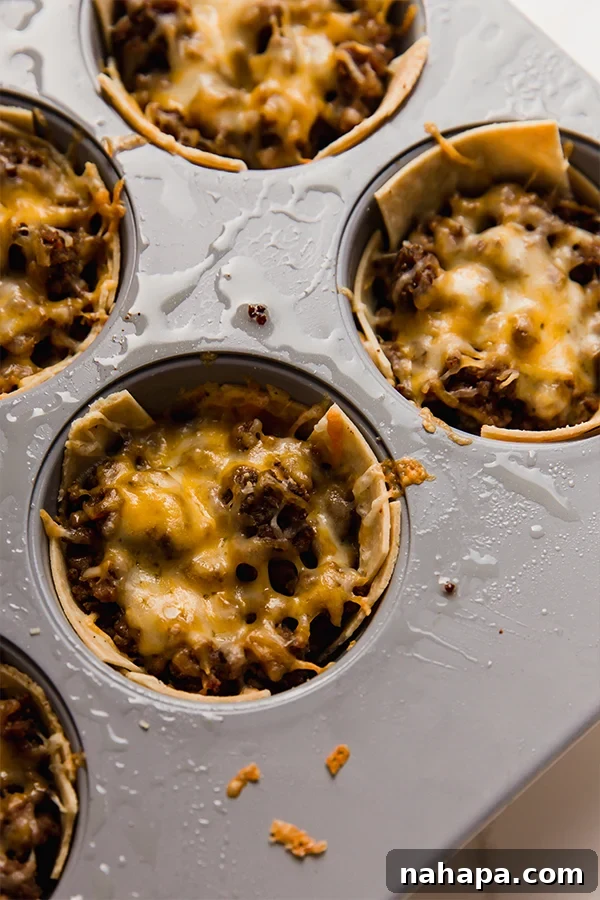
Carefully transfer the muffin tin with the filled taco cups to your preheated oven. Bake for 10-15 minutes. Keep a close eye on them, as baking times can vary slightly depending on your oven and the thickness of your tortillas. You’re looking for the tortilla edges to turn golden brown and become visibly crisp. The cheese, if added, should be bubbly and melted. The goal is a firm, crunchy shell that holds its shape when removed from the tin.
Step 5: Cool Slightly and Top with Your Favorites
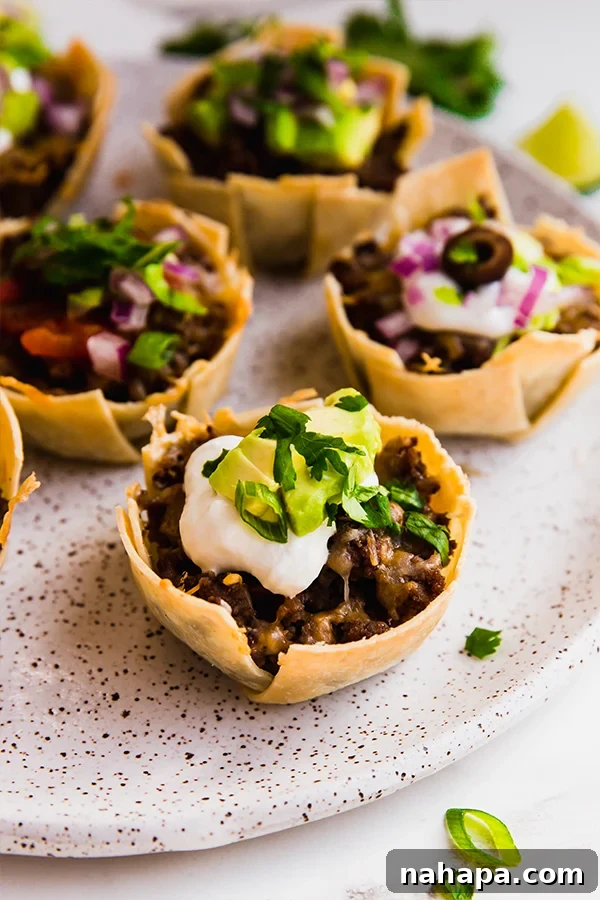
Once baked, remove the muffin tin from the oven. Allow the mini taco cups to cool slightly in the tin for a few minutes. This crucial step helps the shells firm up even more and makes them easier to remove without breaking. Using a small knife or offset spatula, carefully loosen and remove each taco cup from the muffin tin. Transfer them to a serving plate and, most importantly, add your chosen toppings! Pile on the fresh cilantro, diced avocado, a dollop of sour cream, or a generous spoonful of salsa. Serve immediately and enjoy the crunchy, savory goodness!
Pro Tips & Tricks for Perfect Mini Taco Cups
- Measure Your Tortillas: While you don’t need a ruler, take a moment to eyeball or gently press a tortilla into a muffin cup to gauge the ideal size for your slices. This helps create uniform, perfectly sized shells that hold their shape.
- Seal Those Gaps: Even with careful slicing, small gaps can appear when lining the muffin tin. Use smaller scraps of tortilla to patch these holes. This prevents the filling from leaking out and ensures a fully contained, crispy cup.
- Don’t Be Afraid to Mix & Match Toppings: One of the best parts of this recipe is the versatility of toppings. Try different combinations on each cup to discover new flavor profiles. From spicy to tangy to fresh, variety is the spice of life (and taco cups!).
- Avoid Overfilling: Resist the urge to pack too much beef into each cup. Filling them three-quarters full allows the tortillas to crisp up properly and prevents the cups from becoming soggy or falling apart.
- Parchment Paper for Easy Cleanup: For even easier cleanup, you can line your muffin tin with parchment paper cups before adding the tortillas. This creates a non-stick barrier and simplifies removal.
Can you make mini taco cups ahead of time? How do you reheat them?
These **gluten-free taco cups** are undoubtedly best enjoyed fresh, when the shells are at their crispiest. However, you can absolutely prepare them in advance. Store any leftovers in an airtight container in the refrigerator for 2-3 days. To reheat, arrange them on a baking sheet and warm them in a preheated oven (around 350°F / 175°C) for a few minutes until heated through and the shells have re-crisped. Avoid the microwave if possible, as it can make the shells soggy.
Can you make mini taco cups dairy-free or AIP-friendly?
Absolutely! Making these mini taco cups dairy-free is simple. Just omit the shredded cheese entirely, or use a high-quality dairy-free shredded cheese alternative. They are still incredibly delicious without cheese, especially when loaded with other flavorful toppings like guacamole, salsa, and fresh herbs. For a creamy touch, opt for dairy-free sour cream or even a dollop of unsweetened plain dairy-free yogurt. For an AIP (Autoimmune Protocol) friendly version, ensure you use compliant tortillas (like cassava flour tortillas) and a taco seasoning free of nightshades and other AIP no-gos. A simple AIP seasoning can be made with salt, garlic powder, onion powder, dried cilantro, and dried oregano.
Are mini taco cups an appetizer or a main dish?
The beauty of these **taco cups** is their adaptability. Their bite-sized nature makes them ideal for appetizers, perfect for parties, game days, or casual get-togethers where finger foods are preferred. They are easy to grab and enjoy without the need for silverware. However, if you’re looking for a fun and engaging dinner, simply serve a larger portion per person! A serving of 3-4 taco cups, perhaps alongside a fresh salad or some rice, makes for a satisfying and exciting main course. They’re a fantastic way to make taco night more interactive and less messy for the whole family.
Can you use chicken or other proteins in mini taco cups instead of beef?
Yes, the versatility of this recipe extends to the protein! You can easily substitute the ground beef with other options. Shredded chicken, seasoned with taco spices, makes for a lighter alternative. Ground turkey is another popular choice for a leaner filling, and it also absorbs flavors wonderfully. For those who enjoy a bit more spice, ground chorizo can add a fantastic depth of flavor. You could even explore plant-based options like seasoned black beans, lentils, or a meat substitute for a vegetarian-friendly version. Just ensure your chosen protein is thoroughly cooked and well-seasoned before filling the cups.
More Delicious Recipes You’ll Love
If you enjoyed these mini taco cups, here are some other flavorful recipes that you might like to try for your next meal or gathering:
- Paleo Taco Dip: A creamy, zesty dip packed with flavor, perfect for healthy snacking.
- Ground Beef Tostadas: Crispy tortillas loaded with seasoned beef and fresh toppings for a satisfying meal.
- Taco Stuffed Zucchini Boats: A lighter, low-carb alternative that still delivers all the classic taco taste.
Mini Taco Cups (Gluten Free)
Leave a Review
Pin Recipe
Ingredients
- ½ lb ground beef
- 1-2 tsp taco seasoning, see notes for AIP
- 4 grain-free tortillas, I use Siete almond flour tortillas
- ⅓ cup shredded cheese, optional, omit for AIP
For the toppings
- Chopped cilantro
- Sliced green onion
- Sliced black olives
- Diced avocado
- Shredded lettuce
- Salsa, omit for AIP
- Lime juice
Instructions
-
Preheat the oven to 375 F and lightly grease a muffin tin.
-
Add the ground beef to a pan over medium heat and season. Crumble and brown until cooked through. Set aside.
-
Slice your tortilla into strips and line the muffin tin, covering all of the spaces to make a full shell.
-
Fill the tortilla shells with a large spoonful of beef, filling three-quarters of the way full. Top with cheese if desired.
-
Transfer to the oven and bake for 10-15 minutes or until the tortillas are crisp.
-
Allow to cool slightly and carefully remove from the muffin tin. Transfer to a plate and add toppings of your choice.
Notes
All nutritional information are estimations and will vary. Estimations do not include optional ingredients.
Did you Make this Recipe?Tag @unboundwellness on Instagram and hashtag #unboundwellness!
Want to save this recipe for later?
Sign up for our newsletter to have delicious recipes like this one sent straight to your inbox! You’ll never miss a meal idea and always have inspiration on hand. Click here to subscribe.