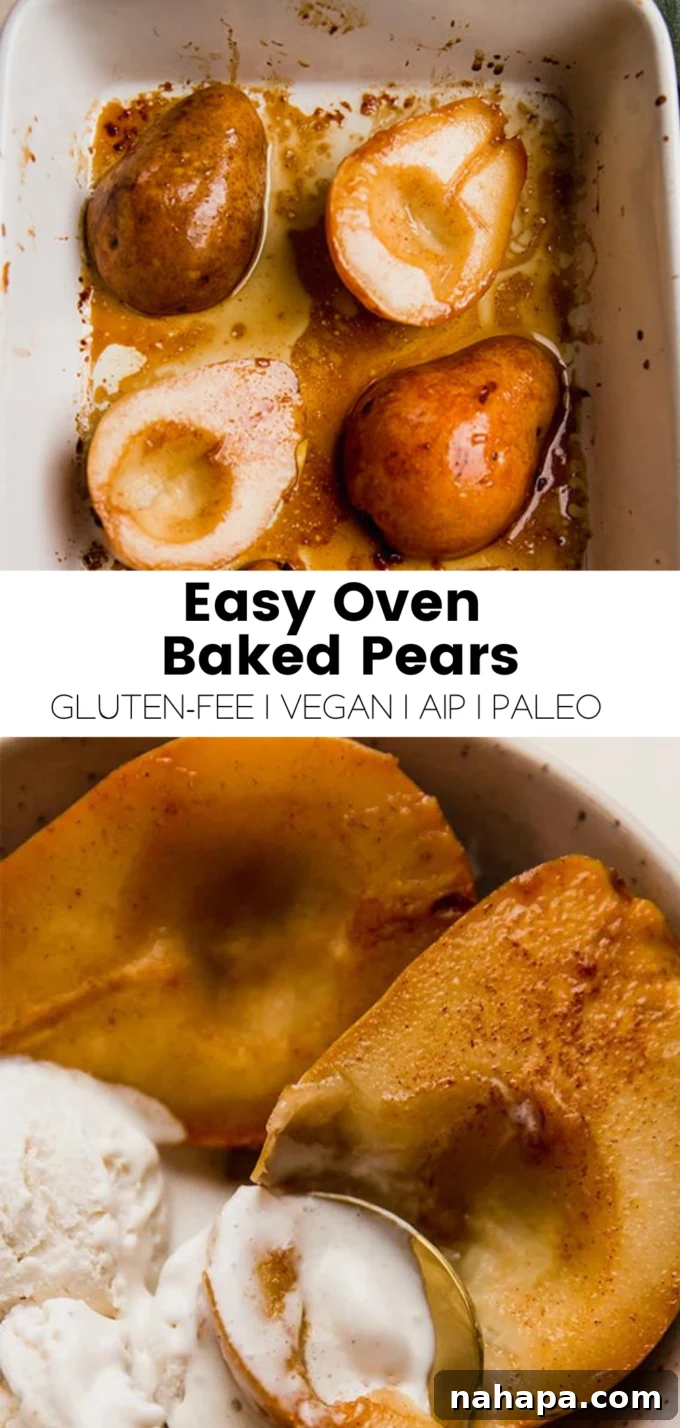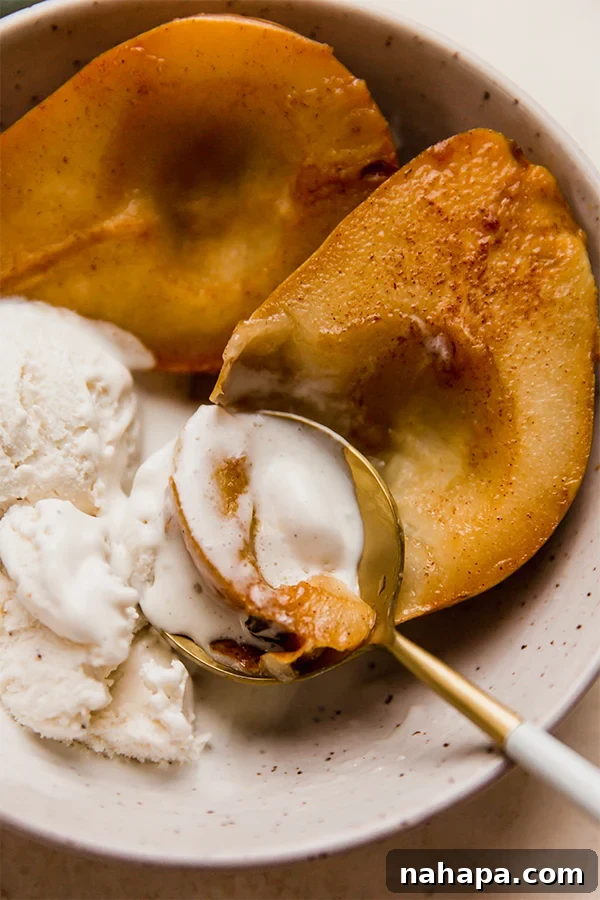
Easy & Healthy Oven-Baked Pears: Your Simple Winter Dessert Guide
As the days grow shorter and the air turns crisp, our cravings often shift towards comforting, warm treats. While holiday seasons are synonymous with elaborate pies and festive cookies, sometimes the simplest pleasures are the most satisfying. Enter the humble pear, transformed into a remarkably elegant and utterly delicious dessert with minimal effort. Our recipe for oven-baked pears is designed for those moments when you desire a wholesome, quick, and irresistibly sweet indulgence without the fuss.
These naturally sweetened, tender baked pears are the epitome of simple sophistication. They require just a handful of wholesome ingredients and a straightforward baking process, making them an ideal last-minute dessert or a delightful healthy breakfast option. Whether you’re navigating a busy holiday schedule, hosting an impromptu gathering, or simply treating yourself to a nutritious snack, these oven-baked pears offer a perfect blend of warmth, flavor, and ease.
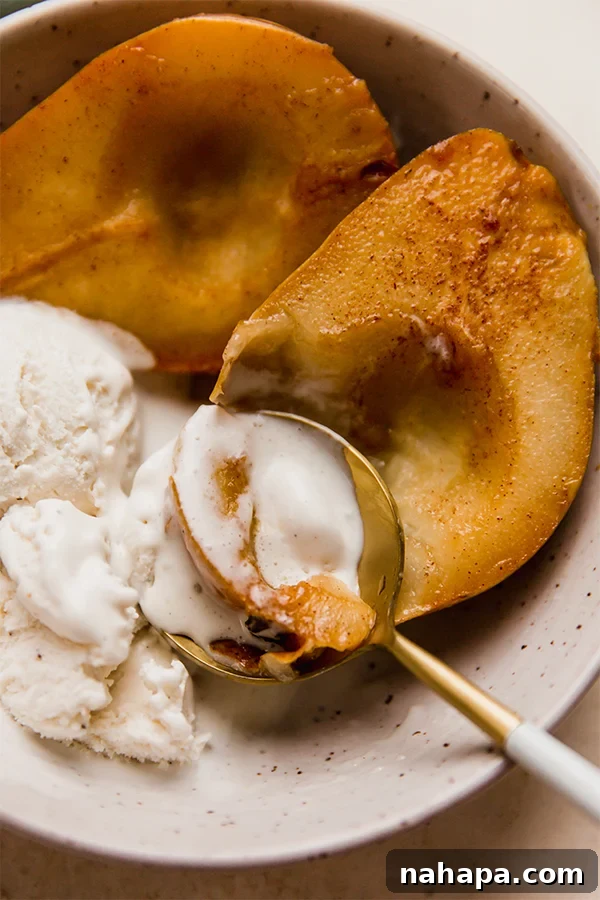
Why Oven-Baked Pears Will Become Your Go-To Dessert
There’s a special charm to a dessert that feels luxurious yet requires minimal effort. These oven-baked pears perfectly embody that charm, offering numerous reasons why they’ll quickly become a staple in your kitchen:
- Effortlessly Easy & Time-Saving: Forget about complicated pastry work or lengthy prep times. This recipe is incredibly straightforward, involving just a few steps of slicing, seasoning, and baking. It’s perfect for beginner bakers or anyone looking for a quick dessert solution that doesn’t compromise on taste. From start to finish, you’re looking at less than 40 minutes, making it ideal for busy weeknights or last-minute entertaining.
- Wholesome, Real Food Ingredients: At the heart of this dish are fresh, ripe pears, complemented by natural sweeteners like honey and coconut sugar. We steer clear of refined sugars, artificial flavors, or unnecessary additives. This makes it a fantastic option for those following a clean eating lifestyle, or anyone simply seeking a healthier alternative to traditional sugary desserts. You can feel good about indulging in a treat that celebrates the natural goodness of fruit.
- Naturally Delicious & Nutrient-Rich: Pears are packed with dietary fiber, vitamins (like Vitamin C and K), and antioxidants. Baking them gently enhances their natural sweetness and brings out their juicy, tender texture. The addition of warm spices like cinnamon and ginger not only elevates the flavor profile but also introduces additional health benefits, making this a truly nourishing dessert.
- Incredibly Versatile: While perfect as a standalone dessert, these baked pears are also wonderfully adaptable. Serve them warm with a scoop of vanilla ice cream, a dollop of whipped cream, or a sprinkle of toasted nuts for added crunch. They can even double as a healthy breakfast alongside Greek yogurt or oatmeal, or a light snack throughout the day.
- Seasonal Comfort: Pears are at their peak during the fall and winter months, making this recipe a celebration of seasonal produce. The warm spices and tender fruit create a comforting aroma that fills your home, embodying the cozy spirit of colder seasons. It’s a dish that warms you from the inside out.
Essential Ingredients for Your Perfect Baked Pears
Crafting these delectable oven-baked pears requires only a handful of readily available ingredients. Each component plays a crucial role in achieving the optimal flavor and texture. Here’s a closer look at what you’ll need and why:
- Fresh Pears: The star of our show! While you can experiment with various types, Bartlett pears are highly recommended for their sweet flavor, soft texture when baked, and tendency to hold their shape well. Other excellent choices include Bosc (firmer, holds shape well, slightly spicier), Anjou (sweet, juicy, smooth texture), or Comice (very sweet, juicy, melts in your mouth). Choose pears that are ripe but still firm to the touch, avoiding any with soft spots or blemishes.
- Ghee or Coconut Oil: These healthy fats are essential for preventing the pears from sticking to the baking dish and helping the spices and sweeteners adhere beautifully, promoting a lovely caramelization.
- Ghee: Clarified butter, ghee offers a rich, nutty flavor and is often tolerated by those sensitive to dairy due to the removal of milk solids. It’s a wonderful choice for its buttery taste.
- Coconut Oil: A fantastic dairy-free and vegan alternative. Opt for unrefined coconut oil for a subtle coconut aroma, or refined coconut oil if you prefer no coconut flavor. It’s also suitable for an AIP (Autoimmune Protocol) diet. If you tolerate dairy, unsalted butter can also be used for a classic flavor.
- Lemon Juice: A squeeze of fresh lemon juice is not just for flavor; it’s a critical element that brightens the pears’ natural sweetness and prevents them from over-browning, helping them maintain their appealing golden hue. It adds a subtle tang that balances the sweetness perfectly.
- Natural Sweeteners (Coconut Sugar & Honey): We use a combination of these natural sweeteners to achieve a rich, caramelized coating without relying on refined sugars.
- Coconut Sugar: A less processed alternative to brown sugar, coconut sugar boasts a caramel-like flavor similar to brown sugar but with a lower glycemic index. It contributes to a beautiful golden-brown crust. You can easily substitute it with brown sugar if preferred.
- Honey: This liquid sweetener adds moisture and a distinct floral sweetness, aiding in the caramelization process. For a vegan option or a different flavor profile, maple syrup is an excellent substitute, offering a rich, earthy sweetness.
- Warming Spices (Cinnamon & Ground Ginger): These spices are key to transforming the simple baked pear into a comforting, aromatic dessert.
- Cinnamon: A classic pairing with apples and pears, cinnamon provides a warm, sweet, and slightly woody note that is inherently comforting.
- Ground Ginger: Adds a delightful zing and a comforting warmth, perfectly complementing the sweetness of the pears and enhancing the overall flavor profile. A small amount goes a long way to introduce that inviting, subtle spice.
Step-by-Step Guide: Crafting Your Perfect Oven-Baked Pears
Creating these delightful baked pears is incredibly simple. Follow these easy steps to achieve tender, sweet, and perfectly spiced fruit every time.
- Preheat Your Oven & Prepare Your Dish: Begin by preheating your oven to a moderate 350°F (175°C). While the oven heats, lightly grease a shallow baking dish with your chosen fat – coconut oil or ghee. This prevents sticking and helps in achieving that beautiful golden crust. Ensure the dish is large enough to accommodate the pear halves without overcrowding them, allowing for even baking.
- Prepare the Pears: Wash the pears thoroughly under cool running water. Carefully slice each pear in half lengthwise, from stem to base. Using a small spoon or melon baller, gently scoop out the fibrous core and seeds from the center of each pear half. You can also trim a tiny bit off the rounded back of each pear half if needed, to create a flat surface, ensuring they sit steadily in the baking dish without wobbling.
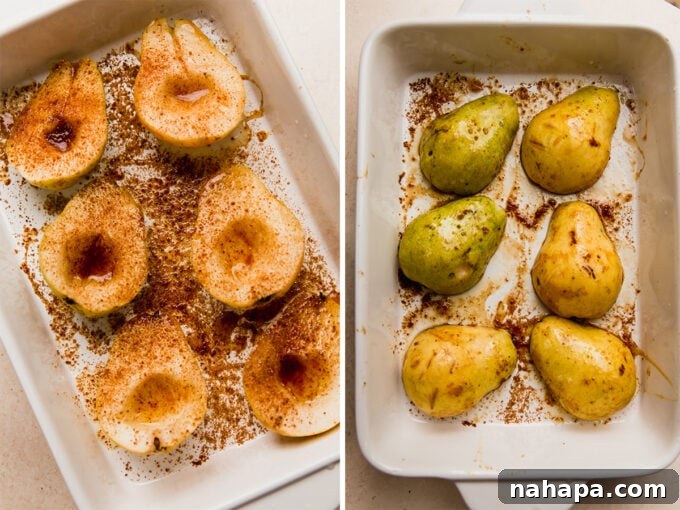
- Arrange and Season: Place the pear halves into your prepared baking dish. Initially, arrange them flesh-side up. Drizzle the fresh lemon juice evenly over the cut surfaces of the pears. In a small bowl, combine the cinnamon, ground ginger, coconut sugar, and honey (or maple syrup). Stir well to create a fragrant, slightly sticky seasoning mixture.
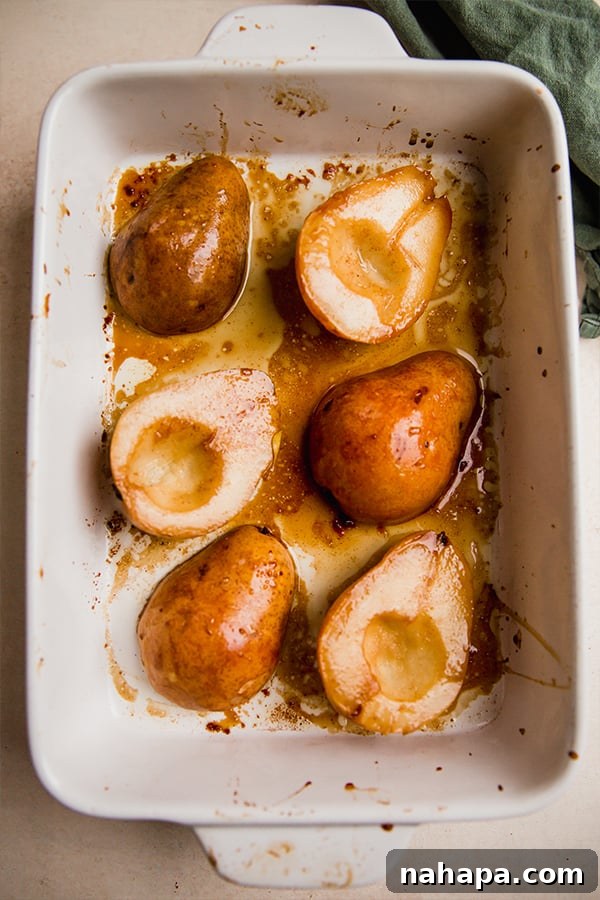
- Coat for Maximum Flavor: Spoon the spice and sweetener mixture generously over the flesh of each pear half. Now, here’s a crucial step for even flavor distribution: gently rotate and flip the pear halves a few times within the dish, ensuring all cut sides are thoroughly coated with the delicious topping. The melted ghee or coconut oil in the dish will help the mixture adhere. Once coated, arrange the pears cut-side down and skin-side up in the baking dish. This orientation helps to tenderize the flesh and allows the sugars to caramelize beautifully on the skin.
- Bake to Perfection: Transfer the baking dish to your preheated oven. Bake uncovered for approximately 20 to 25 minutes. The baking time can vary slightly depending on the pear variety and their ripeness – firmer pears may need a few extra minutes. You’ll know they’re done when the pears are fork-tender, easily pierced with a fork, and the topping has transformed into a rich, bubbly, caramelized glaze.
- Serve Warm and Enjoy: Once baked, carefully remove the dish from the oven. Allow the pears to cool slightly for a few minutes before serving. The warmth brings out their incredible aroma and enhances their natural sweetness. They are truly delightful on their own, but even better when paired with your favorite accompaniments!
Choosing the Best Pears for Baking
The type of pear you choose can significantly impact the final texture and flavor of your baked dessert. While many varieties work well, some are better suited for baking due to their ability to hold shape and their inherent sweetness.
- Bartlett Pears: As mentioned, Bartletts are an excellent choice. They are juicy, sweet, and become wonderfully tender when baked without turning mushy. Their classic pear flavor truly shines.
- Bosc Pears: These pears have a firmer, denser flesh and a slightly spicier flavor. They maintain their shape exceptionally well during baking, offering a lovely texture contrast.
- Anjou Pears: Green or red Anjous are sweet, juicy, and have a smooth texture. They bake up beautifully, becoming soft and succulent.
- Comice Pears: Known for their exceptionally sweet and juicy, melt-in-your-mouth texture, Comice pears are a luxurious choice for baking, though they might become slightly softer than other varieties.
Tip for Success: Always choose pears that are ripe but still firm. Overly soft pears might become too mushy, while unripe pears won’t soften enough or develop their full flavor during baking. A gentle give near the stem indicates perfect ripeness.
Delicious Customization & Variations
One of the best things about this baked pear recipe is its flexibility! Feel free to get creative and customize it to your taste or what you have on hand.
- Add a Crunchy Topping: Before baking, sprinkle the pears with a mixture of chopped nuts (pecans, walnuts, or almonds are excellent), gluten-free oats, or even a simple streusel topping for added texture and flavor.
- Spice It Up: Beyond cinnamon and ginger, consider adding a pinch of nutmeg, cardamom, or a touch of allspice for a more complex spice blend, especially fitting for autumn and winter.
- Citrus Zest: Grate a little orange or lemon zest over the pears before baking for an extra burst of fresh, aromatic flavor.
- Dried Fruits: Tuck a few raisins, dried cranberries, or chopped dates into the cored cavity of the pears before baking for added sweetness and chewiness.
- A Hint of Alcohol: For an adult twist, a splash of brandy, rum, or pear liqueur can be drizzled over the pears before baking for an enhanced flavor depth.
Irresistible Serving Suggestions
While these oven-baked pears are delightful on their own, pairing them with the right accompaniments elevates them to an extraordinary dessert experience. Here are some of our favorite ways to serve them:
- Classic Creamy Toppings:
- Whipped Cream: A dollop of light, airy whipped cream is a timeless choice, offering a refreshing contrast to the warm pears. For a dairy-free option, coconut whipped cream is an excellent alternative that’s equally luxurious.
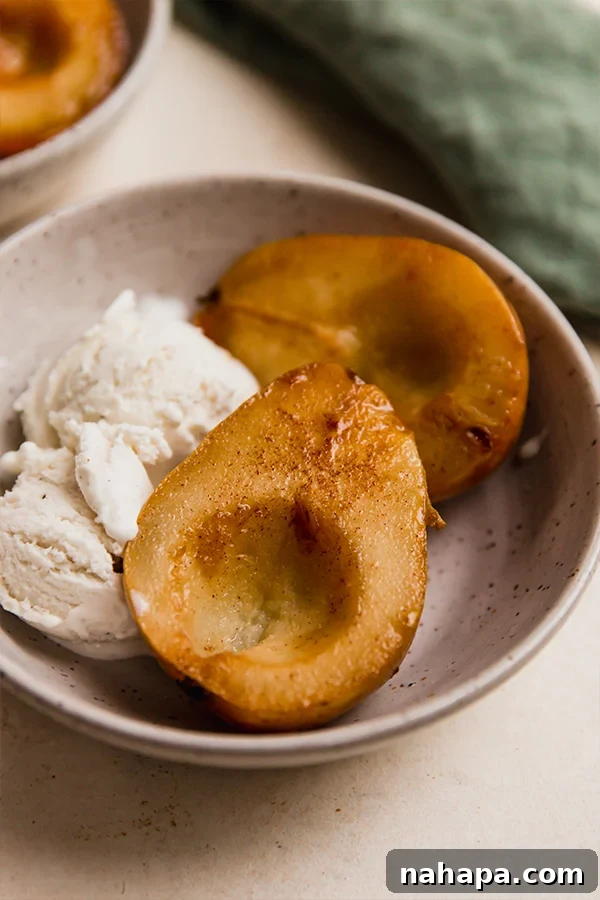
- Ice Cream: A scoop of your favorite vanilla bean ice cream (or a dairy-free vanilla alternative like Cosmic Bliss dairy-free ice cream) provides a comforting warm-and-cold sensation. Other flavors like caramel or cinnamon ice cream would also be exquisite.
- Greek Yogurt: For a lighter, protein-packed option, a spoonful of plain or vanilla Greek yogurt offers a creamy, tangy balance, making this dessert suitable even for breakfast.
- Nutty & Crunchy Additions:
- Toasted Nuts: A sprinkle of roasted almonds, pecans, or walnuts adds a delightful crunch and a depth of nutty flavor that complements the soft pears beautifully.
- Granola: A handful of your favorite crunchy granola can add texture and an extra layer of flavor, especially if you’re enjoying the pears for breakfast or a hearty snack.
- Sauces & Drizzles:
- Caramel Sauce: A warm drizzle of homemade caramel sauce takes this dessert to an indulgent level.
- Maple Syrup: A simple additional drizzle of maple syrup can enhance the natural sweetness.
Storage & Reheating Tips
These oven-baked pears are undoubtedly best enjoyed fresh, when they’re warm and the spices are most aromatic. However, you can certainly prepare them in advance or save leftovers for later.
- Storage: Allow any leftover baked pears to cool completely to room temperature. Store them in an airtight container in the refrigerator for up to 3-4 days.
- Reheating: To reheat, place the pears back into an oven-safe dish and warm them in a preheated oven at 300°F (150°C) for about 5-10 minutes, or until just warmed through. Be careful not to overcook them, as they can become too soft. You can also gently warm them in a microwave for 30-60 seconds, but the oven method is preferred for maintaining texture and flavor.
The Wholesome Goodness of Pears
Beyond their delightful taste and versatility, pears are a nutritional powerhouse, making this dessert not just a treat for your taste buds but also for your body. Here’s a quick look at some of the health benefits:
- Rich in Fiber: Pears are an excellent source of dietary fiber, particularly soluble fiber, which is vital for digestive health. Fiber helps regulate blood sugar levels, promotes satiety, and can contribute to a healthy gut microbiome.
- Packed with Antioxidants: These fruits are rich in antioxidants, including flavonoids and phytonutrients, which help combat oxidative stress and inflammation in the body, supporting overall cellular health.
- Good Source of Vitamins and Minerals: Pears provide essential vitamins like Vitamin C (an immune booster) and Vitamin K (important for bone health and blood clotting), along with minerals such as potassium and copper.
- Natural Sweetness: Relying on the natural sugars in pears, honey, and coconut sugar reduces the need for refined sugars, providing a more stable energy release and fewer adverse health effects.
Embracing desserts like these oven-baked pears allows you to enjoy sweet treats while nourishing your body with natural, wholesome ingredients.
You’ll Also Love These Wholesome Desserts!
If you enjoyed the simplicity and deliciousness of these oven-baked pears, be sure to explore some of our other favorite healthy and easy-to-make desserts:
- Air Fryer “Baked” Apples: Another fantastic warm fruit dessert made even quicker in an air fryer.
- The Best Caramelized Pears: For a slightly different take, these caramelized pears offer another layer of rich, sweet flavor.
- Paleo Apple Crisp: A comforting, grain-free, and nut-free option that’s perfect for any occasion.
Easy Oven Baked Pears Recipe
These oven-baked pears are the perfect easy dessert! Serve them with some whipped cream or ice cream, and enjoy!
Yield:
3 servings
Prep Time:
10 minutes
Cook Time:
25 minutes
Total Time:
35 minutes
Ingredients
- 3 Bartlett pears
- 1 tbsp ghee, melted (substitute coconut oil for AIP or butter if tolerated)
- Juice of ¼ lemon
- ½ tsp cinnamon
- ¼ tsp ground ginger
- 1 tbsp honey (substitute maple syrup for a vegan option)
- 2 tbsp coconut sugar (substitute brown sugar if preferred)
Instructions
- Preheat the oven to 350°F (175°C) and lightly grease a shallow baking dish with coconut oil or ghee. Set aside.
- Slice each pear in half lengthwise and use a spoon to scoop out the seeds and core.
- Place the pear halves into the prepared baking dish, flesh side up. Drizzle with lemon juice.
- In a small bowl, combine cinnamon, ground ginger, honey, and coconut sugar. Spoon this mixture generously over the cut surfaces of the pears.
- Gently rotate and flip the pears a few times within the dish to ensure all cut sides are coated. Then, arrange the pears cut-side down, skin-side up in the baking dish.
- Bake uncovered for 20-25 minutes, or until the pears are fork-tender and the topping is bubbly and caramelized.
- Carefully remove from the oven and serve slightly warm. Enjoy on their own or with your favorite toppings like coconut whipped cream or ice cream.
Notes
All nutritional information provided is an estimation and may vary based on specific ingredients and brands used. Estimations do not include optional serving ingredients.
Nutrition (per serving, estimated)
- Serving Size: 1 pear half
- Calories: 195 kcal
- Carbohydrates: 40.9 g
- Protein: 0.9 g
- Fat: 4.3 g
- Fiber: 4.8 g
Please remember that all nutrition facts are estimated and will vary.
Made this delicious recipe? We’d love to see it! Tag @unboundwellness on Instagram and use the hashtag #unboundwellness to share your creation!