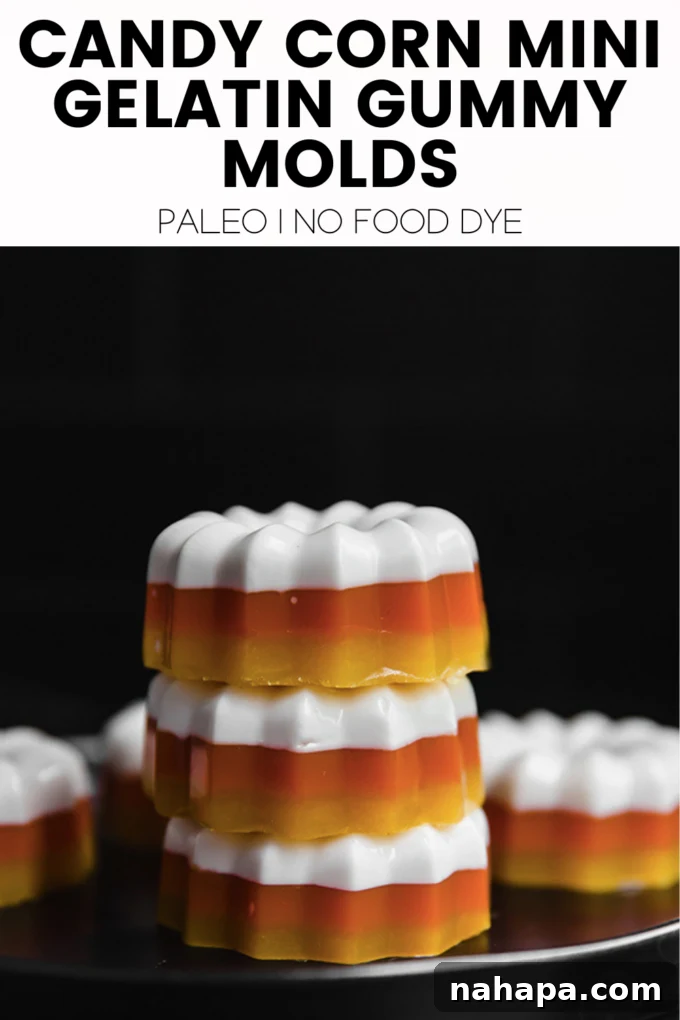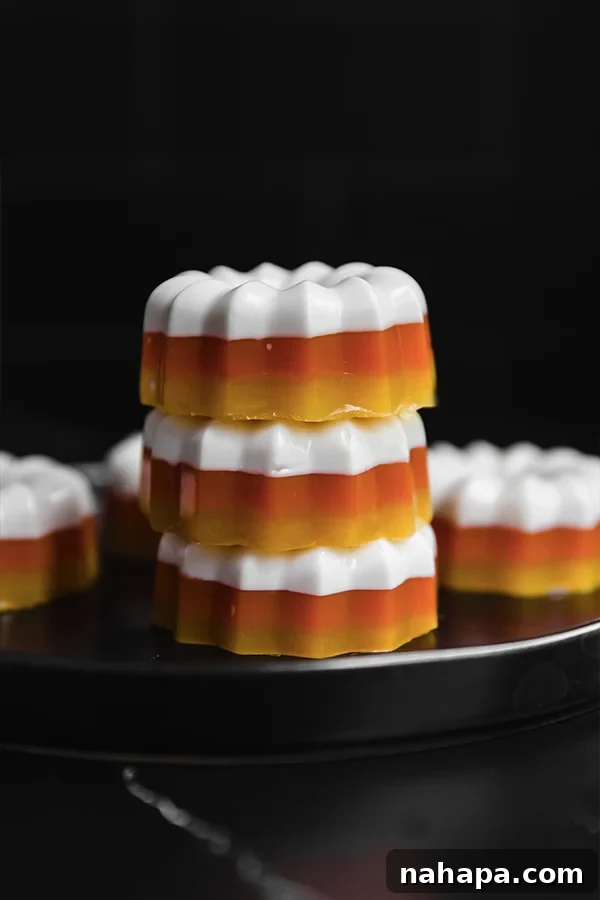
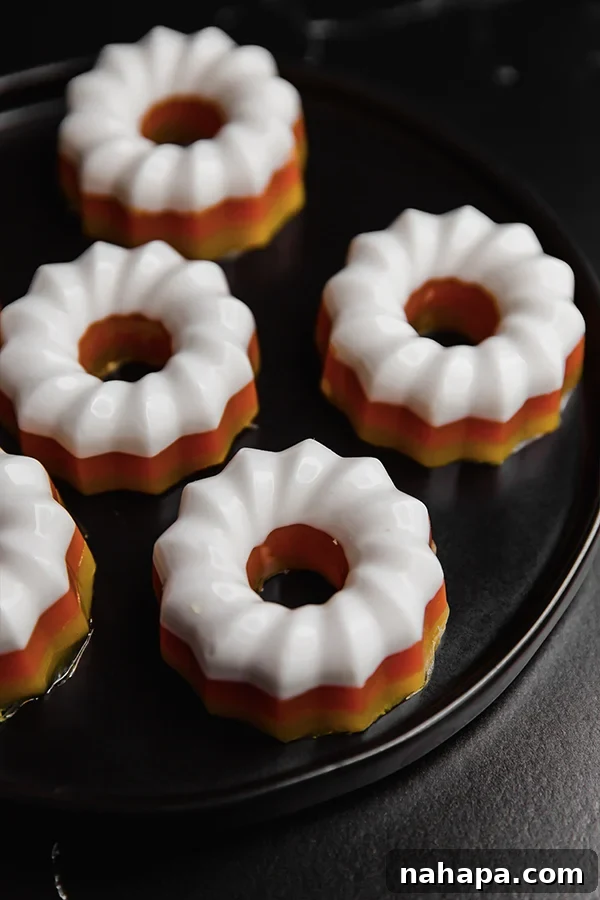
Step back in time with a healthier twist on a classic Halloween favorite! These candy corn mini gelatin molds capture all the nostalgic charm of traditional candy corn without any of the questionable ingredients. Perfect for those seeking paleo-friendly options, this recipe proudly features natural colors, real flavors, and absolutely no artificial food dyes or corn syrup. Get ready to enjoy a guilt-free, delicious treat that’s as fun to make as it is to eat!
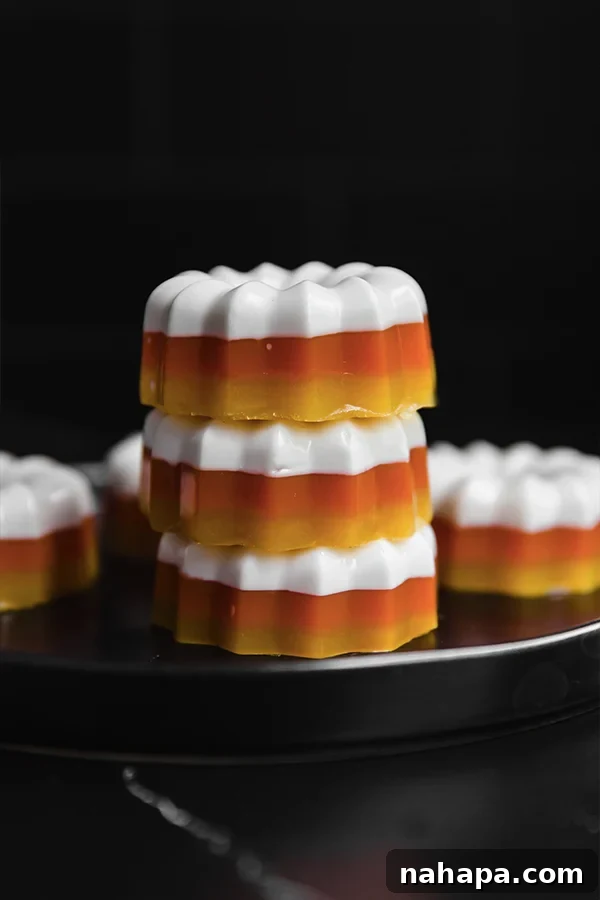
Healthy & Homemade Candy Corn Gelatin Gummies: Your Perfect Paleo, Dye-Free Halloween Treat
Candy corn has always been a divisive topic among Halloween enthusiasts. Love it or hate it, its iconic tri-color design is synonymous with autumn festivities. While many adore its unique taste, the traditional version is notorious for being packed with artificial food dyes, corn syrup, and other less-than-desirable ingredients. But what if you could recreate that beloved candy corn experience in a way that aligns with a healthier lifestyle, free from artificial additives and full of wholesome goodness?
Enter our delightful recipe for Candy Corn Mini Gelatin Gummy Molds! This innovative approach transforms the classic treat into a nutritious, paleo-friendly gummy. Made entirely with real, natural ingredients, these charming molds are simple to prepare and offer a refreshing, guilt-free alternative for Halloween or any time you crave a touch of nostalgia. They’re not just a dessert; they’re a celebration of natural flavors and mindful eating, ensuring everyone can enjoy the festive spirit without compromise.
Why Choose Homemade Healthy Candy Corn?
The appeal of making your own candy corn goes far beyond just a fun kitchen project. Commercial candy corn often contains ingredients like high-fructose corn syrup, artificial colors (Yellow #5, Yellow #6, Red #40), and artificial flavors, which many people choose to avoid due to dietary restrictions, sensitivities, or a general preference for natural foods. By crafting your own gelatin gummies, you gain complete control over what goes into your treats.
- No Artificial Dyes: We achieve the vibrant white, orange, and yellow hues using natural sources like full-fat coconut milk, fresh carrot juice, ripe mango, and a touch of turmeric. These natural pigments provide beautiful colors without any synthetic chemicals.
- No Corn Syrup: Instead of refined sugars and high-fructose corn syrup, this recipe utilizes natural sweeteners like raw honey. Honey provides a gentle sweetness and beneficial compounds, offering a much healthier alternative that still satisfies your sweet tooth.
- Paleo-Friendly & Gut-Supportive: With ingredients carefully selected for their natural origins and minimal processing, these gummies fit perfectly into a paleo diet. Furthermore, gelatin, a key component, is known for its potential benefits for gut health, promoting digestive wellness and contributing to healthy skin, hair, and nails.
- Customizable Sweetness & Flavors: Making candy corn from scratch allows you to adjust sweetness levels to your preference. You can also experiment with different fruit and vegetable juices to create unique color variations and flavor profiles, making each batch a personalized treat.
- A Fun & Educational Activity: Preparing these gummies can be a wonderful activity for families, teaching children about natural ingredients and the process of making healthy snacks from scratch.
This recipe offers a delicious and engaging way to enjoy the festive spirit of candy corn without the worry, proving that healthy treats can be just as exciting, flavorful, and visually appealing as their traditional counterparts.
The Essential Ingredients for Your Natural Candy Corn Molds
Crafting these beautiful and tasty candy corn gummies requires a thoughtful selection of ingredients, each playing a crucial role in achieving the desired color, flavor, and texture. Here’s a closer look at what you’ll need:
- Coconut Milk (Full-Fat). This is the star ingredient for creating the opaque, creamy white layer at the base of your candy corn. Opt for full-fat coconut milk to ensure a rich texture and vibrant white color. Its natural fats also help the gelatin set beautifully and provide a lovely subtle flavor that complements the fruity layers. Ensure you’re using canned full-fat coconut milk, not the beverage type, for the best consistency.
- Carrot Juice. For the iconic orange middle layer, fresh carrot juice is an excellent natural choice. It imparts a beautiful, earthy orange hue and a touch of natural sweetness. You can use high-quality store-bought 100% carrot juice (without added sugars or preservatives) or juice your own carrots for the freshest taste and maximum nutritional benefits.
- Mango and Orange Juice. These two ingredients combine to form the bright, sunny yellow top layer. Ripe mango adds a tropical sweetness and helps deepen the yellow color, while fresh orange juice provides a tangy citrus note, balancing the overall flavor. Blending fresh or frozen diced mango ensures maximum flavor and natural pigment. For an even more intense yellow, a tiny pinch of ground turmeric can optionally be added, which won’t significantly affect the flavor but will boost the color.
- Gelatin. This is the backbone of our gummy molds, essential for setting the liquids into a firm yet jiggly texture. High-quality unflavored gelatin powder is crucial for this recipe. It’s important to note that collagen powder cannot be used as a substitute for gelatin. While both are derived from collagen, only gelatin has the unique gelling properties that allow liquids to solidify and hold their shape when cooled. Using collagen will result in a liquid or very soft mixture that won’t hold the candy corn form.
- Honey. Used as a natural sweetener, honey beautifully balances the flavors of the fruit and vegetable juices. Its golden hue also complements the overall color scheme of candy corn. While other natural sweeteners like maple syrup could be used, be mindful that they might subtly alter the final color of your layers. Adjust the amount of honey to your personal sweetness preference; taste the mixtures before adding gelatin for an accurate assessment.
- Pumpkin Puree (for orange layer). A small amount of pumpkin puree not only enhances the orange color but also adds a subtle earthy depth and a creamy texture to the middle layer, perfectly complementing the carrot juice. Make sure to use 100% pure pumpkin puree, not pumpkin pie filling.
Each ingredient is chosen not only for its flavor and color contribution but also for its natural, wholesome properties, ensuring your candy corn gummies are truly a better-for-you treat, packed with flavor and free from artificial additives.
Recommended Tools for Perfect Gelatin Molds
Having the right kitchen tools can significantly streamline the process and enhance the outcome of your homemade candy corn gelatin molds. While the recipe is adaptable, these specific items will ensure the best results:
- The Candy Corn Gelatin Mold. The success and aesthetic appeal of this recipe heavily rely on using a suitable mold that produces the classic candy corn shape. The measurements provided in this recipe are calibrated for a specific mini gelatin mold. Using this exact mold will help you achieve consistent layers and an authentic look, mimicking traditional candy corn. If you opt for a different mold shape or size, the quantity of each layer might need adjustment to ensure even distribution and the desired tri-color balance. The key is to ensure that the total volume of your liquid mixtures is appropriate for your chosen mold’s capacity.
- Teaspoon Measuring Tool. Precision is paramount when layering multiple colors. A standard set of measuring spoons, particularly the teaspoon, will be your best friend for carefully spooning each liquid layer into the mold cavities. This meticulous approach helps prevent spills, ensures clean lines between colors, and guarantees that each color layer is uniform in thickness, contributing to the professional look of your gummies.
- Blender. Essential for preparing the vibrant yellow layer, a good quality blender will help you achieve a smooth puree from the diced mango and orange juice. A smooth base is crucial for a consistent gummy texture. After blending, passing the mixture through a fine-mesh strainer is also recommended to remove any fibrous mango bits, ensuring a silky-smooth liquid for your gummy.
- Small Saucepan or Pot. A small saucepan or pot is needed for gently heating the mixtures for each layer. Low heat is critical for thoroughly dissolving the gelatin powder without bringing the mixture to a boil. Boiling can compromise gelatin’s setting ability, leading to a less firm gummy. Gentle heating ensures a smooth, lump-free liquid ready for molding.
- Fine-Mesh Strainer. As mentioned, a fine-mesh strainer is invaluable for the yellow layer, ensuring a perfectly smooth liquid by removing any pulp or fibers from the mango puree. It can also be used to strain other juice mixtures if you desire an ultra-smooth texture.
These tools, combined with a little patience and attention to detail during the layering process, will set you up for success in creating stunning, delicious, and healthy candy corn gelatin molds that are sure to impress.
Frequently Asked Questions About These Healthy Gelatin Gummies
Can I make these candy corn gummies without any added sweetener?
While you certainly can attempt to omit the honey, we strongly recommend including at least a small amount of honey or another natural sweetener of your choice. The juices and coconut milk provide some natural sweetness, but a touch of honey significantly enhances the overall flavor profile, making the gummies truly taste like a delightful treat. Without it, the natural flavors of the fruits and vegetables might be a bit too subtle or slightly tart, especially if using less sweet varieties of juices. The honey also contributes to the authenticity of the candy corn flavor.
How should I serve these candy corn gelatin molds?
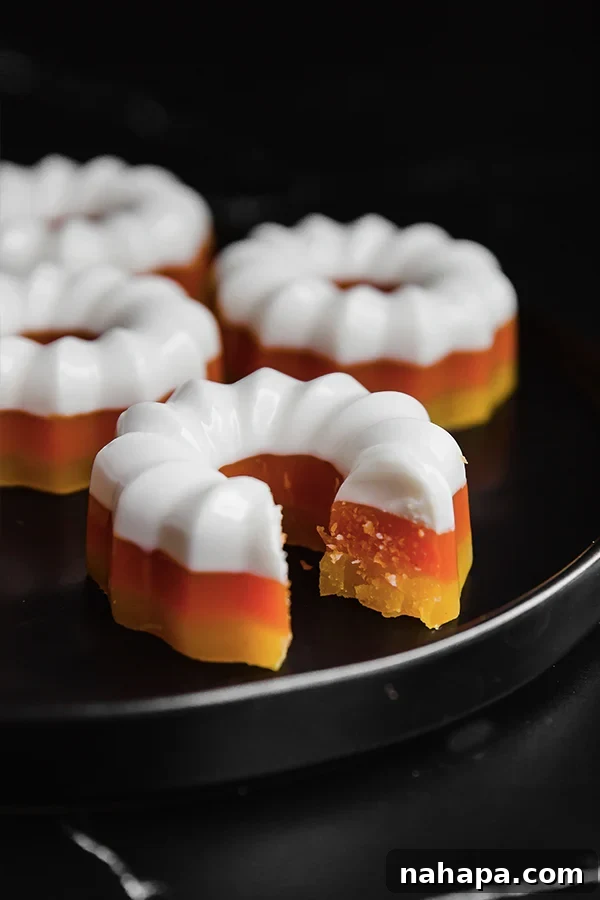
These gelatin gummies are best served thoroughly chilled. The cold temperature is essential for maintaining their firm yet jiggly texture, making them incredibly refreshing and enjoyable. You can serve them directly from the mold, or carefully pop them out onto a decorative serving platter for a more elegant presentation. While they can be eaten by hand, their delicate and soft texture makes enjoying them with a small fork a pleasant experience, especially when served as a delicate dessert or at a Halloween party.
How long do these homemade candy corn gummies last?
When stored properly in an airtight container in the refrigerator, these natural gelatin molds will stay fresh and maintain their optimal texture for up to 5-7 days. Because they are made with fresh, natural ingredients and without artificial preservatives, their shelf life is shorter than commercial candies. It’s always best to consume them within this timeframe for the best taste and quality.
Can I substitute collagen for gelatin in this recipe?
No, unfortunately, collagen powder cannot be substituted for gelatin in this recipe. While both are beneficial for health and derived from similar protein sources, gelatin has unique gelling properties that are essential for these molds to set and hold their specific candy corn shape. Collagen, often sold as “collagen peptides,” dissolves in liquid but does not form a firm gel upon cooling, meaning your gummies would not solidify correctly and would remain liquid or very soft. Ensure you use unflavored gelatin powder (often labeled as “gelatin powder” or “bovine gelatin”) for the successful creation of these vibrant treats.
Can I make these ahead of time for a Halloween party?
Absolutely! These candy corn gelatin molds are an excellent make-ahead treat. You can prepare them up to 2-3 days in advance and store them in an airtight container in the refrigerator. This allows the flavors to fully meld and simplifies your party preparations, giving you more time to enjoy the festivities.
You’ll also love these other healthy Halloween-inspired treats:
- Healthy Pudding “Dirt” Cups
- Bloody Good Red Velvet Cheesecake
- Spooky Healthy Halloween Gummies
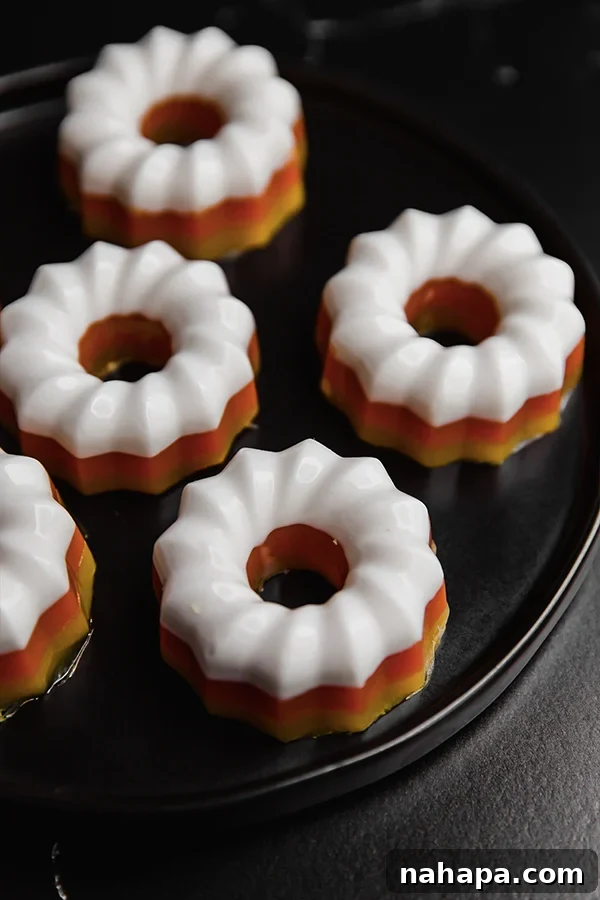
Candy Corn Mini Gelatin Gummy Molds (Paleo, No Food Dye)
6 servings
4 hrs
10 mins
4 hrs 10 mins
Michelle
These candy corn mini gelatin molds are a healthier take on candy corn with a touch of nostalgia! They’re also paleo-friendly and made without any food dyes or corn syrup!
Leave a Review
Pin Recipe
Ingredients
For the white layer
- ½ cup full-fat coconut milk
- 1 ½ tbsp gelatin powder
- 2 tsp honey
For the orange layer
- ½ cup carrot juice
- 1 tbsp pumpkin puree
- 2 tsp honey
- 1 ½ tsp gelatin powder
For the yellow layer
- ½ cup orange juice
- ¼ cup diced mango
- Pinch of turmeric (optional, for enhanced color)
- 2 tbsp gelatin powder
Instructions
- Prepare the White Layer: Combine the ingredients for the white layer (coconut milk, gelatin powder, honey) in a small pot. Whisk gently until the gelatin powder is evenly distributed. Allow the mixture to “bloom” for about 5 minutes, which allows the gelatin to absorb the liquid and soften. Then, move the pot to the stove and heat on low, stirring constantly, until the mixture becomes fully liquid and smooth. Do not let it boil, as this can affect the gelatin’s setting properties.
- Pour the White Layer: Once the white mixture is liquid, remove it from the heat and allow it to cool slightly, ensuring it doesn’t begin to harden. Carefully spoon approximately 4 teaspoons of this warm mixture into each cavity of your chosen candy corn gelatin mold. Precision is key here to ensure even layers and neat lines. Transfer the mold to the refrigerator and let it set and harden completely for 1-2 hours.
- Prepare the Orange Layer: While the white layer is chilling, prepare the orange layer. Combine carrot juice, pumpkin puree, honey, and gelatin powder in a clean small pot. Whisk to combine and allow the gelatin to bloom for 5 minutes. Gently heat on low, stirring continuously, until the mixture is completely liquid and smooth. Remove from heat and allow it to cool slightly before proceeding.
- Pour the Orange Layer: Remove the mold with the set white layer from the fridge. Carefully spoon another 4 teaspoons of the slightly cooled orange layer over the hardened white layer in each cavity. Be gentle to avoid mixing the layers. Return the mold to the refrigerator and allow this orange layer to set and harden for another 1-2 hours.
- Prepare the Yellow Layer: To prepare the vibrant yellow layer, combine the diced mango, orange juice, and the optional pinch of turmeric in a blender. Blend until the mixture is very smooth and consistent. For an ultra-smooth gummy, pass the mixture through a fine-mesh strainer to remove any lingering mango fibers or pulp. Pour this liquid into a clean small pot. Stir in the gelatin powder and allow it to bloom for a few minutes. Heat on low, stirring, until the mixture is fully liquid and thoroughly combined. Let it cool slightly.
- Pour the Yellow Layer: Finally, remove the mold from the fridge once the orange layer is firm to the touch. Carefully pour the remainder of the yellow layer mixture into each cavity, filling it to the top. Transfer the mold back to the fridge for a final hardening period of 1-2 hours, or until all three layers are completely set and firm.
- Un-mold and Serve: Once fully set, carefully un-mold the candy corn gummies. This might require gently prying the edges of the mold away from the gummies or inverting the mold onto a surface. Serve chilled and enjoy your beautiful, homemade, and healthy Halloween treats!
Notes
All nutrition facts provided are estimated values and may vary based on specific ingredients and brands used, as well as exact portion sizes.
For the best visual appeal and easiest layering, ensure each layer cools slightly before pouring onto the previous one, and that each layer is fully set before adding the next. Patience is a virtue in this recipe, especially during the chilling periods!
If you have trouble with un-molding, you can gently run a thin, damp knife around the edges of each gummy before popping them out. Chilling them thoroughly makes this process easier.
Want to Save This Recipe for Later?
Enter your name and email below, and we’ll send this delicious recipe directly to your inbox so you can easily access it whenever you’re ready to make these amazing candy corn gummies!
(Please note: This is a placeholder for a signup form. A functional form would typically be implemented using server-side logic or a separate email service.)
Did you make this delightful recipe?
We’d absolutely love to see your creations! Share your photos on Instagram and tag @unboundwellness. Don’t forget to use the hashtag #unboundwellness so we can find and admire your healthy Halloween treats!