
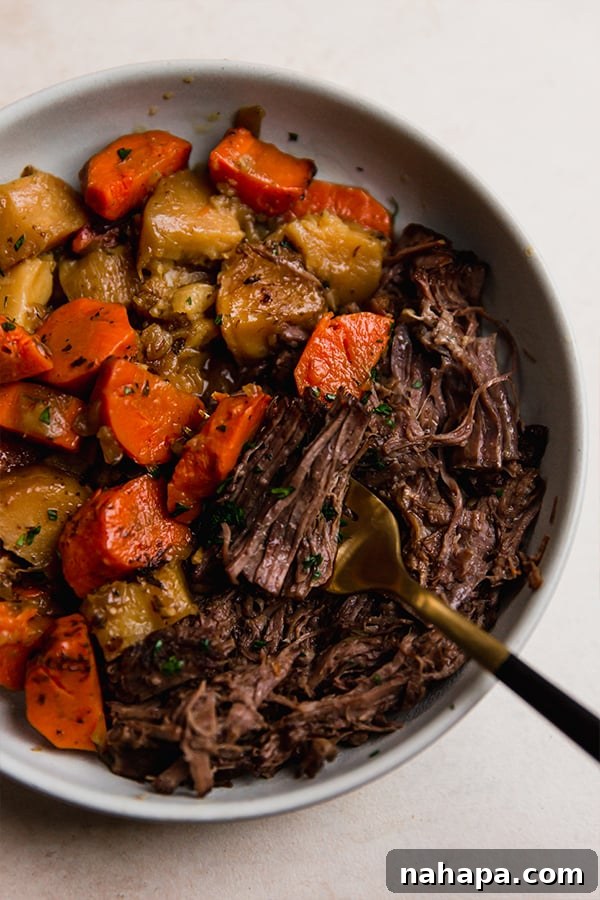
There’s an undeniable warmth and satisfaction that comes with a perfectly cooked pot roast. Imagine fork-tender beef, rich with savory flavors, complemented by a medley of wholesome root vegetables, all simmering together in a luscious gravy. This isn’t just a meal; it’s an experience, a culinary embrace that brings comfort to the soul. If you’ve been searching for the definitive recipe to achieve that melt-in-your-mouth perfection, your quest ends here. This guide will walk you through crafting the ultimate braised chuck roast, transforming a humble cut of meat into an extraordinary culinary masterpiece. We’ll explore the secrets to slow-cooking, ensuring every bite is as tender and flavorful as comfort food should be.
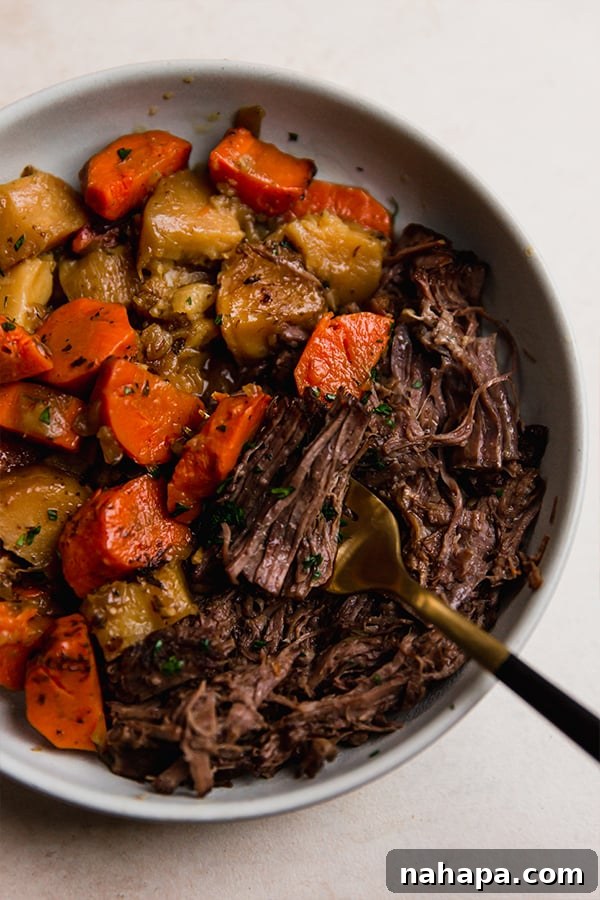
Chuck roast is widely considered the ideal cut for a classic pot roast, known for its ability to become incredibly tender and juicy when cooked low and slow. While many recipes opt for a slow cooker, this oven-braised method offers a superior depth of flavor and a wonderfully even cook, making it surprisingly easy to achieve restaurant-quality results right in your own kitchen. Get ready to impress your family and friends with a hearty meal that’s both simple to prepare and unforgettable to taste.
Unveiling the Magic of Chuck Roast: Why It’s Perfect for Pot Roast
Chuck roast, often labeled as “chuck eye roast,” “shoulder roast,” or simply “pot roast,” is a large, flavorful cut of beef sourced from the shoulder region of the cow. What makes this particular cut so revered for slow-cooked dishes like pot roast is its unique composition. It’s an inherently tough cut, rich in connective tissue and marbling, which might sound counter-intuitive for tenderness. However, it’s precisely these characteristics that, with the right cooking method, unlock unparalleled tenderness and deep, beefy flavor.
When cooked “low and slow” – that is, at a lower temperature for an extended period – the collagen in the connective tissue gradually breaks down into gelatin. This transformation is magical; it not only tenderizes the meat to a point where it literally falls apart with a fork but also enriches the cooking liquid, creating a thick, luxurious sauce that infuses every fiber of the beef. Unlike leaner cuts that can dry out quickly, the marbling (intramuscular fat) in chuck roast renders slowly, keeping the meat moist and succulent throughout the long cooking process.
Beyond its culinary attributes, chuck roast is also an incredibly economical choice. It tends to be significantly more affordable per pound compared to premium cuts like steaks or tenderloins. This makes it an excellent option for feeding a family or preparing multiple meals from a single recipe, without compromising on flavor or quality. Its versatility also means that while it shines in a classic pot roast, it can also be shredded for tacos, sandwiches, or used in stews and chilis. In essence, chuck roast is a culinary powerhouse, offering a perfect blend of rich flavor, incredible tenderness, and budget-friendliness, making it the undisputed champion for your next pot roast endeavor.
Essential Ingredients for a Perfectly Braised Chuck Roast
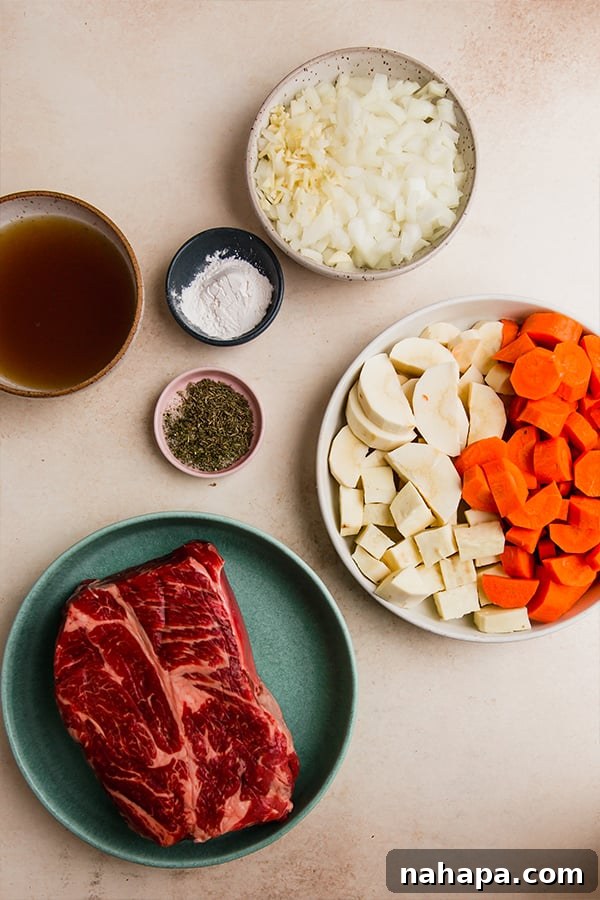
Crafting a truly spectacular braised chuck roast begins with selecting the right ingredients. Each component in this recipe plays a crucial role, contributing to the overall depth of flavor, tender texture, and aromatic experience. Here’s a detailed look at what you’ll need and why:
- Chuck Roast: The star of our dish! Opt for a 3-4 pound cut, preferably with good marbling. This ensures maximum flavor and juiciness as it slowly braises to fall-off-the-bone perfection.
- Salt, Pepper, Dried Parsley, Dried Thyme, Dried Sage, and Garlic Powder: This carefully selected blend of seasonings is fundamental for building a robust flavor profile. Salt enhances the natural taste of the beef, while pepper adds a subtle kick. The dried herbs – parsley, thyme, and sage – infuse the roast with classic, earthy aromatics that are synonymous with comfort food. Garlic powder provides a foundational savory note that complements the fresh garlic.
- Fresh Garlic (minced): While garlic powder provides a consistent base, fresh minced garlic adds a pungent, aromatic layer that truly brightens the dish and creates a more complex flavor.
- Arrowroot Starch: This gluten-free thickener is used to coat the roast before searing, helping to create a beautifully browned crust and contributing to the thickening of the final gravy, giving it a silky smooth texture.
- Avocado Oil: With its high smoke point, avocado oil is perfect for searing the chuck roast, allowing for a golden-brown crust without burning. It’s a neutral-flavored oil that won’t overpower the rich beef taste.
- Coconut Aminos: A fantastic soy-free alternative to soy sauce, coconut aminos add a subtle umami depth and a touch of sweetness, helping to deglaze the pan and create a richer, more complex base for the sauce.
- Yellow Onion: The aromatic cornerstone of many savory dishes, diced yellow onion sweetens as it cooks, providing a foundational flavor and aroma for the entire pot roast.
- Carrots, Parsnip, and White Sweet Potato: These root vegetables are more than just a built-in side dish; they contribute sweetness, earthiness, and a pleasant texture to the braising liquid, absorbing the rich flavors as they cook. Carrots offer natural sweetness, parsnips add a unique, slightly spicy sweetness, and white sweet potatoes provide a creamy texture and mild sweetness. Feel free to adjust the proportions or include other root vegetables like regular potatoes or celery for variation.
- Beef Broth: The primary liquid for braising, high-quality beef broth is essential for tenderizing the meat and forming the rich gravy. Choose a low-sodium option to control the saltiness.
- Red Wine Vinegar: A splash of red wine vinegar adds a crucial acidic brightness that balances the richness of the beef and vegetables, enhancing the overall flavor profile without making the dish taste vinegary. It also helps tenderize the meat.
- Bay Leaves: These dried leaves infuse the braising liquid with a subtle, aromatic, and slightly bitter note that adds complexity and a classic pot roast flavor. Remember to remove them before serving.
- Fresh Parsley (for topping): A final sprinkle of fresh chopped parsley not only adds a pop of vibrant color but also introduces a fresh, herbaceous counterpoint to the rich, savory dish, awakening the palate.
Step-by-Step Guide: Crafting Your Perfect Oven Braised Chuck Roast
Creating a mouth-watering braised chuck roast in the oven is a rewarding culinary journey. This method ensures a deep, rich flavor and meat that practically melts off the bone. Follow these detailed steps for guaranteed success:
- Preheat Your Oven: Begin by preheating your oven to 400°F (200°C). This initial higher temperature is crucial for the first phase of cooking, helping to establish a good sear and kickstart the braising process before settling into a lower, slower cook.
- Prepare the Chuck Roast: Remove your chuck roast from the refrigerator and let it sit at room temperature for about 30 minutes before you begin. This helps the meat cook more evenly and encourages a crispier sear. Pat the roast thoroughly dry with paper towels; a dry surface is essential for achieving a good brown crust. Generously season both sides of the roast with half of your salt, pepper, dried parsley, dried thyme, dried sage, and garlic powder. Once seasoned, lightly coat both sides with arrowroot starch. This not only aids in browning but also helps thicken the sauce later.
- Sear the Roast to Perfection: Place a large, oven-safe Dutch oven or a heavy-bottomed pot with a lid over medium-high heat. Add the avocado oil and let it heat until shimmering. Carefully place the seasoned and starched chuck roast into the hot oil. Sear for 2-4 minutes on each side, or until a beautiful, golden-brown crust forms. This crucial step, known as the Maillard reaction, develops deep, complex flavors that are essential to a great pot roast. Once seared, remove the roast from the pot and set it aside on a clean plate.
- Deglaze the Pan: With the pot still on medium heat, pour in the coconut aminos. Use a wooden spoon to scrape up any browned bits (fond) stuck to the bottom of the pot. These bits are packed with flavor and will contribute significantly to your sauce. This process is called deglazing.
- Sauté the Aromatics and Vegetables: Add the diced yellow onion and minced garlic to the pot. Sauté for 3-4 minutes, stirring occasionally, until the onion becomes lightly translucent and fragrant. Next, add the remainder of your prepared vegetables—carrots, parsnip, and white sweet potato—to the pot. Sauté for another 5 minutes, allowing them to soften slightly and absorb the flavors from the pan. Season these vegetables with the remaining half of your dried parsley, dried thyme, dried sage, and garlic powder.
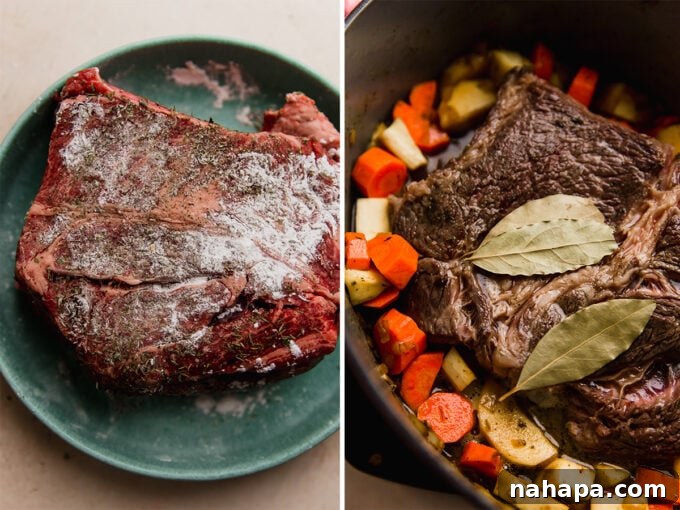
- Assemble and Begin Braising: Gently push the sautéed vegetables to the sides of the pot, creating a space in the center for the chuck roast. Carefully return the seared roast to this space. Pour the beef broth and red wine vinegar over the roast and vegetables. Add the bay leaves on top of the roast. Ensure the liquid comes about halfway up the sides of the roast (you might need a little more or less broth depending on your pot and roast size). Place the lid securely on the Dutch oven.
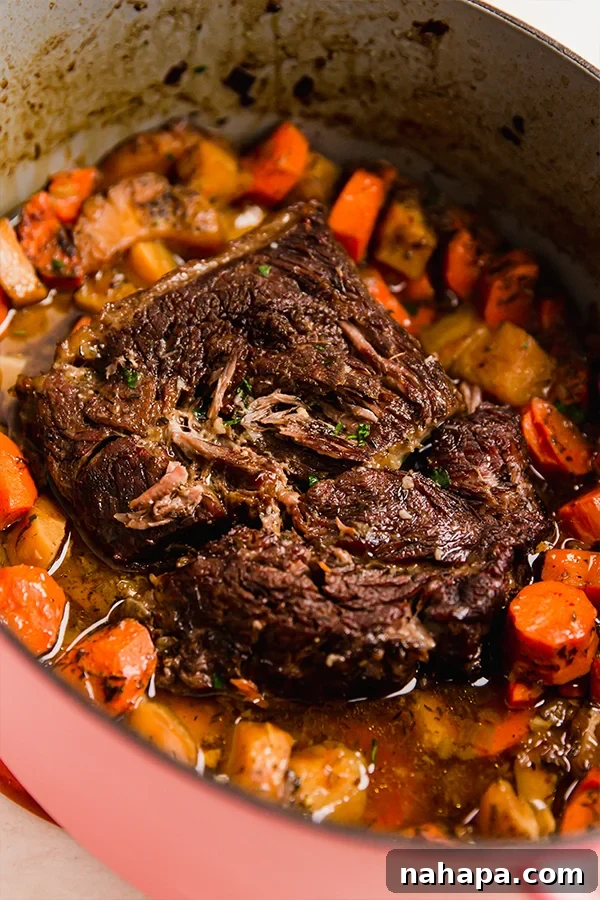
- Oven Braising: Transfer the covered Dutch oven to your preheated 400°F (200°C) oven. Roast for 30 minutes at this higher temperature. After 30 minutes, reduce the oven temperature to 300°F (150°C) and continue roasting. For a 3 lb roast, cook for another 3 hours. For a 4 lb roast, extend the cooking time to about 3 hours and 30 minutes. The goal is an internal temperature of 185-195°F (85-90°C), which indicates perfectly tender, shreddable meat. The exact time may vary based on your oven and the thickness of the roast, so use a meat thermometer for accuracy.
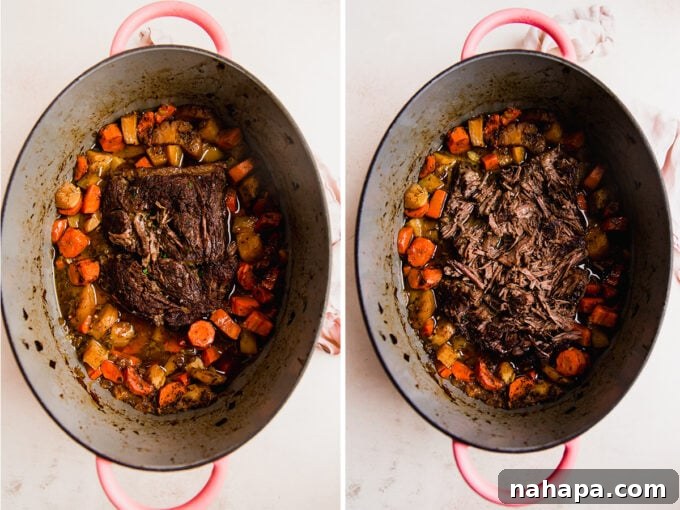
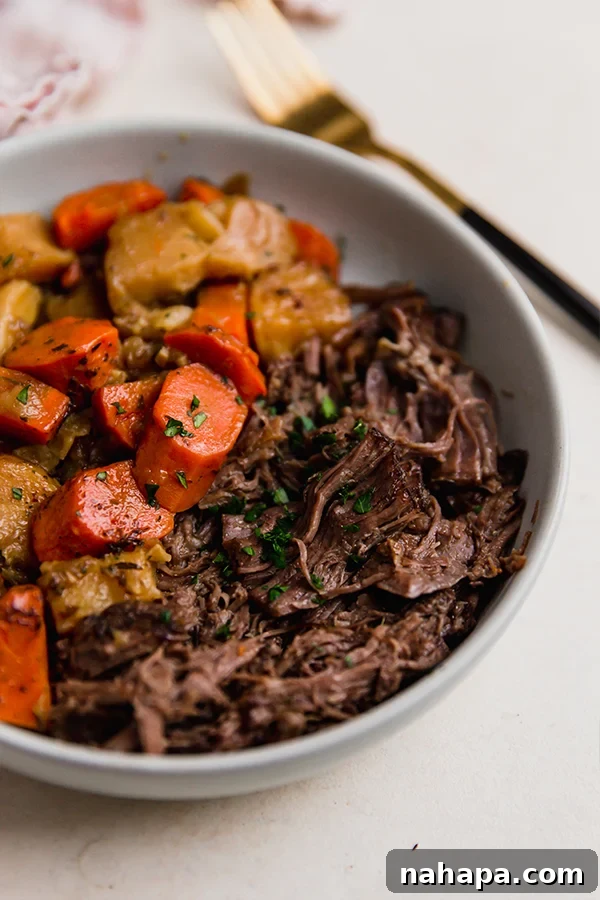
- Rest, Shred, and Serve: Once the roast is done, carefully remove the Dutch oven from the oven. Remove the lid and discard the bay leaves. This is a critical step: allow the roast to rest in its cooking liquid for 10-15 minutes. Resting allows the juices to redistribute throughout the meat, resulting in an even more succulent and flavorful roast. After resting, use two forks to gently shred the roast directly in the pot. Serve generous portions of the shredded beef with the tender root vegetables. Spoon some of the rich, savory cooking liquid (which is now a delicious gravy) over the top, and finish with a sprinkle of fresh chopped parsley for brightness.
Pro Tips for the Best Braised Chuck Roast Every Time
Achieving the perfect braised chuck roast involves a few key techniques and considerations. These tips and tricks will elevate your pot roast from good to absolutely unforgettable, ensuring maximum flavor and tenderness:
- Don’t Skip Resting the Meat! This is perhaps the most crucial tip for any roast. After removing the Dutch oven from the oven, resist the urge to immediately shred the meat. Instead, let it rest, covered, in its cooking liquid for 10-15 minutes. This resting period allows the muscle fibers to relax and reabsorb the juices that have migrated to the center during cooking. The result? A remarkably more tender, moist, and flavorful roast. Skipping this step often leads to dry, tough meat.
- Bring the Roast to Room Temperature: Before you begin searing, let your chuck roast sit on the kitchen counter for at least 30 minutes (up to an hour for larger roasts). Cooking meat directly from the fridge can lead to uneven cooking, where the outside cooks too quickly while the inside remains undercooked or takes too long to reach the desired temperature. Bringing it to room temperature helps it cook more evenly and makes it easier to get that coveted crispy, browned exterior during searing.
- Pat the Meat Dry for a Better Sear: Before seasoning and searing, ensure your chuck roast is thoroughly patted dry with paper towels. Excess moisture on the surface of the meat will steam rather than sear, preventing the formation of that delicious, flavorful crust (the Maillard reaction). A dry surface is key to achieving that deep, rich brown color and enhanced flavor.
- Use a Heavy-Bottomed Pot or Dutch Oven: An enameled cast iron Dutch oven is ideal for this recipe. Its heavy construction and excellent heat retention ensure even cooking and distribution of heat, which is essential for successful braising. If you don’t have one, any heavy-bottomed, oven-safe pot with a tight-fitting lid will work, but a Dutch oven will give you the best results.
- Don’t Be Shy with Seasoning: Chuck roast is a substantial cut of meat, so it can handle a generous amount of seasoning. Don’t be afraid to rub a good amount of salt, pepper, and herbs into the meat before searing. This builds flavor from the very beginning.
- Check for Doneness with a Thermometer: While fall-apart tenderness is the ultimate goal, an internal meat thermometer is your best friend. For truly shreddable pot roast, aim for an internal temperature between 185°F and 195°F (85-90°C). This temperature range ensures that the connective tissues have had ample time to break down, guaranteeing that melt-in-your-mouth texture.
- Consider the Broth Quantity: Ensure the braising liquid comes about halfway up the sides of the roast, but avoid submerging it completely. This allows the top of the roast to get a bit more direct heat, creating a slightly crustier top while the bottom braises beautifully in the liquid. If the liquid evaporates too much during cooking, you can add a little more warm broth.
- Thickening the Gravy (Optional): The arrowroot starch used to coat the roast will naturally thicken the gravy. However, if you prefer an even thicker gravy, you can remove the roast and vegetables from the pot after cooking. Skim off any excess fat from the liquid. In a small bowl, whisk together a tablespoon of arrowroot starch (or cornstarch) with an equal amount of cold water to create a slurry. Whisk this into the simmering liquid in the pot and cook for a few minutes until thickened to your desired consistency.
Frequently Asked Questions About Oven Braised Chuck Roast
How long do you cook a 3 lb chuck roast in the oven?
For this oven-braised method, a 3 lb chuck roast will typically require a total cooking time of approximately 3.5 hours. This includes an initial 30 minutes at 400°F (200°C), followed by about 3 hours at a reduced temperature of 300°F (150°C). Keep in mind that cooking times can vary slightly depending on your specific oven, the actual thickness of the roast (a flatter roast may cook faster), and whether it’s bone-in or boneless. Always rely on a meat thermometer to ensure the internal temperature reaches 185-195°F (85-90°C) for optimal fall-apart tenderness. This internal temperature is key to breaking down the connective tissues.
How long do you cook a 4 lb chuck roast in the oven?
A larger 4 lb chuck roast will naturally require a bit more time to reach that desired tenderness. Using this same oven-braising method, expect a total cooking time of around 4 hours. This includes the initial 30 minutes at 400°F (200°C), followed by approximately 3 hours and 30 minutes at 300°F (150°C). As with the smaller roast, factors like oven calibration, the exact dimensions of your cut, and whether it contains a bone can influence the precise cooking duration. Always keep your meat thermometer handy and aim for an internal temperature of 185-195°F (85-90°C) to ensure your roast is perfectly tender and shreddable.
How do you cook a chuck roast without vegetables?
While I wholeheartedly recommend including the vegetables for their incredible flavor contribution and the convenience of having a built-in side dish, it is certainly possible to make this recipe without them. If you opt to omit the root vegetables, the core cooking process and times will remain largely the same. However, you will need to adjust the amount of beef broth slightly, likely using about 2 to 2.25 cups instead of 2.5 cups, as the vegetables release moisture during cooking. You’ll still want enough liquid to come about halfway up the sides of the roast. If you skip the vegetables, consider adding a few extra aromatics like celery stalks or additional onions to the braising liquid to maintain some depth of flavor, removing them before serving.
What are the best serving suggestions for braised chuck roast?
A classic braised chuck roast, already complete with tender root vegetables, makes for a satisfying meal on its own. However, you can elevate the dining experience with a few simple additions. Creamy mashed potatoes or fluffy polenta are excellent choices to soak up the rich gravy. A simple green salad with a light vinaigrette provides a fresh counterpoint to the richness of the meat. Crusty bread is also perfect for dipping into the flavorful sauce. For a lighter touch, consider serving it alongside roasted asparagus or green beans.
Can I make this chuck roast in a slow cooker?
Yes, while this recipe is optimized for oven-braising for maximum flavor development, you can adapt it for a slow cooker. You would still want to sear the chuck roast and sauté the aromatics and vegetables on the stovetop first to build flavor (this step is highly recommended even for slow cooker versions). After searing and sautéing, transfer everything to your slow cooker. Cook on low for 6-8 hours or on high for 3-4 hours, until the meat is fork-tender. The internal temperature for shreddable meat should still be 185-195°F (85-90°C).
Storage & Reheating Instructions
One of the best things about braised chuck roast is that it often tastes even better the next day as the flavors have more time to meld. Proper storage and reheating will ensure your leftovers are just as delicious as the freshly cooked meal.
Storage: Allow the cooked chuck roast and vegetables to cool completely before storing. Transfer them, along with plenty of the delicious braising liquid (gravy), to an airtight container. Store in the refrigerator for 3-4 days. You can also freeze portions in freezer-safe containers for up to 3 months. When freezing, ensure there’s enough liquid to cover the meat to prevent freezer burn and keep it moist.
Reheating:
- Oven Method (Recommended): For best results, especially if reheating a larger portion, use the oven. Preheat your oven to 300°F (150°C). Transfer the roast and liquid to an oven-safe dish. Cover tightly with foil to prevent drying out. Reheat for 20-30 minutes, or until thoroughly warmed through. Adding a little extra beef broth before reheating can help maintain moisture.
- Stovetop Method: For smaller portions, you can reheat on the stovetop. Place the roast and liquid in a saucepan or Dutch oven over medium-low heat. Cover and simmer gently, stirring occasionally, until heated through. Be careful not to let it boil vigorously, as this can dry out the meat.
- Microwave Method: While convenient, the microwave can sometimes dry out the meat. For individual servings, place a portion of the roast and gravy in a microwave-safe dish. Cover loosely and microwave in 1-minute intervals, stirring in between, until heated through.
Always ensure the meat is piping hot (165°F/74°C) before serving.
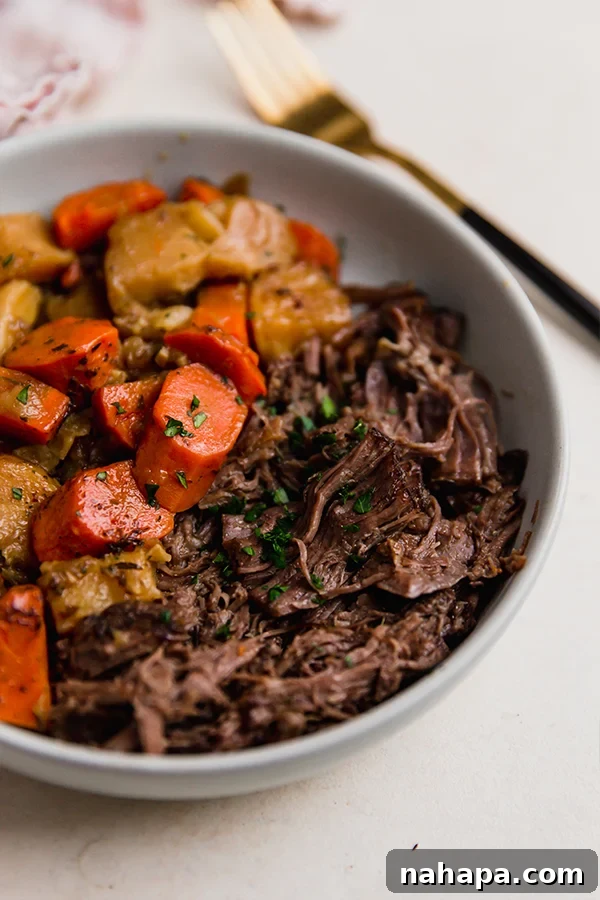
With its rich flavors, comforting aroma, and incredibly tender texture, this oven-braised chuck roast is more than just a meal; it’s a culinary experience designed to gather loved ones around the table. The low and slow cooking method transforms a simple cut of beef into a masterpiece of savory goodness, paired perfectly with hearty root vegetables and a luscious gravy. Whether you’re preparing it for a special occasion or a cozy family dinner, this recipe promises to deliver a heartwarming dish that will be remembered long after the last bite. So, embrace the art of braising, follow these steps, and savor the true essence of comfort food.
Other Hearty Comfort Food Recipes You’ll Love
- Slow Cooker Pot Roast
- Barbacoa Beef
- Slow Cooker Beef Ragu
★
★
★
★
Easy Oven Braised Chuck Roast
8
servings
Michelle
This oven-braised chuck roast is the ultimate way to make pot roast! Cook it low and slow to enjoy incredibly tender, flavorful, and comforting beef that falls apart with a fork.
Leave a Review
Pin Recipe
Ingredients
- 3-4 lb chuck roast
- Salt and pepper, divided
- 1 tbsp dried parsley, divided
- 2 tsp dried thyme, divided
- 1 tsp dried sage
- 1 tsp garlic powder, divided
- 3 cloves garlic, minced
- 1 ½ tbsp arrowroot starch
- 2 tbsp avocado oil
- 1 tbsp coconut aminos
- ½ yellow onion, diced
- 3 large carrots, peeled and chopped
- 1 large parsnip, peeled and chopped
- 1 white sweet potato, peeled and chopped
- 2 ½ cups beef broth
- 1 tbsp red wine vinegar
- 3 bay leaves
- 1 tbsp fresh parsley, chopped (for topping)
Instructions
- Preheat the oven to 400°F (200°C).
- Set the roast on the counter for 30 minutes at room temperature before patting it thoroughly dry. Generously season with half of the salt, pepper, dried parsley, dried thyme, dried sage, and garlic powder on both sides, then coat evenly with arrowroot starch on both sides.
- Using a large Dutch oven (or a heavy, oven-safe pot with a lid), heat over medium-high heat and add the avocado oil. Once the oil is shimmering, carefully add the seasoned roast. Sear for 2-4 minutes on each side or until a rich, golden-brown crust has formed. Set the seared roast aside on a clean plate.
- Add the coconut aminos to the pot and use a wooden spoon to scrape any browned bits (fond) off the bottom of the pot, incorporating them into the liquid. This deglazing step adds tremendous flavor to your sauce.
- Add the diced onion and minced garlic to the pot and sauté for 3-4 minutes, or until the onion is lightly translucent and fragrant. Add the remainder of the chopped vegetables (carrots, parsnip, and white sweet potato) and sauté for another 5 minutes, allowing them to soften slightly. Season the vegetables with the remaining dried parsley, dried thyme, dried sage, and garlic powder.
- Push the vegetables to the sides of the pot, creating a space in the center for the roast. Carefully add the seared chuck roast back to the pot. Pour the beef broth and red wine vinegar over the roast and vegetables. Place the bay leaves on top of the roast. Ensure the liquid covers about halfway up the sides of the roast. Place the lid securely on the pot.
- Transfer the covered Dutch oven to the preheated 400°F (200°C) oven and roast for 30 minutes. After 30 minutes, reduce the oven heat to 300°F (150°C). Continue to roast for another 3 hours for a 3 lb roast, and approximately 3 hours and 30 minutes for a 4 lb roast. The internal temperature should be between 185-195°F (85-90°C) for incredibly tender, shreddable meat.
- Once cooked, carefully remove the Dutch oven from the oven. Remove the lid and discard the bay leaves. Allow the roast to rest in its cooking liquid for 10-15 minutes. This crucial resting period ensures the meat stays juicy and tender.
- Using two forks, gently shred the roast directly in the pot, mixing it with the tender vegetables and rich gravy. Serve generous portions, spooning extra cooking liquid over the top, and garnish with fresh chopped parsley.
Notes
Don’t skip resting the meat! This ensures your roast stays perfectly juicy and tender.
Storage and reheating: Keep this roast in an airtight container with plenty of cooking liquid in the fridge for 3-4 days. Reheat gently in the oven at 300°F (150°C), covered, with extra cooking liquid until thoroughly warmed.
Nutrition Information
Serving: 1 serving, Calories: 309kcal, Carbohydrates: 12.9g, Protein: 35.3g, Fat: 12.3g, Fiber: 2.5g
Did you Make this Recipe?
Tag @unboundwellness on Instagram and hashtag #unboundwellness!