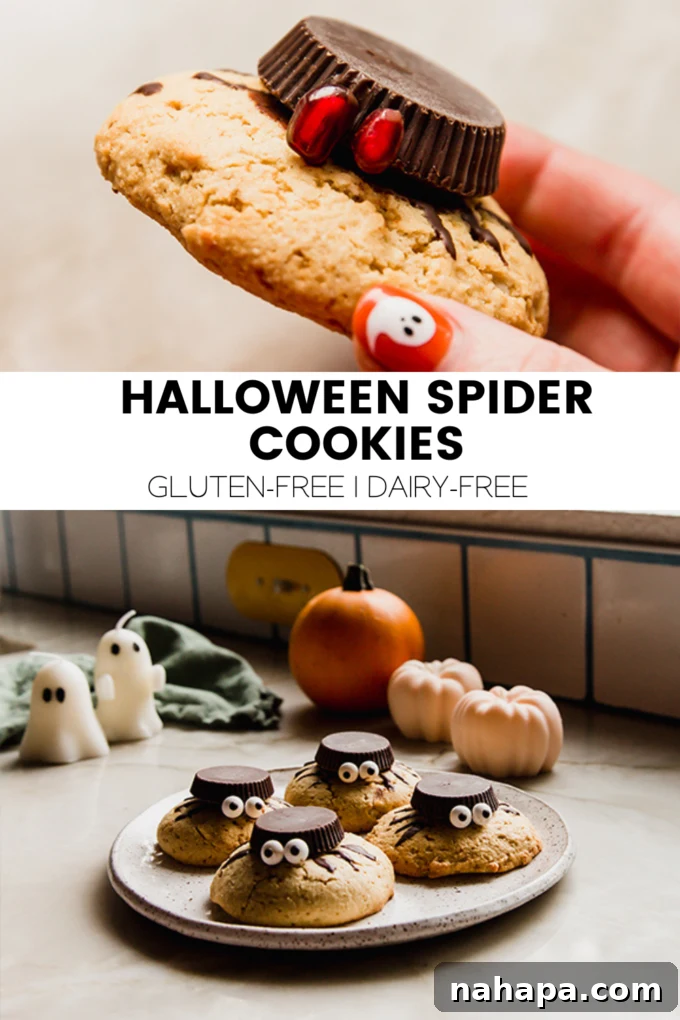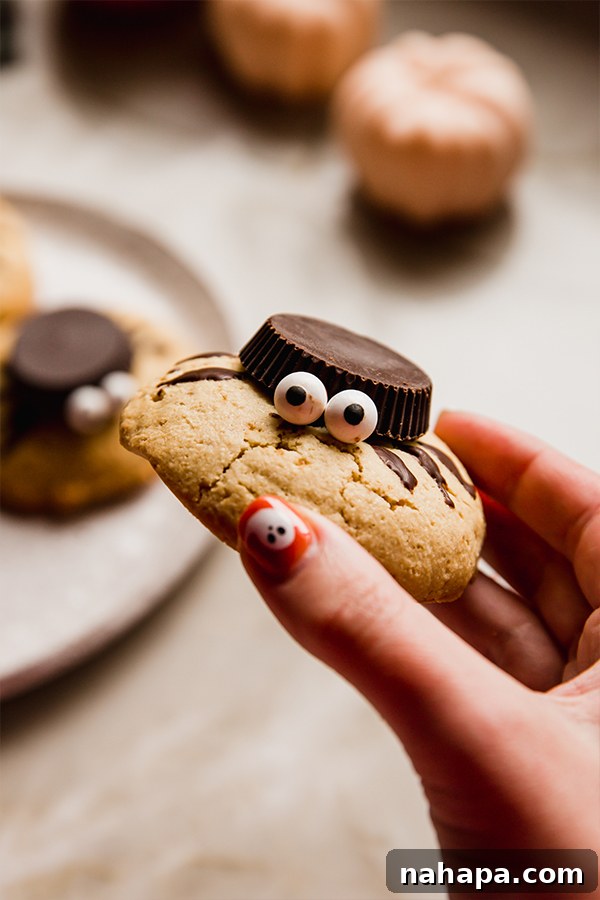
Get ready to weave some magic into your Halloween celebrations with these delightful and spooky Gluten-Free and Dairy-Free Halloween Spider Cookies! Forget the struggle of finding allergy-friendly treats that are both fun and delicious. This recipe offers a fantastic solution, combining the classic comfort of a sugar cookie with a festive, creepy-crawly twist. Imagine sinking your teeth into a soft, sweet cookie, perfectly complemented by a rich almond butter cup, all adorned to look like a friendly (or spooky!) spider. These cookies aren’t just a treat; they’re a centerpiece, a conversation starter, and a fantastic way to include everyone in the holiday fun.
Halloween has undoubtedly become one of the most exciting times of the year for creative baking. It’s a holiday that encourages embracing the whimsical, the silly, and yes, even the slightly spooky. While countless variations of spider cookies exist online, this recipe stands out by offering a completely gluten-free and dairy-free version, ensuring that those with dietary restrictions can also indulge without worry. Whether you’re hosting a ghoulish gathering, preparing snacks for a school party, or simply enjoying a quiet evening at home with family, these spider cookies are guaranteed to bring smiles and a touch of Halloween cheer.
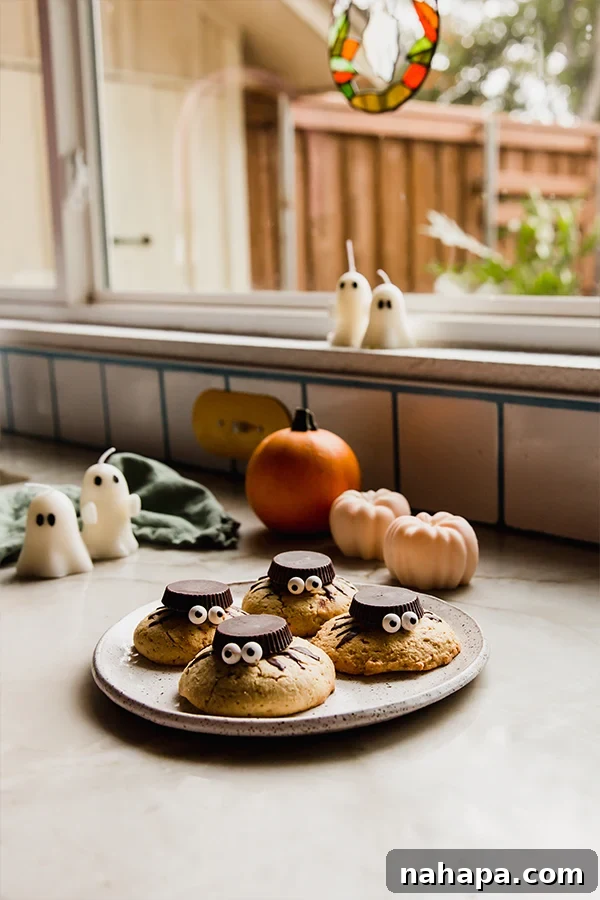
Why You’ll Love These Spooky-Sweet Halloween Spider Cookies
There are countless reasons why these Halloween Spider Cookies will become your new go-to recipe for the spooky season. Beyond their adorable appearance, they offer practical benefits that make baking stress-free and enjoyable:
- Perfectly Themed and Allergy-Friendly: Holiday treats often come with a hidden ingredient list that can be problematic for those with food sensitivities. This recipe provides a fantastic alternative, allowing everyone to enjoy the festive spirit. Made without gluten or dairy, these sugar cookies are crafted to be safe and delicious for a wider audience, ensuring no one misses out on the Halloween fun. It’s a truly inclusive dessert option.
- Ideal for Make-Ahead Preparations: Planning a Halloween party or just want to get a head start on your holiday baking? These spider cookies are perfect for preparing in advance. They require refrigeration to set the chocolate decorations and maintain their structure, making them an excellent candidate for batch baking a day or two before your event. This allows you to focus on other party preparations or simply relax and enjoy the season.
- Irresistibly Delicious Flavor: Despite being gluten and dairy-free, these cookies don’t compromise on taste. The combination of a tender, slightly sweet sugar cookie base with the creamy, rich almond butter cup and a hint of chocolate creates a flavor profile that is truly satisfying. They’re designed to be enjoyed by all, regardless of dietary needs.
- Simple and Fun to Decorate: The decoration process is straightforward and incredibly enjoyable, especially if you involve children! Transforming a simple cookie and an almond butter cup into a cute spider is a rewarding experience that adds to the festive charm. It’s a low-stress activity that yields impressive results.
Essential Ingredients for Allergy-Friendly Baking
Crafting these delicious spider cookies starts with selecting the right ingredients. This recipe prioritizes both flavor and dietary considerations, ensuring a treat that is safe and satisfying. Here’s a closer look at the key components:
- Almond Flour and Tapioca Starch: These two flours form the gluten-free base of our cookies. Almond flour provides a tender texture and a subtly rich flavor, while tapioca starch (also known as tapioca flour) adds a desirable chewiness and helps bind the ingredients, preventing crumbly cookies often associated with gluten-free baking. Using this blend ensures a cookie that’s both soft and holds its shape beautifully.
- Baking Soda: A crucial leavening agent that helps the cookies rise slightly and achieve a light, airy texture without being overly cakey.
- Egg: The egg acts as a binder, holding the dough together and adding moisture. For those avoiding eggs, a flax egg is an excellent substitute. To make one, simply combine 1 tablespoon of ground flaxseed meal with 3 tablespoons of water and let it sit for about 5-10 minutes until it thickens to a gel-like consistency.
- Coconut Sugar and Maple Syrup: These natural sweeteners provide the perfect balance of sweetness without being overpowering. Coconut sugar offers a caramel-like note and a slightly lower glycemic index than refined sugar, while maple syrup adds a rich, distinct flavor and helps keep the cookies moist. Using both ensures a complex and delightful sweetness.
- Coconut Oil: When melted, coconut oil contributes essential moisture and a subtle richness to the cookie dough, helping create a tender crumb. It’s a fantastic dairy-free alternative to butter in baking.
- Vanilla Extract: A staple in most dessert recipes, vanilla extract enhances all the other flavors, adding a warm, aromatic depth to the cookies.
- Melted Chocolate: This is essential for the “glue” that holds the almond butter cup spider body to the cookie and for drawing those spooky legs. Opt for a high-quality dairy-free chocolate to maintain the allergy-friendly nature of the recipe. Brands like Enjoy Life chocolate chips are excellent choices for their delicious taste and allergen-free properties.
- Almond Butter Cups: These are the star of our spider’s body! Choose your favorite dairy-free almond butter cups. Brands like Unreal offer delicious options that are often free from common allergens, making them perfect for this recipe. Their creamy almond butter filling paired with chocolate provides a delightful contrast to the cookie base.
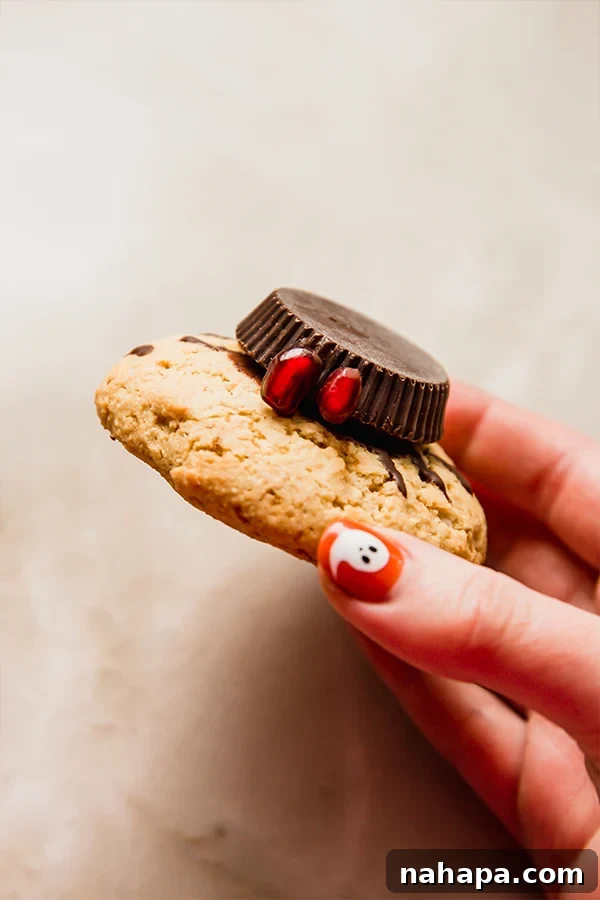
- Candy Eyes: These small, edible decorations instantly transform your cookies into charming spiders. They’re widely available, especially around Halloween. However, if you prefer a more natural or less sweet option, small pomegranate seeds make an excellent, surprisingly realistic alternative, giving your spiders a slightly more “spooky” and less “cute” vibe.
Step-by-Step Guide to Crafting Your Spider Cookies
Making these spider cookies is a fun and straightforward process. Follow these detailed steps to create your delicious and festive treats:
- Prepare Your Baking Station: Begin by preheating your oven to 350°F (175°C). Line a baking sheet with parchment paper and lightly grease it to prevent sticking. This ensures your cookies will lift off easily after baking.
- Combine Dry Ingredients: In a large mixing bowl, combine the almond flour, tapioca starch, and baking soda. Whisk them together thoroughly until all ingredients are well-incorporated. This step ensures an even distribution of leavening and texture throughout the cookies.
- Fold in Wet Ingredients to Form Dough: Add the egg (or flax egg), coconut sugar, maple syrup, melted coconut oil, and vanilla extract to the dry ingredient mixture. Gently fold them together using a spatula or spoon until a cohesive cookie dough forms. Be careful not to overmix, as this can lead to a tougher cookie. The dough should be soft but manageable.
- Scoop and Bake the Cookies: Use a standard cookie scoop (approximately 1.5-2 tablespoons) to portion out uniform cookies. You should yield about 6-7 cookies from this recipe. Place the dough balls onto the prepared baking sheet, ensuring they are evenly spaced. Gently flatten each cookie dough ball with the palm of your hand; they won’t spread much during baking. Transfer the baking sheet to the preheated oven and bake for approximately 12 minutes, or until the edges are lightly golden brown.
- Cool Completely: Once baked, remove the cookies from the oven and carefully transfer them to a wire cooling rack. It is absolutely crucial to allow the cookies to cool completely before proceeding with decoration. Warm cookies will cause the chocolate to melt and make a mess. Patience is key for perfectly decorated spiders!
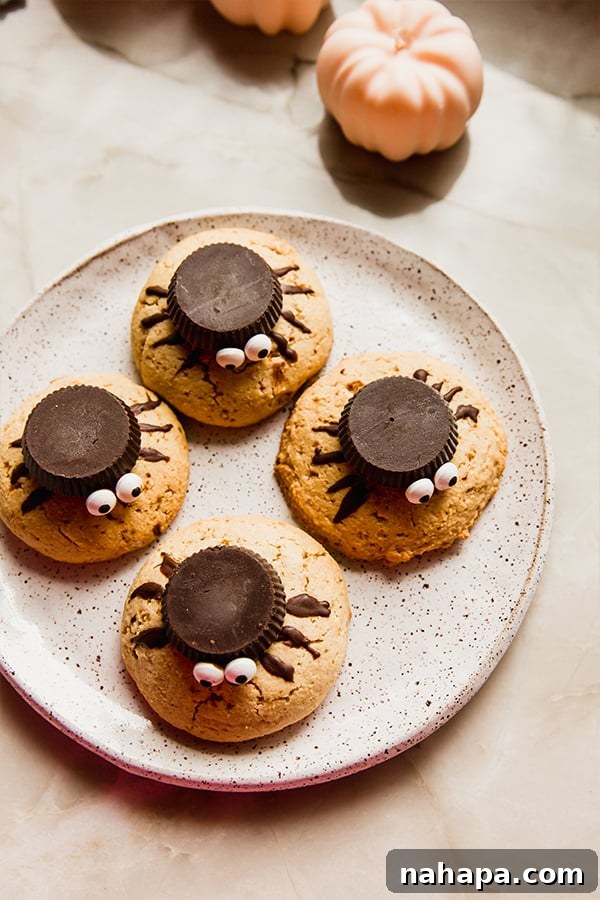
- Decorate with Almond Butter Cups and Legs: Once the cookies are entirely cool, begin the fun part! Take an almond butter cup and place a small dab of melted chocolate onto its large, flat end. Gently press this side onto the center of a cooled cookie, securing it in place. Next, dip a toothpick, a fine brush, or a piping bag with a very small hole into the remaining melted chocolate. Carefully draw eight spider legs extending from the sides of the almond butter cup onto the cookie, four on each side. Aim for thin, delicate lines to resemble spider legs.
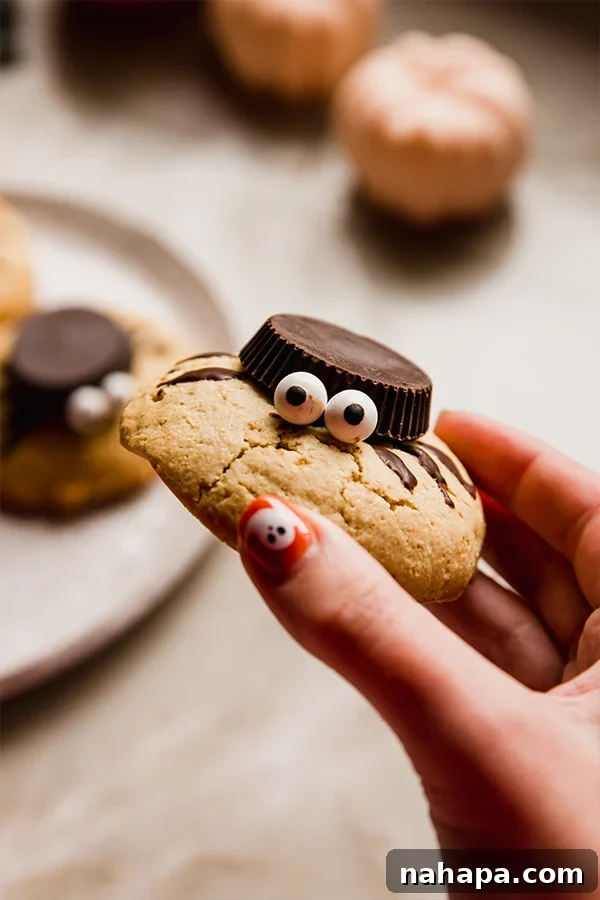
- Add the Spooky Eyes: Using the same toothpick or tool, dab a tiny amount of melted chocolate onto the back of two candy eyes (or pomegranate seeds, if using). Position these eyes on the bottom half of the almond butter cup to create your spider’s face. Repeat this decoration process for all remaining cookies.
- Set and Enjoy: Once all your spider cookies are decorated, transfer them to the fridge for at least 30 minutes. This chilling time allows the melted chocolate to firm up completely, ensuring the almond butter cups and candy eyes stay securely in place. Serve your spooky spider cookies chilled and delight in your festive creations!
Tips & Tricks for Perfect Halloween Spider Cookies
Achieving the perfect spider cookie is simple with a few helpful tips:
- Ensure Cookies are Completely Cool: This is arguably the most important tip! If your cookies are even slightly warm when you attempt to decorate them, the melted chocolate will run and create a messy, unappeired result. Always let them cool thoroughly on a wire rack before starting the decoration phase.
- Allow Chocolate to Set in the Fridge: After decorating, refrigerating the cookies is essential. This allows the melted chocolate to harden completely, firmly securing the almond butter cups and candy eyes. This step ensures your spiders maintain their form and don’t fall apart when handled. Plan for at least 30 minutes of chilling time.
- The Right Consistency for Melted Chocolate: When melting chocolate, whether in a microwave or a double boiler, aim for a smooth, pourable but not overly thin consistency. If it’s too thick, it will be hard to draw the legs. If it’s too thin, it might spread too much. If needed, you can thin it slightly with a tiny bit of coconut oil (for dairy-free options) or thicken it by letting it cool slightly.
- Piping Bag vs. Toothpick for Legs: For precise, delicate spider legs, a piping bag fitted with a very small round tip (like a Wilton 1 or 2) works wonders. If you don’t have one, a simple toothpick dipped in chocolate, or even a ziplock bag with a tiny corner snipped off, can also create neat lines. Practice on a piece of parchment paper first if you’re unsure.
- Uniform Cookie Size: Using a cookie scoop helps ensure all your cookies are the same size. This not only makes them bake more evenly but also creates a more aesthetically pleasing final product when decorated.
How to Make the Recipe Without Candy Eyes
While candy eyes add an undeniable cuteness factor, they might not be suitable for everyone due to dietary restrictions or personal preference. If you’re looking for an alternative, pomegranate seeds are a fantastic, natural option! Simply use two small pomegranate seeds per spider in place of candy eyes. The deep red color of the seeds against the chocolate creates a more realistic and slightly spooky effect, which can be even more fun for Halloween. They offer a burst of flavor and a fresh textural contrast, making your spiders unique and delicious.
Creative Variations & Serving Suggestions
While these spider cookies are fantastic as is, feel free to get creative with variations and how you serve them:
- Different “Bodies”: If almond butter is not an issue, consider using other nut butter cups, like peanut butter cups, for a different flavor profile. Just ensure they are dairy-free if that’s a requirement.
- Colorful Webs: Instead of plain chocolate legs, you could use white chocolate tinted with food coloring (like green or purple) for extra vibrant spiders!
- Sprinkle Fun: Before the chocolate sets, sprinkle some orange, black, or purple sprinkles around the spider for an extra festive touch.
- Cookie Base Variations: While this recipe is for sugar cookies, you could adapt the spider decoration to other gluten-free, dairy-free cookie bases like chocolate chip or oatmeal cookies for variety.
When serving, arrange them artfully on a platter with other Halloween decor. They pair wonderfully with a warm mug of dairy-free hot chocolate or a spooky green smoothie. They’re also an excellent addition to a Halloween dessert bar, alongside other themed treats.
Storage and Make-Ahead Advice
These spider cookies are not just delicious but also conveniently make-ahead friendly. After they are fully decorated and the chocolate has set in the refrigerator, you can store them in an airtight container. Keep them refrigerated for 2-3 days for optimal freshness. If stacking them, place a piece of parchment paper between layers to prevent the decorations from sticking or getting damaged. This makes them a perfect option for busy party planners or for enjoying over several days during the Halloween season.
These Gluten-Free and Dairy-Free Halloween Spider Cookies truly embody the spirit of the holiday: fun, a little spooky, and utterly delicious. They prove that dietary restrictions don’t have to limit your ability to enjoy festive treats. With a simple ingredient list and straightforward steps, you can create a batch of cookies that will impress everyone and ensure all your guests, regardless of their dietary needs, can join in the celebration. So, gather your ingredients, unleash your inner baker, and get ready to create some unforgettable Halloween magic!
You’ll also love these other spooky treats…
- Spooky Halloween Gummies
- Poison Candy Apples
- Coconut Butter Covered Strawberry Ghosts
Halloween Spider Cookies (Gluten & Dairy Free)
Yield: 7 cookies
Author: Michelle
These spooktacular spider cookies are the ultimate Halloween treat! Made with a delicious gluten-free and dairy-free sugar cookie base, they’re topped with an almond butter cup transformed into an adorable spider, perfect for a fun and festive celebration.
Ingredients
For the Cookies:
- 1 ½ cup almond flour
- ⅓ cup tapioca starch
- ¼ tsp baking soda
- 1 egg (or 1 flax egg: 1 tbsp ground flax + 3 tbsp water)
- 1 tbsp coconut sugar
- 2 tbsp maple syrup
- 2 tbsp coconut oil, melted
- 1 tsp vanilla extract
For the Topping & Decoration:
- 2 tbsp melted chocolate (e.g., Enjoy Life chocolate chips)
- 6 almond butter cups (e.g., Unreal brand)
- Candy eyes (or pomegranate seeds for a natural alternative)
Instructions
- Preheat oven to 350°F (175°C) and line a baking sheet with lightly greased parchment paper.
- In a large bowl, whisk together the dry ingredients (almond flour, tapioca starch, baking soda) until well combined.
- Fold in the wet ingredients (egg, coconut sugar, maple syrup, melted coconut oil, vanilla extract) until a cohesive dough forms. Do not overmix.
- Using a cookie scoop, portion out 6-7 uniform cookies onto the prepared baking sheet. Gently flatten each cookie with your palm.
- Bake for 12 minutes, or until the edges are lightly golden brown.
- Remove from the oven and carefully transfer the cookies to a wire rack to cool completely. This is crucial for successful decoration.
- Once cookies are thoroughly cooled, take an almond butter cup and place a small amount of melted chocolate on its flat end. Position it in the center of each cookie, pressing gently to secure.
- Dip a toothpick or a fine piping tool into the remaining melted chocolate and draw eight spider legs extending from the almond butter cup onto the cookie.
- For the eyes, dab a tiny amount of melted chocolate onto the back of two candy eyes (or pomegranate seeds) and affix them to the bottom of the almond butter cup.
- Repeat the decoration process for all cookies.
- Transfer the decorated spider cookies to the fridge for at least 30 minutes to allow the chocolate to set firmly.
- Serve chilled and enjoy your spooky treats!
Recipe Notes
- Make-Ahead: These cookies can be prepared 2-3 days in advance and stored in an airtight container in the refrigerator.
- Egg Substitute: If using a flax egg, ensure it sits for 5-10 minutes to thicken before adding to the dough.
- Chocolate Choice: For a fully dairy-free option, use chocolate chips specifically labeled as dairy-free.
Nutrition Information (Estimated Per Cookie)
- Serving: 1 cookie
- Calories: 326 kcal
- Carbohydrates: 23.6g
- Protein: 6.6g
- Fat: 15.8g
- Fiber: 1.8g
All nutrition facts are estimated and will vary based on exact ingredients and preparation.