
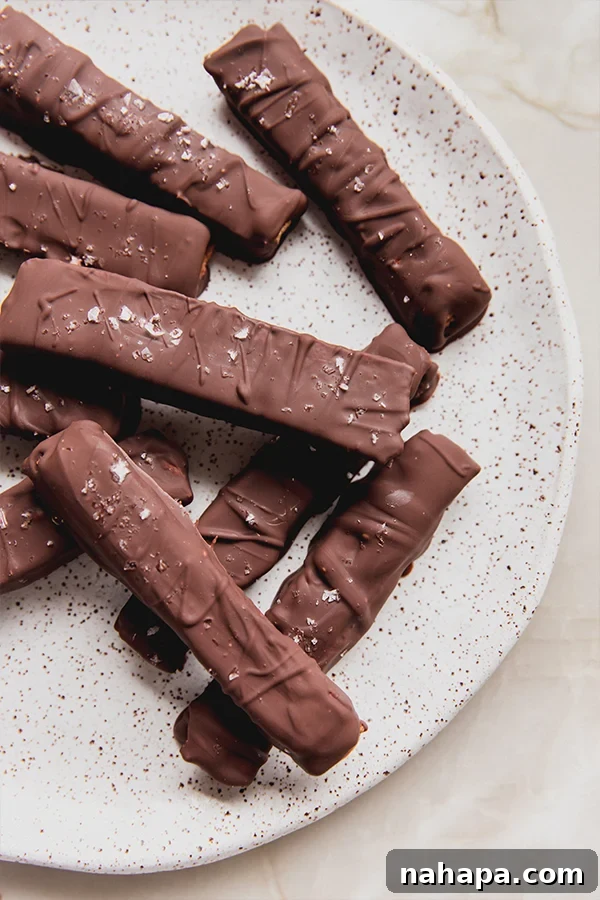
Are you craving that classic chocolate-covered wafer crunch but need a healthier, diet-friendly option? Look no further! These homemade Kit Kat bars are a dream come true for anyone following a paleo, gluten-free, or dairy-free lifestyle. They capture all the deliciousness of the iconic candy bar with wholesome ingredients and surprisingly simple steps. Say goodbye to the days of missing out on your favorite treats; these delightful bars are proof that healthy eating can be incredibly indulgent and easy to achieve.
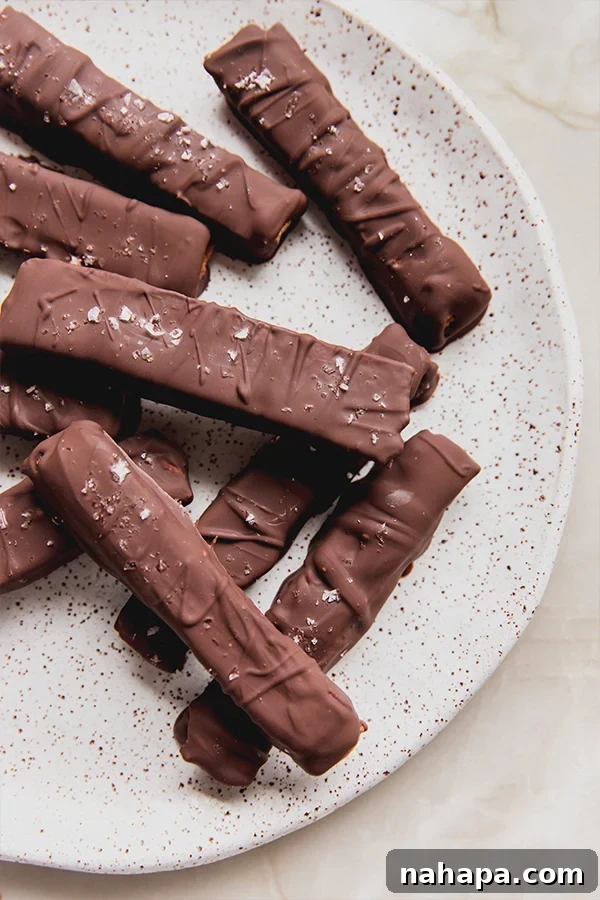
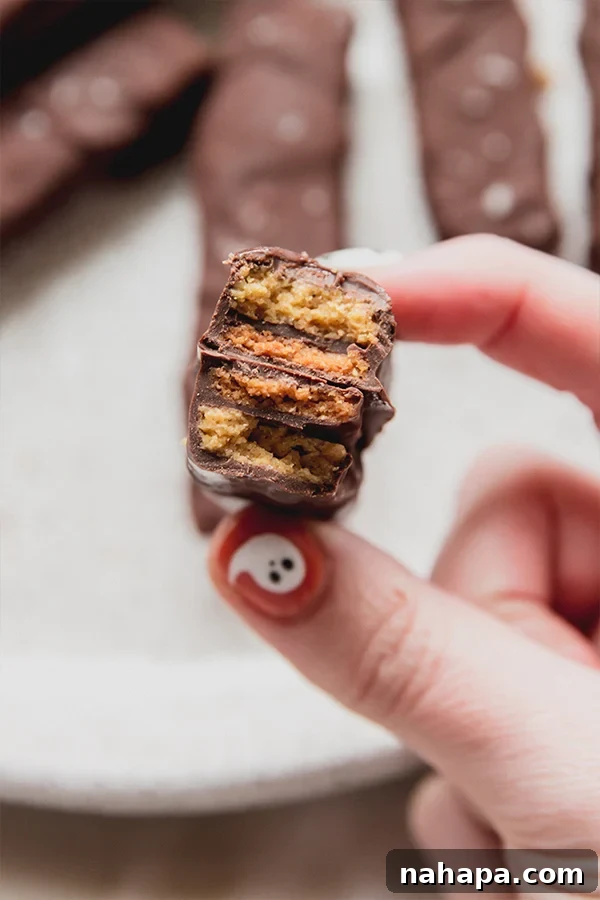
Kit Kat bars were once a nostalgic favorite of mine, a crunchy, chocolatey indulgence that seemed impossible to recreate with dietary restrictions. However, I discovered that crafting a healthier, homemade version is not only achievable but also incredibly fun and satisfying. All it takes is a simple grain-free wafer cookie, layered and coated with rich, melted dairy-free chocolate. The result is a copycat Kit Kat bar that truly hits the spot, providing that familiar snap and melt-in-your-mouth goodness without any gluten or dairy.
Why You’ll Love These Copycat Kit Kat Bars
- A Healthier Take on a Beloved Classic: These Kit Kat bars transform a traditional candy into a guilt-free pleasure. By using paleo-friendly ingredients, we eliminate gluten, dairy, and refined sugars, making them suitable for various dietary needs. You get to enjoy the iconic taste and texture of a Kit Kat without compromising your wellness goals. It’s the perfect treat for satisfying those sweet cravings in a way that truly nourishes your body.
- Surprisingly Simple and Forgiving: Don’t let the idea of making homemade candy intimidate you. This recipe is designed to be straightforward and incredibly forgiving, even for beginner bakers. The beauty of these bars is that perfection isn’t required. Even if your wafers aren’t perfectly even or flat, the generous coating of melted chocolate will elegantly mask any imperfections, ensuring your Kit Kat bars still look and taste fantastic. This makes the baking process enjoyable and stress-free.
- Customizable for Any Taste: While the core recipe is delicious on its own, it also offers plenty of room for personalization. You can experiment with different types of dairy-free chocolate, add a sprinkle of sea salt for a gourmet touch, or even infuse the chocolate with a hint of peppermint or orange extract for a unique twist. These bars are a fantastic canvas for your culinary creativity.
- Perfect for Sharing or Meal Prep: Whether you’re making a batch for a party, a thoughtful homemade gift, or simply for your weekly treat stash, these bars are an excellent choice. They are easy to scale up for larger gatherings and hold up well, making them ideal for prepping ahead of time. Store them in the fridge or freezer, and you’ll always have a delightful, healthier treat ready when a craving strikes.
The Ingredients for Your Delicious Copycat Kit Kat Bars
Crafting these delectable bars requires a few key ingredients, each playing a vital role in achieving that authentic Kit Kat experience while adhering to paleo and dairy-free standards. Here’s a closer look at what you’ll need:
- Egg: Acts as a binder for our wafer dough, providing structure and helping achieve that desirable crispness. For a vegan option, you can easily substitute with a flax egg (see notes below for instructions).
- Coconut Oil: Used in both the wafer and the chocolate coating. In the wafer, it adds moisture and helps create a tender crumb. In the chocolate, it aids in melting and creates a smooth, glossy finish that sets beautifully.
- Coconut Sugar: A natural, unrefined sweetener that gives the wafers a subtle caramel-like flavor, mimicking the sweetness of traditional Kit Kats without using refined sugars. It’s a great paleo alternative.
- Vanilla Extract: Enhances the overall flavor profile of the wafer, adding a warm, aromatic note that complements the chocolate perfectly. Don’t skip this essential flavor enhancer!
- Baking Soda: A leavening agent that contributes to the wafer’s delicate texture, ensuring they are light and crisp, not dense.
- Almond Flour: This is the primary flour for our grain-free wafers. It provides a finely textured, nutty base that bakes up beautifully crisp. It’s an excellent gluten-free and paleo-friendly flour.
- Arrowroot Starch: A crucial ingredient that works alongside almond flour to give the wafers their characteristic crispness and delicate structure. It also helps bind the dough, ensuring it’s easy to roll and handle.
- Dairy-Free Chocolate Chips: The star of the show for our rich coating. Make sure to choose a high-quality dairy-free brand to ensure the best flavor and melting consistency. This brand is a personal favorite for its smooth texture and delicious taste.
How to Make Homemade Gluten-Free Kit Kat Bars
Creating these delightful bars is a simple process, broken down into easy-to-follow steps. Get ready to bake your new favorite healthier treat!
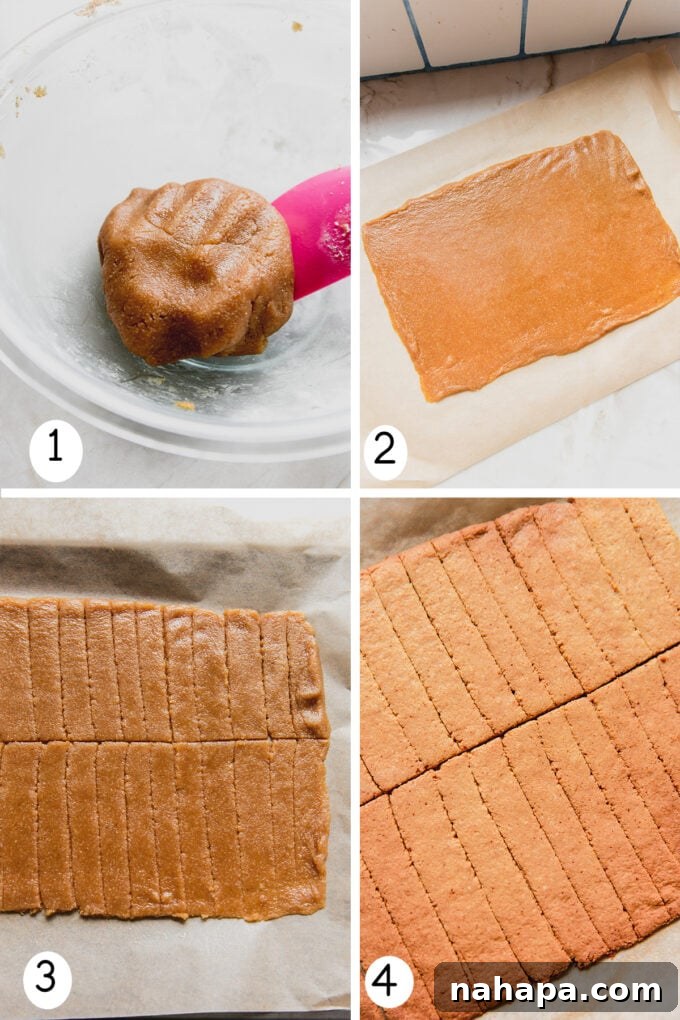
- Prepare the Wafer Dough: Begin by combining the egg (or flax egg), melted coconut oil, coconut sugar, and vanilla extract in a bowl. Whisk these wet ingredients thoroughly until well combined. Then, gently fold in the almond flour, arrowroot starch, and baking soda. Continue stirring until a cohesive dough forms. It should be pliable and easy to handle.
- Roll and Score the Dough: Lay out a sheet of parchment paper and lightly grease it. Transfer your wafer dough to the parchment paper and, using a rolling pin, roll it out into a thin, large rectangle, aiming for about 1/4 inch thickness. The thinner you roll it, the crispier your wafers will be. Once rolled, use a sharp paring knife to score the dough horizontally down the middle, then slice thin vertical strips across both halves. This will help you break them into individual pieces after baking.
- Bake the Wafers: Carefully transfer the parchment paper with the scored dough onto a baking sheet. Bake in a preheated oven at 325°F (160°C) for approximately 12 minutes, or until the wafers are lightly golden brown and firm to the touch. Keep a close eye on them, as baking times can vary.
- Cool and Separate: Once baked, remove the wafers from the oven and allow them to cool completely on the baking sheet. Cooling is crucial as it allows them to firm up and become crisp. Once cooled, carefully break them along the scored lines into individual wafer pieces. Handle gently to prevent breakage.
- Melt the Chocolate Coating: While the wafers are cooling, prepare your chocolate. In a double boiler or using a microwave, melt the dairy-free chocolate chips with the remaining coconut oil. Stir continuously until the mixture is smooth, glossy, and completely liquid. A double boiler offers more control and prevents the chocolate from scorching.
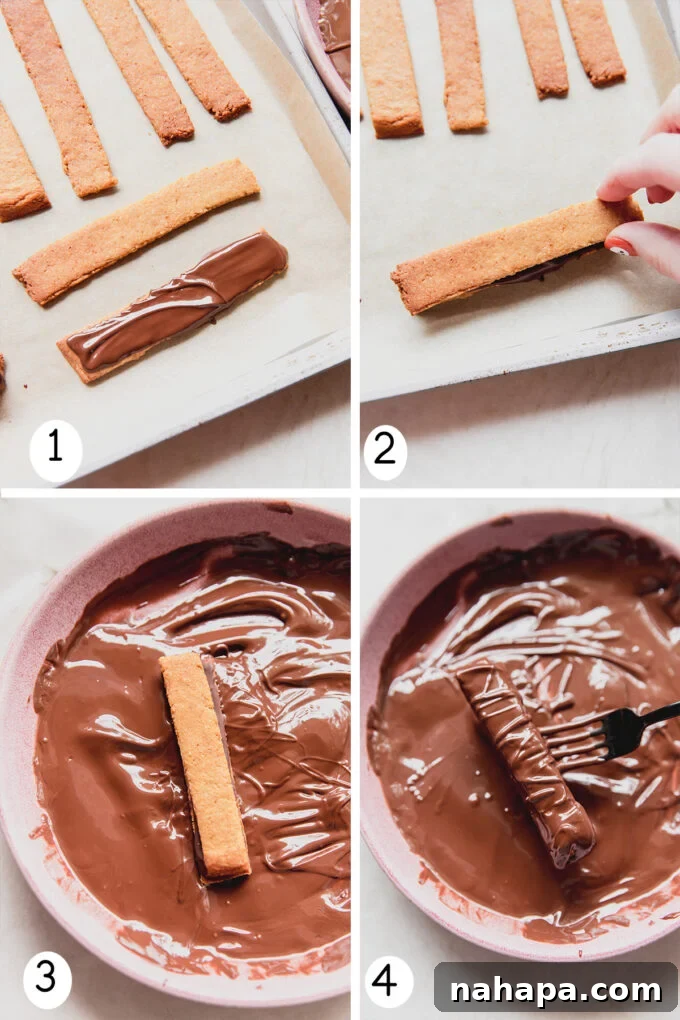
- Layer the Wafers: Take one cooled wafer piece and spread a thin layer of melted chocolate on top. Immediately place another wafer on top, pressing gently to create a sandwich. Repeat this process for all your wafer pieces, creating multi-layered bars. Arrange the layered wafers on a parchment-lined baking sheet.
- Chill to Set: Transfer the baking sheet with the layered wafers to the freezer for about 10-15 minutes. This step is essential to set the inner chocolate layers, making the bars firm enough for the final dip without falling apart.
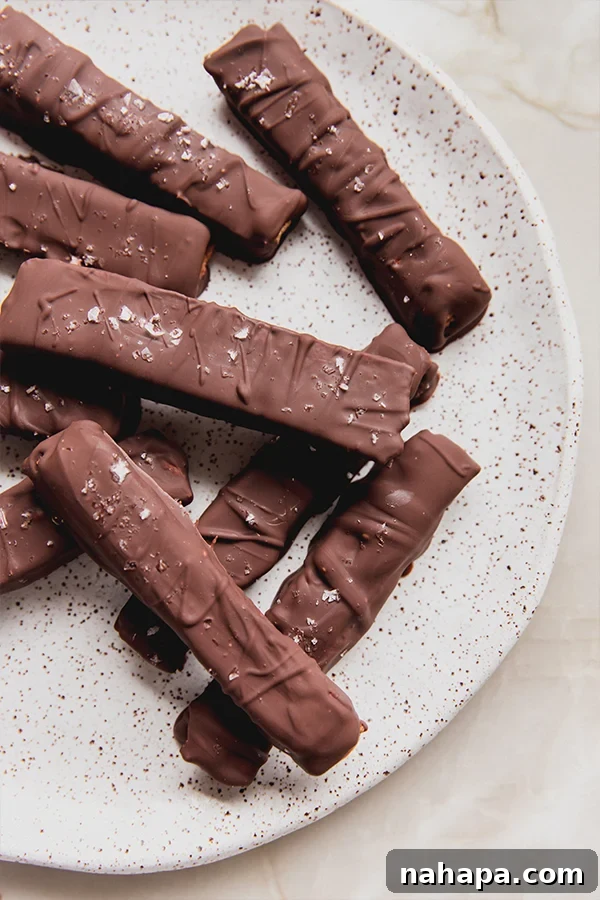
- Coat with Chocolate: Remove the chilled, layered wafers from the freezer. Working one at a time, carefully dip each layered cookie into the melted chocolate, ensuring it’s fully coated. Use a fork to lift the bar, allowing any excess chocolate to drip off for a clean finish. Place the chocolate-coated bars back onto the parchment-lined baking sheet. For extra flair, drizzle any leftover melted chocolate over the tops. If desired, sprinkle a pinch of sea salt on top for a delightful contrast.
- Final Set and Enjoy: Return the chocolate-coated bars to the fridge and let them chill until the chocolate is completely set and firm, typically about 30 minutes to an hour. Once set, they are ready to serve and enjoy! Store any remaining bars in an airtight container in the refrigerator for optimal freshness.
Tips & Tricks for Perfect Paleo Kit Kat Bars
- Embrace Imperfection: Remember, homemade treats don’t need to be picture-perfect. If your wafers aren’t perfectly uniform in size or shape, don’t worry! The generous chocolate coating will hide any slight irregularities, and the taste will still be absolutely amazing.
- Use a Shallow Bowl for Dipping: When it comes to coating your layered wafers, a wide, shallow bowl or dish for your melted chocolate works best. This allows for easier dipping and ensures a more even chocolate coverage with less mess.
- Parchment Paper is Your Friend: Always use parchment paper on your baking sheets for both baking the wafers and setting the chocolate-coated bars. This prevents sticking and makes for easy cleanup.
- Chill Thoroughly: Don’t rush the chilling process. Ensuring the layered wafers are well-chilled before the final dip helps them maintain their structure and prevents the chocolate from becoming too runny. A quick freeze also helps the chocolate coating set faster.
- Quality Chocolate Matters: The type of dairy-free chocolate chips you use will significantly impact the final taste. Opt for a brand you enjoy eating on its own for the best results.
Frequently Asked Questions (FAQs)
Can you make this recipe nut-free?
While this specific recipe relies on almond flour for the wafers, making it nut-free would require a substitution for the flour. I have not personally tested this recipe with nut-free alternatives like tigernut flour or a blend of gluten-free flours. However, you could achieve a similar result by using a store-bought, nut-free wafer cookie and simply following the chocolate layering and dipping steps with a nut-free dairy-free chocolate.
Are these Kit Kat bars vegan?
Yes, this recipe can easily be made vegan! The only non-vegan ingredient is the egg. Simply substitute the egg with a flax egg (1 tablespoon ground flaxseed mixed with 3 tablespoons water, allowed to sit for 5 minutes until gel-like). All other ingredients – coconut oil, coconut sugar, vanilla extract, almond flour, arrowroot starch, baking soda, and dairy-free chocolate chips – are typically vegan-friendly.
How long do these homemade Kit Kat bars last?
These gluten-free Kit Kat bars are best stored in an airtight container in the refrigerator. They will maintain their freshness and texture for about 3-4 days. For longer storage, you can freeze them for up to a month. Just be sure to thaw them slightly at room temperature or in the fridge before enjoying for the best texture.
Can I add any toppings or variations?
Absolutely! Feel free to get creative with your toppings. A sprinkle of flaky sea salt immediately after dipping in chocolate adds a wonderful salty-sweet contrast. You could also chop up some dried berries, toasted coconut flakes, or even a dash of chili powder for an unexpected kick. For flavor variations, try adding a few drops of peppermint extract or orange extract to your melted chocolate before dipping.
Other Paleo & Gluten-Free Treats You’ll Love
If you enjoyed making these copycat Kit Kat bars, you might also like these other delicious and healthy alternatives to classic candies:
- Homemade Paleo Twix Bars
- Paleo Samoa Cookies
- Homemade Oreo Cookies
Gluten Free Kit Kat Bars (Dairy free)
Want to save this for later?
Just drop your name and email below. Then we’ll email right to your inbox. ✉️
(Email signup form content removed as per instructions.)
Ingredients
For the wafer
- 1 egg, sub flax egg, see notes
- 3 tbsp coconut oil, melted
- 3 tbsp coconut sugar
- ½ tsp vanilla extract
- 1 cup almond flour
- 2 tbsp arrowroot starch
- ¼ tsp baking soda
For the chocolate
- 1 cup dairy-free chocolate chips, I use this brand
- 2 tsp coconut oil
Instructions
- Preheat the oven to 325 F.
- To prep the wafer dough, combine the egg, coconut oil, coconut sugar, and vanilla extract. Whisk well. Fold in the almond flour, arrowroot, and baking soda. Stir until a dough forms.
- Add the dough to a greased sheet of parchment paper and roll it into a thin, large rectangle about 1/4″ thick. Using a sharp paring knife, score the dough in half horizontally, and then slice thin vertical strips.
- Transfer to the oven and bake for 12 minutes or until lightly golden brown. Remove from the oven and allow to cool before carefully breaking up the wafers into individual pieces.
- Using a method of your choice (I prefer a double boiler method) melt the chocolate and coconut oil together until fully liquid.
- Working with one wafer at a time, add a thin layer of chocolate to the top and sandwich another wafer on top. Transfer to a parchment-lined baking sheet. Repeat for all of the wafers. Transfer to the freezer for about 10-15 minutes or until set.
- Remove from the freezer. Working with one layered cookie at a time, carefully dip each one into the melted chocolate, using a fork to allow the excess chocolate to run off. Set the coated cookie back onto the parchment paper and repeat. Use any leftover chocolate to drizzle over the top of the cookie. Top with salt if desired.
- Return to the fridge until the chocolate is set. Serve chilled, and store in the fridge for 3-4 days or in the freezer for a month.
Notes
All nutritional information are estimations and will vary. Nutritional information does not include optional ingredients.
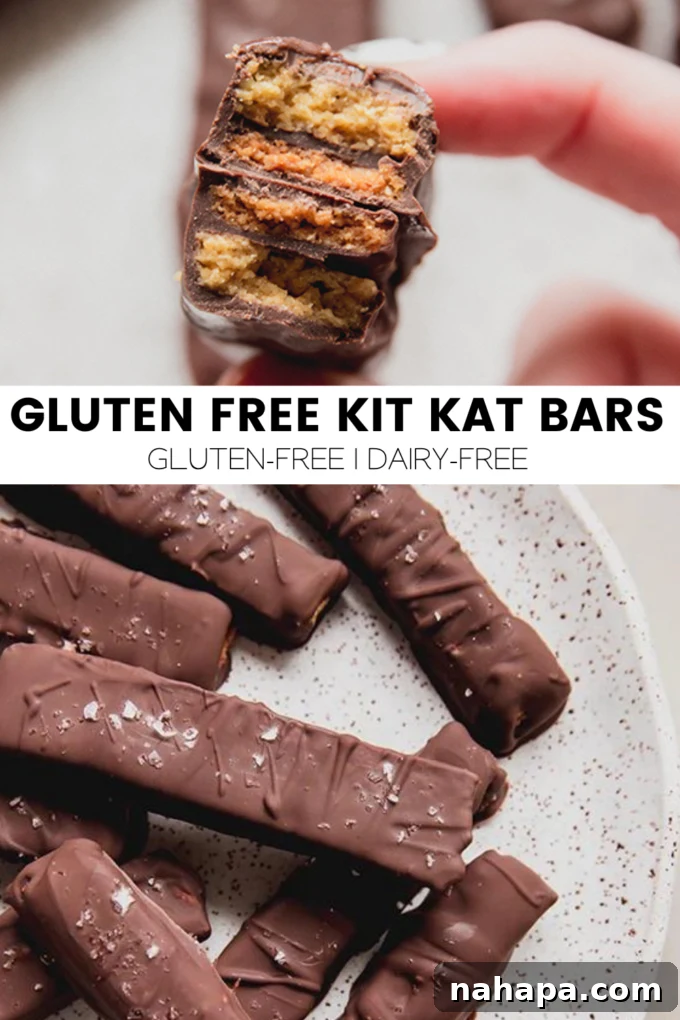
There you have it – a truly delicious and satisfying way to enjoy your favorite chocolate wafer candy, made entirely from scratch with wholesome, paleo-friendly ingredients. These homemade gluten-free Kit Kat bars prove that embracing a healthier lifestyle doesn’t mean sacrificing flavor or fun. Whether you’re making them for yourself, your family, or a special occasion, these bars are sure to impress. So go ahead, break off a piece, and savor the moment!