This post contains affiliate links.
Indulge Guilt-Free: The Best Dairy-Free Gluten-Free Ice Cream Sandwiches (Paleo & AIP-Friendly!)
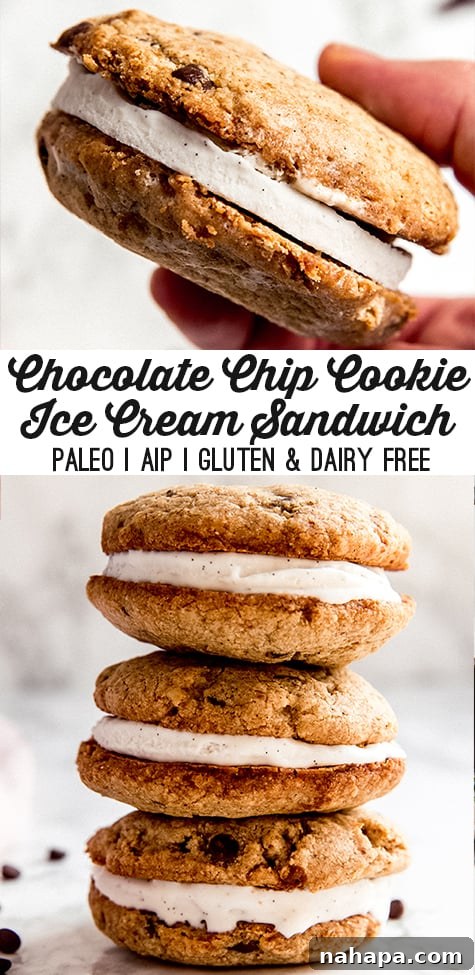
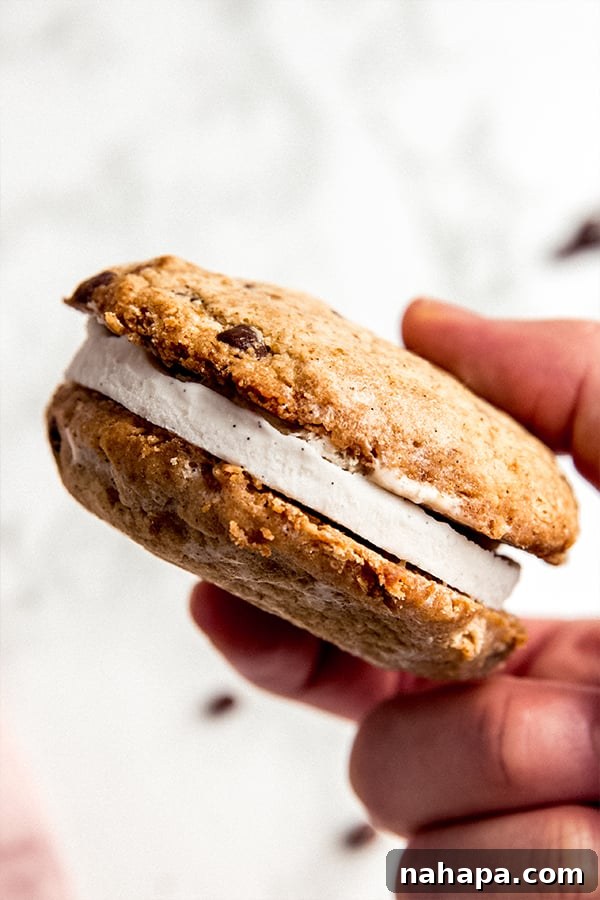
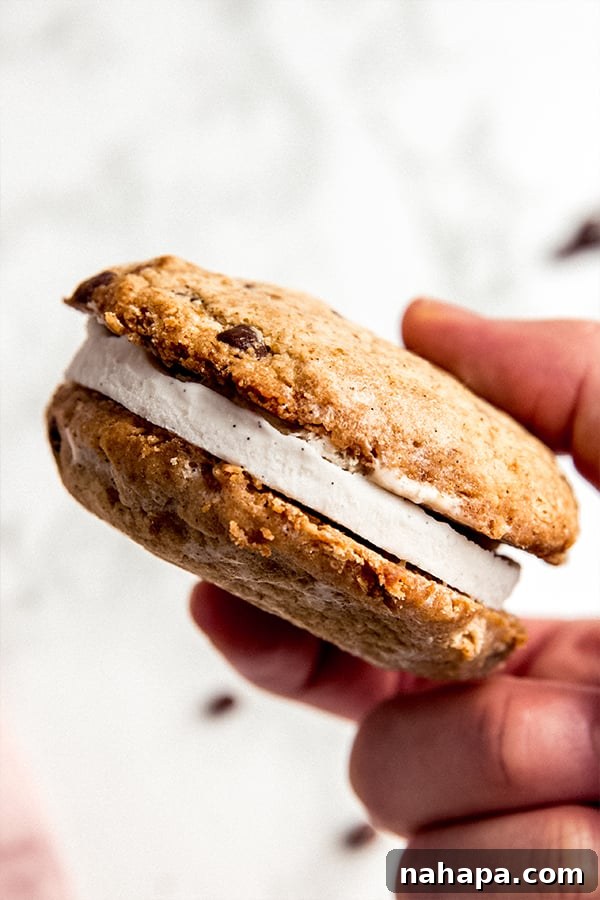
There’s nothing quite like a classic ice cream sandwich to bring back childhood memories and cool you down on a hot summer day. The perfect blend of chewy cookie and creamy, frozen goodness is simply irresistible. However, for those navigating dietary restrictions like dairy, gluten, or grains, this quintessential treat often feels out of reach. But what if we told you that you could enjoy a decadent, satisfying ice cream sandwich that’s not only dairy-free and gluten-free but also paleo and easily adaptable for the Autoimmune Protocol (AIP)? Get ready to transform your summertime dessert game with this incredible recipe for homemade cookie ice cream sandwiches!
Our journey into the world of wholesome desserts means never compromising on flavor or texture. These aren’t just ‘good for being dairy-free’; they’re genuinely delicious, crafted with nourishing ingredients that cater to sensitive stomachs without sacrificing any of the joy. Whether you’re hosting a backyard barbecue, looking for a special treat for the kids, or simply craving a moment of sweet indulgence, these healthy ice cream sandwiches are designed to delight everyone. Prepare to make a new family favorite that proves healthy eating can be incredibly fun and incredibly tasty!
Why You’ll Love These Health-Conscious Ice Cream Sandwiches
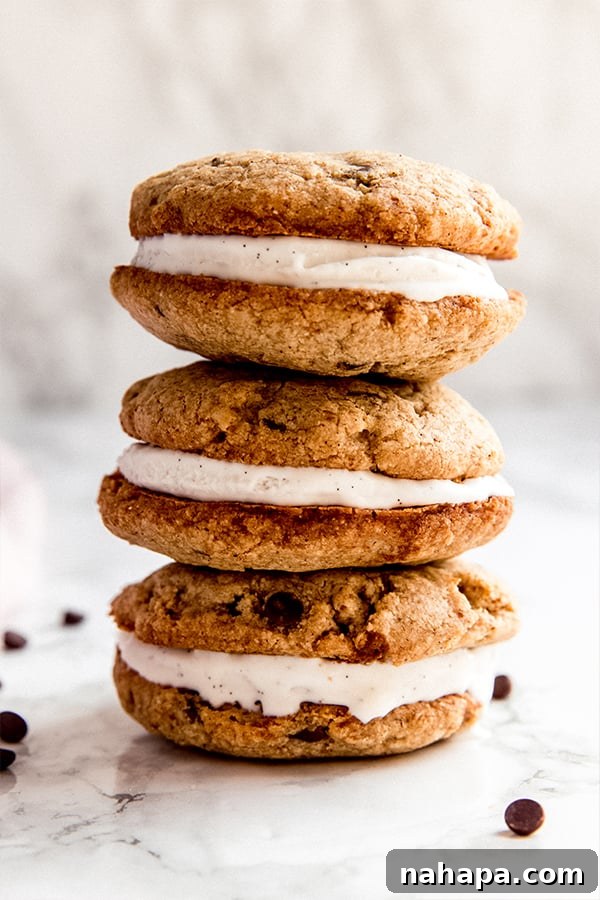
Here in Dallas, ice cream is practically a staple in our household, especially when the temperatures soar! In fact, my husband’s pregnancy announcement was cleverly centered around an ice cream sundae, so it’s safe to say we have a deep affection for all things ice cream. And what better way to elevate the simple scoop than by turning it into a spectacular ice cream sandwich? These treats aren’t just a dessert; they’re an experience – decadent, incredibly fun to make, and utterly delicious. But beyond their mouth-watering appeal, they offer significant dietary advantages:
- **Dairy-Free Delight:** We use plant-based ice cream and avoid all dairy products, making them perfect for those with lactose intolerance or dairy allergies.
- **Gluten-Free & Grain-Free:** Say goodbye to wheat and other grains! Our cookies are made with alternative flours that ensure a safe and delicious experience for individuals with gluten sensitivities or celiac disease.
- **Paleo Perfection:** Adhering to paleo principles, this recipe is free from refined sugars, grains, legumes, and dairy, focusing instead on whole, unprocessed ingredients.
- **AIP-Friendly Adaptations:** With a simple swap for carob chips instead of chocolate, these sandwiches become compliant with the Autoimmune Protocol, offering a safe and enjoyable dessert option for those on a healing journey.
This thoughtful combination of dietary considerations means almost everyone can enjoy these frozen delights without worry. They are designed to be inclusive, ensuring that no one misses out on the joy of a summertime ice cream sandwich!
Key Ingredients for Our Wholesome Treat
The magic behind these delightful ice cream sandwiches lies in a carefully selected blend of wholesome ingredients. Each component plays a crucial role in achieving the perfect texture, flavor, and dietary compliance:
- **Tigernut Flour:** A cornerstone of gluten-free and grain-free baking, tigernut flour is a root vegetable, not a nut, making it suitable for many with allergies. It imparts a slightly sweet, earthy flavor and a wonderfully chewy texture to our cookies.
- **Tapioca Starch:** This acts as a binding agent and thickener, helping to create a soft, pliable cookie dough and a slightly crisp cookie once baked. It’s essential for achieving that classic cookie ice cream sandwich feel.
- **Gelatin:** Used in small amounts, gelatin helps to improve the texture of the cookies, adding a subtle chewiness and ensuring they hold their shape, especially when cold.
- **Coconut Flour:** Known for its high fiber content and absorbent nature, coconut flour contributes to the cookie’s structure and helps maintain its softness. Its mild flavor complements the other ingredients beautifully.
- **Coconut Oil:** This healthy fat provides moisture and richness to the cookies. When chilled, it helps the cookies solidify, making them perfect for holding creamy ice cream without becoming crumbly.
- **Maple Syrup:** Our natural sweetener of choice, maple syrup offers a rich, deep sweetness without the need for refined sugars. It also adds a touch of moisture, contributing to the cookies’ texture.
- **Dairy-Free Chocolate Chips (or Carob Chips for AIP):** For those who can tolerate chocolate, dairy-free chocolate chips add a classic sweet element. For AIP compliance, carob chips are an excellent substitute, providing a similar flavor profile without cocoa.
- **Dairy-Free Vanilla Ice Cream:** The star of the show! A good quality dairy-free vanilla ice cream is key. We’ll discuss recommendations shortly, but the goal is a creamy, scoopable base that freezes well.
Each ingredient is chosen not just for its dietary properties but also for its contribution to the overall deliciousness and integrity of the final product. Let’s get baking!
Step-by-Step Guide: Crafting Your Perfect Ice Cream Sandwiches
Creating these incredible dairy-free gluten-free ice cream sandwiches is a rewarding process, and following these detailed steps will ensure your success. Precision and proper chilling are your best friends here!
- **Prepare Your Baking Station:** Begin by preheating your oven to 375°F (190°C). Line a baking sheet with parchment paper. This non-stick surface is crucial for easily removing your delicate cookies after baking.
- **Combine Dry Ingredients:** In a medium-sized mixing bowl, sift together the tigernut flour, gelatin, tapioca starch, coconut flour, and baking soda. Sifting helps to remove any lumps and ensures that your dry ingredients are evenly distributed, leading to a consistent cookie texture.
- **Incorporate Wet Ingredients:** To the sifted dry ingredients, add the maple syrup, melted coconut oil, and your choice of dairy-free chocolate chips (or AIP-friendly carob chips). Stir everything together thoroughly with a spoon or spatula until a cohesive dough forms. The dough should be soft but manageable, not too sticky.
- **Form and Flatten the Cookies:** Using a medium-sized ice cream scoop (a 1.5-inch diameter scoop works well for uniform cookies), scoop 8 even portions of dough onto your prepared baking sheet. Leave a little space between each cookie. Once scooped, use the palm of your hand or the bottom of a glass to gently flatten each cookie dough ball to about ¼ to ½ inch thickness. These cookies won’t spread much, so shape them as you’d like them to appear in the final sandwich.
- **Bake and Cool the Cookies:** Place the baking sheet into the preheated oven and bake for approximately 12 minutes, or until the edges are lightly golden and the cookies are baked through. They should feel firm to the touch but still soft in the center. Carefully remove the baking sheet from the oven and allow the cookies to cool completely on a wire rack. Once cool, transfer them to the refrigerator for at least 30 minutes to chill further. This step is vital for making the cookies sturdy enough to handle the ice cream.
- **Prepare the Ice Cream Layers:** While your cookies are cooling and chilling, take your dairy-free vanilla ice cream out of the freezer. Let it sit on the countertop for about 5 minutes to soften slightly. It should be soft enough to scoop easily but not melted. Scoop about 4 large portions of the softened ice cream onto a separate small parchment-lined baking sheet. Using a rubber spatula or an offset spatula, gently flatten the ice cream into a rectangle or square shape, aiming for about ½ inch thickness. The goal is to create a slab of ice cream that you can easily cut. Transfer this sheet of flattened ice cream to the freezer and allow it to fully freeze for at least 1-2 hours, or until solid.
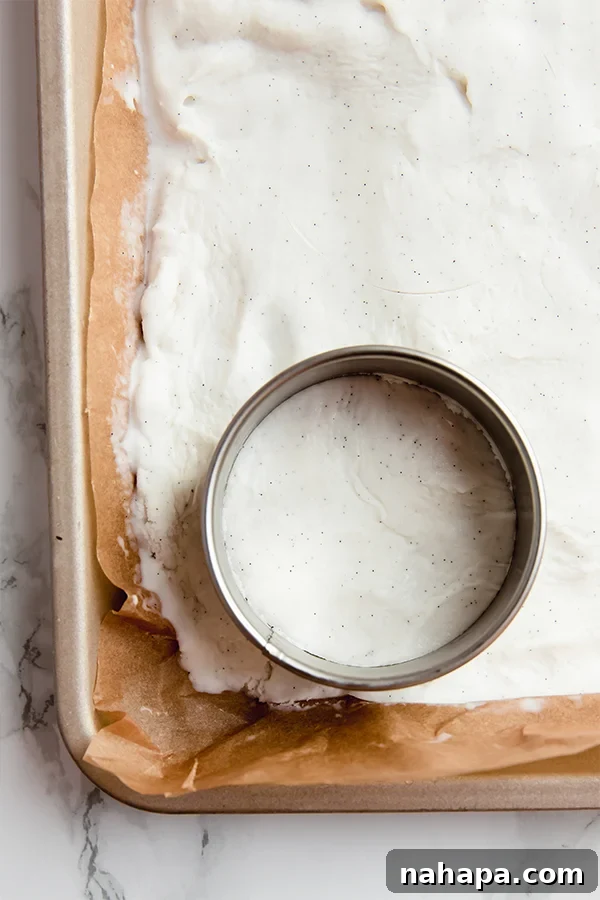
- **Assemble the Ice Cream Sandwiches:** Once both your cookies are well-chilled and your ice cream slab is frozen solid, it’s time for assembly! Take the frozen ice cream slab out of the freezer. Using a biscuit cutter that is roughly the same diameter as your cookies, cut out 4 uniform circles of ice cream. Work quickly to prevent the ice cream from melting too much. Carefully place one frozen ice cream circle between two chilled cookies. Gently press them together just enough to adhere, but don’t squeeze too hard.
- **Serve or Store:** Your homemade dairy-free gluten-free ice cream sandwiches are now ready to be enjoyed! For the best experience, serve them immediately. If you’re not eating them all at once (and who could blame you if you are!), wrap each sandwich individually in freezer-safe plastic wrap or parchment paper, then store them in an airtight container or freezer bag in the freezer.
Enjoy your wholesome, delicious, and perfectly customized ice cream sandwiches!
Tips for Success: Achieving Ice Cream Sandwich Perfection
Making homemade ice cream sandwiches, especially with special dietary considerations, can be an art. Here are some pro tips to ensure your dairy-free gluten-free ice cream sandwiches turn out absolutely perfect every time:
- **Chill Your Cookies Thoroughly:** This is arguably the most critical step for stable sandwiches. After baking, your cookies must be completely cooled and then chilled in the refrigerator for at least 30 minutes, or even longer. Cold cookies are firm cookies, and firm cookies won’t crumble or melt as easily when you add the ice cream.
- **Work Quickly with Ice Cream:** Ice cream, by nature, melts. When you take your frozen ice cream slab out to cut and assemble, work efficiently. Have your cookies ready, your biscuit cutter nearby, and a clear workspace. The faster you assemble, the less melting will occur, leading to a cleaner sandwich.
- **Uniform Cookie Size:** Try to make your cookies as uniform in size and thickness as possible. This ensures even baking and a visually appealing, easier-to-eat sandwich. Using an ice cream scoop for the dough and gently flattening with a consistent pressure helps immensely.
- **Don’t Over-Softened the Ice Cream:** While you want the ice cream soft enough to flatten, you don’t want it soupy. If it’s too soft, it will be hard to flatten evenly and will take longer to refreeze. A few minutes on the counter is usually sufficient.
- **Freezer-Safe Storage is Key:** If you’re planning to store these for later, individual wrapping in plastic wrap or parchment paper prevents freezer burn and keeps them fresh. An airtight container adds another layer of protection.
- **Consider Your Climate:** If you live in a very warm or humid environment, you might need to work even faster and ensure everything is extra cold. You might even want to pop the assembled sandwiches back into the freezer for 10-15 minutes before serving if they start to soften too much.
- **AIP Substitutions:** Remember to use carob chips instead of chocolate chips if following the AIP protocol. Also, ensure your dairy-free vanilla ice cream is AIP-compliant (often homemade or specific brands that avoid common AIP triggers).
Frequently Asked Questions About Our Dairy-Free Ice Cream Sandwiches
Here are some common questions and helpful answers to guide you in making and enjoying these wonderful dairy-free gluten-free ice cream sandwiches:
What kind of dairy-free ice cream should I use for this recipe?
I personally adore the coconut bliss brand of vanilla ice cream for a delicious store-bought dairy-free option. Its creamy texture and rich vanilla flavor work perfectly here. However, any good quality dairy-free vanilla ice cream should work well. For those strictly following the Autoimmune Protocol (AIP), you’ll need to be mindful of ingredients. Many store-bought options may contain non-AIP compliant ingredients like nuts or gums. In such cases, making a homemade AIP-friendly vanilla ice cream is your best bet. There are many fantastic recipes available online for simple, 3-ingredient AIP vanilla ice cream using coconut milk, maple syrup, and vanilla extract.
Can I make these ahead of time and store them in the freezer for later?
Absolutely, you can! These ice cream sandwiches are fantastic for making ahead, which makes them a perfect party dessert or a convenient treat to have on hand. The key to successful storage is proper wrapping. I highly recommend wrapping each individual sandwich tightly in freezer-safe plastic wrap or parchment paper. Then, place the wrapped sandwiches in an airtight freezer bag or container. This prevents freezer burn and keeps them fresh and delicious for longer.
How long can you store them in the freezer?
If you’re anything like me, these delicious treats will be devoured pretty quickly! But if you manage to resist, they can be kept well in the freezer for a few weeks. Stored correctly (individually wrapped and in an airtight container), they will maintain their quality, texture, and flavor for up to 2-3 weeks. Beyond that, while still safe to eat, the quality might start to decline slightly.
Do you really have to cut out the ice cream with a biscuit cutter? Can you just scoop it?
While using a biscuit cutter to create uniform ice cream circles results in a very neat and aesthetically pleasing sandwich that’s easier to eat, it’s definitely not mandatory. You absolutely can just scoop the softened ice cream directly onto one cookie and then top it with another. The result will be equally delicious, though perhaps a bit messier to handle – but sometimes, that’s part of the fun of an ice cream sandwich!
Can I make substitutions for the flours?
This recipe is specifically formulated for tigernut flour and tapioca starch to achieve the desired gluten-free, grain-free, and paleo/AIP texture. Substituting these flours, especially tigernut flour, can significantly change the outcome in terms of texture, moisture, and how the cookies hold together. If you’re experienced with gluten-free baking, you might experiment with other AIP-friendly flours like cassava flour, but results are not guaranteed. For best results, stick to the flours specified in the recipe.
Is this recipe truly AIP-friendly?
Yes, with the specified modifications, this recipe is designed to be AIP-friendly! The main considerations are ensuring your chocolate chips are swapped for carob chips (as cocoa is typically reintroduced later in AIP) and that your chosen dairy-free ice cream is compliant. As mentioned, most store-bought dairy-free ice creams are not AIP-compliant due to ingredients like nuts, gums, or sweeteners. Therefore, making a homemade AIP vanilla ice cream is usually the safest and best option for strict AIP adherence. Always double-check ingredient labels if using store-bought products.
More Wholesome Sweet Treats You’ll Love
If you’re enjoying these delicious and health-conscious ice cream sandwiches, you’ll be thrilled to discover more delightful recipes that cater to similar dietary needs. Explore these other fantastic treats from Unbound Wellness:
- Decadent Chocolate Ice Cream Sandwiches: For the ultimate chocolate lovers, a richer, cocoa-infused version of this beloved treat.
- Exotic Turmeric Mango Coconut Ice Cream: A vibrant, flavorful, and incredibly refreshing ice cream that’s bursting with tropical goodness.
- Refreshing Blueberry Lemon Sorbet: A light, zesty, and naturally sweet sorbet perfect for a palate cleanser or a fruity dessert.
Cookie Ice Cream Sandwiches Recipe
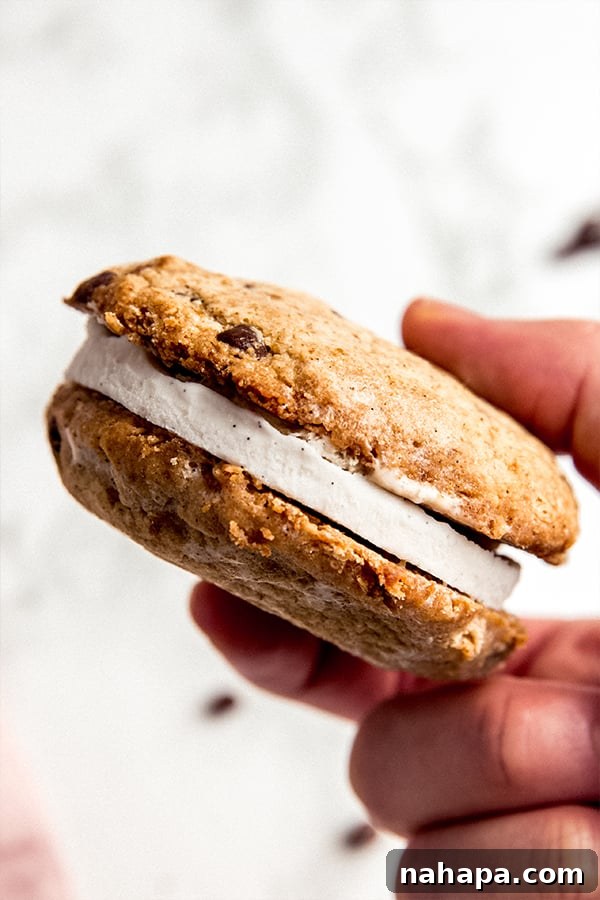
These cookie ice cream sandwiches are a decadent and delicious summertime treat! They’re dairy-free, gluten-free, paleo, and can be made AIP-friendly.
Yield: 4 servings | Prep Time: 1 hour | Cook Time: 12 minutes | Author: Michelle
Ingredients
- 1 cup tigernut flour
- ¼ cup tapioca starch
- 2 tbsp coconut flour
- 1 tbsp gelatin
- ⅛ tsp baking soda
- ⅓ cup maple syrup
- ⅓ cup coconut oil
- 3 tbsp dairy-free chocolate chips (sub carob chips for AIP)
- About 4 large scoops of dairy-free vanilla ice cream (I recommend NadaMoo! for store-bought, or homemade/AIP vanilla ice cream)
Instructions
- Preheat the oven to 375 F and line a baking sheet with parchment paper.
- Using a medium bowl, sift the tigernut flour, gelatin, tapioca starch, coconut flour, and baking soda together.
- Stir in the maple syrup, coconut oil, and chocolate chips. Stir well until a dough forms.
- Using a medium-sized ice cream scoop (like this one), scoop 8 evenly sized cookies onto the baking sheet. Use your hand to flatten the cookies.
- Bake in the preheated oven for 12 minutes or until baked through. Cool completely on a cooling rack. Transfer to the fridge to chill further.
- While the cookies cool, set the ice cream on the countertop for about 5 minutes, or just enough so you can easily scoop it. Scoop about 4 large scoops worth of ice cream onto a small parchment-lined baking sheet. Use a rubber spatula to flatten to about 1/2″ thickness. Transfer to the freezer and allow it to fully freeze.
- Using a biscuit cutter, cut 4 uniform circles of ice cream. Carefully sandwich between two cookies.
- Serve immediately or wrap in freezer-safe wrap and store.
Notes
You can also simply scoop the ice cream directly onto the cookie and sandwich them together, though it will be slightly more messy to eat!
All nutritional information are estimations and will vary. Estimations do not include optional ingredients.
Nutrition Information (Estimated)
- Serving: 1 serving
- Calories: 641 kcal
- Carbohydrates: 49.1g
- Protein: 8.9g
- Fat: 36.9g
- Fiber: 3.3g
All nutrition facts are estimated and will vary.
Made this Recipe? Share Your Creation!
We’d love to see your delicious dairy-free gluten-free ice cream sandwiches! Tag @unboundwellness on Instagram and use the hashtag #unboundwellness!