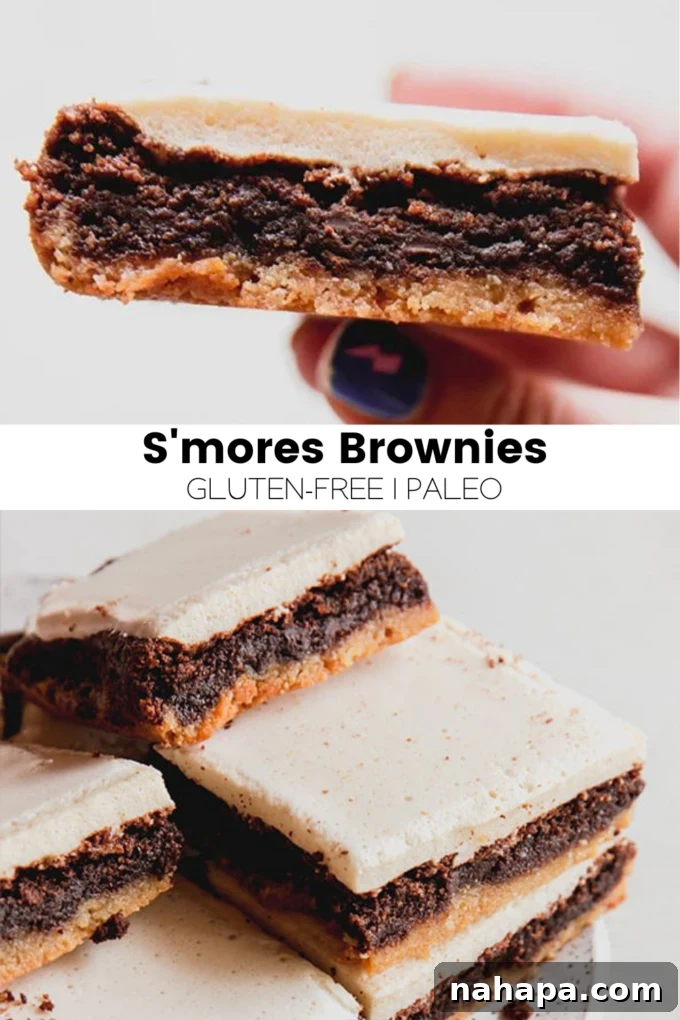
Prepare to be enchanted by the ultimate dessert experience: S’mores Brownies! Imagine the iconic campfire treat, reimagined into a luscious, layered brownie bar that’s not only incredibly decadent but also thoughtfully crafted to be grain-free and egg-free. This isn’t just another brownie recipe; it’s a nostalgic journey transformed into a sophisticated, bake-at-home delight that promises to be an absolute hit with everyone who takes a bite. Forget the sticky mess of outdoor s’mores; these brownies deliver all the beloved flavors in a convenient, bakery-style package, perfect for any gathering or a cozy night in.
Embrace the Magic of Homemade S’mores Brownies
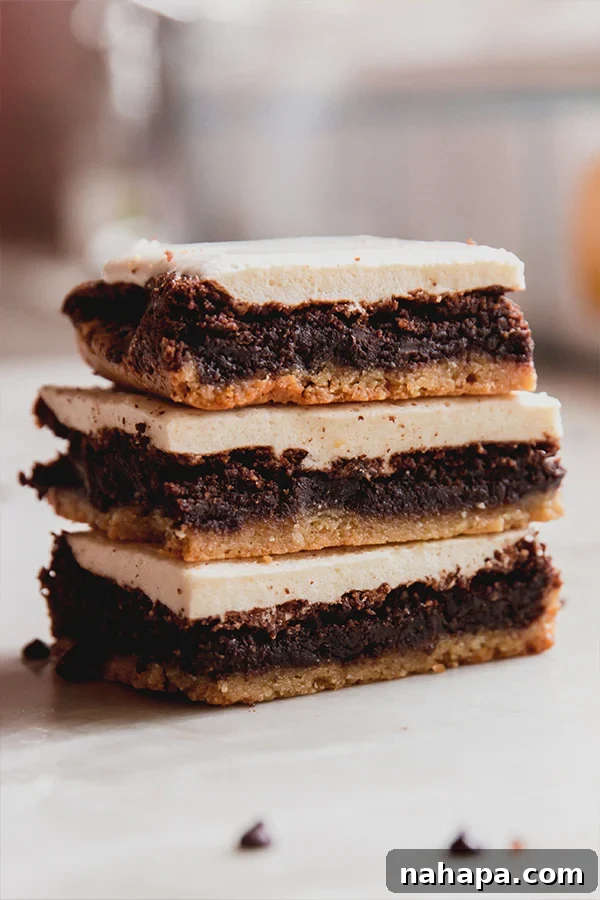
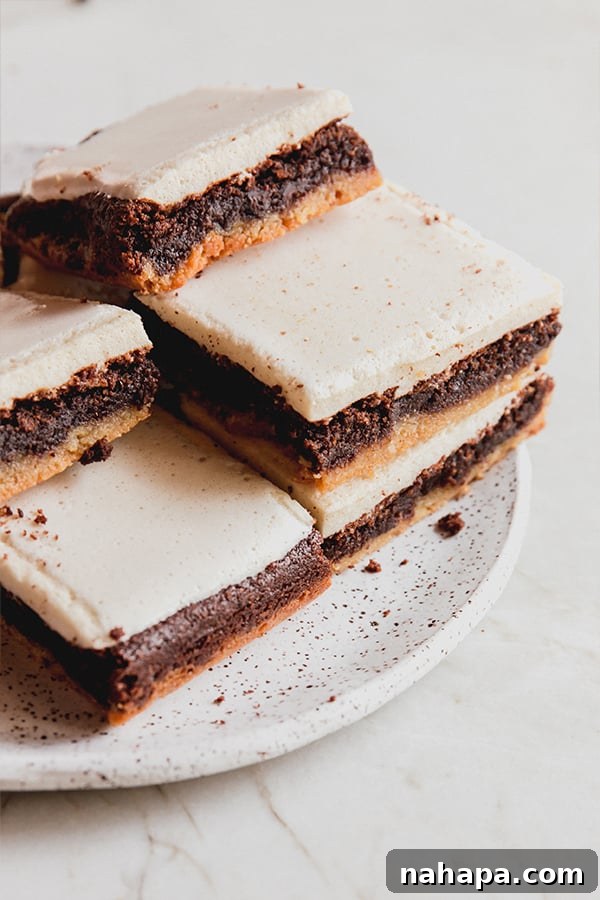
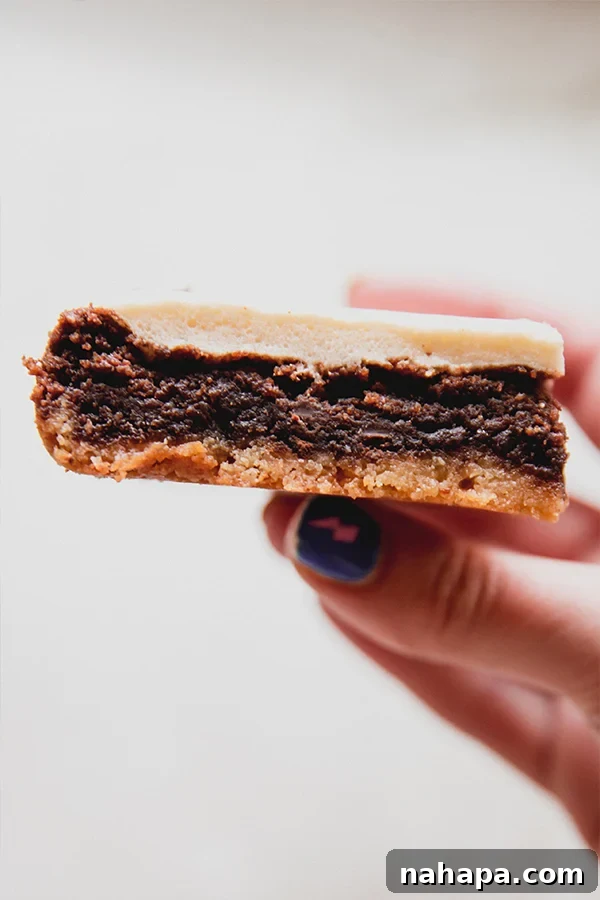
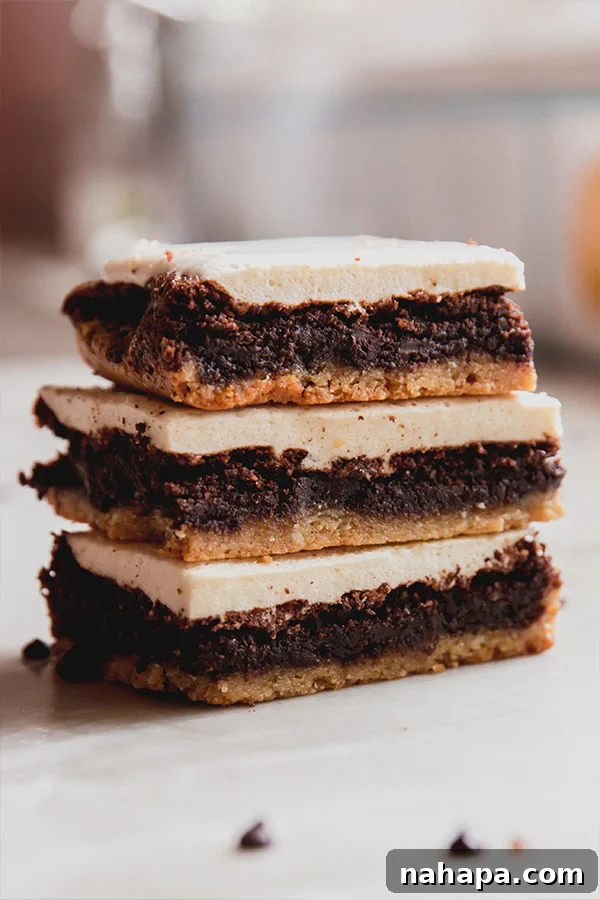
S’mores hold a special place in our hearts, evoking memories of warm summer nights, crackling campfires, and the joyful indulgence of toasted marshmallows, melted chocolate, and crisp graham crackers. While the traditional campfire version is undeniably charming, these S’mores Brownies offer a delightful new way to savor those cherished flavors, bringing them right into your kitchen. We’ve meticulously designed this recipe to capture the essence of classic s’mores within a multi-layered masterpiece: a sturdy, cinnamon-kissed graham cracker crust, a rich and fudgy chocolate brownie core, and a glorious, fluffy marshmallow topping that will have you dreaming of more.
What makes these brownies truly special is their ability to cater to various dietary needs without compromising on taste or texture. By making them grain-free and egg-free, we’ve ensured that more people can enjoy this incredible dessert, transforming a typically ingredient-heavy treat into an accessible and wholesome option. Each bite offers a harmonious blend of textures and tastes—the slight crunch of the crust, the dense chewiness of the brownie, and the soft, sweet embrace of the marshmallow, creating a symphony of flavors that is genuinely irresistible.
Why These Gluten-Free S’mores Brownies Are a Must-Try
- The Unbeatable S’mores Flavor Profile: There’s something inherently magical about the combination of chocolate, marshmallow, and graham cracker. This recipe expertly balances these elements, delivering that iconic s’mores taste in every single square. It’s a perfect solution for enjoying these flavors year-round, no campfire required!
- Dietary Inclusivity and Wholesome Ingredients: Catering to those with specific dietary preferences, these brownies are proudly grain-free and egg-free. We also provide options to make them dairy-free, ensuring that these delectable treats can be enjoyed by a wider audience, including those following an Autoimmune Protocol (AIP) with simple modifications.
- Streamlined Baking for Ultimate Convenience: We understand that life can be busy, which is why this recipe incorporates a smart shortcut: a pre-made gluten-free brownie mix. This simple step significantly reduces prep time without sacrificing an ounce of flavor or quality, allowing you to create a complex-tasting dessert with impressive ease.
- A Show-Stopping Dessert for Any Occasion: From casual family gatherings to special celebrations, these S’mores Brownies are guaranteed to impress. Their beautiful layers and rich flavors make them a standout dessert that looks as good as it tastes, sparking joy and conversations with every serving.
Essential Ingredients for Crafting Your Perfect S’mores Brownies
Creating these multi-layered masterpieces involves a few key components, each playing a crucial role in building the irresistible texture and flavor of our grain-free, egg-free S’mores Brownies. We’ve chosen ingredients that are both delicious and accommodating to specific dietary considerations.
For the Golden Grain Cracker Crust:
- Almond Flour: This provides the foundational structure for our grain-free “graham cracker” crust. It imparts a delicate nutty flavor and a tender, yet firm, texture, mimicking traditional graham crackers beautifully. Ensure you use blanched, fine almond flour for the best results.
- Arrowroot Starch: A fantastic grain-free thickener, arrowroot starch helps bind the crust ingredients, adding a slight crispness and ensuring the crust holds its shape once baked. Tapioca starch can be used as a direct substitute if arrowroot is unavailable.
- Maple Syrup: Our natural sweetener of choice, maple syrup, not only adds a lovely sweetness but also contributes to the binding properties of the crust. Its distinct flavor complements the cinnamon perfectly.
- Ghee (Melted): Clarified butter, or ghee, provides a rich, buttery flavor and helps bring the crust together. For a completely dairy-free option, melted coconut oil can be substituted at a 1:1 ratio, offering a similar binding and richness.
- Vanilla Extract: A touch of vanilla enhances all the other flavors, adding warmth and depth to the crust.
- Cinnamon: This spice is vital for achieving that classic graham cracker taste. It adds a warm, inviting aroma and a spicy-sweet note that makes the crust truly authentic.
For the Rich and Fudgy Brownie Layer:
- Gluten-Free Brownie Mix: To make this recipe as accessible and simple as possible, we recommend using a high-quality pre-made gluten-free brownie mix. Prepare it according to the package directions, ensuring it aligns with your dietary needs (e.g., egg-free if desired, or if the mix allows for egg substitutes). This shortcut saves considerable time without compromising the fudgy, chocolatey goodness essential to s’mores. For those who prefer to bake from scratch, any reliable homemade paleo or gluten-free brownie recipe will work, just ensure it’s baked as directed before topping.
For the Fluffy Marshmallow Topping:
- Gelatin: This is the magical ingredient that creates the light, airy, and bouncy texture of homemade marshmallows. Unflavored gelatin powder is bloomed in water before being whipped into a delightful cloud.
- Honey: As a natural sweetener, honey provides the sweet foundation for our marshmallow layer. Its distinct floral notes add a unique complexity compared to traditional corn syrup.
- Vanilla Extract: Just like in the crust, vanilla extract is crucial for enhancing the sweetness and rounding out the flavors of the marshmallow.
- Water: Used for blooming the gelatin and helping to create the honey syrup, water is a simple yet essential component for achieving the perfect marshmallow consistency.
Understanding the role of each ingredient will not only help you successfully make these brownies but also empower you to confidently make substitutions if needed, always keeping the delicious end result in mind.
Mastering the Layers: How to Make Gluten-Free S’mores Brownies
Crafting these extraordinary S’mores Brownies is a delightful process, broken down into distinct, manageable steps. Follow this detailed guide to ensure each layer contributes to a perfectly balanced and utterly delicious treat.
Phase 1: Building the Golden Graham Cracker Crust
- Preheat Oven and Prepare Baking Dish: Begin by preheating your oven to 350°F (175°C). Line an 8×8-inch baking dish with parchment paper, leaving an overhang on two sides to easily lift the brownies out later. Lightly grease the parchment paper to prevent sticking.
- Combine Crust Ingredients: In a large mixing bowl, combine the almond flour, arrowroot starch (or tapioca starch), maple syrup, melted ghee (or coconut oil), vanilla extract, and cinnamon. Stir vigorously with a spoon or spatula until all ingredients are fully incorporated. The mixture should form a cohesive, slightly wet, and sticky “dough” that resembles coarse graham cracker crumbs.
- Press and Parbake: Transfer the crust mixture into the prepared baking dish. Using the back of a spoon or your clean fingers, press the mixture evenly and firmly across the bottom of the dish, creating a compact layer. This ensures a stable base for your brownies. Transfer the dish to the preheated oven and parbake for 10 minutes. This partial bake helps to set the crust, preventing it from becoming soggy once the brownie layer is added.
- Cool Completely: Remove the baking dish from the oven and set it aside on a wire rack. Allow the crust to cool completely to the touch. This step is crucial; attempting to add the brownie batter to a warm crust can result in an uneven bake or a messy final product.
Phase 2: The Heart of Chocolatey Goodness (Brownie Layer)
- Prepare the Brownie Batter: While the crust is cooling, prepare your chosen gluten-free brownie mix according to the package instructions. If using a homemade recipe, follow its specific steps. Ensure your mix is compatible with your dietary needs (e.g., egg-free or dairy-free as required).
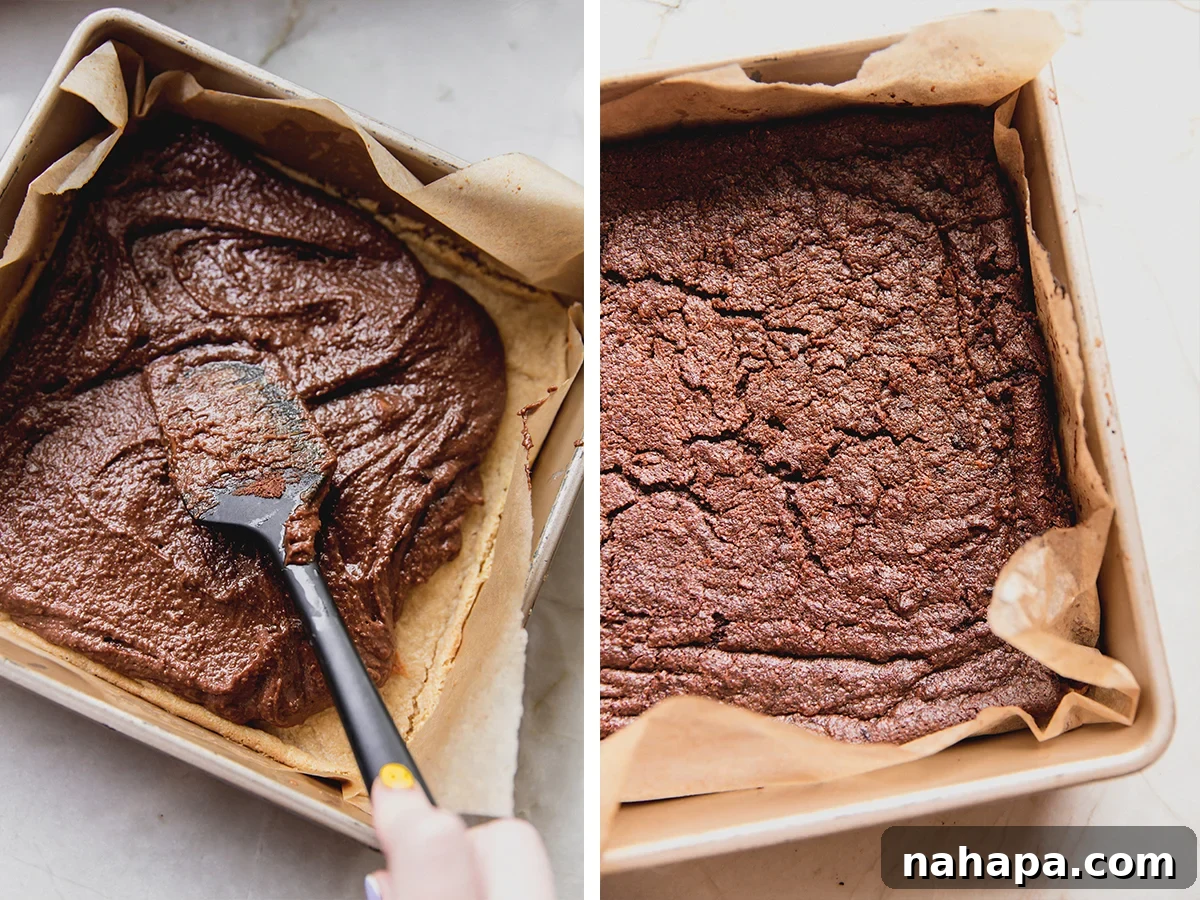
- Layer Over the Crust: Once the crust is completely cool, carefully pour the prepared brownie batter directly over it. Use an offset spatula or the back of a spoon to gently spread the batter evenly across the crust, taking care not to disturb the parbaked layer beneath.
- Bake to Perfection: Return the baking dish to the preheated oven. Bake for approximately 25-28 minutes. Baking times can vary, so keep an eye on your brownies. To check for doneness, insert a toothpick into the center of the brownie layer; it should come out with moist crumbs attached, but not wet batter. Avoid overbaking, as this can lead to dry brownies.
- Cool Again: Remove the brownies from the oven and place the dish back on the wire rack. Allow them to cool completely. This second cooling period is vital, as it allows the brownies to set fully, making them easier to slice and creating a clean separation between the layers.
Phase 3: The Cloud-Like Marshmallow Topping
- Bloom the Gelatin: In a small, heatproof bowl, pour ½ cup of cold water. Evenly sprinkle the gelatin powder over the water’s surface. Stir gently with a fork to ensure there are no dry spots. Let the mixture sit for about 5-10 minutes (this is called “blooming”), allowing the gelatin to absorb the water and swell, creating a thick, jelly-like consistency.
- Heat the Sweetener: While the gelatin blooms, combine 1 cup of honey with the remaining ½ cup of water in a medium-sized saucepan. Place the saucepan over low heat and slowly bring the mixture to a temperature of 235-240°F (113-116°C). Use a candy thermometer for accuracy. It’s crucial not to let it boil rapidly; a gentle simmer is ideal. As soon as it reaches the target temperature, remove it immediately from the heat.
- Whip it Up! Carefully pour the hot honey syrup into the bloomed gelatin mixture. Immediately begin whisking on high speed with either an electric hand mixer or a stand mixer fitted with a whisk attachment. Continue to whisk for 8-10 minutes until the mixture transforms into a thick, glossy, and marshmallow-like fluff, forming stiff peaks. At the halfway point, add the vanilla extract and continue beating. The mixture should be noticeably lighter in color and have significantly increased in volume.
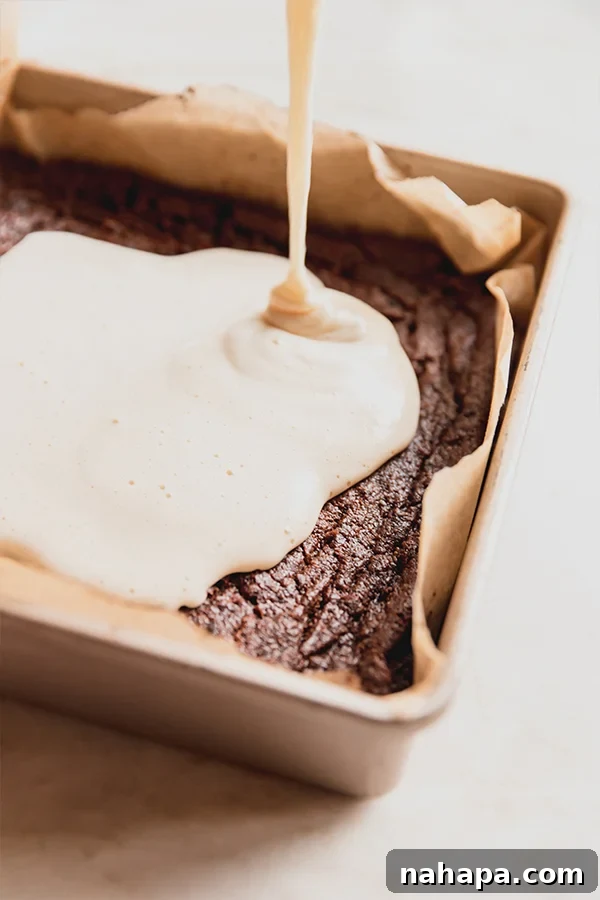
- Pour and Chill: Working quickly (as the marshmallow sets as it cools), pour the fluffy marshmallow mixture evenly over the completely cooled brownie layer in the baking dish. Use an offset spatula to spread it smoothly from edge to edge. Transfer the dish to the refrigerator and chill for at least 3-4 hours, or until the marshmallow topping is firm, soft, and springy to the touch. This chilling time is essential for the marshmallow to set properly.
Phase 4: Slice, Serve, and Savor!
- The Final Cut: Once chilled and firm, use the parchment paper overhang to lift the entire slab of S’mores Brownies out of the baking dish and onto a cutting board. For clean cuts, use a sharp, warm knife (run it under hot water and wipe dry between cuts). Slice into 9 generous bars, or 18 smaller servings if desired.
- Enjoy! Serve your exquisite S’mores Brownies chilled, and prepare for a chorus of compliments!
Expert Tips for S’mores Brownie Success
- Chilling is Key: The marshmallow layer needs ample time to set properly. Resist the urge to cut the brownies before they are thoroughly chilled (at least 3-4 hours in the refrigerator). This ensures clean slices and a stable, non-sticky marshmallow topping.
- Precise Cutting for Perfect Portions: Unlike some s’mores bars that are meant to be pulled apart, these brownies, with their dense brownie and firm marshmallow, are best sliced cleanly. Use a sharp knife, and for the neatest edges, wipe the blade clean and warm it slightly between each cut.
- Ingredient Quality Matters: While we use a shortcut for the brownie layer, investing in high-quality almond flour, pure maple syrup, and good vanilla extract will elevate the overall flavor of your S’mores Brownies.
- Don’t Rush the Cooling: Allow each baked layer (crust and brownie) to cool completely before adding the next. This prevents layers from melding improperly and ensures distinct, beautiful layers in your finished product.
- Temperature Control for Marshmallow: When heating the honey mixture for the marshmallow, using a candy thermometer is highly recommended. Achieving the correct temperature (235-240°F) is crucial for the gelatin to set properly and yield a perfectly fluffy marshmallow.
Storage and Shelf Life
To maintain the optimal texture and freshness of your S’mores Brownies, store them in an airtight container in the refrigerator. They will keep beautifully for 2-3 days. If you find the marshmallow has stiffened too much directly from the fridge, allow them to sit at room temperature for 10-15 minutes before serving for a softer, more pliable marshmallow layer.
Making Them AIP-Friendly: Autoimmune Protocol Modifications
For those following the Autoimmune Protocol (AIP), these S’mores Brownies can be easily adapted with a few specific tweaks:
- AIP-Compliant Crust Alternative: For an AIP-friendly crust, you would need to use a different base as almond flour is not permitted. Consider using an AIP-compliant crust recipe, often made with ingredients like tigernut flour, coconut flour, or cassava flour, which are suitable for AIP.
- AIP-Approved Brownie Mix: The conventional gluten-free brownie mix would need to be replaced with an AIP brownie mix. These mixes are specifically formulated without common inflammatory ingredients such as eggs, nuts, and certain flours, ensuring they align with the protocol.
By making these careful substitutions, you can enjoy these delightful S’mores Brownies while adhering to your AIP dietary guidelines.
More Delightful Recipes You’ll Love
If you’re a fan of these S’mores Brownies, you’re sure to enjoy these other sweet treats:
- S’mores Fudge: All the s’mores flavor packed into a rich, decadent fudge.
- Cosmic Brownies: A nostalgic, fun-filled chocolate treat reminiscent of childhood favorites.
- Paleo Chocolate Zucchini Brownies: A delicious way to enjoy brownies with added vegetables, keeping them wholesome and moist.
Gluten Free S’mores Brownies
Yield: 9 bars
Prep Time: 30 mins
Cook Time: 45 mins
Author: Michelle
Leave a Review
Pin Recipe
Ingredients
For the graham cracker crust
- 1 cup almond flour
- 2 tbsp arrowroot starch
- ¼ cup maple syrup
- ¼ cup ghee, melted (sub coconut oil)
- ½ tsp vanilla extract
- 1 tsp cinnamon
For the brownie layer
- Gluten-free brownie mix, prepared as directed (for homemade use this recipe)
For the marshmallow
- 1 cup water, divided
- 3 tbsp gelatin
- 1 cup honey
- ½ tsp vanilla extract
Instructions
To make the graham cracker crust
- Preheat the oven to 350 F and line an 8×8″ baking dish with lightly greased parchment paper.
- Combine the ingredients for the crust in a large bowl and stir until fully incorporated. The batter should be fairly wet and sticky.
- Press the batter into the baking dish until it evenly covers the bottom. Transfer to the oven and parbake for 10 minutes. The crust will not be baked through yet.
- Remove the pan from the oven and set aside, allowing the crust to cool.
For the brownie layer
- Prepare the brownies as directed. I used a boxed brownie mix to simplify the recipe.
- Carefully add the brownie batter over the graham cracker crust, using a spatula to evenly press the brownie batter down.
- Transfer to the oven and bake for 25-28 minutes or until a toothpick inserted comes out clean. Remove from the oven and allow to cool to the touch.
For the marshmallow
- Pour 1/2 cup of water into a small bowl and sprinkle the gelatin over top. Stir gently to ensure the gelatin is combined. Set aside.
- Using a medium-sized pot slowly heat the honey combined with the other 1/2 cup of water. Slowly bring the temperature to 235-240 F degrees on low heat. Remove from heat immediately once the mixture comes to temperature.
- Slowly add in the honey mixture to the gelatin mixture as you whisk on high with either an electric hand mixer or a stand mixer. Add the vanilla. Continue whisking on high, until stiff peaks start to form in the marshmallow mixture.
- Pour the mixture over the prepared brownies and place in the fridge to harden for 3-4 hours or until soft and springy to the touch.
- Slice into 9 bars (or 18 for smaller servings) and enjoy chilled!
Notes
All nutritional information are estimations and will vary. Estimations do not include optional ingredients.
Nutrition Information (Estimated):
- Serving: 1 serving
- Calories: 402 kcal
- Carbohydrates: 64.5g
- Protein: 5.4g
- Fat: 11g
- Fiber: 0.7g
All nutrition facts are estimated and will vary.
Did you Make this Recipe?
Tag @unboundwellness on Instagram and hashtag #unboundwellness!
There you have it—a comprehensive guide to creating the most incredible grain-free, egg-free S’mores Brownies. This recipe is a testament to the fact that dietary considerations don’t mean sacrificing flavor or fun. Each layer is crafted to perfection, delivering a delightful blend of textures and tastes that will transport you back to those cherished campfire memories, all from the comfort of your kitchen. Gather your ingredients, follow these steps, and prepare to indulge in a truly unforgettable dessert that celebrates the joy of s’mores in every magnificent bite!