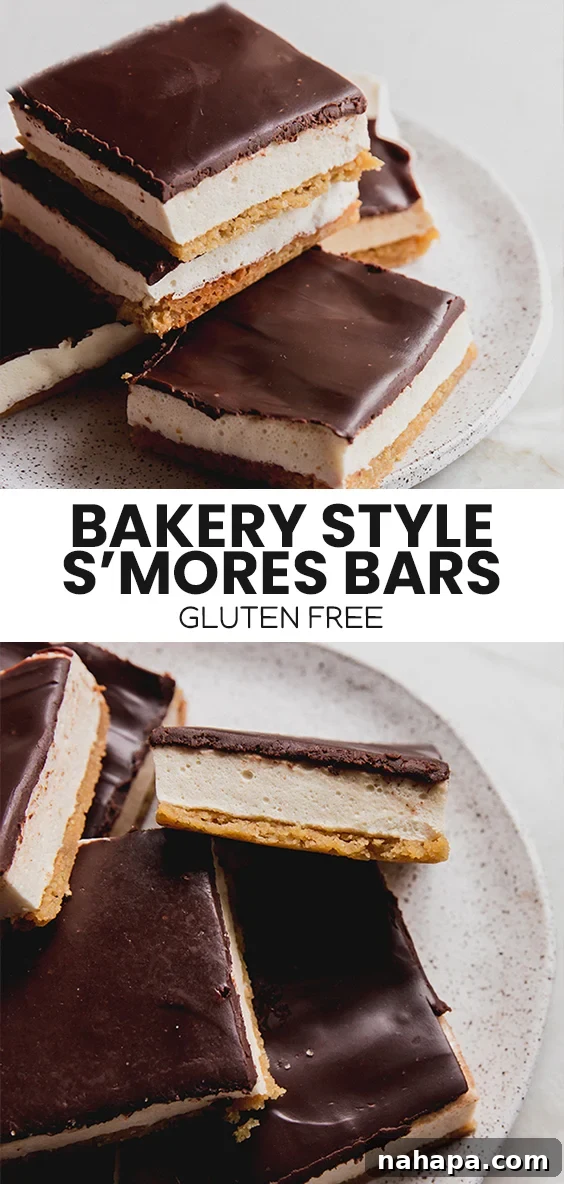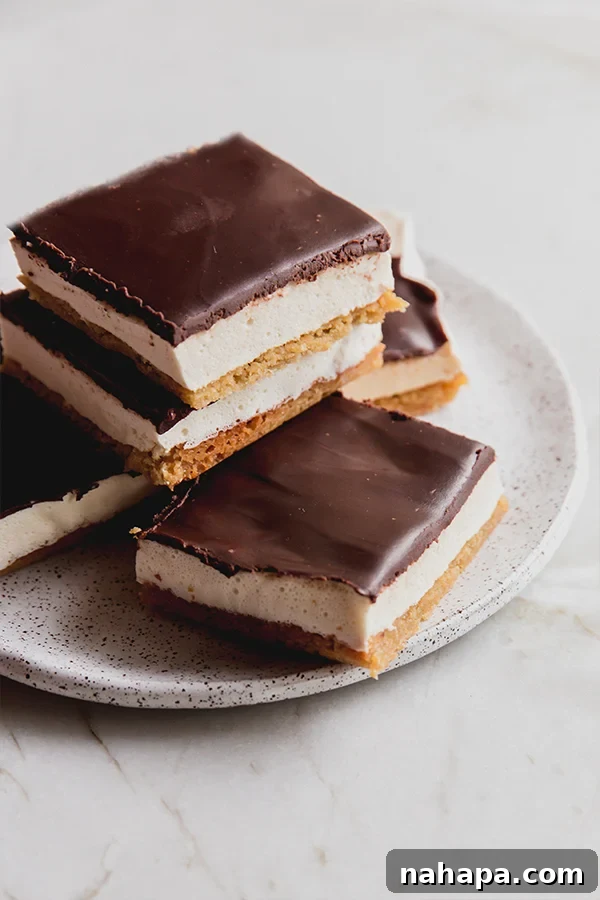
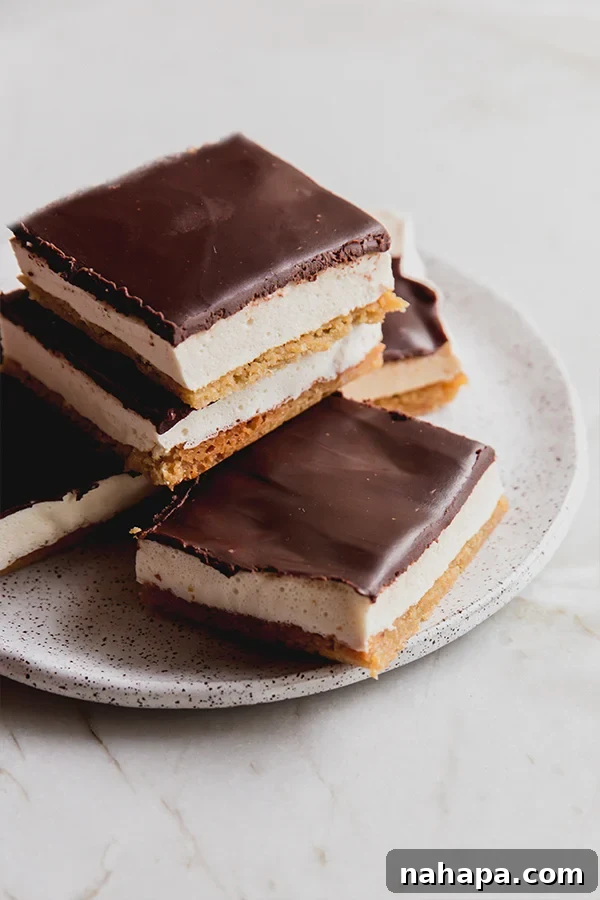
Get ready to indulge in the ultimate sweet escape with these divine gluten-free s’mores bars! Imagine a perfectly buttery graham cracker crust, topped with a cloud of homemade, fluffy marshmallow, all crowned with a rich, smooth chocolate ganache. This isn’t just a dessert; it’s a nostalgic journey to campfire memories, reimagined into a sophisticated, bakery-style treat that’s completely free from gluten, soy, and easily adaptable for other dietary needs. Forget the struggle of finding allergen-friendly ingredients for traditional s’mores; these bars offer all the classic flavors you adore, elevated to a truly decadent experience.
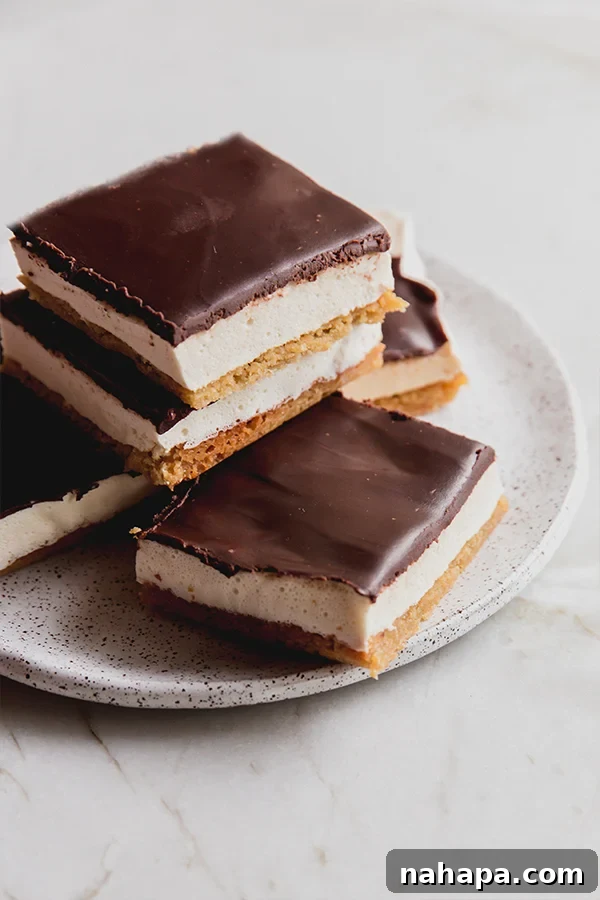
For many, s’mores are a cherished treat, a symbol of warmth and outdoor fun. But for those navigating gluten or soy sensitivities, enjoying this classic can often feel like a distant dream. The good news is, you absolutely don’t have to miss out! This recipe for gluten-free s’mores bars brings back all the beloved flavors and textures, transforming the simple campfire treat into an elegant, easy-to-make dessert that caters to various dietary preferences. These bars are a celebration of flavor and inclusivity, proving that dietary restrictions don’t mean compromising on deliciousness. Each bite delivers a harmonious blend of crisp, soft, and creamy, making them an irresistible addition to any occasion, from casual family gatherings to festive celebrations.
Why You’ll Fall in Love with These Gluten-Free S’mores Bars
These aren’t just any s’mores bars; they’re a revelation for anyone seeking a delightful, allergen-friendly dessert without sacrificing flavor or texture. Here’s why these bars are destined to become your new go-to indulgence:
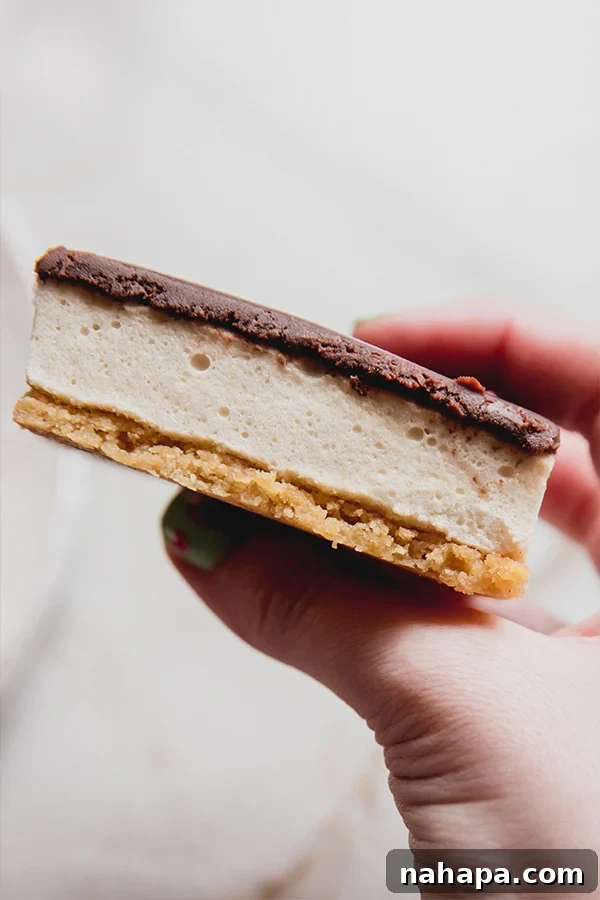
- Authentic S’mores Experience, Elevated: These bars capture the quintessential s’mores taste, but with a refined, bakery-quality twist. The combination of a rich, buttery crust, a soft, airy marshmallow layer, and a smooth, decadent chocolate ganache creates a multi-textured masterpiece that surpasses the traditional campfire version. It’s truly a s’more reimagined for the dessert connoisseur.
- Remarkably Allergen-Friendly: Unlike many store-bought alternatives that can hide problematic ingredients, this homemade version is meticulously crafted to be soy-free and corn-free. The flexibility of the recipe also allows for easy modifications, making it suitable for an AIP (Autoimmune Protocol) diet, ensuring more people can safely enjoy this delicious treat. It’s a dessert designed with your well-being in mind.
- A Perfect Make-Ahead Dessert: Planning a party or need a sweet treat ready to go? These s’mores bars are an excellent option as they require setting time, making them ideal for preparing in advance. Simply assemble, chill, and slice when you’re ready to serve. This frees up your time, allowing you to focus on other preparations or simply relax and enjoy your event.
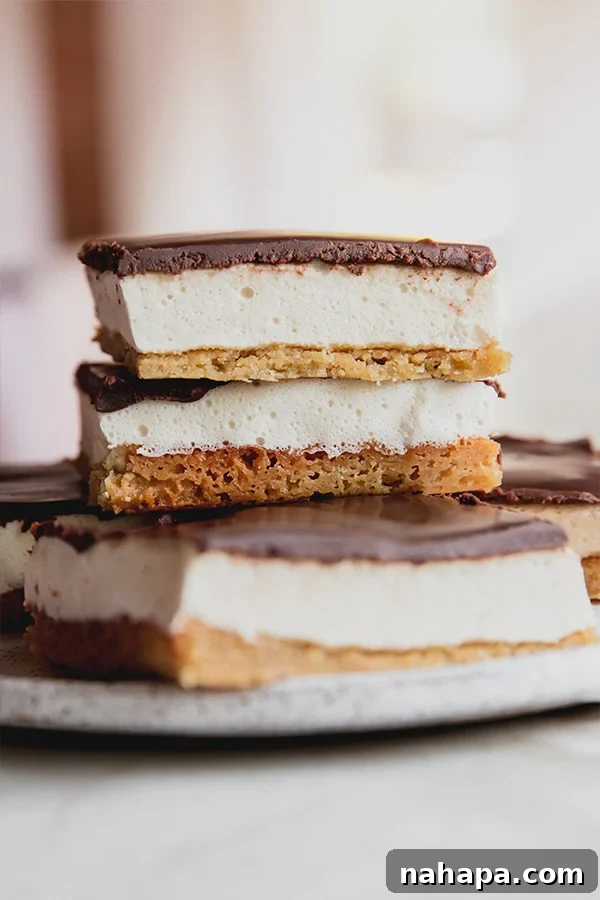
- Visually Stunning and Impressive: With their distinct layers and glossy chocolate topping, these s’mores bars are as beautiful to behold as they are to eat. They present wonderfully on a dessert platter, effortlessly impressing guests and making them think you spent hours in the kitchen, even though the process is surprisingly straightforward.
- Customizable to Your Liking: While the recipe is fantastic as written, it also offers room for personalization. Adjust the amount of cinnamon in the crust for a bolder flavor, try different types of dairy-free chocolate for the ganache, or even experiment with a sprinkle of sea salt on top for a gourmet touch.
Unpacking the Delicious Ingredients for Gluten-Free S’mores Bars
Crafting these delectable s’mores bars involves a careful selection of ingredients, each playing a crucial role in achieving the perfect balance of flavor and texture. Here’s a closer look at the key components:
- Almond Flour: This forms the base of our gluten-free graham cracker crust. Almond flour provides a rich, slightly nutty flavor and a tender crumb, mimicking the texture of traditional graham crackers beautifully while keeping it entirely gluten-free. It’s a fantastic alternative that also adds a boost of healthy fats and protein.
- Arrowroot Starch: A vital component for the crust, arrowroot starch (or tapioca starch as a substitute) helps bind the ingredients and gives the crust a crisp yet tender consistency. It’s a light, flavorless thickener that ensures the crust holds its shape without becoming dense.
- Maple Syrup: Used in both the crust and the homemade marshmallow, pure maple syrup provides natural sweetness and a subtle, rich flavor. It’s a wonderful unrefined sugar alternative that contributes to the overall warmth and depth of the s’mores taste.
- Ghee (Clarified Butter): For that classic buttery graham cracker flavor, ghee is essential. It provides richness and helps bind the crust ingredients. For a dairy-free option, coconut oil can be substituted, offering a similar fat content and a subtle tropical note that complements the chocolate and marshmallow.
- Vanilla Extract and Cinnamon: These two spices are the secret to giving the gluten-free crust an authentic “graham cracker” taste. Vanilla adds warmth and sweetness, while cinnamon provides that signature comforting spice that truly elevates the base layer. Don’t skip these for the best flavor!
- Water, Gelatin, and Honey: These three ingredients are the magical trio behind the incredibly fluffy, homemade marshmallow layer. Gelatin gives the marshmallow its characteristic springy texture, while honey provides natural sweetness and helps create that iconic sticky, chewy consistency when whipped to perfection. Making marshmallows from scratch ensures they are free from corn syrup and other unwanted additives often found in store-bought versions.
- Dairy-Free Chocolate Chips and Coconut Cream: The grand finale! These ingredients combine to create a luscious, dairy-free chocolate ganache. The chocolate chips provide the rich cocoa flavor, while full-fat coconut cream lends a creamy, velvety texture, resulting in a ganache that’s smooth, decadent, and sets beautifully.
Crafting Your Own Gluten-Free S’mores Bars: A Step-by-Step Guide
Making these decadent bars is a rewarding process, breaking down into three main layers, each contributing to the irresistible final product. Follow these steps to create your own batch of gluten-free s’mores bliss.
- Step One: Prepare and Bake the Golden Graham Cracker Crust.
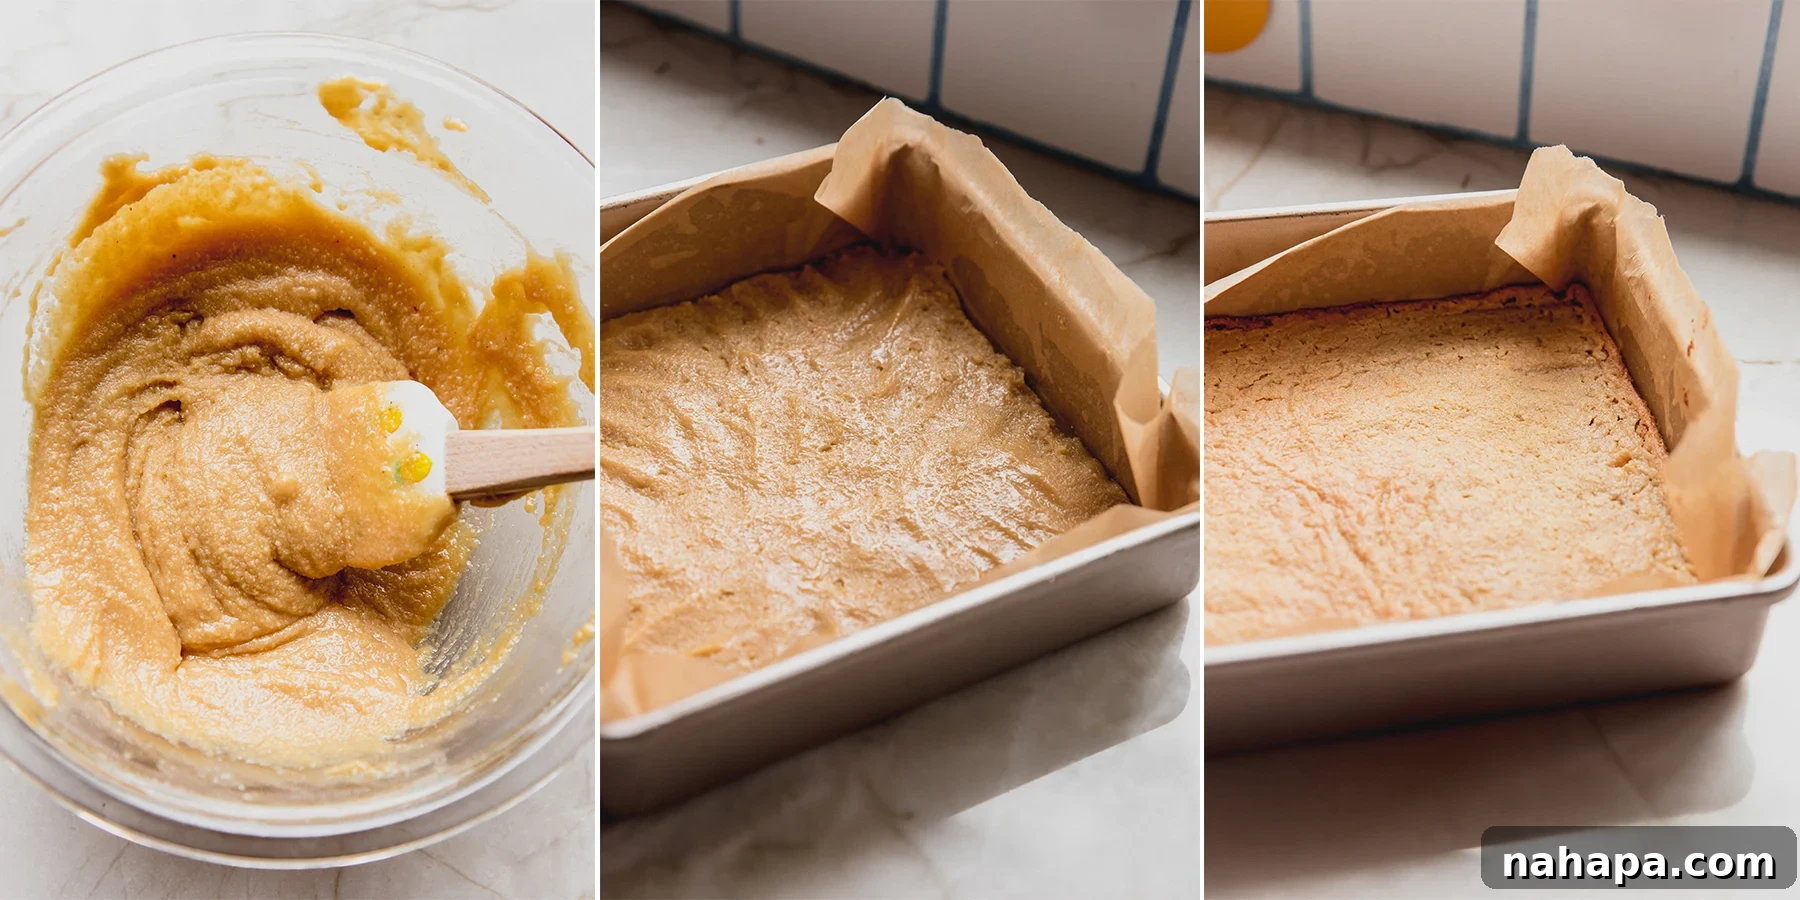
Begin by preheating your oven to 350°F (175°C) and lining an 8×8-inch baking dish with lightly greased parchment paper, allowing some overhang on the sides for easy removal later. In a large mixing bowl, combine the almond flour, arrowroot starch, maple syrup, melted ghee (or coconut oil), vanilla extract, and cinnamon. Stir vigorously until all ingredients are thoroughly incorporated and the mixture forms a moist, sticky dough. This batter should be pliable enough to press. Carefully press the crust mixture evenly into the bottom of the prepared baking dish. Ensure it’s compact and forms a uniform layer. Transfer the dish to the preheated oven and bake for 18-20 minutes, or until the edges are lightly golden brown and fragrant. Once baked, remove the pan from the oven and set it aside on a wire rack to cool completely to the touch. Patience here is key, as a cool crust provides a stable base for the next layer.

- Step Two: Whip Up the Fluffy Homemade Marshmallow Layer.
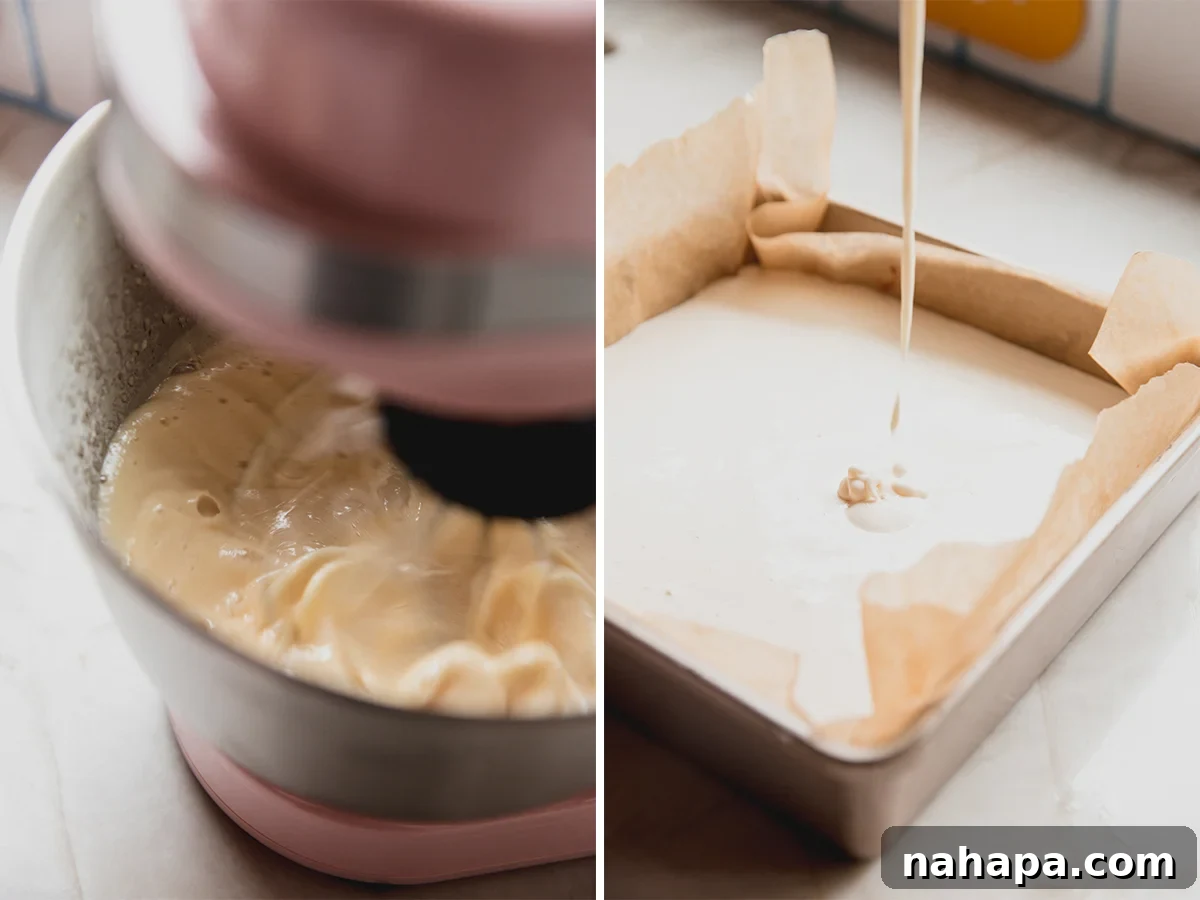
In a small bowl, pour ½ cup of cold water and evenly sprinkle the gelatin powder over the top. Stir gently with a spoon to ensure the gelatin is fully moistened and combined, then set it aside to bloom for about 5-10 minutes. Meanwhile, in a medium-sized, heavy-bottomed pot, combine 1 cup of honey with the remaining ½ cup of water. Place the pot over low to medium heat and slowly bring the mixture to a temperature of 235-240°F (113-116°C) using a candy thermometer. Do not rush this step, as precise temperature is crucial for the marshmallow consistency. Once the mixture reaches the desired temperature, immediately remove it from the heat. Carefully and slowly pour the hot honey mixture into the bloomed gelatin mixture while continuously whisking on high speed with either an electric hand mixer or a stand mixer fitted with the whisk attachment. Continue to whisk on high for 8-10 minutes, or until the mixture becomes thick, glossy, and stiff peaks begin to form, resembling marshmallow fluff. The volume will significantly increase. Once whipped, immediately pour the warm marshmallow mixture evenly over the cooled graham cracker crust in the baking dish. Transfer the dish to the refrigerator and allow the marshmallow layer to harden for 3-4 hours, or until it feels soft yet springy to the touch.
- Step Three: Create and Spread the Decadent Chocolate Ganache.
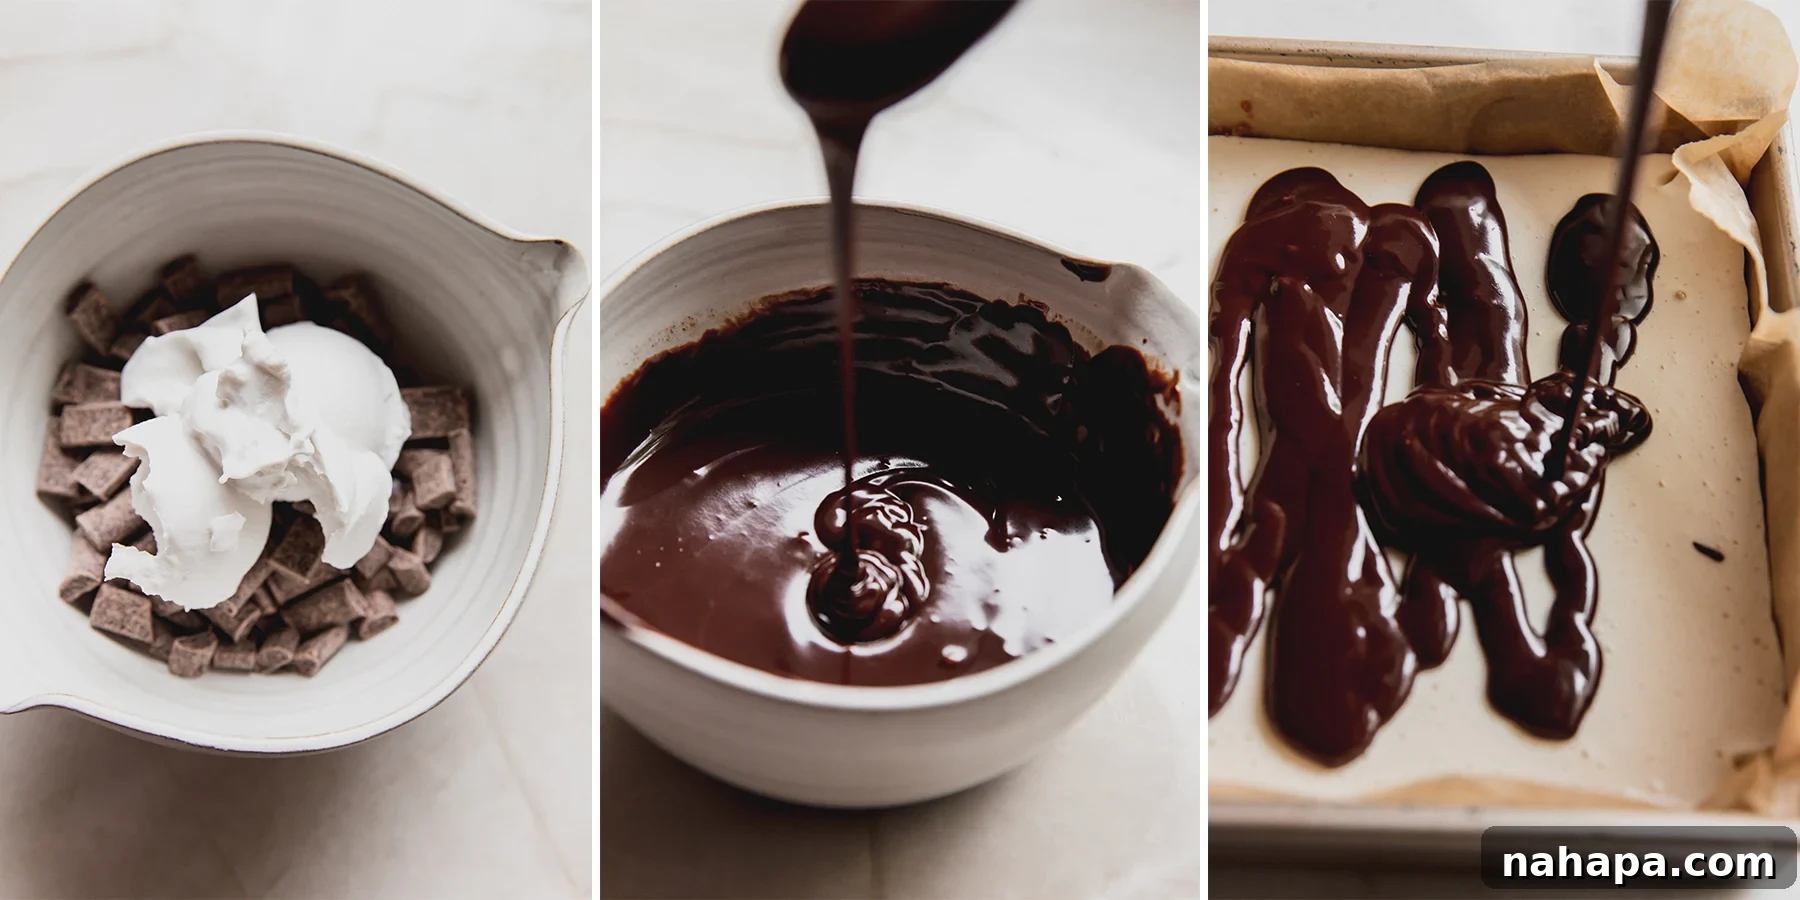
In a heatproof bowl, combine the dairy-free chocolate chips and coconut cream. You can melt this mixture in two ways: either in the microwave in 20-second intervals, stirring thoroughly after each interval until smooth and fully melted, or over a double boiler on the stovetop, stirring constantly. Once melted and smooth, allow the ganache to cool slightly for about 10-15 minutes. It should still be pourable but not steaming hot, as excessive heat could melt the marshmallow layer. Gently pour the slightly cooled chocolate ganache over the set marshmallow layer. Use a rubber spatula to carefully and evenly spread the chocolate across the entire surface. Once the ganache is spread, return the baking dish to the refrigerator to allow the chocolate layer to set and harden for an additional 1-2 hours.
- Step Four: Slice, Serve, and Savor Every Bite!
Once the chocolate ganache is completely set and firm, remove the baking dish from the refrigerator. Carefully lift the s’mores bars out of the pan using the parchment paper overhang and transfer them to a clean cutting board. For best results, use a sharp, warm knife (run it under hot water and wipe dry) to slice the bars. Cut into 9 large, generous slices or 18 smaller, bite-sized pieces, depending on your preference and occasion. These bars are best served chilled, allowing the layers to remain distinct and the chocolate to have a satisfying snap. Enjoy the rich, multi-layered delight of your homemade gluten-free s’mores bars!
Essential Tips & Tricks for Perfect S’mores Bars
Achieving bakery-quality s’mores bars at home is easier than you think, especially with these helpful tips and tricks:
- Embrace the Virtue of Patience: This is arguably the most crucial tip! Allowing each layer—the crust, the marshmallow, and the ganache—to fully cool and set in its own time is vital for the bars to come out perfectly. Rushing the cooling process can lead to messy layers, a runny ganache, or a marshmallow that doesn’t hold its shape. We know the anticipation is intense, but the wait is absolutely worth it for beautifully structured and delicious bars.
- Stand Mixer vs. Hand Mixer: While a stand mixer offers convenience, an electric hand mixer works just as effectively for whipping the marshmallow. It might require a bit more hands-on effort and a slightly longer whipping time to achieve those stiff peaks, but the end result will be just as wonderfully fluffy. Don’t let the lack of a stand mixer deter you from making this recipe!
- Invest in a Candy Thermometer: For perfectly set homemade marshmallows, a reliable candy thermometer is your best friend. It ensures the honey and water syrup reaches the precise temperature (235-240°F) needed for the gelatin to activate correctly and yield that ideal marshmallow consistency. While you might try to eyeball it or use a meat thermometer in a pinch, a dedicated candy thermometer guarantees accuracy and takes the guesswork out of the process, making your marshmallow-making experience much smoother and more successful.
- Grease Your Parchment Paper: When lining your baking dish, don’t forget to lightly grease the parchment paper. This simple step prevents the crust from sticking and makes removing the entire slab of s’mores bars incredibly easy, allowing for clean, precise cuts.
- Sharp, Warm Knife for Slicing: For clean and beautiful slices, especially through the chocolate ganache, use a sharp knife. For an even smoother cut, run your knife under hot water, wipe it dry, and then slice. Repeat this process for each cut to prevent the chocolate from cracking or dragging.
- Quality Ingredients Make a Difference: While substitutions are possible, using high-quality ingredients, especially for the chocolate and honey, will significantly enhance the overall flavor profile of your s’mores bars. Choose dairy-free chocolate chips that you genuinely enjoy eating on their own.
Adapting This Recipe for AIP (Autoimmune Protocol)
For those following an Autoimmune Protocol diet, enjoying sweet treats can be challenging, but these s’mores bars can be tweaked to fit your needs! With a few simple substitutions, you can create a delightful AIP-compliant version:
- AIP-Friendly Crust: Instead of the almond flour crust, you can make a delicious AIP-approved crust. Consider using this lemon bar crust recipe as a base, adapting it slightly to fit the s’mores flavor profile. It often involves ingredients like tigernut flour, which is a great AIP-compliant flour alternative.
- Carob-Based “Chocolate” Ganache: For the ganache, traditional chocolate is not AIP-compliant. However, a fantastic alternative is using a carob-based “chocolate”. Carob powder, when combined with coconut cream and a sweetener, can create a rich, chocolate-like flavor and texture that works wonderfully as a ganache topping.
By implementing these adjustments, you can still enjoy the multi-layered goodness of s’mores bars while adhering to your AIP dietary guidelines.
Storage Best Practices for Your S’mores Bars
To keep your gluten-free s’mores bars fresh and delicious, proper storage is essential. Given their delicate layers, particularly the marshmallow and ganache, refrigeration is key to maintaining their structure and quality:
- Refrigeration is Crucial: Always store these s’mores bars in an airtight container in the refrigerator. This prevents the marshmallow from becoming too soft and ensures the ganache remains firm and intact, especially in warmer environments.
- Enjoy Freshness: These bars are at their absolute best within the first 24-48 hours after preparation. During this time, the crust maintains a slightly crisp texture, contrasting beautifully with the soft marshmallow and firm chocolate.
- Shelf Life: While the crust will naturally soften a bit over time in the fridge, the bars can still be enjoyed for 3-4 days or even slightly longer, provided they are kept properly sealed. Always check for any signs of spoilage before consuming.
- Freezing (Untested): The original recipe hasn’t been tested for freezing. Freezing might alter the texture of the marshmallow or the ganache, making them less ideal. For optimal enjoyment, it’s recommended to consume them fresh from the refrigerator within the suggested timeframe.
- Preventing Odor Absorption: An airtight container not only keeps the bars fresh but also prevents them from absorbing any odors from other foods in your refrigerator, ensuring they retain their pure, delightful s’mores flavor.
You’ll Also Love These Gluten-Free Treats…
- Gluten-Free S’mores Pizza
- Campfire Banana S’mores
- Paleo S’mores Cookies
Gluten Free S’mores Bars
9
servings
1 hr
20 mins
Michelle
Pin Recipe
Want to save this for later? Just drop your name and email below, and we’ll email it right to your inbox! ✉️
Ingredients
For the graham cracker crust
-
1 cup
almond flour -
2 tbsp
arrowroot starch -
¼ cup
maple syrup -
¼ cup
ghee, melted (sub coconut oil for dairy-free) -
½ tsp
vanilla extract -
1 tsp
cinnamon
For the marshmallow
-
1 cup
water, divided -
3 tbsp
gelatin -
1 cup
honey
For the chocolate ganache
-
1 cup
dairy-free chocolate chips -
¼ cup
coconut cream
Instructions
To make the graham cracker crust
-
Preheat the oven to 350 F (175 C) and line an 8×8″ baking dish with lightly greased parchment paper, leaving an overhang for easy removal.
-
Combine almond flour, arrowroot starch, maple syrup, melted ghee (or coconut oil), vanilla extract, and cinnamon in a large bowl. Stir until fully incorporated and the batter is fairly wet and sticky.
-
Press the batter evenly into the bottom of the prepared baking dish. Transfer to the oven and bake for 18-20 minutes, or until lightly golden brown.
-
Remove the pan from the oven and set aside, allowing the crust and the pan to cool completely to the touch.
For the marshmallow
-
Pour 1/2 cup of water into a small bowl and sprinkle the gelatin over top. Stir gently to ensure the gelatin is combined and set aside to bloom.
-
Using a medium-sized pot, slowly heat the honey combined with the other 1/2 cup of water. Slowly bring the temperature to 235-240 F (113-116 C) on low heat using a candy thermometer. Remove from heat immediately once the mixture comes to temperature.
-
Slowly add the hot honey mixture into the gelatin mixture as you whisk on high with either an electric hand mixer or a stand mixer. Continue whisking on high until stiff peaks start to form in the marshmallow mixture (about 8-10 minutes).
-
Pour the marshmallow mixture over the prepared and cooled crust. Place in the fridge to harden for 3-4 hours or until soft and springy to the touch.
For the ganache
-
Combine the dairy-free chocolate chips and coconut cream in a bowl and melt in the microwave in 20-second intervals (stirring each round) or over a double boiler until smooth.
-
Allow the ganache to cool slightly (you don’t want it steaming hot or the marshmallow can melt) before pouring over the marshmallow layer. Use a rubber spatula to evenly spread the chocolate over the marshmallow.
-
Transfer to the fridge to allow the ganache to harden for 1-2 hours.
-
Once the ganache is set, remove from the fridge and carefully transfer to a cutting board using the parchment paper overhang. Cut into 9 large slices, or 18 smaller slices, and serve chilled!
Notes
- Make this AIP crust instead.
- Use a carob-based “chocolate” for the ganache instead.
All nutritional information are estimations and will vary. Estimations do not include optional ingredients.
Serving:
1serving
Calories:
425kcal
Carbohydrates:
57g
Protein:
5.8g
Fat:
16.2g
Fiber:
2.5g
Did you Make this Recipe?
Tag @unboundwellness on Instagram and hashtag #unboundwellness!