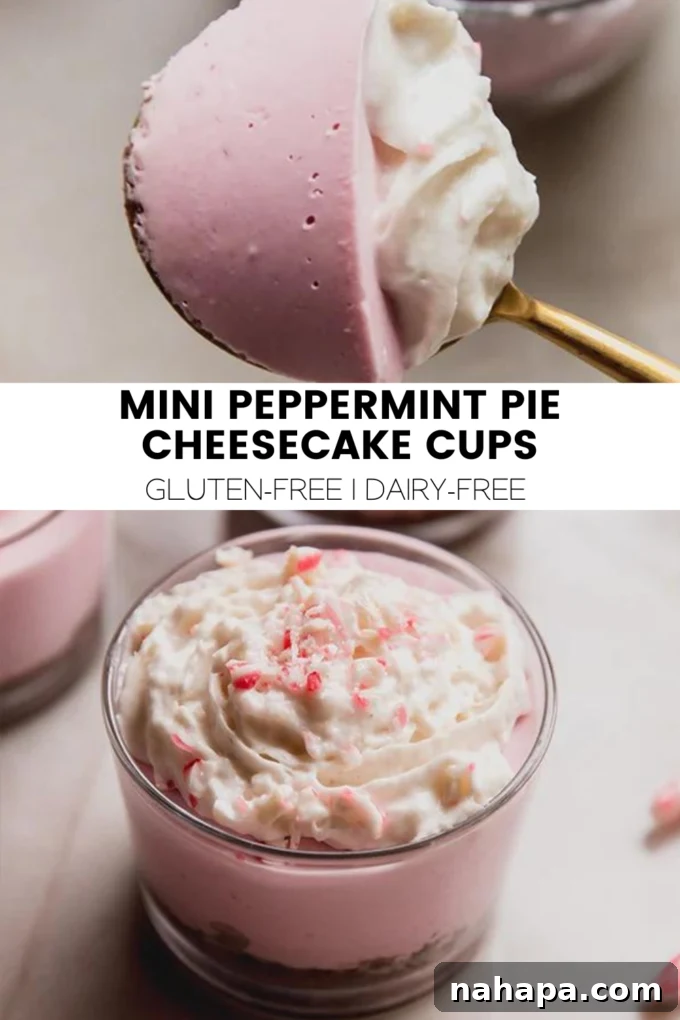
Welcome to the ultimate solution for stress-free holiday entertaining: these delightful Mini Peppermint Pie Cups! Imagine a luscious, minty dessert that captures the festive spirit without requiring an oven, complicated crusts, or hours of baking. These individual treats are not only incredibly easy to make but are also thoughtfully crafted to be gluten-free, dairy-free, and adaptable for those following an Autoimmune Protocol (AIP) diet, making them the perfect inclusive offering for any gathering.
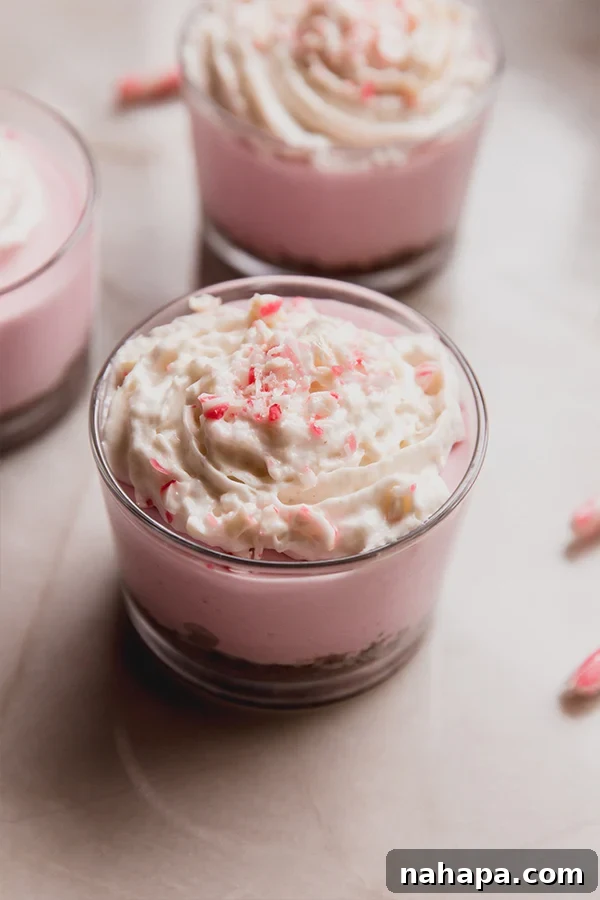
For years, the idea of a classic peppermint pie has enchanted me, its beauty and vibrant flavor promising a true holiday centerpiece. However, the holiday season often brings a whirlwind of activity, making extensive baking feel like an added burden. This year, I decided to transform that dream into a delightful reality by simplifying the process. The result? These incredibly easy, approachable, and utterly delicious mini peppermint pie cups. Forget the stress of baking pie crusts or worrying about oven temperatures; these require no baking whatsoever, offering all the delightful taste of a full pie in a convenient, charming individual serving. They are meticulously designed to be gluten-free, egg-free, dairy-free, and free from artificial food dyes, with simple modifications to make them fully AIP-compliant.
The Magic of No-Bake Mini Peppermint Pie Cups for the Holidays
The holiday season is synonymous with delicious treats, but it doesn’t have to mean endless hours slaving away in the kitchen. These mini peppermint pie cups are a game-changer, bringing all the festive cheer and flavor of traditional holiday desserts without any of the fuss. Their no-bake nature means you can whip them up in a fraction of the time, freeing you up to enjoy precious moments with family and friends. The refreshing burst of peppermint perfectly complements the rich, creamy texture, creating a dessert that feels both indulgent and surprisingly light. Served in individual portions, they are elegant, hygienic, and perfectly suited for holiday parties, potlucks, or a cozy evening by the fire. Imagine the joy of presenting a dessert that caters to various dietary needs without compromising on taste or presentation!
Why You’ll Adore These Gluten-Free, Dairy-Free Peppermint Treats
These mini peppermint pie cups aren’t just easy; they’re a holiday culinary triumph that caters to modern dietary needs and busy schedules. Here’s why they’re destined to become a new favorite:
Effortless No-Bake Perfection
While holiday baking has its charm, there’s something truly liberating about a no-bake dessert, especially during the most hectic time of the year. These cups eliminate the need for an oven, making them ideal for small kitchens, hot climates, or simply when you want a delicious treat without turning on the heat. The simplicity of assembly ensures a foolproof dessert every time, allowing even novice chefs to create something spectacular.
Incredibly Allergen-Friendly
Navigating holiday gatherings with food sensitivities can be challenging. This recipe is a beacon of inclusivity, designed to be naturally gluten-free, egg-free, dairy-free, and free from artificial food dyes. Furthermore, with simple adjustments, they can be made compliant with the Autoimmune Protocol (AIP), ensuring that almost everyone at your table can enjoy a festive, worry-free treat. It’s a joy to offer a dessert that’s not only delicious but also genuinely considerate of dietary restrictions.
The Perfect Festive Flavor
Peppermint is the quintessential flavor of the holidays, and these cups deliver it in spades. The cool, invigorating mint combined with a rich, creamy “cheesecake” filling and a subtly sweet chocolate crust creates a harmonious balance of flavors and textures. It’s a refreshing alternative to heavier holiday desserts, offering a bright and memorable taste experience that truly embodies the spirit of the season.
Quick & Easy Prep
From start to finish, these mini pies are designed for efficiency. The active preparation time is minimal, primarily involving blending and pressing, with the fridge doing most of the work for setting. This means you can easily prepare them in advance, making your holiday meal planning smoother and less stressful. Spend less time in the kitchen and more time enjoying the festivities!
Essential Ingredients for Your Mini Peppermint Pie Cups
Crafting these delectable mini peppermint pie cups requires a thoughtful selection of high-quality ingredients, each playing a crucial role in achieving their perfect flavor and texture. We focus on natural, whole-food options to keep this dessert as wholesome as it is delicious.
For the Irresistible Crust
- Chocolate Cookies: The foundation of our pie cups, these cookies provide a rich, chocolatey base. For a gluten-free option, look for certified gluten-free chocolate cookies. If you’re following an AIP diet, select a recipe or brand specifically designed for AIP compliance, often made with ingredients like tigernut flour or cassava flour.
- Coconut Oil: Melted coconut oil binds the cookie crumbs together, forming a firm yet tender crust. It’s a fantastic dairy-free alternative to butter, lending a subtle tropical note that complements the other flavors.
For the Creamy Peppermint Filling
- Coconut Yogurt: This provides a tangy, creamy base for our “cheesecake” filling, mimicking the texture and slight tartness of traditional cream cheese. I highly recommend a high-quality brand like Culina for its smooth texture and rich flavor.
- Coconut Cream: Essential for achieving that luxurious, thick consistency, coconut cream adds richness and body to the filling. You can either purchase canned coconut cream or simply spoon off the thick, hardened cream from the top of a chilled can of full-fat coconut milk.
- Maple Syrup: Our natural sweetener of choice, maple syrup offers a warm, nuanced sweetness without the need for refined sugars. Adjust the amount to your personal preference for sweetness.
- Natural Red Food Color (Beet Powder): To give these peppermint treats their signature festive hue, we use beet powder. This natural option avoids artificial dyes and provides a beautiful, earthy red tint. Start with a pinch and gradually add more until you reach your desired shade.
- Peppermint Extract: The star flavor! Peppermint extract infuses the filling with that distinctive, refreshing minty taste. Quality is key here for the best flavor, and remember that a little goes a long way.
- Water and Gelatin: Since this is a no-bake recipe, gelatin acts as our binding agent and thickener, ensuring the filling sets beautifully without the need for eggs or baking. It gives the cups their stable, creamy texture.
Optional but Recommended Toppings
- Whipped Coconut Cream: A dollop of light, airy whipped coconut cream adds an extra layer of decadence and visual appeal. It perfectly balances the richness of the pie filling.
- Crushed Candy Cane: For a classic holiday touch and a delightful textural crunch, crushed candy canes are a wonderful garnish. If you’re on an AIP diet, omit this topping as candy canes typically contain refined sugar and artificial colors.
Step-by-Step Guide: How to Craft Your Peppermint Pie Cups
Creating these festive mini peppermint pie cups is a straightforward process, broken down into simple, manageable steps. Follow along to bring this delightful holiday dessert to life!
Preparing the Perfect Cookie Crust
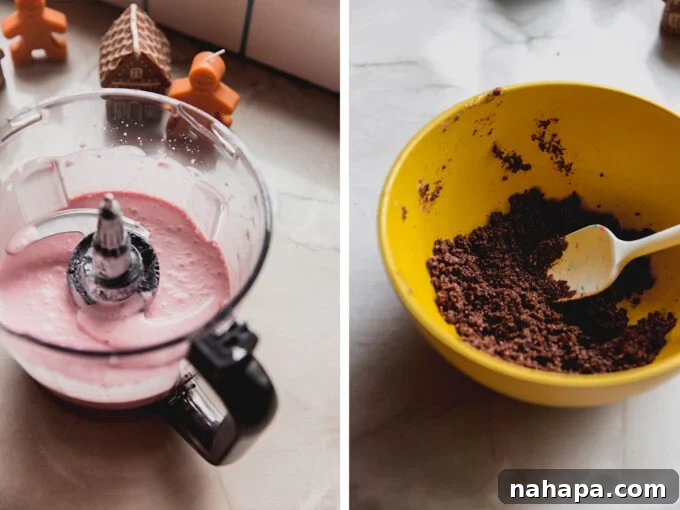
- Crumble the Cookies: Begin by adding your chosen chocolate cookies to a food processor. Process until they are finely crumbled, resembling coarse sand. Ensure there are no large chunks remaining, as this will create a smoother, more even crust.
- Combine with Coconut Oil: Pour the melted coconut oil over the cookie crumbs in the food processor. Pulse for 5-10 seconds until the mixture is well combined and holds together when pressed. The oil helps bind the crumbs, forming a stable crust.
- Form the Crusts: Evenly divide the crust mixture among four small dessert cups (or ramekins, mason jars, etc.). Use the back of a spoon or your fingertips to firmly press the mixture down into the bottom of each cup, creating a compact, even layer. This firm pressing is crucial to prevent the crust from falling apart.
- Chill the Crusts: Transfer the cups with their crusts to the refrigerator while you prepare the filling. Chilling helps the coconut oil solidify, setting the crust and preventing it from becoming soggy.
Blending the Dreamy Peppermint Filling
- Prepare the Blending Base: Thoroughly clean out your food processor from the crust step, or use a clean blender. Add the coconut cream, coconut yogurt, maple syrup, natural red food coloring (beet powder), and peppermint extract to the food processor.
- Blend for Smoothness and Flavor: Blend until all ingredients are thoroughly combined and the mixture is smooth and creamy. Taste the filling at this stage. This is your opportunity to adjust the flavor: add a little more beet powder for a deeper red color, or a touch more peppermint extract if you prefer a stronger minty kick. Remember to add small amounts, blend, and re-taste until perfect.
- Activate the Gelatin: In a small saucepan, pour the water and evenly sprinkle the gelatin powder over the surface. Allow it to sit undisturbed for 2-3 minutes; this process, known as “blooming,” allows the gelatin to absorb water and hydrate.
- Dissolve the Gelatin: Place the saucepan on the stovetop over low heat. Gently warm the mixture for 1-2 minutes, stirring continuously, until the gelatin is fully dissolved and the mixture is completely liquid and clear. Be careful not to boil it. Remove from heat immediately.
- Combine Gelatin with Filling: Use a whisk or a milk frother to quickly blend the warm gelatin mixture until it becomes frothy. Immediately add this frothy gelatin mixture to the food processor with the peppermint filling. Pulse for just 3-5 seconds to quickly combine, ensuring it’s evenly distributed without overmixing.
Assembling and Chilling Your Cups
- Fill the Cups: Retrieve the chilled crusts from the refrigerator. Carefully pour the creamy peppermint cheesecake filling over each crust, evenly distributing the mixture among the dessert cups.
- Allow to Set: Transfer the filled cups back to the refrigerator. Allow them to chill for a minimum of 3-4 hours, or preferably overnight, until the filling is completely set and firm to the touch. This crucial step ensures the pie cups maintain their shape and have the desired texture.
The Grand Finale: Toppings!
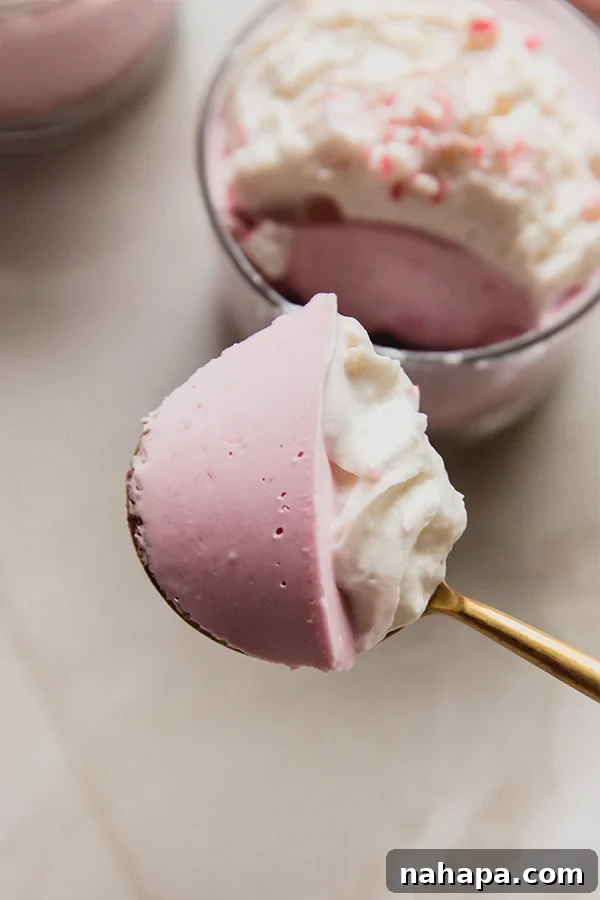
- Serve and Garnish: Once fully set, your mini peppermint pie cups are ready to enjoy! If desired, top each cup with a generous swirl of whipped coconut cream and a sprinkle of crushed candy canes for an extra festive touch and delightful crunch. For AIP, omit the candy canes.
Tips & Tricks for Peppermint Pie Cup Success
- Adjust the Peppermint to Taste: Peppermint extract can be quite potent. I find a little goes a long way, but my husband prefers a stronger mint flavor. Start with the recommended amount, then taste the filling and add more a tiny drop at a time until it’s just right for your palate.
- Achieving Your Ideal Red Hue: Beet powder provides a lovely natural color, but its intensity can vary. Begin with a small pinch and gradually incorporate more, blending after each addition, until you achieve the desired level of vibrant red.
- Whipping Coconut Cream: To make whipped coconut cream, chill a can of full-fat coconut milk (or coconut cream) overnight. Scoop out the thick, hardened cream from the top, leaving the liquid behind. Beat with an electric mixer until light and fluffy.
- Storage and Make-Ahead Advice: These mini peppermint pie cups are excellent for making ahead! Store them covered in the refrigerator for up to 3-4 days. This makes them perfect for busy holiday preparations.
- Vegan Adaptation: Agar vs. Gelatin: This recipe relies on gelatin for its unique setting properties in a no-bake context. Eggs will not work as a substitute here due to the lack of heat. However, if you’re looking for a strictly vegan option, you can experiment with 1 teaspoon of agar-agar powder per batch as a plant-based gelling agent. Note that agar-agar can sometimes produce a firmer, less creamy texture than gelatin.
Frequently Asked Questions (FAQs)
Can I use different cookies for the crust?
Absolutely! While chocolate cookies provide a classic flavor, feel free to experiment with other gluten-free cookie varieties like vanilla wafers or gingerbread cookies for a different twist. Just ensure they are firm enough to crumble and bind with coconut oil.
What if I don’t have coconut yogurt?
Coconut yogurt adds a lovely tang and creaminess. If you can’t find it, you might try a dairy-free cream cheese alternative, though the flavor profile will shift slightly. Ensure any substitute is also dairy-free and suitable for your dietary needs.
How long do these cups last?
These mini peppermint pie cups store well! Keep them covered tightly in the refrigerator for up to 3-4 days. They are a fantastic make-ahead dessert for entertaining.
Can I make these ahead for a party?
Yes, absolutely! In fact, making them a day in advance allows the flavors to meld beautifully and ensures the filling is perfectly set. This is ideal for reducing stress on the day of your event.
Is this recipe suitable for an AIP diet?
Yes, this recipe is designed with AIP in mind. Ensure your chocolate cookies are AIP-compliant (e.g., made with tigernut flour), and omit the crushed candy cane topping, as most contain refined sugar and artificial dyes. All other ingredients listed for the filling are typically AIP-friendly.
Explore More Allergy-Friendly Peppermint Delights
If you’ve fallen in love with these peppermint pie cups, you’ll be thrilled to discover other delicious and healthy peppermint recipes from Unbound Wellness:
- Paleo Peppermint Bark: A classic holiday treat, reinvented to be paleo-friendly and utterly addictive.
- Homemade Peppermint Patties: Enjoy the refreshing taste of peppermint patties with a wholesome, homemade twist.
- Copycat Peppermint Joe-Joes: Recreate your favorite festive cookies with an allergy-friendly recipe.
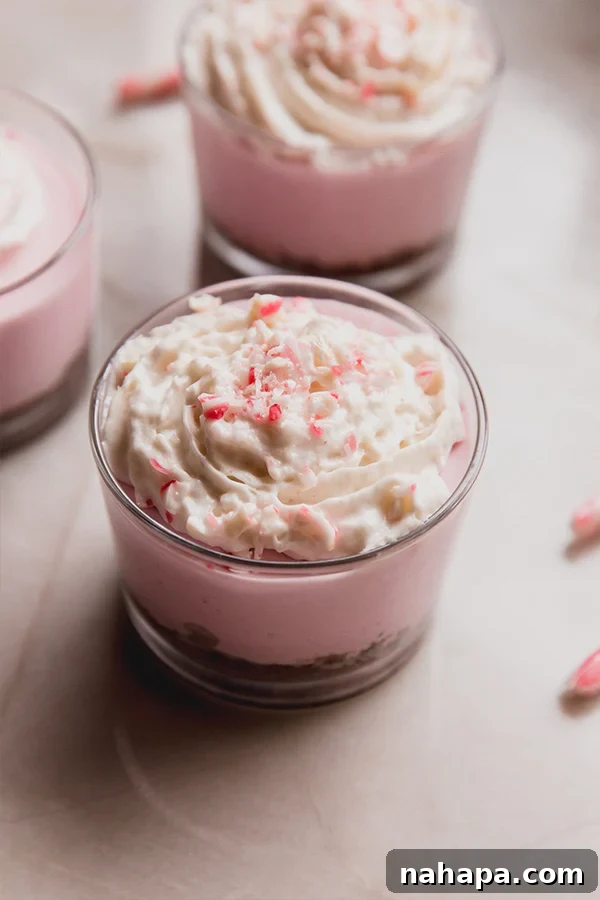
Mini Peppermint Pie Cheesecake Cups {Gluten & Dairy Free}
Leave a Review
Pin Recipe
Ingredients
For the crust
- 1 cup chocolate cookies, use this for gluten-free, this for AIP
- 3 tbsp coconut oil, melted
For the filling
- 5 oz coconut yogurt, I use the brand Culina
- 1 ¾ cup coconut cream
- 3 tbsp maple syrup
- Pinch of natural red food color, I use Beet Powder
- 1 tsp peppermint extract
- 3 tbsp water
- 1 tbsp gelatin
For topping
- Whipped coconut cream
- Crushed candy cane, omit for AIP
Instructions
For the crust
-
Add the cookies to a food processor and process until they’re finely crumbled. Add the coconut oil and process for 5-10 seconds to combine.
-
Evenly divide the crust among 4 small dessert cups and press down. Transfer to the fridge while you make the filling.
For the filling
-
Clean out the food processor and add the coconut cream, coconut yogurt, maple syrup, food coloring, and peppermint extract. Blend until combined, adding more food coloring if you want a deeper color, or more peppermint if you want a stronger peppermint flavor.
-
Pour the water into a small saucepan and evenly sprinkle the gelatin over the water. Allow to sit for 2-3 minutes to allow to harden. Place on the stovetop set to low heat for 1-2 minutes until the mixture is fully liquid. Remove from heat. Use a whisk or milk frother to blend the gelatin mixture until frothy. Add the gelatin mixture to the food processor and pulse for 3-5 seconds to combine.
-
Pour the cheesecake filling over the crust, evenly filling the dessert cups.
-
Transfer to the fridge for 3-4 hours or until the filling is totally set.
-
Serve the cups topped with whipped coconut cream and crushed candy canes if desired.
Notes