This post contains affiliate links.
Gluten-Free Texas Toast: The Ultimate Crispy & Delicious Sourdough Side Dish
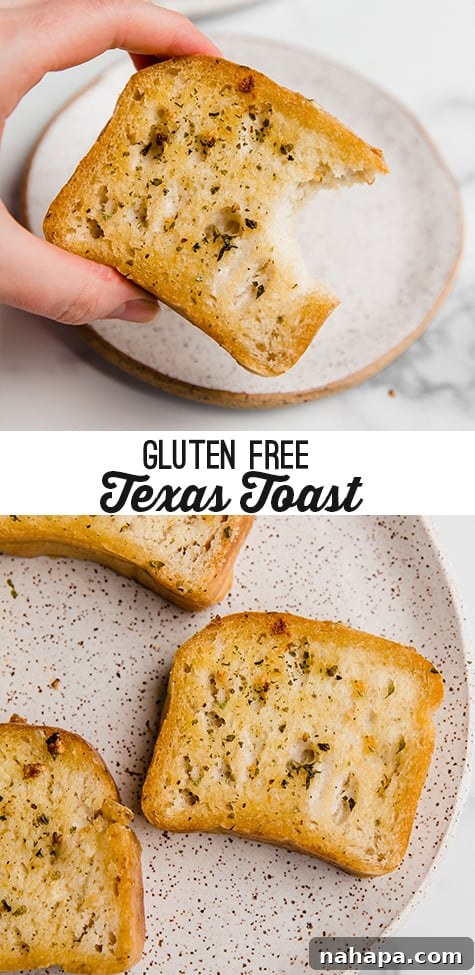
There’s nothing quite like the comforting crunch of a perfectly golden-brown slice of Texas Toast. It’s a nostalgic side dish that brings warmth and flavor to any hearty meal. But for those navigating gluten sensitivities or dietary restrictions, this beloved classic often remains just a memory. Until now!
Welcome to the ultimate guide for making truly exceptional gluten-free Texas Toast right in your own kitchen. This recipe delivers all the irresistible crispiness, rich garlic flavor, and buttery goodness you remember, but crafted with wholesome gluten-free sourdough and clarified butter (ghee), making it a delicious and inclusive option for everyone at the table.
Forget the frozen boxes of the past; this homemade version elevates Texas Toast to a new level, proving that gluten-free doesn’t mean compromising on taste or texture. Prepare to impress your family and friends with a side dish that’s simple to make, incredibly satisfying, and utterly delicious.
What Exactly is Texas Toast? And How is it Different from Garlic Bread?
For many, Texas Toast evokes fond childhood memories of thick, savory slices served alongside family dinners. But what truly defines this Southern staple, and what sets it apart from its close cousin, garlic bread?
The Defining Characteristics of Texas Toast
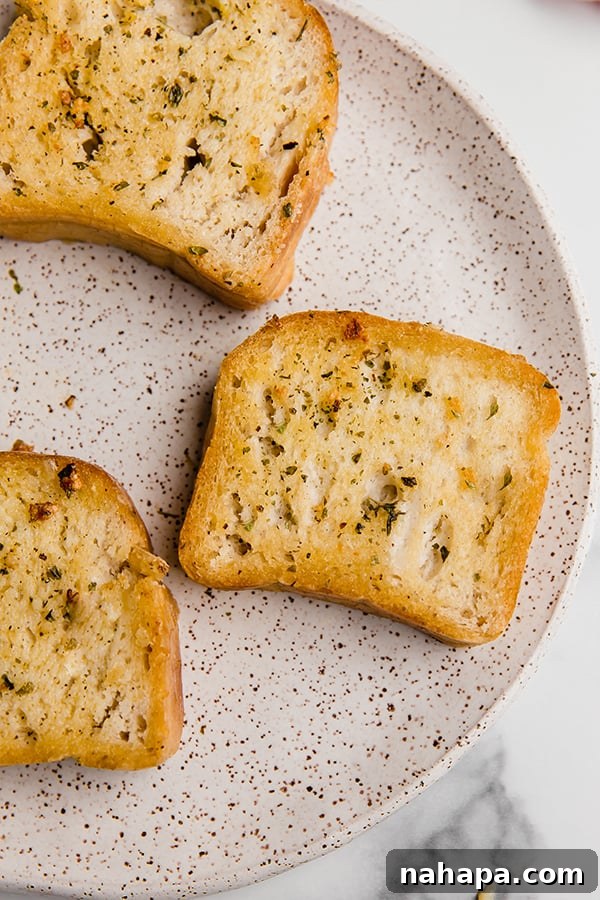
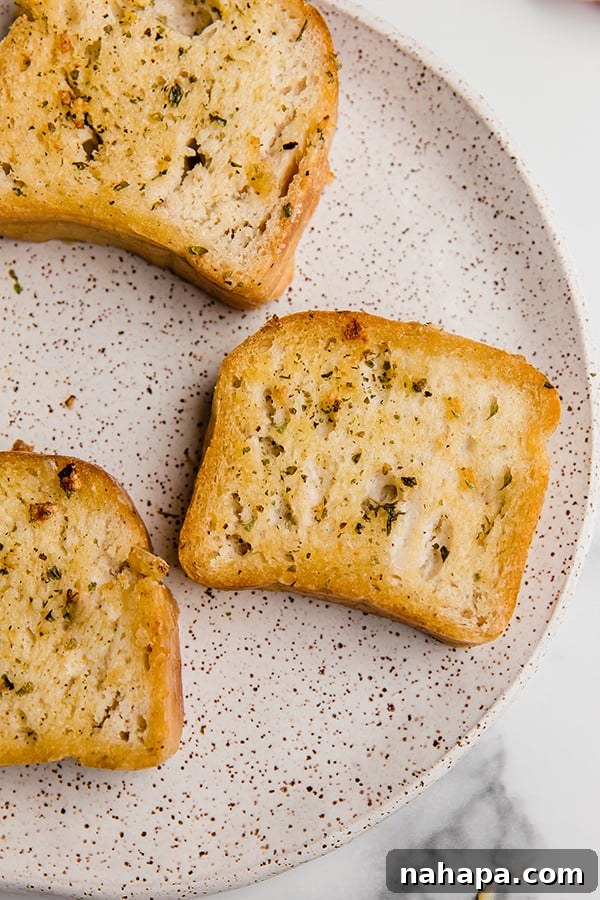
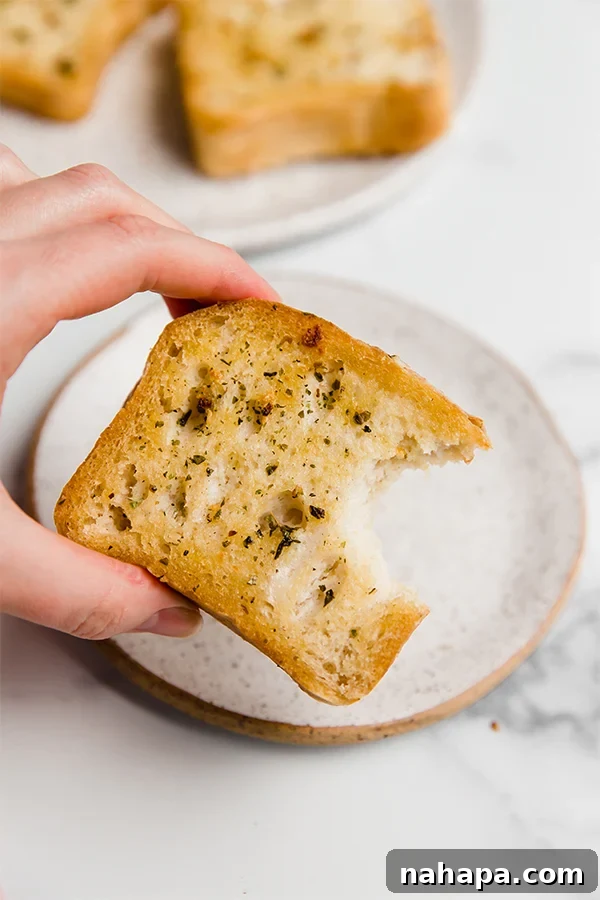
At its heart, Texas Toast is a celebration of simplicity and flavor. It’s essentially a generously thick slice of bread, typically about 1.5 to 2 inches thick, that has been slathered with a rich butter, garlic, and herb spread. This substantial thickness is key to its unique texture, allowing it to remain soft and fluffy on the inside while developing an irresistibly crispy exterior when cooked.
While often associated with frozen convenience foods, the true magic of Texas Toast shines when made fresh. The combination of pungent garlic, aromatic parsley, and rich butter soaking into a robust bread forms the foundation of its craveable taste.
Texas Toast vs. Garlic Bread: Unpacking the Differences
Many confuse Texas Toast with garlic bread, and while they share a similar flavor profile, there are two distinct differences that define them:
- Thickness of the Slice: The most immediately noticeable difference is the bread itself. Texas Toast is always cut into significantly thicker slices than typical sandwich bread or French bread used for garlic bread. This extra heft allows the toast to absorb more of the buttery spread without becoming soggy and provides a satisfying chewiness in the center, contrasting beautifully with the crispy crust. Garlic bread, on the other hand, often uses thinner slices or a whole baguette cut lengthwise, which tends to be more uniformly crisp throughout.
- Cooking Method: This is perhaps the most crucial distinction for achieving authentic Texas Toast. While garlic bread is almost always baked in the oven until golden, traditional Texas Toast is pan-fried. Frying in a skillet over medium heat creates a superior crispiness and a beautiful, even golden-brown crust that baking simply can’t replicate as effectively. The direct contact with the hot pan caramelizes the butter and bread sugars, locking in moisture and delivering that signature crunchy texture much faster than oven baking. As any true Texan will tell you, pan-frying is the way to go for the real deal.
The result of these differences is a side dish that stands proudly on its own, offering a more robust and textural experience than standard garlic bread. And the best part? You don’t need a box of frozen bread to enjoy this classic. Our homemade, gluten-free version brings all that deliciousness right to your plate, with the added benefit of being lactose-free thanks to ghee!
The Power of Quality Ingredients for Exceptional Gluten-Free Texas Toast
Crafting the perfect gluten-free Texas Toast starts with selecting the right ingredients. Each component plays a vital role in achieving that perfect balance of crispy texture, rich flavor, and hearty satisfaction. Here’s a closer look at the stars of this recipe:
Ghee: The Golden Secret for Lactose-Free Richness
- What is Ghee? Ghee, often referred to as clarified butter, is butter that has been simmered to remove water and milk solids. This process leaves behind a pure, golden fat with a rich, nutty flavor that’s even more concentrated than regular butter.
- Lactose-Free & Digestible: The removal of milk solids means that ghee is naturally lactose-free, making it an excellent alternative for individuals with lactose intolerance who still want to enjoy the flavor and culinary benefits of butter. It’s also often better tolerated by those with dairy sensitivities compared to regular butter.
- High Smoke Point: Ghee has a higher smoke point than butter, which means it can be cooked at higher temperatures without burning. This is particularly advantageous for pan-frying Texas Toast, ensuring a beautiful golden crust without charring the butter.
- Flavor and Nutrition: Beyond its functional benefits, ghee imparts a wonderfully rich, slightly caramelized flavor that enhances the overall taste of the toast. It’s also a source of fat-soluble vitamins and beneficial fatty acids, including conjugated linoleic acid (CLA). My personal favorite brand, known for its exceptional quality and flavor, is Fourth & Heart Ghee, which I highly recommend.
Fresh Garlic: The Heart of the Flavor
- Unleash the Aroma: When it comes to garlic bread, freshness is paramount. Using fresh garlic cloves, finely minced, provides a pungent, aromatic punch that cannot be replicated by garlic powder or pre-minced garlic in a jar. The natural oils in fresh garlic release an incredible depth of flavor as they cook in the ghee.
- Mincing Matters: Taking the time to finely mince your garlic ensures an even distribution of flavor across the toast and prevents large, overpowering chunks. You’ll need about 8 cloves for this recipe, which might seem like a lot, but trust me, it’s exactly what you need for that classic Texas Toast taste.
- Health Benefits: Beyond flavor, garlic is renowned for its health-promoting properties, including immune support and anti-inflammatory compounds.
Gluten-Free Sourdough Loaf: The Foundation of Excellence
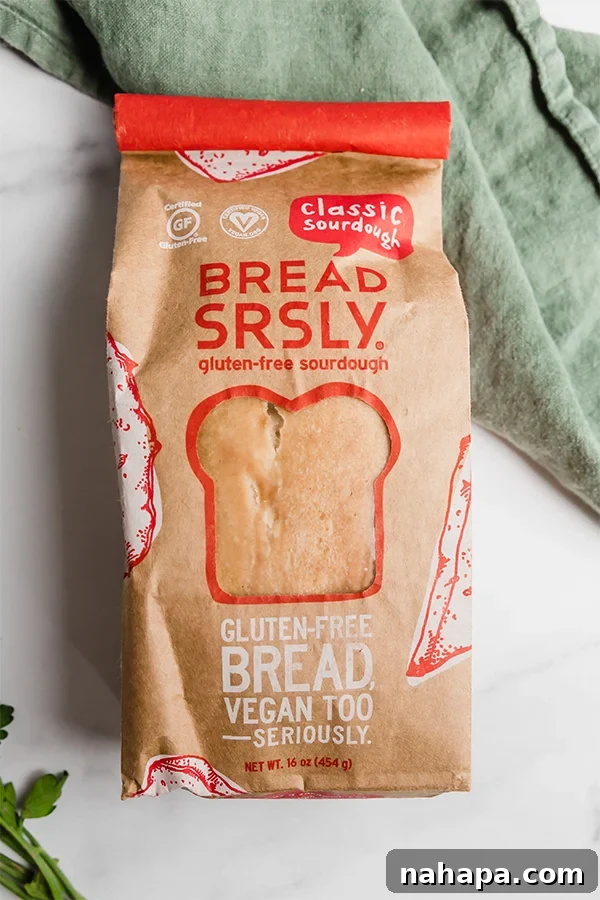
- The Importance of Quality GF Bread: The success of gluten-free Texas Toast hinges entirely on the quality of your gluten-free bread. Many GF breads can be dense, crumbly, or lack the structural integrity needed to withstand thick slicing and pan-frying. That’s why choosing a high-quality loaf is non-negotiable.
- Why Sourdough? Gluten-free sourdough bread is an exceptional choice for Texas Toast. Sourdough fermentation can improve the texture and flavor of gluten-free grains, often resulting in a bread that is less dense and has a delightful tang. Its slightly chewy crumb and robust crust are ideal for soaking up the ghee mixture and achieving that satisfying crispiness.
- My Top Recommendation: My absolute favorite gluten-free sourdough comes from Bread SRSLY. Their bread is truly outstanding, offering incredible flavor and a texture that rivals traditional sourdough. I order it regularly and have it shipped directly to my house, freezing any extra loaves to enjoy later. The quality is consistently amazing. You can even use my code UNBOUNDWELLNESS for free shipping on your first order!
- Alternatives: If Bread SRSLY isn’t accessible, look for other high-quality gluten-free artisan loaves that are thick, sturdy, and have a good crumb structure. Avoid overly soft or crumbly gluten-free sandwich breads, as they may not hold up well to the frying process.
Salt, Pepper, and Parsley: The Finishing Touches
- Seasoning Essentials: A good quality sea salt and freshly cracked black pepper are essential for seasoning the garlic-ghee spread, bringing out all the flavors.
- Aromatic Parsley: Dried parsley adds a touch of earthy freshness and color to the toast. While dried works perfectly, if you have fresh parsley on hand, a tablespoon of finely chopped fresh parsley will elevate the aroma and visual appeal even further.
By focusing on these high-quality ingredients, you’re not just making gluten-free Texas Toast; you’re creating a culinary experience that’s rich in flavor, texture, and satisfaction.
Mastering the Art of Gluten-Free Texas Toast: Step-by-Step Guide
Creating crispy, flavorful gluten-free Texas Toast is surprisingly simple, and much faster than you might think. Follow these steps to achieve pan-fried perfection every time:
1. Prepare the Aromatic Ghee Spread
- In a small mixing bowl, combine the softened ghee, minced fresh garlic, salt, black pepper, and dried parsley.
- Stir all the ingredients together thoroughly until they are well combined and form a uniform, aromatic paste. The consistency should be spreadable but not too runny.
- Set this flavorful spread aside. This allows the flavors to meld slightly while you prepare the bread.
2. Slice the Bread and Apply the Spread
- Take your chosen gluten-free sourdough loaf and slice it into thick, generous pieces. Aim for slices approximately 1.5 to 2 inches thick. This thickness is crucial for the authentic Texas Toast experience, providing a sturdy base that stays soft inside while getting perfectly crispy outside.
- Using a butter knife or spatula, spread a generous amount of the prepared ghee mixture evenly onto both sides of each bread slice. Don’t be shy – the more spread, the more flavor and crispiness! Ensure every inch of the surface is coated for maximum deliciousness.
- Repeat this process for all the slices, making sure each piece is thoroughly coated.
3. Pan-Frying for Perfection
- Heat a large skillet (cast iron or a heavy-bottomed non-stick pan works best) over medium heat. Allow the pan to get adequately hot before adding the toast.
- Once hot, carefully place 2-3 slices of the prepared toast into the skillet at a time. It’s important not to overcrowd the pan, as this can lower the pan’s temperature and prevent proper browning and crisping. Give each slice enough space.
- Fry each side of the toast for approximately 2-3 minutes, or until the bread turns a beautiful golden brown and develops a wonderfully crispy texture. Keep a close eye on it, as cooking times can vary based on your stove and pan. The goal is a deep, rich color and an audible crunch.
- Once one side is perfectly golden, carefully flip the toast using tongs or a spatula and cook the other side until it reaches the same level of crispness and color.
- Remove the finished slices from the pan and immediately place them on a wire rack to prevent them from becoming steamy and losing their crispness.
- Repeat the frying process with the remaining bread slices until all your gluten-free Texas Toast is cooked to perfection.
4. Serve Fresh
- Serve your homemade gluten-free Texas Toast immediately while it’s still warm and crispy, fresh from the skillet. It makes an incredible side to a wide variety of meals!
Tips for the Perfect Batch & Beyond
Once you’ve mastered the basic recipe, you might have some questions about making ahead, reheating, or adapting this delicious side dish. Here are some answers and extra tips to ensure your gluten-free Texas Toast is always a hit.
Can You Make This Recipe Ahead of Time?
While this gluten-free Texas Toast is undeniably best enjoyed fresh, when it’s at its crispiest and most aromatic, you can certainly prepare it ahead of time. However, be aware that the texture will soften slightly upon cooling. If you choose to make it in advance, store the cooled toast in an airtight container at room temperature for up to 2 days. For best results, reheat it in a dry skillet over medium heat for a few minutes per side, or in a toaster oven, until it regains its desired crispiness. Avoid reheating in the microwave, as this will make it soft and chewy.
Can You Make It in the Oven Instead of Pan-Frying?
Technically, yes, you can bake Texas Toast in the oven. Preheat your oven to 375°F (190°C), place the buttered slices on a baking sheet, and bake for 10-15 minutes, flipping halfway through, until golden and crisp. However, for that truly authentic, superior crispiness that defines Texas Toast, pan-frying is highly recommended. The direct heat of the skillet creates a much more satisfying crust and a faster cooking time, making it the preferred method for the best possible outcome.
Can You Make This Recipe AIP (Autoimmune Protocol) Compliant?
The gluten-free sourdough bread used in this recipe is not typically AIP compliant due to its grain content. However, if you’re following the Autoimmune Protocol, you don’t have to miss out on a delicious garlicky side. You can adapt the concept by using an AIP-friendly bread alternative. For a fantastic alternative, check out my recipe for AIP Garlic & Herb Dinner Rolls, which offers a similar savory, herb-infused flavor profile in a compliant form.
Variations and Customizations
Once you have the basic recipe down, feel free to get creative with your gluten-free Texas Toast:
- Cheesy Texas Toast: For an extra layer of indulgence, sprinkle some shredded dairy-free cheese (or regular cheese if tolerated) over the toast during the last minute of frying, allowing it to melt and get bubbly.
- Spicy Kick: Add a pinch of red pepper flakes to the ghee mixture for a subtle heat.
- Herb Garden: Experiment with other fresh or dried herbs like oregano, thyme, or chives alongside the parsley for different flavor profiles.
- Onion Powder Boost: A dash of onion powder can add another layer of savory depth to the garlic spread.
- Sweet Texas Toast: For a unique twist, try a sweet version by spreading your thick-cut gluten-free bread with a cinnamon-sugar-ghee mixture and pan-frying until golden.
No matter how you customize it, this homemade gluten-free Texas Toast is a versatile and satisfying addition to almost any meal!
Gluten-Free Texas Toast Recipe Card
Gluten Free Texas Toast
This gluten-free Texas Toast is a crunchy and delicious side dish to eat with a hearty meal! It’s made with gluten-free sourdough and ghee.
Yield: 8 servings
Prep Time: 5 mins
Cook Time: 15 mins
Author: Michelle
Leave a Review
Pin Recipe
Ingredients
- 8 tbsp ghee (recommended brand)
- 8 cloves garlic, minced
- ¾ tsp salt
- ¼ tsp black pepper
- 2 tsp dried parsley
- 1 loaf gluten-free bread (I use this GF sourdough bread)
Instructions
- Make the spread: Using a small bowl, combine the ghee, garlic, salt, pepper, and parsley until well combined. Set aside.
- Slice the toast: Slice the bread into thick slices about 1.5″-2″ thick. Spread a generous amount of the ghee mixture onto each side of the toast. Repeat for all slices.
- Fry: Heat a large skillet over medium heat and add about 2-3 slices of toast at a time, being careful not to crowd the pan. Fry on each side for 2-3 minutes or until the bread is crispy. Repeat for all of the bread.
- Serve: Serve fresh as a side to a meal.
Notes
All nutritional information are estimations and will vary. Estimations do not include optional ingredients.
Nutrition Facts (Estimated)
Serving: 1 serving, Calories: 158 kcal, Carbohydrates: 13.3g, Protein: 2.1g, Fat: 11g, Fiber: 1.3g
All nutrition facts are estimated and will vary.
Did you Make this Recipe?
Tag @unboundwellness on Instagram and hashtag #unboundwellness!
You’ll Also Love These Gluten-Free & AIP-Friendly Recipes
- Easy Gluten-Free Garlic Bread
- Grain-Free Paleo “Corn”Bread
- AIP Garlic & Herb Dinner Rolls