
This post contains affiliate links, which means I may earn a small commission at no extra cost to you if you make a purchase through these links.
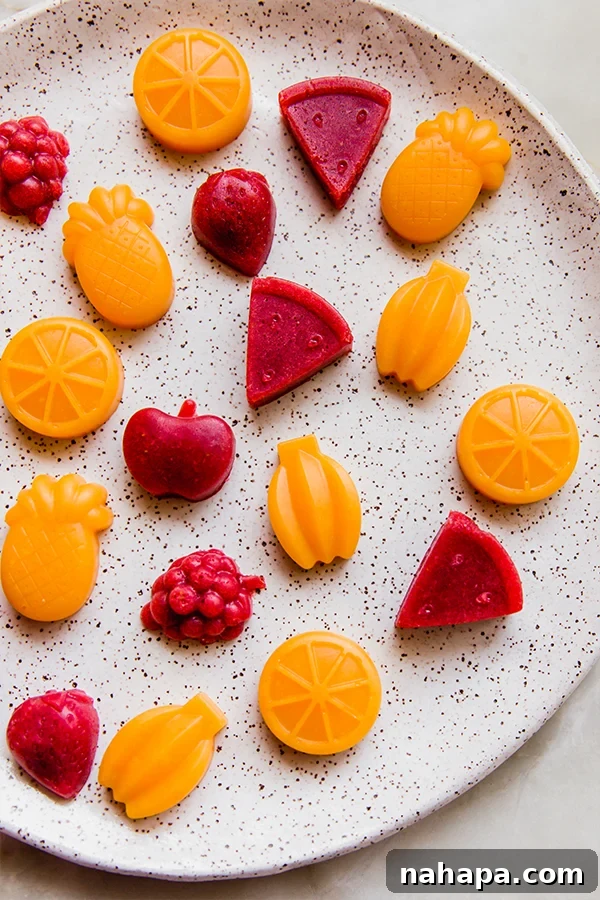
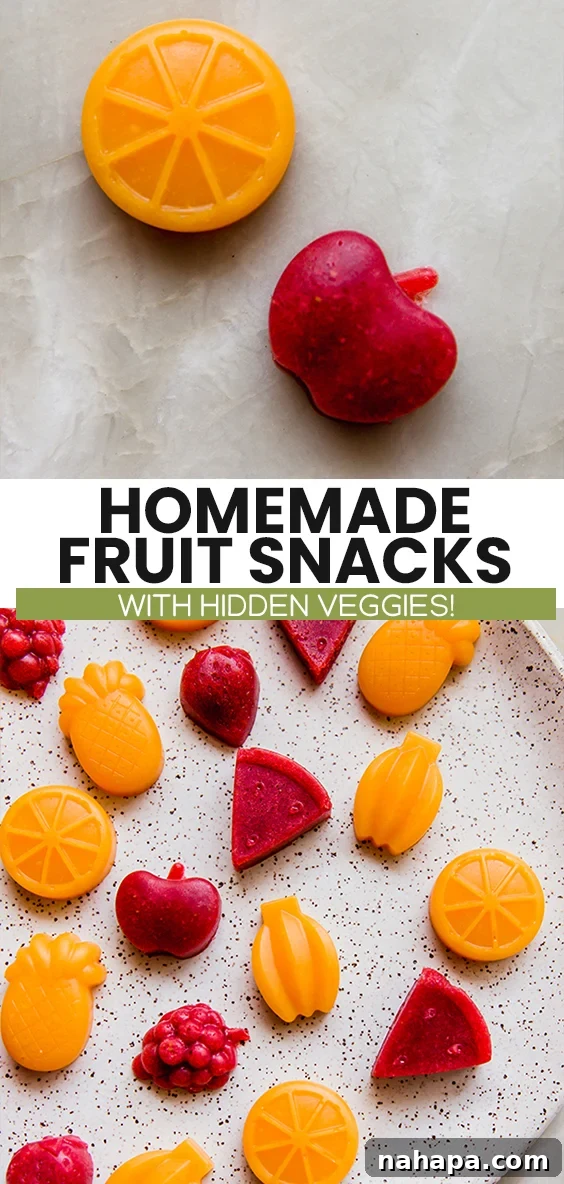
Are you looking for a healthier alternative to store-bought fruit snacks? Look no further! This comprehensive guide will show you how to create delicious, real food fruit gummies right in your own kitchen. Forget corn syrup, artificial colors, and mysterious ingredients; our homemade fruit snacks are bursting with the natural goodness of fresh fruits and vegetables, offering a treat that’s as nutritious as it is delightful for both kids and adults.
Classic fruit snacks have long been a lunchbox staple and a convenient treat. Their vibrant colors and fun shapes often give the illusion of healthiness. However, a quick glance at the ingredient list of most commercial options reveals a different story: artificial dyes, high-fructose corn syrup, and minimal actual fruit content. While moderation is always key, wouldn’t it be wonderful to enjoy a gummy treat made with ingredients you can recognize and feel good about?
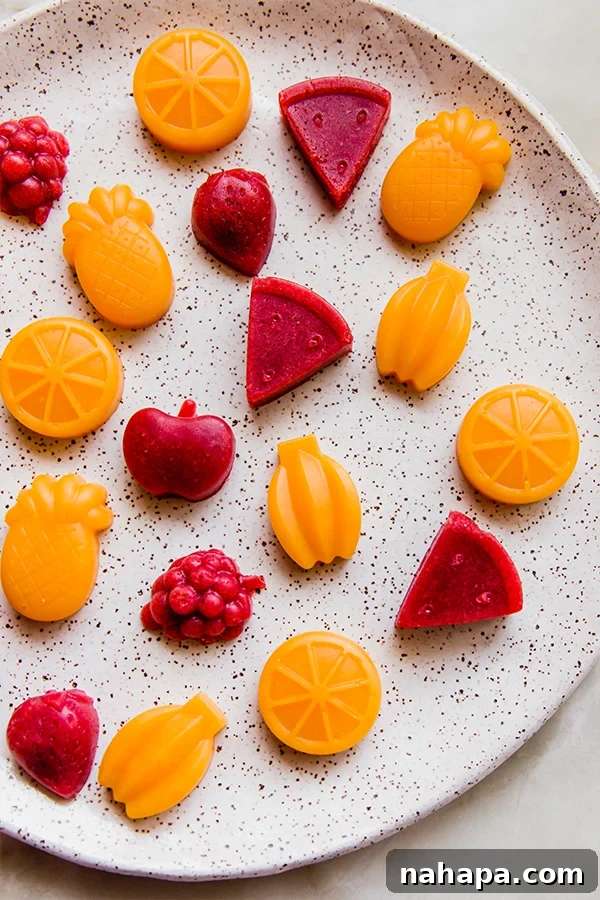
The good news is that crafting your own wholesome fruit gummies is surprisingly simple. With just a few staple ingredients and basic kitchen tools, you can whip up batches of these naturally sweet and chewy delights. They are an excellent way to sneak extra fruits and vegetables into your diet, perfect for school lunches, after-school snacks, or even a guilt-free dessert. Get ready to transform your snack game with these real-food fruit snacks!
Why You’ll Fall in Love with These Homemade Fruit Snack Gummies
These aren’t just any fruit snacks; they’re a revelation! Here’s why this recipe will quickly become a household favorite:
- Packed with Real Fruit and Veggies: Unlike their store-bought counterparts, these gummies are genuinely made from pureed fresh fruits and vegetables. This means you’re getting natural vitamins, minerals, and antioxidants in every bite. Say goodbye to empty calories and hello to nutritious snacking!
- Free from Artificial Additives: You control every ingredient, ensuring no corn syrup, artificial colors, or preservatives make it into your snacks. This makes them an ideal choice for families looking to reduce their intake of processed foods and maintain a clean eating lifestyle.
- Endlessly Customizable and Fun: The recipe is incredibly versatile! You can experiment with countless fruit and vegetable combinations to create a rainbow of flavors and colors. Using fun molds adds an extra layer of excitement, especially for children, making healthy eating an enjoyable and engaging experience.
- Simple to Make: Don’t be intimidated by the idea of making your own gummies. The process is straightforward and doesn’t require any advanced culinary skills. It’s a perfect project for a relaxed afternoon and a rewarding one for anyone looking to make healthier choices.
- A Delicious Treat for All Ages: Whether you’re a parent seeking healthier options for your kids or an adult craving a guilt-free sweet treat, these gummies hit the spot. Their satisfying chewiness and natural sweetness make them an irresistible snack for kids of all ages, including the “kids at heart.”
Essential Ingredients for Your Healthy Fruit Gummies
Creating these delicious and healthy fruit snacks requires just a handful of wholesome ingredients. Each component plays a crucial role in achieving the perfect texture, sweetness, and vibrant flavor.
- Honey: Our primary natural sweetener for these gummies. Honey not only adds a lovely depth of flavor but also offers beneficial enzymes and antioxidants. For those seeking an alternative, pure maple syrup can be used for a slightly different, equally delicious profile. The goal is to provide just enough sweetness to complement the natural flavors of the fruit without overwhelming them.
- Gelatin: This is the magic ingredient responsible for the characteristic gummy texture. Gelatin is derived from collagen and is known for its potential health benefits, including supporting gut health, skin elasticity, and joint function. When bloomed and heated, it creates a firm yet tender consistency. For a vegan alternative, please refer to our dedicated section below on how to substitute with agar powder.
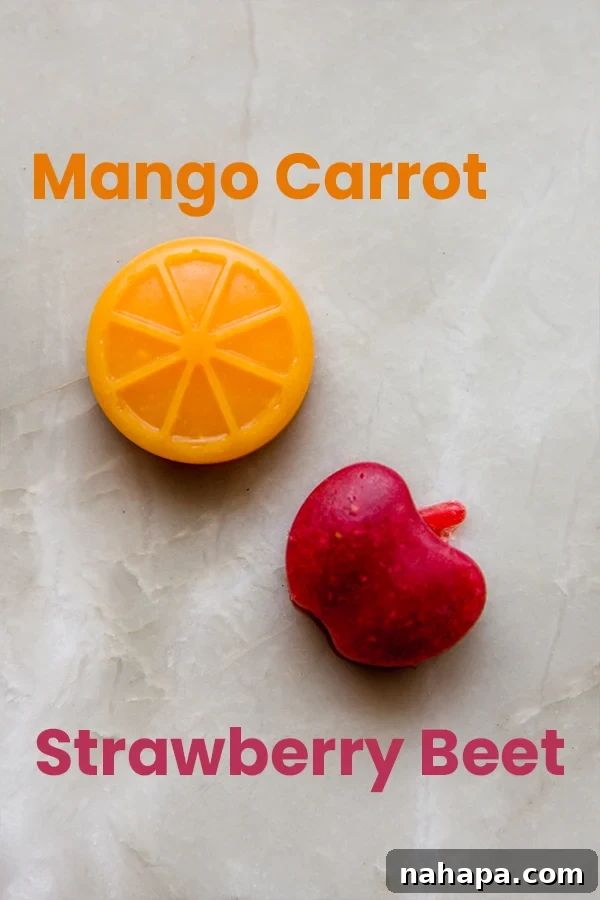
- Strawberries, Beets, Mango, and Carrots: These are the fantastic fruit and vegetable combinations we’ve highlighted in this recipe, chosen for their vibrant colors and complementary flavors.
- Strawberries & Beets: This pairing creates a beautiful reddish-pink hue and a sweet, slightly earthy flavor. Strawberries are rich in Vitamin C, while beets offer folate and manganese.
- Mango & Carrots: This combination yields a sunny orange color and a wonderfully sweet, tropical flavor. Mangoes are packed with Vitamins A and C, and carrots are famed for beta-carotene.
But don’t limit yourself! The beauty of this recipe lies in its adaptability. Other fantastic combinations could include blueberries & beets for a deep purple, peaches & carrots for a mellow orange, or even pineapple & spinach for a surprising green twist. Choose fruits and vegetables that are ripe and in season for the best flavor and nutritional punch.
Handy Tools for Gummy-Making Success
You won’t need a professional kitchen setup to make these delightful fruit snacks. A few common kitchen tools will ensure a smooth and enjoyable process.
- Food Processor or Blender: Absolutely essential for pureeing your fruits and vegetables into a smooth liquid. A high-speed blender will typically yield the smoothest consistency, but a good food processor will also do the trick. Ensure your produce is finely chopped before blending to aid the process.
- Fine Mesh Strainer: This tool is highly recommended if you want to achieve that classic, smooth fruit snack texture, free from pulp and fibers. Straining the blended mixture ensures your gummies are silky and melt-in-your-mouth, much like store-bought versions but with superior ingredients.
- Dropper: A clean medicine dropper or a dropper specifically designed for candy making will be incredibly helpful for neatly filling your molds. This allows for precision and minimizes mess, especially when working with small, intricate molds.
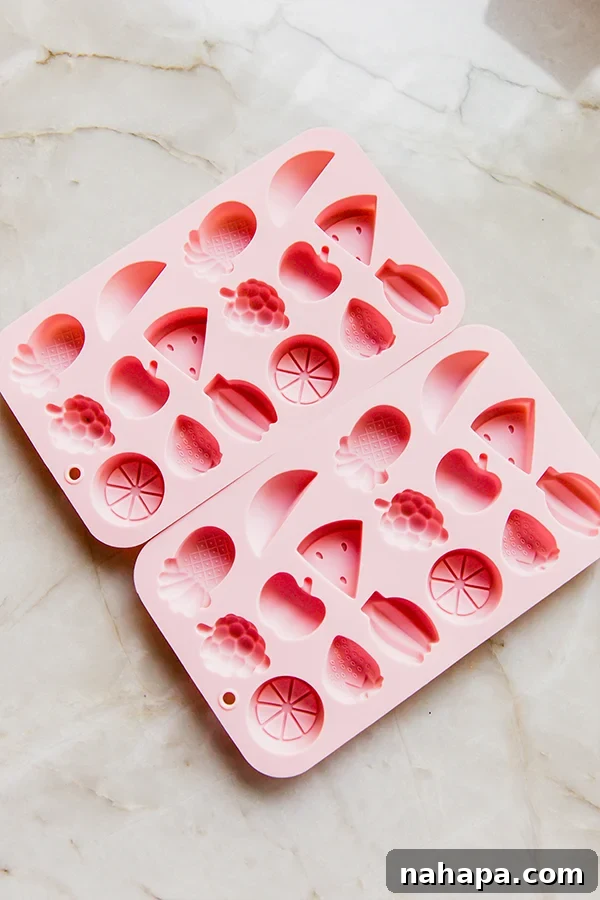
- Fruit Molds: While not strictly mandatory, fruit-shaped silicone molds make the experience much more fun and visually appealing. They come in various shapes and sizes, from classic fruit designs to fun animals. Alternatively, if you don’t have molds, you can simply pour the mixture into a glass container and slice the set gummies into squares or rectangles.
Step-by-Step Guide: Crafting Your Own Healthy Fruit Snacks
Making these homemade fruit snacks is a straightforward process that yields incredibly rewarding results. Follow these simple steps to create your own batch of delightful gummies.
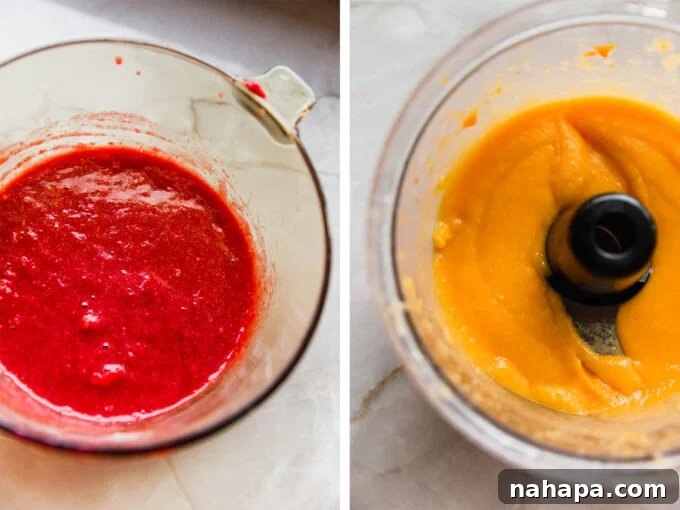
- Step One: Blend and Strain Your Produce. Begin by placing your chosen chopped fruits and steamed vegetables (e.g., strawberries and beets, or mango and carrots) into your food processor or blender. Process until the mixture is completely smooth and liquid. Next, set a fine mesh strainer over a medium-sized pot. Pour the blended fruit and vegetable mixture into the strainer and, using a silicone spatula, press down firmly to extract as much juice as possible. This straining process is key to achieving a smooth, pulp-free gummy. You should aim for approximately 1 cup of juice for the strawberry beet combination and about 1 1/3 cups for the mango carrot mixture, which tends to be thicker.
- Step Two: Combine with Honey and Bloom Gelatin. Pour the freshly strained fruit and vegetable juice into the same pot. Stir in the honey until it is fully dissolved. Once the honey is incorporated, evenly sprinkle the gelatin powder over the surface of the liquid. Gently stir or whisk it in to ensure it’s well-distributed. Allow this mixture to sit undisturbed for about 2-3 minutes. This crucial step, known as “blooming” the gelatin, allows the granules to absorb liquid and soften, preventing lumps when heated.
- Step Three: Gently Heat to Dissolve. Place the pot on the stove over low heat. Gently warm the mixture, stirring occasionally, for 3-4 minutes. The goal is to fully dissolve the gelatin without bringing the mixture to a boil. You’ll know it’s ready when the liquid is completely smooth and clear, with no visible gelatin particles. Avoid high heat, as boiling can reduce the gelling power of gelatin.
- Step Four: Fill Your Molds. Once the gelatin is fully dissolved and the mixture is liquid, carefully transfer it into your chosen molds. The easiest and neatest way to do this is by using a dropper, allowing you to fill each cavity precisely and minimize spills. If you’re not using molds, simply pour the liquid into a lightly oiled glass container (such as an 8×8 inch dish).
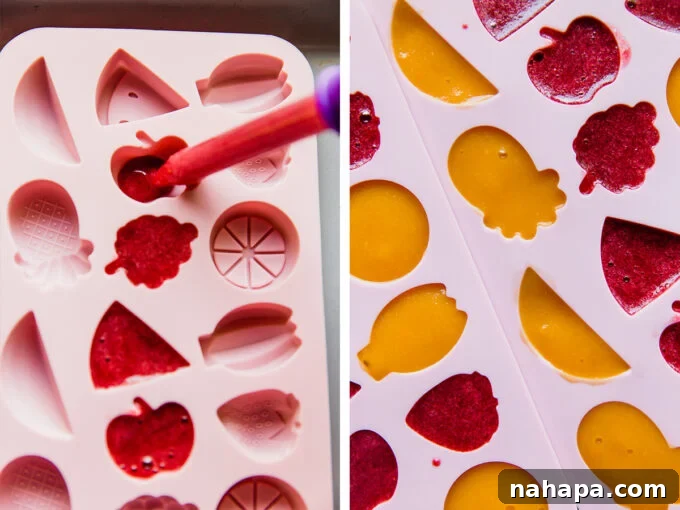
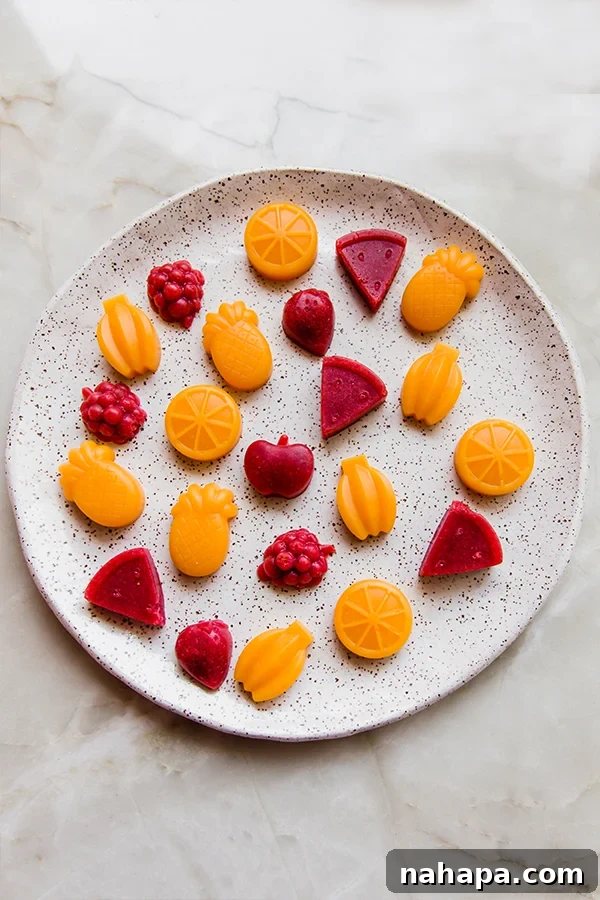
- Step Five: Chill and Enjoy! Once all your molds are filled (or your glass container is poured), transfer them to the refrigerator. Allow the gummies to chill and fully set for a minimum of 4-6 hours, or ideally overnight. Once firm, carefully remove the gummies from their molds by gently pushing them out from the bottom. If using a glass container, slice the set gummy slab into desired shapes and sizes. Serve chilled and savor these delightful, homemade treats!
Pro Tips & Tricks for Perfect Homemade Gummies
To help you get the most out of your gummy-making experience, here are some extra tips and tricks:
- Don’t Waste the Pulp! After straining your fruit and vegetable juice, you’ll be left with a small amount of fibrous pulp. Don’t discard it! This pulp is still full of nutrients. It can be easily added to smoothies for extra fiber, stirred into oatmeal, or even incorporated into muffins or other baked goods. Minimizing food waste is a win-win!
- Molds are Optional, But Fun: While silicone molds create those charming, classic fruit snack shapes, they aren’t strictly necessary. If you don’t have molds, simply pour your gummy mixture into a shallow glass baking dish (like an 8×8 inch square pan) that has been lightly greased with a neutral oil or lined with parchment paper. Once set, you can easily slice the large gummy slab into squares, strips, or any shape you desire with a sharp knife.
- Storage Solutions: These homemade fruit snacks are best stored in an airtight container in the refrigerator. They typically remain fresh and delicious for up to 5-7 days. Because they contain fresh ingredients and no preservatives, they should always be kept chilled to maintain their texture and prevent spoilage.
- Adjust Sweetness to Taste: The amount of honey suggested in the recipe provides a balanced sweetness that complements the natural flavors of the fruit and vegetables. However, feel free to adjust this to your personal preference. If your fruit is exceptionally sweet, you might use a little less honey. If you prefer a sweeter gummy, you can add a touch more. Always taste the juice mixture before adding gelatin to gauge the sweetness.
- Ensure Complete Dissolution: When heating the gelatin mixture, be patient and ensure all the gelatin granules are completely dissolved. Any undissolved particles can lead to a grainy texture in your final gummies. Gentle, consistent stirring over low heat is key.
How to Make This Recipe Vegan-Friendly
For those following a vegan diet, or if you simply prefer a plant-based alternative, you can easily swap out the animal-derived gelatin for agar-agar powder. Agar-agar is a natural gelling agent derived from seaweed and works wonderfully in this recipe, though it behaves a bit differently than gelatin.
To substitute gelatin with agar-agar, use a ratio of three times less agar-agar than you would gelatin. Agar-agar is significantly stronger, so a little goes a long way. For example, if a recipe calls for 3 tablespoons of gelatin, you would only need 1 tablespoon of agar-agar powder.
When using agar-agar, it’s crucial to bring the mixture to a rolling boil for at least 1-2 minutes to activate its gelling properties, unlike gelatin which only requires gentle heating. Once boiled, pour into molds and chill. I do not recommend using pectin as a substitute for this specific recipe, as the entire preparation method would need to be fundamentally different to accommodate pectin’s unique gelling requirements.
A Special Note for Toddlers and Young Children
While these homemade fruit snacks are a fantastic healthy alternative, it’s important to exercise caution when serving them to toddlers and very young children. Our gummies are significantly softer and less firm than many store-bought varieties, making them easier to chew. My own son, who is over 3 years old, enjoys them without issue. However, small, chewy foods in general can pose a choking hazard for toddlers.
Always supervise young children while they are eating. You might consider cutting the gummies into smaller, bite-sized pieces, or ensuring they are fully mashed for younger toddlers. Prioritize safety and use your best judgment based on your child’s chewing and swallowing abilities.
Explore Endless Fruit and Vegetable Combination Options
The true beauty of this homemade fruit snack recipe lies in its incredible versatility. Once you understand the basic ratio of fruit/vegetable juice to gelatin, the possibilities for flavor and color combinations are virtually limitless! You can create a vibrant array of healthy snacks tailored to your taste preferences or whatever seasonal produce you have on hand. Here are even more ideas to inspire your culinary creativity, using the same foundational method described in the recipe:
- Berry Boosters:
- Blueberries & Beets: A gorgeous deep purple hue with a sweet, earthy flavor profile.
- Raspberries & Carrots: Tangy and sweet, creating a lovely rosy orange color.
- Blackberries & Purple Cabbage: For an intensely dark and unique gummy.
- Tropical Twists:
- Pineapple & Carrots: Sweet and tangy, reminiscent of sunshine.
- Kiwi & Spinach: A vibrant green gummy with a refreshing, slightly tart taste.
- Mango & Sweet Potato: A richer, creamier texture with natural sweetness.
- Green Goodness:
- Green Grapes & Spinach: A mild, sweet, and surprisingly delicious way to incorporate greens.
- Apple & Kale: A classic pairing for a subtly sweet and healthy snack.
- Honeydew & Cucumber: For an incredibly refreshing and light green gummy.
- Citrus Zest:
- Orange & Ginger: A zesty, warming combination, great for a little spice.
- Grapefruit & Red Bell Pepper: For a uniquely tart and vibrant snack.
- Seasonal Delights:
- Peaches & Zucchini: A delicate flavor for summer, easily disguised.
- Pumpkin & Apple: A cozy, autumnal flavor, perfect for fall.
When experimenting, consider the natural sweetness, tartness, and color of your chosen ingredients. You might need to adjust the amount of honey slightly depending on how sweet your fruits are. The key is to blend, strain, and then combine with your gelling agent, enjoying the process of creating wholesome, personalized snacks for everyone to enjoy!
You’ll also love exploring more of our healthy and delicious gummy recipes:
- Homemade Peach Ring Gummies
- Sour Watermelon Gummies
- Pumpkin Turmeric Gummies
Rating: 4.72 from 7 reviews
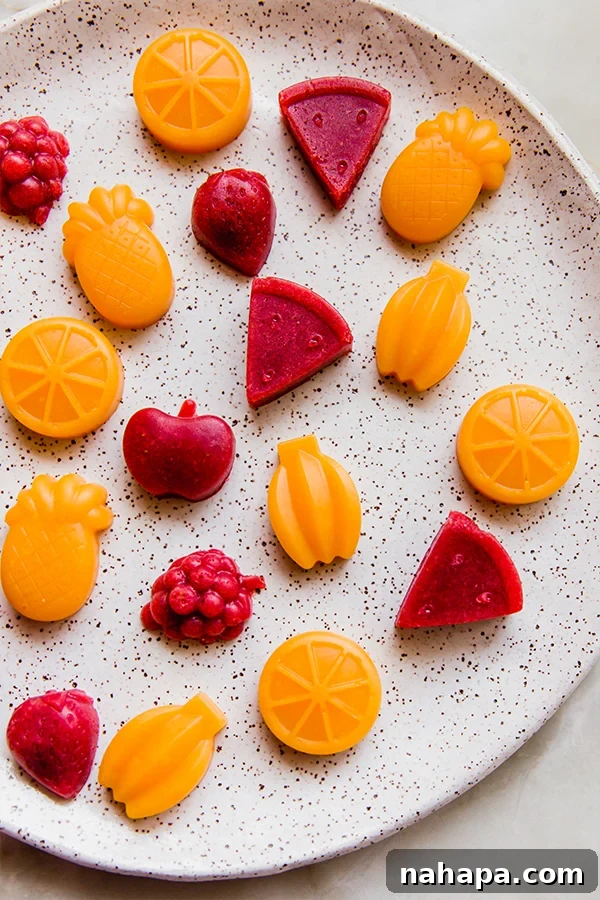
Homemade Fruit Snacks (with Veggies!)
Prep Time: 30 mins
Author: Michelle
Leave a Review
Pin Recipe
Want to save this for later?
Just drop your name and email below. Then we’ll email it right to your inbox. ✉️
(Email subscription form would typically go here.)
Ingredients
For the Strawberry Beet Fruit Snacks
- 1 lb strawberries, chopped
- ⅓ cup beets, steamed and chopped
- 2 tbsp honey
- 2 tbsp + 1 tsp gelatin (see notes for vegan option)
For the Mango Carrot Fruit Snacks
- 1 lb mango, chopped
- ⅓ cup carrots, steamed and chopped
- 2 tbsp honey
- 3 tbsp gelatin (see notes for vegan option)
Instructions
- Repeat the same method for both fruit and vegetable combinations above. Add the fruit and vegetables (strawberry and beet, or mango and carrot) to a blender or food processor. Blend until fully liquid. Using a fine mesh strainer set over a medium pot, strain out the juice using a silicone spatula to push down the pulp. You should have about 1 cup of the strawberry beet juice after straining, and about 1 1/3 cups of the mango and carrot juice (which will be much thicker).
- Pour the juice into a pot and add the honey. Stir well. Sprinkle the gelatin over the liquid and lightly mix. Allow to harden for 2-3 minutes (this is called “blooming”).
- Transfer the pot to the stove and heat over low heat for 3-4 minutes or until the gelatin is fully liquid and dissolved. Do not boil.
- Use a dropper to carefully transfer the liquid into the mold. Alternatively, you can use a large glass container.
- Transfer to the fridge for 4-6 hours or until fully set. Carefully remove from the mold (or slice the gummies if using a large glass container) and serve chilled!
Notes
Nutritional Information
All nutritional facts are estimations and not exact. They will vary based on ingredients and preparation methods.
How to Make This Recipe Vegan
If you want to swap out gelatin for agar-agar powder, simply use the same ratio with fruit and vegetables, but use three times less agar-agar than you would gelatin. Agar-agar is a lot stronger than gelatin. To calculate the amount of agar-agar needed, divide the amount of gelatin by three. For example, for the mango gummies, you would only need 1 tablespoon of agar-agar. Remember to bring the mixture to a boil for 1-2 minutes to activate the agar-agar. I wouldn’t use pectin in this recipe, as the actual method for making the recipe would be very different.
A Note for Toddlers
These gummies are a lot softer than store-bought varieties. My son, who is over 3 years old, is fine with them. However, if you have toddlers, please use caution with gummies and other small foods in general as they can be a choking hazard. Always supervise children while eating and cut into smaller pieces if necessary.
Did you Make this Recipe?
Tag @unboundwellness on Instagram and hashtag #unboundwellness!
Making your own fruit snacks is not just about avoiding unhealthy ingredients; it’s about embracing creativity in the kitchen, experimenting with natural flavors, and providing genuinely nutritious treats for your family. This recipe offers a fantastic foundation for endless healthy snacking possibilities. Enjoy the process, and delight in the delicious results!