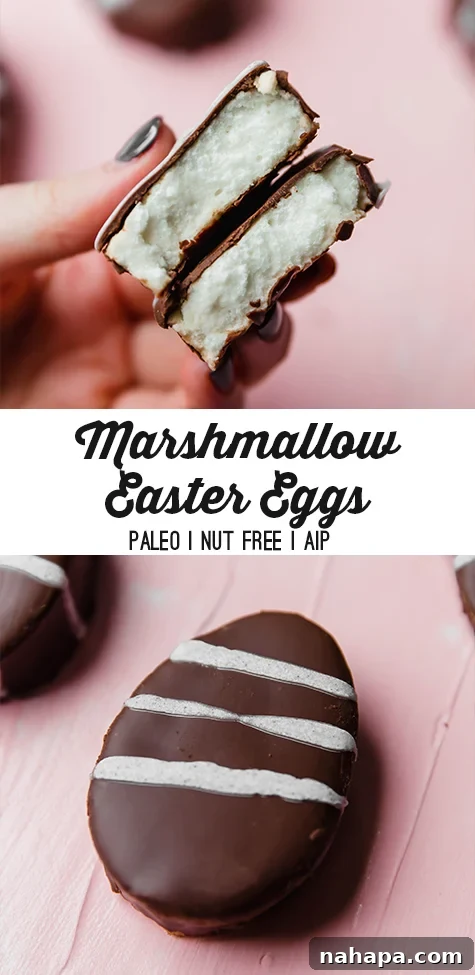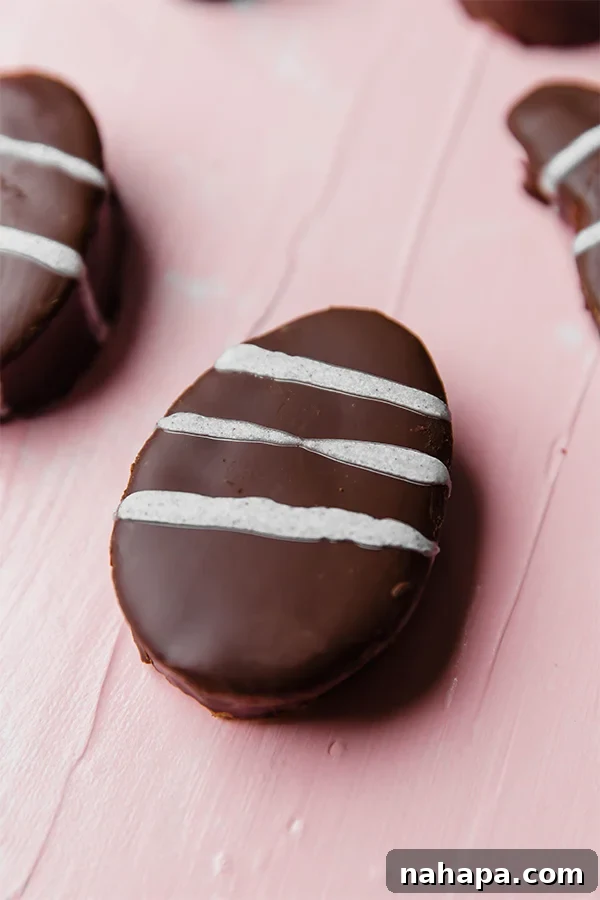
Easter brings a whimsical charm, a time for renewal, family gatherings, and, of course, delightful treats. While the candy aisle overflows with vibrant, sugary confections, many of us seek healthier, wholesome alternatives that still capture the festive spirit. Introducing our exquisite homemade marshmallow Easter eggs – a real food rendition of that classic holiday candy you remember, reimagined for modern dietary needs. These delightful creations are not only incredibly fun to make at home but are also proudly nut-free, paleo-friendly, and fully AIP (Autoimmune Protocol) compliant, ensuring everyone can indulge without compromise.
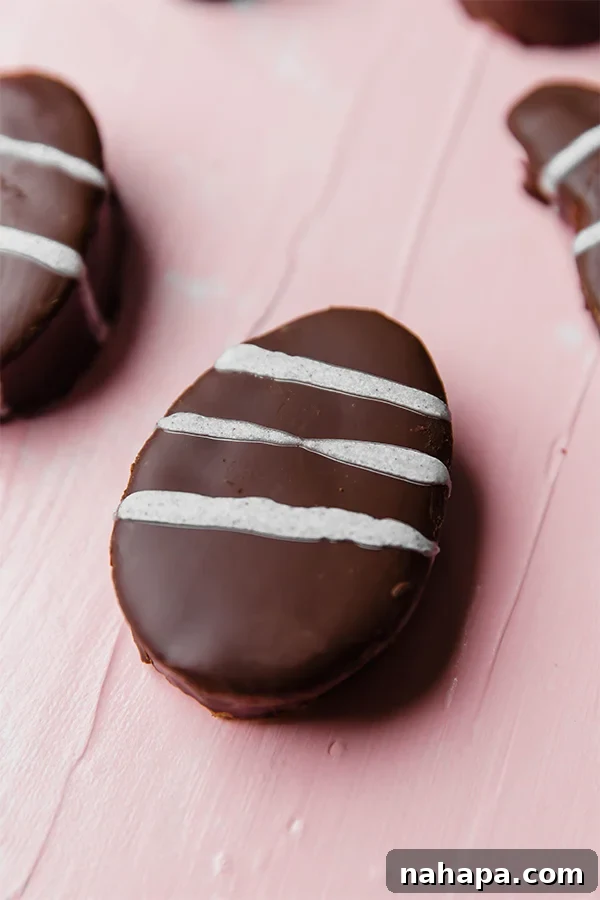
Embracing Easter Nostalgia with Wholesome Treats
There’s a unique anticipation that builds between the chill of winter holidays and the first signs of spring, especially when it comes to seasonal treats. After the hearty comfort foods that sustain us through colder months, Easter signals a vibrant shift, a craving for bright colors and sweet flavors. Many of us harbor fond memories of childhood Easters, eagerly anticipating the colorful bounty from the candy aisle – Cadbury eggs, chocolate bunnies, peanut butter delights, and those beloved marshmallow eggs. While these candies hold a special place in our hearts, the reality for many is a struggle with artificial ingredients, processed sugars, and common allergens like nuts and dairy.
This year, why not recapture that cherished nostalgia with a wholesome twist? Our recipe allows you to recreate those magical marshmallow eggs right in your own kitchen, transforming them into a real food treat that aligns with your health goals. It’s a wonderful opportunity to engage in a fun, family-friendly activity that results in delicious, guilt-free indulgence. You can get as creative as you wish with decorations, making each egg a miniature work of art and a testament to the joy of homemade goodness.
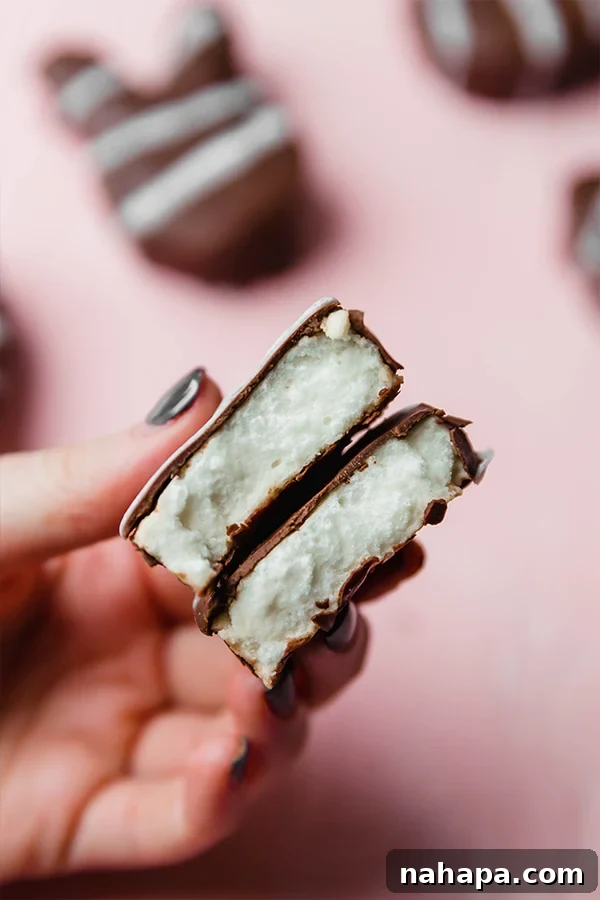
What makes these marshmallows truly special? They are crafted without any cornstarch, artificial flavors, or questionable “weird ingredients” often found in commercial versions. Instead, we rely on simple, pure ingredients that are nut-free, paleo, and AIP-friendly. This means you can enjoy the pillowy texture and sweet flavor of traditional marshmallows, knowing they support your dietary journey and provide a healthier option for the whole family.
Crafting Your Own Real Food Marshmallow Easter Eggs: A Step-by-Step Guide
Creating these delightful marshmallow Easter eggs is a rewarding process that combines simple ingredients with a bit of kitchen magic. Here’s a detailed breakdown to guide you through each stage, ensuring perfect results every time.
Making the Perfect Paleo & AIP Marshmallow Base
The foundation of our Easter eggs is a fluffy, tender marshmallow free from common allergens and processed sugars. Follow these steps carefully to achieve that classic jiggly texture.
- Prepare Your Pan: Begin by lining a large casserole dish pan with parchment paper. This is a crucial step to prevent sticking. Lightly dust the parchment paper with arrowroot starch. This will make slicing much easier later.
- Bloom the Gelatin: In a small bowl, pour ½ cup of water. Sprinkle the gelatin evenly over the water. Stir gently with a spoon or whisk for just a few seconds to ensure all the gelatin is moistened. This process, known as “blooming,” allows the gelatin to hydrate and become ready to incorporate into the hot honey mixture. Set this bowl aside; it will thicken as it sits.
- Heat the Honey Mixture: In a medium-sized, heavy-bottomed pot, combine the remaining ½ cup of water with the honey. Place the pot over low heat. The key here is to heat it slowly and steadily.
- Reach the Right Temperature: Attach a candy thermometer to the side of the pot, ensuring it doesn’t touch the bottom. Slowly bring the honey mixture to a temperature between 235-240°F (113-116°C). This is the “firm ball” stage for candy making. It’s essential not to rush this step or let the mixture boil too vigorously. Once the mixture reaches the target temperature, immediately remove it from the heat to prevent overcooking.
- Combine and Whisk: Carefully and slowly, pour the hot honey mixture into the bloomed gelatin mixture while continuously whisking. You can use either an electric hand mixer or a stand mixer fitted with a whisk attachment. The slow addition helps prevent the gelatin from seizing. Continue whisking for a full 10-12 minutes. During this time, the mixture will transform. It will start to cool down, thicken considerably, and lighten in color. You’ll notice it becoming fluffy, and marshmallow peaks will begin to form as air is incorporated. The mixture should feel lukewarm to the touch when ready.
- Chill to Perfection: Once the marshmallow mixture is thick and airy, pour it into your prepared casserole dish. Use a spatula to spread it evenly. Place the pan in the fridge to harden for at least 4 hours. For best results and easier cutting, it’s often ideal to chill overnight.
- Slice the Marshmallows: Once fully hardened, remove the marshmallow slab from the fridge. Lightly coat your chosen cookie cutters (egg, bunny, carrot, etc.) with arrowroot starch to prevent sticking. Press the cookie cutter firmly into the marshmallow slab to cut out your shapes. You can re-roll the scraps gently and cut more shapes if desired. Store these cut marshmallows in an airtight container in the fridge until ready to coat.
Coating and Decorating Your Easter Eggs
Adding a delicious chocolate coating and vibrant drizzle elevates these marshmallows into true Easter masterpieces.
- Melt the Chocolate: Using a double boiler method, gently melt the dairy-free chocolate chips (or carob for AIP) with the coconut oil. Stir until the mixture is completely smooth and liquid. Be careful not to let any water get into the chocolate, as this can cause it to seize.
- Dip the Marshmallows: Once the chocolate is melted, use a fork to dip each marshmallow shape into the chocolate, ensuring it’s fully coated. Lift the marshmallow out, allowing any excess chocolate to drip off.
- Chill Coated Marshmallows: Place the chocolate-coated marshmallows on a sheet of parchment paper. Transfer them to the fridge to chill and harden completely, which typically takes about 15-30 minutes.
- Prepare Natural Colored Drizzle: While the chocolate is hardening, prepare your colored coating. Melt the coconut butter until smooth. Divide it into small bowls if you plan to use multiple colors. Mix in your natural coloring of choice (e.g., matcha powder for green, turmeric for yellow, beetroot powder for purple). Stir well until the color is vibrant and uniform.
- Decorate and Harden Again: Once the chocolate coating on your marshmallows is firm, use a spoon or a piping bag (with a very small hole) to drizzle the colored coconut butter over the hardened chocolate marshmallows. Get creative with zigzags, dots, or swirls! Return the decorated eggs to the fridge for a final chill to set the colored drizzle.
- Serve and Enjoy: Serve your beautiful, real food marshmallow Easter eggs chilled. These are best enjoyed fresh but can be stored in an airtight container in the refrigerator for up to a week.
Essential Ingredients & Tools for Your Marshmallow Easter Eggs
Creating these treats requires a few key ingredients and tools, each playing a vital role in achieving that perfect texture and taste. Understanding their function will help you master the recipe.
The Core Marshmallow Ingredients
- Honey: As the primary sweetener, honey not only provides a natural, rich sweetness but also contributes to the unique texture of these marshmallows. We use a full cup of honey to achieve the necessary consistency and sweetness level, which cannot be easily scaled back without affecting the marshmallow’s structure. For those managing sugar intake, remember you can always enjoy fewer marshmallows!
- Water: Essential for blooming the gelatin and forming the syrup with honey.
- Gelatin: This is the star ingredient for marshmallows. Unlike collagen, which dissolves readily in liquids and is primarily used for its protein benefits, gelatin forms a stable, jiggly gel when cooled. It’s crucial for giving marshmallows their characteristic bouncy, chewy texture. Ensure you’re using high-quality grass-fed gelatin for the best results and nutritional benefits.
- Arrowroot Starch: This acts as a natural, grain-free dusting agent. It prevents the sticky marshmallow from adhering to your pan and cookie cutters, making the shaping process much smoother. It’s not strictly necessary for the marshmallow itself but greatly simplifies handling.
For the Irresistible Coating
- Dairy-Free Chocolate Chips (or AIP Swap): To keep this recipe paleo and potentially AIP, opt for high-quality dairy and soy-free chocolate chips. There are many excellent brands available now that use ingredients like cocoa mass, cocoa butter, and a natural sweetener. For strict AIP, carob is the perfect substitute. You can prepare carob “chocolate” by melting carob powder with coconut oil and a touch of honey, similar to how you would make Hannukah Gelt. Then, simply chop it into chunks or use it directly for dipping.
- Coconut Oil: A small amount of coconut oil helps to thin the melted chocolate, making it smoother and easier to dip your marshmallows, resulting in an even, glossy coat.
- Coconut Butter & Natural Coloring: This combination forms the vibrant, optional drizzle that adds a festive touch. Coconut butter (also known as coconut manna) melts into a smooth, creamy liquid perfect for decorating. For natural coloring, unleash your creativity:
- Green: Use matcha powder or spirulina powder.
- Yellow: A pinch of turmeric powder works wonders (use sparingly to avoid a strong flavor).
- Pink/Purple: Beetroot powder or freeze-dried berry powder (like raspberry or strawberry) will give beautiful hues. Pink pitaya powder is another excellent option for bright pink.
- Blue: Blue spirulina powder offers a lovely natural blue.
These natural powders provide delightful colors without artificial dyes.
Essential Tools for Success
- Candy Thermometer: Absolutely essential for accurately heating the honey mixture to the correct temperature. Precision here ensures the right marshmallow consistency.
- Electric Hand Mixer or Stand Mixer: Whisking the marshmallow mixture for 10-12 minutes is a significant task, and a good mixer will make this process effortless, incorporating the necessary air for fluffiness.
- Large Casserole Dish: For setting your marshmallow slab.
- Parchment Paper: Crucial for easy removal of the set marshmallow.
- Cookie Cutters: While egg-shaped cutters are classic for Easter, don’t limit yourself! Bunny, chick, carrot, or even simple round cutters can be used. The egg shapes are generally easier to coat smoothly, but feel free to experiment with different forms for added fun and visual appeal.
- Small Bowls: For blooming gelatin and for dividing coconut butter for multiple colors.
- Heavy-Bottomed Pot: For heating the honey mixture evenly.
- Spatula: For spreading marshmallow mixture and scraping bowls.
- Fork: Ideal for dipping marshmallows into chocolate, allowing excess to drip off easily.
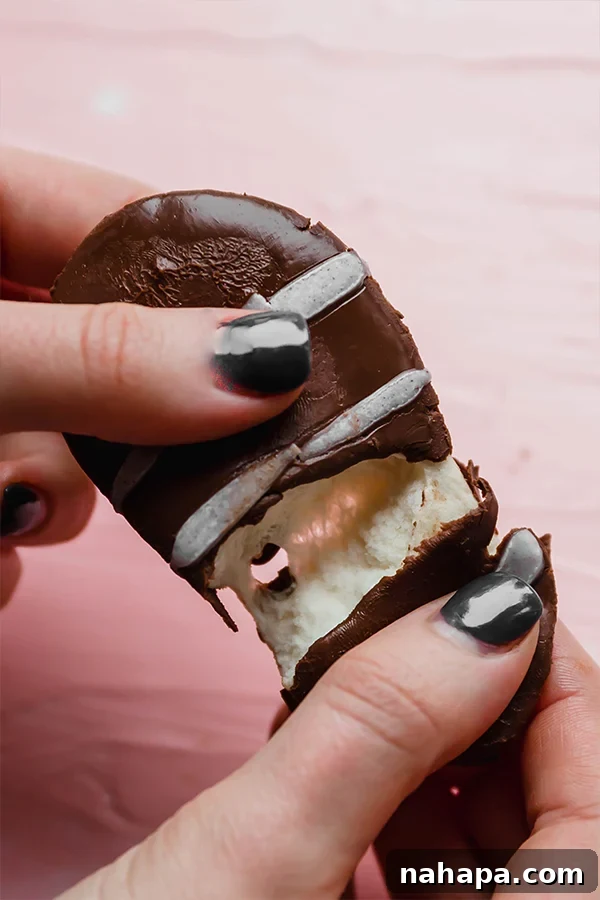
Why Choose Homemade Real Food Marshmallow Easter Eggs?
Beyond the simple joy of creating something delicious in your kitchen, opting for homemade, real food marshmallow Easter eggs offers numerous benefits, especially for those navigating specific dietary paths like Paleo or AIP.
- Dietary Compliance: For individuals with nut allergies, dairy sensitivities, or those following a strict Paleo or AIP lifestyle, finding compliant holiday treats can be a challenge. This recipe eliminates the guesswork, providing a safe and delicious option that everyone can enjoy without fear of hidden ingredients or cross-contamination.
- Control Over Ingredients: When you make treats from scratch, you have complete control over every single ingredient. This means no artificial colors, flavors, high-fructose corn syrup, or preservatives that are common in store-bought candies. You’re choosing wholesome, natural ingredients that nourish your body.
- Superior Taste and Texture: There’s a noticeable difference between homemade and store-bought marshmallows. Homemade versions tend to be incredibly fresh, softer, and possess a more nuanced flavor from natural sweeteners like honey. The texture is perfectly chewy and melt-in-your-mouth delightful.
- Fun and Engaging Activity: Making these marshmallow eggs is a fantastic activity for kids and adults alike. From whisking the marshmallow mixture to dipping in chocolate and adding colorful drizzles, it’s a hands-on experience that fosters creativity and creates lasting family memories.
- Reduced Sugar Impact: While still a sweet treat, using honey as a natural sweetener (compared to refined sugars) often means a slightly different glycemic response and a more nutrient-dense profile. Plus, knowing exactly what’s in your treat helps you make informed choices about your intake.
- The Gift of Thoughtfulness: These beautifully crafted marshmallow Easter eggs make thoughtful and personal gifts for friends, family, and loved ones, especially for those with dietary restrictions who might otherwise miss out on festive sweets.
Making these marshmallow Easter eggs is more than just following a recipe; it’s an act of love, a reconnection with wholesome ingredients, and a celebration of mindful indulgence during a joyous season. Enjoy the process, savor the flavors, and delight in sharing these special treats with those you cherish.
If you like this recipe, you may also like…
- Lemon Berry Scones
- Strawberry Shortcake Bars
- Strawberry Rhubarb Crisp
If you try this recipe out, be sure to leave a comment with a star rating to let me know how it turns out! Your feedback is so helpful to me and other Unbound Wellness readers!
Marshmallow Easter Eggs
Leave a Review
Pin Recipe
Ingredients
For the marshmallows
- 1 cup water, divided
- 3 tbsp gelatin
- 1 cup honey
- 2-3 tbsp arrowroot starch
For the coating
- 2 tbsp coconut oil
- ½ cup dairy-free chocolate chips, sub carob for AIP
- 3 tbsp coconut butter, melted
- 1-2 tsp natural coloring, matcha powder for green, turmeric for yellow, or beetroot powder for purple
Instructions
For the marshmallow
- Prepare a large casserole dish pan by lining with parchment paper and coating with arrowroot starch.
- Pour 1/2 cup of water into a small bowl and sprinkle the gelatin over top. Stir gently to ensure the gelatin is combined. Set aside.
- Using a medium-sized pot slowly heat the honey combined with the other 1/2 cup of water. Slowly bring the temperature to 235-240 F degrees on low heat. Remove from heat immediately once the mixture comes to temperature.
- Slowly add in the honey mixture into gelatin mixture as you whisking with either with an electric hand mixer or in a stand mixer. Continue whisking for 10-12 minutes. The marshmallow mixture should be lukewarm, thick, and marshmallow peaks should start to form.
- Pour the mixture into the prepared pan and place in the fridge to harden for at least 4 hours.
- Use an egg-shaped (or bunny, carrot, etc.) cookie cutter coated with arrowroot slice marshmallows. Store in the fridge.
For the coating
- Use a double boiler method to melt the chocolate with the coconut oil until fully liquid.
- Use a fork to dip the marshmallows one by one into the chocolate until fully coated. Place on parchment paper and chill in the fridge.
- Prepare the colored coating by combining the coconut butter with the coloring of your choice. Drizzle the coconut butter over the hardened chocolate marshmallows. Return to the fridge to harden.
- Serve chilled and enjoy!
Notes
Did you Make this Recipe?
Tag @unboundwellness on Instagram and hashtag #unboundwellness!