
This post contains affiliate links.
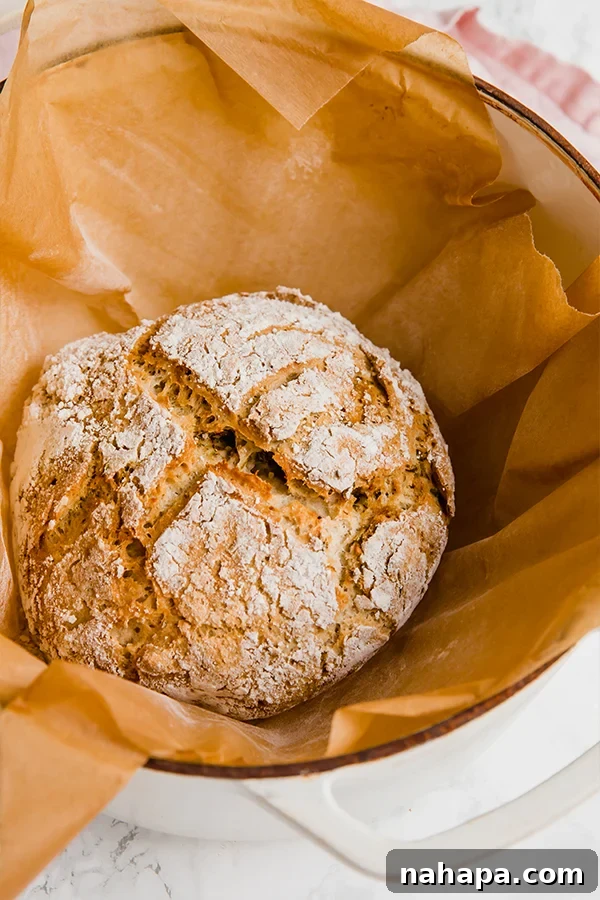
Discover the ultimate guide to baking incredibly flavorful and utterly simple no-knead gluten-free bread right in your own kitchen! This rustic loaf, infused with aromatic garlic and a medley of herbs, and enriched with premium olive oil, promises a delightful homemade bread experience with minimal effort. Forget the complexities often associated with gluten-free baking; this recipe is designed for ease, delivering a wonderfully textured and delicious bread that will become a staple in your home.
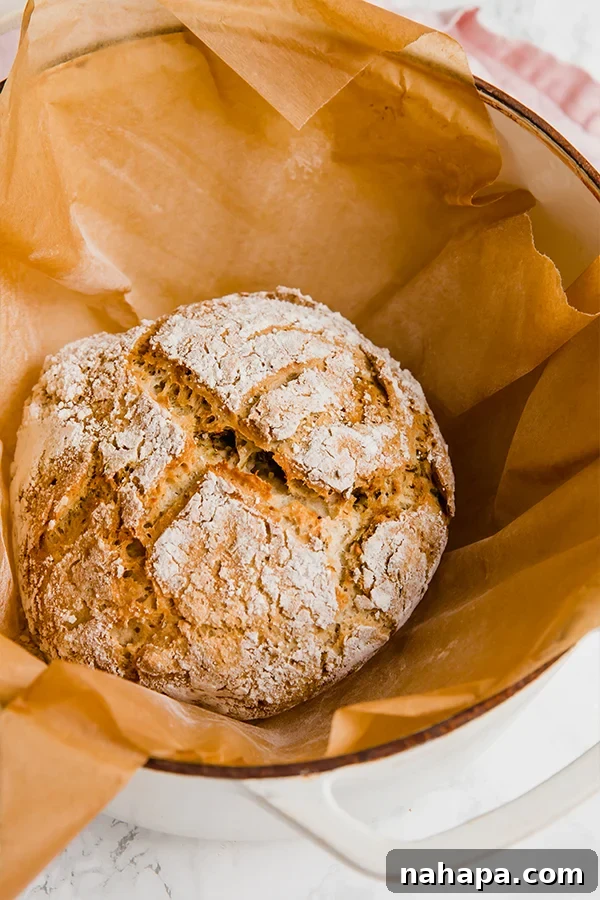
No-Knead Gluten-Free Bread: Effortless & Flavorful Homemade Loaf
There’s an undeniable charm and satisfaction in baking your own bread, and the aroma alone is enough to transform any kitchen into a cozy haven. While the idea of homemade bread might conjure images of elaborate techniques and hours of kneading, this no-knead gluten-free bread recipe shatters those preconceptions. It’s perfect for anyone seeking a fresh, rustic loaf without the intensive labor, especially those navigating the world of gluten-free eating.
My own journey into serious bread baking began with aspirations of mastering gluten-free sourdough after attending a fantastic class in Dallas. However, life (and pregnancy!) had other plans, pushing those ambitious projects to the back burner. Yet, the desire for homemade bread lingered, leading me to seek out something simpler, more accessible, and just as rewarding. This no-knead method was the answer, offering the joy of fresh bread with an incredible garlic, herb, and olive oil flavor profile that’s truly irresistible.
This recipe is a testament to the fact that delicious gluten-free baking doesn’t have to be daunting. It’s a straightforward approach that yields a beautiful, crusty loaf every time. While not specifically paleo or AIP, it’s completely gluten-free and egg-free, making it a wonderful option for many dietary needs. Let’s dive into the simple ingredients and techniques that make this bread a new favorite.
The Essential Ingredients for Your Delicious No-Knead Loaf
Creating this exceptional gluten-free bread starts with a few key ingredients, each playing a vital role in achieving that perfect texture and flavor. Sourcing quality components is important, but the beauty of this recipe lies in its adaptability and reliance on common pantry staples.
- Gluten-Free All-Purpose Flour Blend: The foundation of our loaf. I highly recommend using a reputable cup-for-cup gluten-free flour blend that already contains xanthan gum. This ensures the necessary elasticity and structure that gluten typically provides. Brands like this one have yielded excellent results for me. While other GF flours might work, sticking to a blend designed for baking will give you the most consistent and satisfying outcome. The balance of different flours (rice, tapioca, potato starch, etc.) in these blends is crucial for gluten-free baking success, helping to prevent a crumbly or dense texture.
- Active Dry Yeast: This magical ingredient is what gives our bread its wonderful rise and airy texture. It’s crucial for the fermentation process that develops flavor and structure. When working with yeast, freshness is key! Always check the expiration date. While it can sometimes be tricky to find, it’s worth seeking out for truly exceptional bread. Remember, yeast is a living organism and requires the right conditions to thrive. Using a kitchen thermometer to ensure your water is within the optimal temperature range (110°F-120°F) is vital for proper activation.
- Honey: Not just for sweetness, honey serves as a crucial food source for the yeast, helping it activate and become bubbly. For a vegan alternative, you can easily swap honey for maple syrup or another liquid sugar, ensuring it dissolves well in the warm water with the yeast.
- Baking Soda: This leavening agent works in conjunction with apple cider vinegar to provide an extra lift and tenderness to the gluten-free dough, compensating for the lack of gluten structure. The chemical reaction between the two creates carbon dioxide, which helps the bread rise.
- Apple Cider Vinegar: The acidic component that reacts with baking soda. This reaction creates carbon dioxide gas, which helps the bread rise and achieve a lighter crumb. It also contributes subtly to the overall flavor balance without imparting a strong vinegar taste to the final product.
- Olive Oil: Essential for adding moisture, richness, and contributing to a beautiful golden crust. Using a good quality extra virgin olive oil will also infuse the bread with a lovely Mediterranean flavor that pairs perfectly with garlic and herbs, creating a more robust and appealing taste profile.
- Garlic & Herb Seasoning: This is where much of the incredible flavor comes from! I’ve found that a blend like Primal Palate’s garlic & herb seasoning works wonders, providing a balanced and potent flavor without being overwhelming. You can adjust the amount to your preference or even experiment with your own herb combinations. Think dried oregano, basil, thyme, or a pinch of onion powder for different aromatic profiles.
- Salt: A non-negotiable ingredient in bread baking. Salt doesn’t just add flavor; it also helps control the yeast activity, slowing it down slightly for a more controlled rise, and strengthens the dough structure, leading to a better final product with a balanced taste.
Essential Cookware for Gluten-Free Bread Baking Success
The right tools can make all the difference, transforming a simple recipe into an extraordinary baking experience. For this no-knead gluten-free bread, two pieces of equipment are particularly vital:
The Mighty Dutch Oven (or Cast Iron Pot)
If you’ve ever wondered how bakeries achieve that perfectly crusty exterior and soft, airy interior, the secret often lies in steam. A Dutch oven excels at trapping steam during the initial baking phase, mimicking a professional steam-injected oven. This creates an ideal environment for gluten-free bread to rise beautifully and develop that enviable crisp crust. Without gluten to provide structure, the steam helps the dough expand fully before the crust sets, allowing for a magnificent oven spring.
- Why a Dutch Oven? It heats evenly and retains heat exceptionally well, ensuring consistent baking throughout the loaf. The lid creates a sealed environment, trapping moisture released from the dough, which in turn steams the bread. This steaming is critical for allowing the crust to remain pliable and stretch as the dough rises, leading to maximum volume and a wonderfully chewy texture. Once the lid is removed, the high, dry heat crisps the crust to perfection.
- Size Matters: While any Dutch oven will work, a larger one (typically 5-7 quarts) provides ample space for your loaf to expand without crowding, leading to a better shape and an improved, uniform rise. If your Dutch oven is too small, the dough might hit the sides, affecting its shape.
- Alternatives: A heavy-duty cast iron pot with a tight-fitting lid can serve the same purpose effectively. The key is a heavy, oven-safe pot with a lid that seals well to trap steam. Clay bakers or even a heavy baking sheet with a deep, inverted metal bowl over the bread can also work in a pinch, though results may vary.
Parchment Paper: Your Non-Stick Baking Ally
Parchment paper is not just for preventing sticking; it’s a game-changer for effortlessly transferring your delicate dough into a scorching hot Dutch oven. Trying to maneuver sticky gluten-free dough directly into a preheated pot can be a challenge, potentially burning your hands or deflating your beautifully risen dough. Parchment paper eliminates this stress entirely. You can simply lift the dough by the edges of the parchment paper and gently lower it into the preheated pot, providing a safe and easy transfer method.
- Benefits: Ensures your bread doesn’t stick to the bottom of the Dutch oven, makes clean-up a breeze by creating a barrier, and simplifies the transfer process, reducing the risk of deflating your well-risen dough. This is particularly important for gluten-free doughs which can be more delicate.
- Tip: Ensure you use genuine parchment paper, not wax paper, as wax paper is not oven-safe at high temperatures and can melt or burn. You can trim the parchment paper so it just fits inside the Dutch oven to minimize excess paper that might scorch.
A Cooling Rack: The Secret to a Perfect Gluten-Free Texture
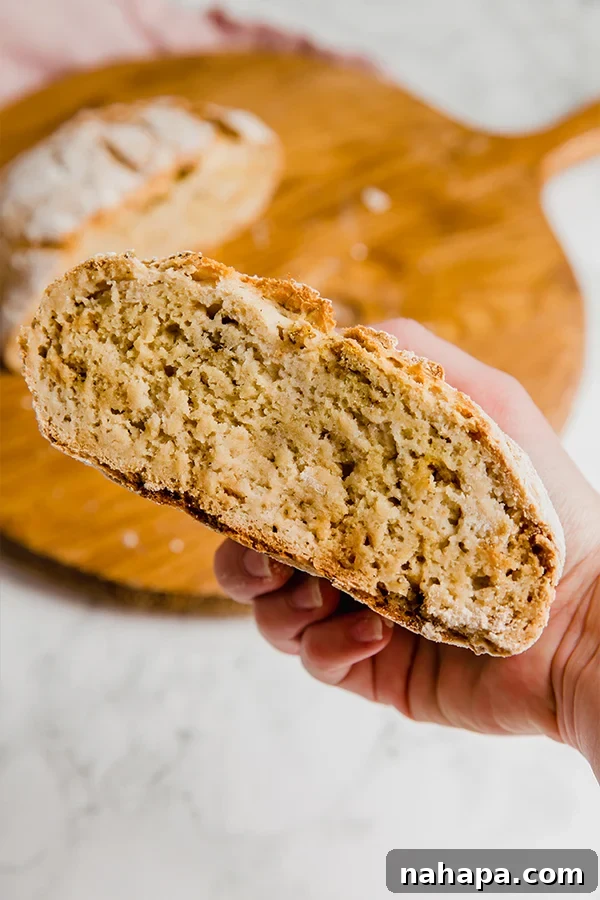
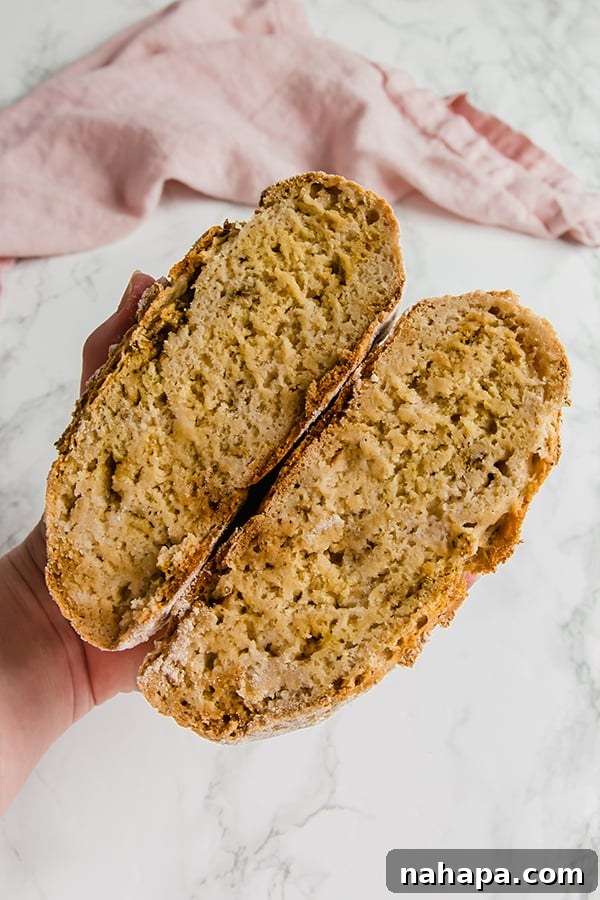
This humble piece of equipment is often overlooked but is absolutely critical for gluten-free bread. Unlike traditional bread, gluten-free loaves can become gummy and dense if they don’t cool properly. A cooling rack allows air to circulate all around the bread, preventing moisture and residual steam from getting trapped at the bottom. This ensures the bread cools evenly, allowing its internal structure to firm up and preventing that undesirable moist, gummy texture.
- Why it’s Crucial: Proper cooling on a rack is the best defense against a gummy texture, especially with gluten-free recipes where the starches need time to fully set. It ensures your efforts result in a loaf with a pleasant chew and firm structure, rather than a dense, wet interior. Patience during this cooling phase will be generously rewarded with a superior crumb.
How to Make No-Knead Gluten-Free Bread: A Simple Step-by-Step Guide
Baking this rustic, flavorful gluten-free bread is surprisingly simple, requiring minimal hands-on time. Follow these steps for a perfect loaf every time:
- Activate the Yeast: In a large mixing bowl, combine the active dry yeast with 1 cup of warm water (ideally between 110°F-120°F – use a kitchen thermometer to be precise) and 1 teaspoon of honey. Stir gently with a spoon or rubber spatula to ensure the honey and yeast dissolve. Cover the bowl loosely with a clean kitchen towel or plastic wrap and let it sit undisturbed for 5-15 minutes. You’ll know the yeast is active when the mixture becomes visibly foamy and bubbly on top, indicating it’s alive and ready to work its magic and leaven your bread.
- Prepare and Rest the Dough: To the activated yeast mixture, add the 1 ½ cups of gluten-free all-purpose flour, ½ teaspoon of baking soda, 1 teaspoon of apple cider vinegar, 2 tablespoons of olive oil, 2 teaspoons of garlic & herb seasoning, and 1 teaspoon of salt. Use a rubber spatula to thoroughly stir the ingredients until they are fully combined and there are no dry spots of flour. The dough will be noticeably sticky and shaggy, which is perfectly normal and expected for a no-knead gluten-free dough. Do not attempt to knead it. Cover the bowl tightly with plastic wrap and allow the dough to rest at room temperature for 45-60 minutes. This resting period allows the yeast to ferment, creating air pockets, and allows the flavors to meld and develop.
- Preheat Oven and Dutch Oven: While your dough is resting, preheat your oven to a high temperature of 450°F (230°C). Once the oven reaches temperature, carefully place your empty Dutch oven (with its lid) inside the preheated oven for at least 30 minutes. This crucial step ensures the pot is scorching hot, which is essential for achieving a perfect, crispy crust and maximum oven spring as soon as the dough hits the hot surface.
- Form the Loaf: Lay a large piece of parchment paper on your counter and lightly flour it with extra gluten-free flour. Lightly flour your hands as well. Gently scoop the sticky dough out of the bowl and onto the floured parchment paper. If the dough is still very wet and difficult to handle, add a little more flour to your hands and the parchment paper to make it manageable. Form the dough into a tight, round loaf. A tight shape helps the bread hold its form and rise upwards uniformly. Using a sharp knife or a bread lame, lightly score a cross or a few parallel lines into the top of the dough. This not only adds a rustic aesthetic but also helps the bread expand evenly and control cracking during baking.
- Bake the Bread (Covered): With extreme caution, using oven mitts, carefully remove the preheated Dutch oven from the oven and set it on a heat-safe surface. Carefully take off the lid. Using the parchment paper as a sling, gently and safely transfer the formed bread dough (still on the parchment paper) into the hot Dutch oven. Place the lid back on the Dutch oven securely. Return the covered Dutch oven to the oven and bake for 35 minutes. Baking it covered creates that essential steamy environment that promotes a beautiful rise and prevents the crust from setting too quickly.
- Bake the Bread (Uncovered): After the initial 35 minutes, carefully remove the lid from the Dutch oven. This allows the moisture to escape, and the crust to crisp up and achieve a beautiful, rich golden-brown color. Continue baking for another 15-20 minutes, or until the bread reaches your desired level of crispness and golden hue. Keep a close eye on the parchment paper during this uncovered stage to ensure it doesn’t scorch or burn excessively.
- Cool Completely: This is a non-negotiable step for gluten-free bread! Once baked, carefully remove the bread from the Dutch oven (still on the parchment paper, if it hasn’t completely burned) and transfer it to a sturdy wire cooling rack. Allow the bread to cool completely to room temperature. This will take at least one hour, but preferably two hours. Resist the urge to slice into it too soon, as cutting warm gluten-free bread often results in a gummy, unset texture. The prolonged cooling process allows the starches to fully set and the internal structure to firm up, giving you that perfect crumb.
- Serve and Enjoy: Once fully cooled, slice your homemade no-knead gluten-free bread and serve! It’s fantastic toasted or untoasted, with butter, alongside soups, or as the base for open-faced sandwiches. Store any leftovers in an airtight container in the fridge to maintain freshness.
Customizing Your No-Knead Gluten-Free Loaf
While this garlic & herb version is a favorite, the beauty of homemade bread is the ability to customize it to your taste. Don’t be afraid to experiment with different flavor profiles to make this recipe uniquely yours! Here are some ideas to spark your creativity:
- Herb Variations: Swap out or add fresh or dried herbs like rosemary (finely chopped), thyme, sage, oregano, or a blend of Italian herbs. Finely chopped fresh chives or dill could also add a lovely fresh note, particularly if served with a lighter meal.
- Savory Add-ins: Consider folding in ingredients like sun-dried tomatoes (well-drained and chopped), chopped black olives, a sprinkle of nutritional yeast for a cheesy flavor (if dairy-free), or even some dairy-free cheese shreds. Roasted garlic cloves, mashed into the dough, would also be a fantastic addition for a deeper garlic flavor. Caramelized onions can also add a subtle sweetness and depth.
- Spice it Up: A pinch of red pepper flakes can add a subtle kick if you enjoy a little heat. Alternatively, a touch of black pepper can enhance the savory notes.
- Seed Power: Incorporate some seeds for added texture, nutrition, and visual appeal. Poppy seeds, sesame seeds, sunflower seeds, or flax seeds can be mixed into the dough or sprinkled generously on top before baking. A blend of “everything bagel” seasoning can also be sprinkled on top for a fun twist.
- Sweet Touches (for a different loaf): If you’re craving a sweeter bread, you could reduce the garlic and herbs and instead add cinnamon, raisins, dried cranberries, or chopped dates. Just be mindful that this will significantly change the flavor profile and may require slight adjustments to liquid if adding very moist ingredients.
Troubleshooting Common Gluten-Free Bread Baking Issues
Even with a straightforward recipe, baking can sometimes present challenges. Here are answers to common questions and tips to help you achieve perfect results every time, ensuring your no-knead gluten-free bread is a resounding success:
“Why is my gluten-free bread gummy?”
This is arguably the most common issue with gluten-free bread, and it can be incredibly frustrating. The primary culprit is often insufficient cooling. Gluten-free flours behave differently than wheat flour; they absorb moisture uniquely and need ample time to set their internal structure. Slicing into warm bread traps steam and moisture, preventing the starches from fully firming up, leading to a dense, wet, and decidedly gummy interior. Always allow your loaf to cool completely on a wire rack for at least 1-2 hours, ideally until it reaches room temperature, before slicing. This patience is truly the most important step for avoiding a gummy texture.
“My bread didn’t rise enough, what went wrong?”
Several factors can affect the rise of your bread, and understanding them can help you diagnose issues:
- Inactive Yeast: This is a frequent cause. Ensure your yeast is fresh (check the expiration date!) and properly activated. Water that is too hot (above 120°F) will kill the yeast, while water that is too cold (below 105°F) won’t activate it effectively. Aim for a “bathwater warm” temperature, ideally 110°F-120°F. The foamy, bubbly appearance after 5-15 minutes of activation is your green light that the yeast is alive and well.
- Expired or Old Ingredients: Old flour or baking soda can lose their leavening power over time. Always check expiration dates, especially for leavening agents.
- Too Much Flour: While tempting to add more flour to a sticky gluten-free dough, adding too much can make the dough too stiff and dense, inhibiting its ability to rise and expand. Gluten-free dough can be quite sticky, so resist the urge to add excessive amounts of extra flour unless explicitly needed for shaping and the dough is unmanageably wet.
- Improper Resting Time: The dough needs its full resting period (45-60 minutes) to allow the yeast to ferment and gases to build up within the dough. Rushing this step will result in a less airy loaf. Ensure the dough is in a warm, draft-free spot during this time.
“Can I use other gluten-free flours?”
Yes, you likely can have similar results with other high-quality gluten-free all-purpose flour blends that are formulated as “cup-for-cup” replacements for wheat flour. These blends typically contain a mix of different gluten-free flours and starches (like rice flour, tapioca starch, potato starch), along with xanthan gum, to mimic the properties of gluten. However, specific brands can vary in their exact composition, which may lead to slight differences in hydration requirements or texture. I haven’t personally tested every brand, but generally, sticking to a blend designed for direct substitution is your best bet for consistency. Avoid using single-source gluten-free flours (like just almond flour or just coconut flour) unless the recipe specifically calls for them, as they have very different absorption rates.
Storage and Serving Suggestions for Your Homemade Gluten-Free Bread
Once you’ve baked your beautiful loaf, proper storage is key to maintaining its freshness and texture. Gluten-free bread tends to dry out faster than traditional bread due to its different starch composition and lack of gluten network, so keep that in mind!
- Room Temperature: If you plan to consume the bread within 1-2 days, it can be stored in an airtight container or a clean bread bag at room temperature. This helps prevent it from going stale too quickly.
- Refrigeration: For longer storage, up to 5-7 days, refrigeration is recommended. Wrap the bread tightly in plastic wrap or foil, then place it in an airtight container or bag to prevent it from drying out further and to extend its shelf life. Reheating or toasting refrigerated slices will restore much of their texture.
- Freezing for Longevity: This bread freezes wonderfully, making it perfect for meal prep or enjoying fresh-tasting bread whenever a craving strikes! Slice the cooled loaf completely, then place the slices in a freezer-safe bag or container with parchment paper between slices to prevent them from sticking together. It can be frozen for up to 2-3 months. Thaw individual slices as needed, or pop them directly into a toaster for a quick and fresh bite – no need to thaw fully!
Your versatile no-knead gluten-free bread is ready to elevate any meal! Here are some serving suggestions:
- Classic Toast: Enjoy toasted with butter, your favorite fruit spread or jam, honey, or a creamy avocado spread.
- Soup & Salad Companion: Serve thick slices alongside a hearty bowl of soup, a flavorful chili, or a fresh, crisp salad. Its rustic texture makes it perfect for dipping.
- Garlic Bread: Slice the loaf, spread with extra garlic butter (or olive oil, minced garlic, and herbs), and toast until golden and fragrant for an irresistible side dish.
- Open-Faced Sandwiches: Create delicious open-faced sandwiches with your favorite toppings like roasted vegetables, deli meats, or hummus.
- Homemade Croutons: Cut day-old bread into cubes, toss with a little olive oil and extra seasoning, then bake until crispy for homemade gluten-free croutons to top salads or soups.
Frequently Asked Questions About Gluten-Free Bread
“Can you make this bread grain-free?”
This bread is not grain-free. It relies on a gluten-free all-purpose flour blend, which typically contains various grains like rice flour, corn starch, or potato starch. If you are specifically looking for a grain-free bread, I highly recommend seeking out a recipe explicitly developed to be grain-free (often using nut flours like almond flour, coconut flour, or tapioca starch in specific ratios) rather than attempting to modify this recipe. Grain-free baking requires a different balance of ingredients and techniques, including different hydration levels and binding agents, for optimal results and a palatable texture.
“I don’t want to make my own bread… what’s your favorite store-bought gluten-free bread?”
While I highly encourage you to try this easy recipe and experience the joy of homemade bread, sometimes convenience is absolutely key! By far, my absolute favorite store-bought gluten-free bread is Bread Srsly GF sourdough bread! I’ve enjoyed it countless times, especially during my pregnancy, and it has consistently impressed me. It’s incredibly delicious and has a fantastic texture that holds up well. They don’t sell it everywhere, but they offer fast shipping directly to your door, and you can easily freeze leftovers to enjoy whenever you wish. You can often use codes like UNBOUNDWELLNESS to get free shipping on your first order if you’d like to try it yourself!
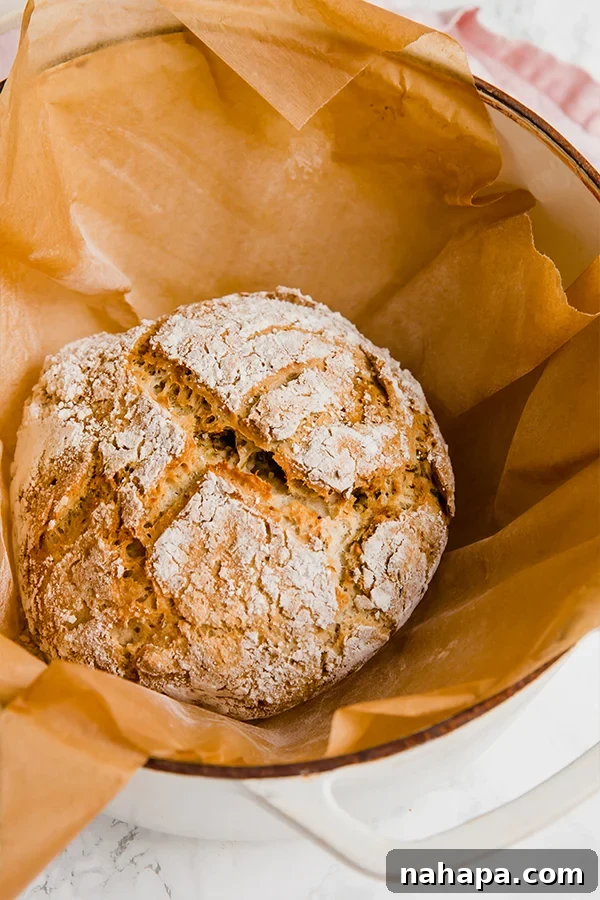
No-Knead Gluten Free Bread
Leave a Review
Pin Recipe
Ingredients
- 1 tsp active dry yeast
- 1 cup water, 110-120F
- 1 tsp honey
- 1 ½ cup gluten-free flour, I used this brand. Plus extra to flour hands
- ½ tsp baking soda
- 1 tsp apple cider vinegar
- 2 tbsp olive oil
- 2 tsp garlic and herb seasoning, I use this brand
- 1 tsp salt
Instructions
-
Add the yeast to a large bowl and pour the water over the yeast along with the honey. Gently combine to dissolve the yeast. Tightly cover the yeast mixture and allow to sit for 5-15 minutes. The top of the mixture should be foamy and bubbly.
-
Add the remainder of the ingredients to the yeast mixture and stir with a rubber spatula to fully combine. Tightly cover the bowl and allow to sit for 45-60 minutes.
-
While the bread sits, preheat the oven to 450 F. Once heated, transfer a dutch oven/cast iron pot to the oven to allow to preheat.
-
Set out a piece of parchment paper that’s lightly floured. Flour your hands and scoop the bread dough out of the bowl and onto the parchment paper. Add more flour as needed if the dough is wet to make it easier to work with. Form the dough into a tight, round bread loaf. Use a sharp knife to lightly score an cross into the top of the bread.
-
Very carefully remove the dutch oven from the oven and remove the lid. Transfer the bread dough along with the parchment paper to the dutch oven and cover.
-
Place the covered dutch oven back in the oven and allow to bake for 35 min.
-
Carefully remove the lid of the dutch oven and bake for another 15-20 minutes or until the bread is crisped to your liking. (Be careful about the parchment paper burning)
-
Remove the bread from the oven and carefully transfer to a cooling rack. Allow to cool completely and come to room temperature (this will at least take one hour, but preferably two hours) before slicing and serving.
-
Serve toasted or untoasted with toppings of your choice! Store in the fridge.
Notes
This recipe was adapted from here and here. Also, shout out to Kuluntu Bakery for the bread baking class I took with them to help learn how to bake a beautiful sourdough loaf from scratch, which helped to perfect this recipe!
All nutritional information are estimations and will vary. Estimations do not include optional ingredients.
Calories: 122kcal,
Carbohydrates: 19.4g,
Protein: 2.8g,
Fat: 3.8g,
Fiber: 0.8g
Did you Make this Recipe?
Tag @unboundwellness on Instagram and hashtag #unboundwellness!
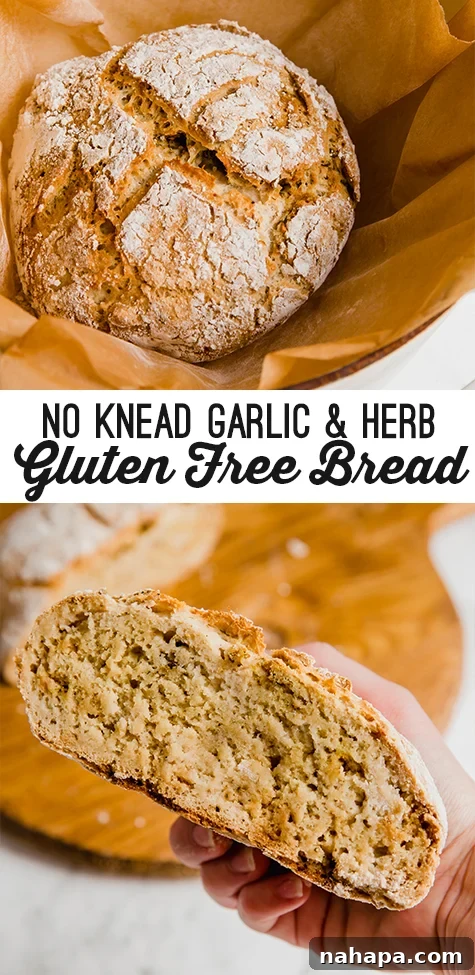
You’ll also love these delicious gluten-free recipes:
- AIP Garlic & Herb Bread Rolls
- Easy Plantain Banana Bread