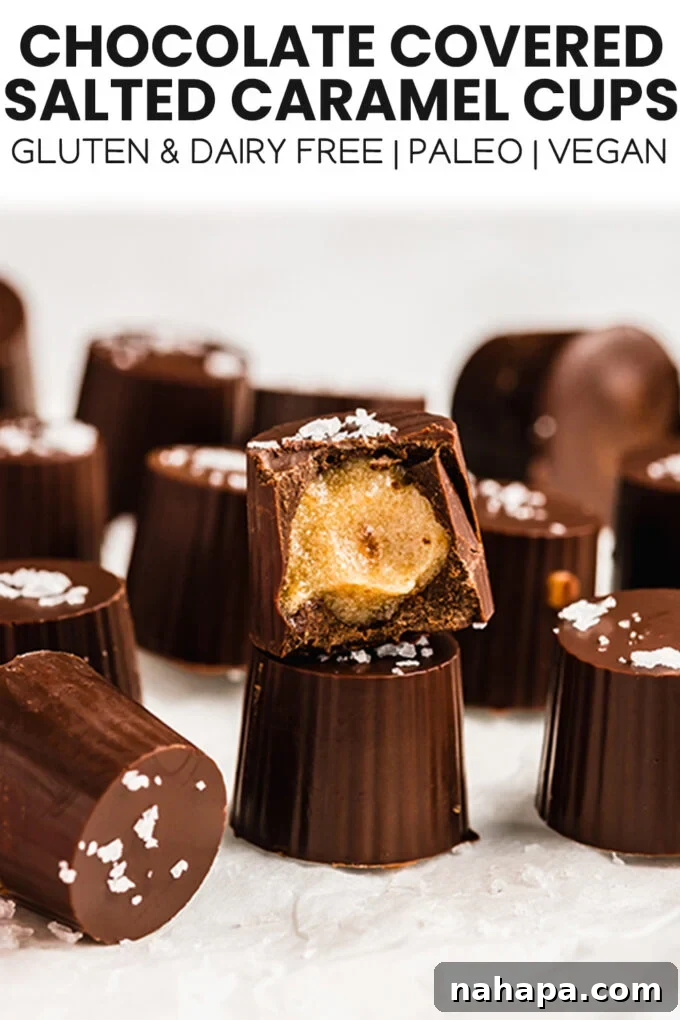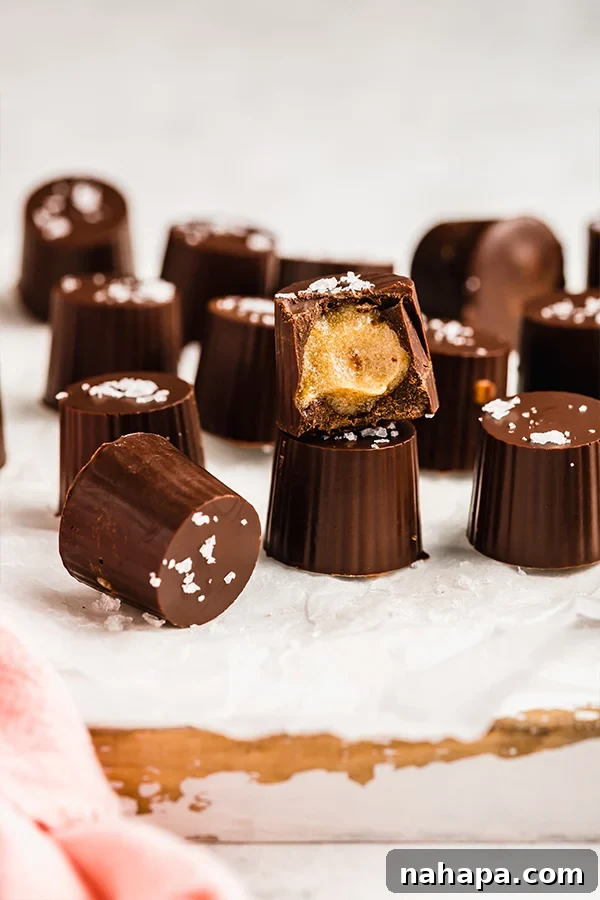
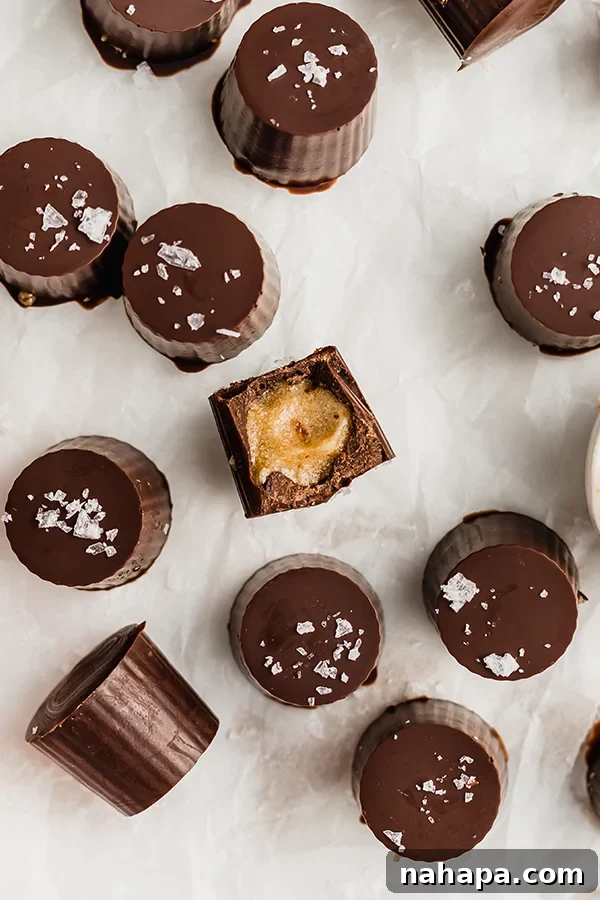
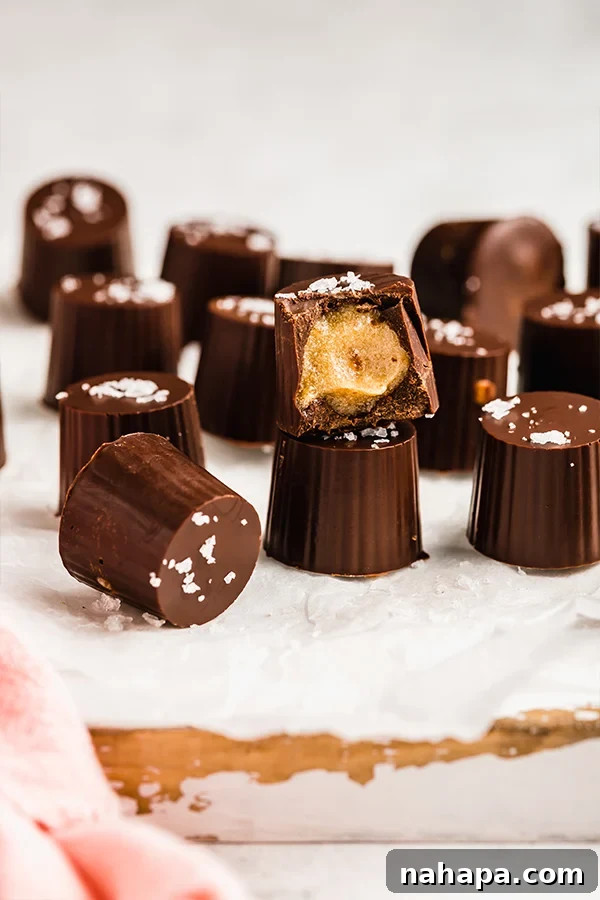
Indulge in the sublime pleasure of a homemade treat that’s not only incredibly delicious but also perfectly aligned with your health and dietary goals. These exquisite Salted Caramel Cups offer the ideal balance of sweet and savory, crafted from wholesome, natural ingredients. Forget about refined sugars, dairy, or gluten; these delightful cups are designed to be paleo, dairy-free, and refined sugar-free, with a simple adaptation available to make them fully AIP (Autoimmune Protocol) compliant. Imagine biting into a rich, velvety chocolate shell to discover a luscious, chewy date caramel filling, all finished with a delicate sprinkle of flaky sea salt. This recipe isn’t just a dessert; it’s a guilt-free celebration of flavor, proving that healthy eating can be utterly decadent.
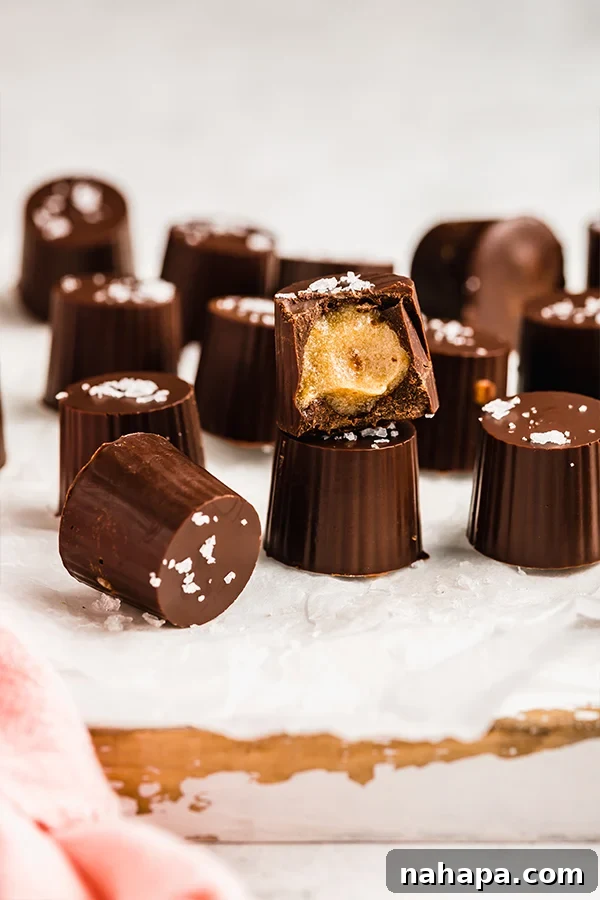
Why You’ll Love These Salted Caramel Cups
In a world full of processed sweets, finding a treat that satisfies your cravings without compromising your health can be a challenge. These homemade salted caramel cups are a game-changer for several compelling reasons:
- Dietary Inclusivity: Whether you’re following a Paleo, dairy-free, or refined sugar-free diet, these cups fit seamlessly into your lifestyle. With an easy swap for carob chips, they become fully AIP compliant, making them accessible to even more dietary restrictions.
- Pure Ingredients: Made with natural sweeteners like Medjool dates and rich coconut milk, you know exactly what you’re putting into your body. No mysterious additives or artificial flavors here!
- Irresistible Flavor Profile: The combination of rich chocolate and a perfectly balanced sweet-and-salty caramel center is simply divine. The flaky sea salt topping adds that extra gourmet touch that elevates these cups from good to extraordinary.
- Effortless Preparation: Don’t let their sophisticated taste fool you; these caramel cups are surprisingly simple to make. With a food processor and a double boiler, you’ll whip up a batch in no time.
- Perfect for Any Occasion: Ideal for a quick personal treat, a healthier dessert option for gatherings, or even as thoughtful edible gifts. They store wonderfully, making them excellent for meal prepping your sweet indulgences.
The Star Ingredients for Your Salted Caramel Creations
Creating these heavenly salted caramel cups begins with selecting high-quality ingredients. Each component plays a crucial role in achieving the perfect flavor and texture:
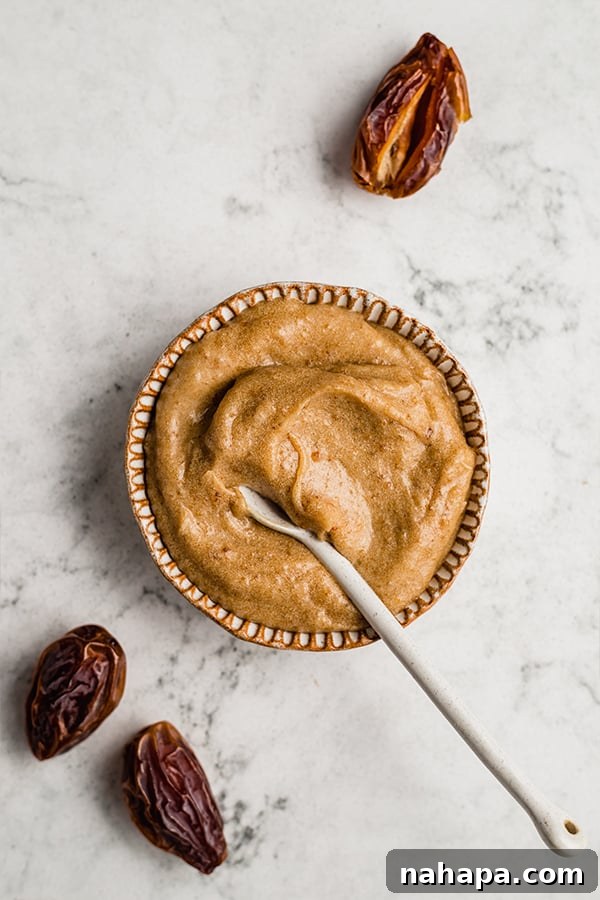
- Medjool Dates: These are the heart of our luscious caramel. Medjool dates are naturally soft, incredibly sweet, and possess a rich, caramel-like flavor on their own, making them an ideal base. Their juicy texture blends beautifully into a smooth, thick caramel. You can buy them pre-pitted to save time, or easily pit them yourself. For the best results, ensure your dates are fresh and plump.
- Dairy-Free Chocolate Chips: The shell of our caramel cups calls for good quality dairy-free chocolate chips. Brands like Enjoy Life are excellent choices, offering a smooth melt and rich chocolate flavor without any dairy. Look for varieties with minimal added sugars if you’re particularly keen on refined sugar-free options.
- Coconut Milk: Full-fat canned coconut milk is essential for creating a creamy, rich caramel. The higher fat content contributes to the desired texture and mouthfeel, ensuring your caramel is velvety smooth and holds its shape. Avoid using thin, boxed coconut milk typically used for beverages, as it will not yield the same rich consistency.
- Sea Salt: A pinch of sea salt in the caramel is crucial for balancing the sweetness of the dates and enhancing the overall flavor profile. Salt isn’t just for savory dishes; it awakens and deepens the sweetness in desserts.
- Coconut Oil: This versatile ingredient serves two purposes. A small amount is added to the chocolate chips to help them melt smoothly and create a slightly softer, more palatable chocolate shell that isn’t too brittle when bitten into. It also aids in the setting process.
- Flaky Sea Salt: This is our grand finale! A sprinkle of flaky sea salt on top of each finished cup adds a delightful textural contrast and a burst of salty flavor that perfectly complements the sweet caramel and chocolate. Don’t skip this step – it truly elevates the experience.
Crafting Your Perfect Salted Caramel Cups: A Step-by-Step Guide
Making these decadent treats is a straightforward process that yields impressive results. Follow these detailed instructions to create your own batch of irresistible salted caramel cups:
Step 1: Prepare the Irresistible Date Caramel
The heart of these cups is the rich, naturally sweet date caramel. Begin by combining your Medjool dates (ensure they are pitted), full-fat canned coconut milk, and a pinch of sea salt in a food processor. Process the mixture on high speed until it transforms into a completely smooth, creamy caramel. It’s important to scrape down the sides of the food processor bowl periodically to ensure all ingredients are thoroughly incorporated and there are no large date pieces remaining. The consistency should be thick and spreadable. Once smooth, transfer the caramel to a separate bowl and set it aside.
Step 2: Master the Art of the Chocolate Shell
Next, you’ll create the glossy chocolate shells that encase our delightful caramel. For best results, use a double boiler method to melt your dairy-free chocolate chips and coconut oil. If you don’t have a dedicated double boiler, you can easily create one by placing a heat-proof bowl (glass or metal) over a pot of simmering water, ensuring the bottom of the bowl does not touch the water. Stir the chocolate and coconut oil continuously until the mixture is fully melted and smooth, with no lumps. Remove from heat once melted.
Now, it’s time to assemble your cups. You will need a silicone candy cup mold for this. Silicone molds are ideal because they allow for easy removal of the finished cups. Pour the melted chocolate mixture into each cavity of your mold, filling it about halfway. Then, carefully add approximately 1/2 tablespoon of the date caramel on top of the chocolate layer. The exact amount may vary slightly depending on the size of your mold; the goal is to have a generous layer of caramel that you’ll love to bite into, but still leave enough room to cap it off with more chocolate. Finally, spoon the remaining melted chocolate mixture over the caramel layer, filling each mold to the top. Gently tap the mold on your countertop a few times to release any air bubbles and ensure a smooth, even top layer.
Step 3: Chill, Set, and Indulge!
Once all your cups are formed, transfer the silicone mold to the refrigerator. Allow them to chill and set completely for at least 2-3 hours. This chilling time is crucial for the chocolate to firm up and for the caramel to achieve its desired chewy texture. Once firm, carefully pop the salted caramel cups out of their molds. Serve them immediately, topped with an extra sprinkle of flaky sea salt for an added touch of gourmet flavor and visual appeal. Enjoy your perfectly crafted, guilt-free treat!
Expert Tips for Making the Best Salted Caramel Cups
Achieving perfection with these salted caramel cups is easy with a few insider tips:
- Quality of Dates: Always use fresh, soft Medjool dates. If your dates seem a bit dry, you can soak them in warm water for 10-15 minutes before blending. Drain them thoroughly before adding to the food processor.
- Don’t Overheat Chocolate: When melting chocolate, low and slow is key. A double boiler prevents direct heat from scorching the chocolate, which can make it seize and become grainy. If using a microwave, melt in short bursts (15-20 seconds), stirring well after each interval, to prevent burning.
- Even Layers: Take your time when pouring the chocolate and adding the caramel. Even layers ensure a balanced flavor in every bite. Tapping the mold helps settle the chocolate and caramel.
- Patience with Chilling: Resist the urge to pull them out early! A full 2-3 hours (or even longer) in the fridge ensures the chocolate is firm and the caramel is perfectly set. If you’re in a hurry, you can place them in the freezer for about 30-45 minutes.
- Experiment with Toppings: While flaky sea salt is classic, feel free to get creative! A sprinkle of cacao nibs, finely chopped nuts (if not AIP), or even a drizzle of extra melted chocolate can add another layer of flavor and texture.
Frequently Asked Questions About Salted Caramel Cups
How do you store this recipe to maintain freshness?
To keep your salted caramel cups fresh and firm, it’s essential to store them in the refrigerator. Place them in an airtight container, and they will remain delicious for 3-4 days. If you wish to extend their shelf life even further, you can freeze them. When stored in the freezer in an airtight container, they can last for several weeks. Simply thaw them slightly at room temperature before enjoying, or eat them straight from the freezer for a firmer, chewier texture.
Can I use other varieties of dates besides Medjool?
While you can certainly experiment with other date varieties, Medjool dates are highly recommended for this recipe. Their naturally soft, juicy texture and rich, caramel-like flavor are unparalleled and contribute significantly to the creamy, chewy consistency of the caramel filling. Other dates, such as Deglet Noor, tend to be firmer and less moist, which might result in a drier, less smooth caramel. If you do use a different variety, you might need to add a touch more coconut milk to achieve the desired blendable consistency.
Do you recommend canned or boxed coconut milk for this recipe?
For the best results, always opt for full-fat canned coconut milk. The higher fat content in canned coconut milk is crucial for creating the rich, creamy, and thick caramel texture that this recipe calls for. Boxed coconut milk, typically found in the dairy aisle and marketed as a beverage, is often much thinner and has a lower fat content, which will not yield the desired consistency for the caramel. Look for brands like Native Forest Simple Coconut Milk, which are usually full-fat and contain minimal additives.
Can these be made into candy bars instead of candy cups?
Absolutely! This recipe is incredibly versatile and can easily be adapted to make candy bars instead of individual cups. You can use a silicone candy bar mold or even line a small square baking dish with parchment paper to create a larger slab that can be cut into bars once set. Keep in mind that depending on the size of your chosen mold, you may yield fewer candy bars than cups, but the delicious taste and texture will remain the same. Feel free to use any mold that suits your preference for shape and size.
What if my chocolate seizes when melting?
Chocolate seizing (becoming thick, grainy, and unworkable) usually happens when even a tiny amount of water or steam gets into the chocolate, or when it’s overheated. To prevent this, ensure all your equipment is completely dry. Use a double boiler method (as described above) to melt the chocolate gently, making sure no steam or water comes into contact with the chocolate. If it does seize, sometimes you can rescue it by stirring in a teaspoon of hot (not boiling) coconut oil or vegetable oil, one at a time, until it smooths out, but this isn’t always successful.
How can I ensure my cups release easily from the mold?
Using a good quality silicone candy cup mold is the best way to ensure easy release. Silicone is naturally non-stick and flexible. Make sure the cups are fully chilled and set before attempting to remove them. If they are not firm enough, they might break or lose shape. Gently push from the bottom of each cavity to pop them out. Avoid twisting or pulling too hard.
Ready to save this incredible recipe for later? You can easily keep it handy by bookmarking this page or sharing it with yourself via email! Just be sure to have all your ingredients ready for your next sweet craving.
Salted Caramel Cups
Pin Recipe
Ingredients
- 8 large pitted Medjool dates
- ½ cup full-fat coconut milk
- Pinch of sea salt
- 1 cup dairy-free chocolate chips, sub carob chips for AIP
- 1 tbsp coconut oil
- Pinch of flaky sea salt to top
Instructions
-
Using a food processor, blend the dates, sea salt, and coconut milk until completely smooth and creamy. Ensure there are no large pieces of dates remaining. Set the date caramel aside.
-
Melt the dairy-free chocolate chips and coconut oil together using a double boiler method until the mixture is fully liquid and smooth.
-
Prepare your silicone candy cup mold. Fill each cavity about halfway with the melted chocolate mixture. Add approximately 1/2 tablespoon (adjust based on mold size) of the date caramel onto the chocolate layer. Ensure it’s a sizable amount for a good bite, but leave room to cover. Pour more chocolate mixture on top to fill each mold completely. Gently tap the mold on the counter to settle the layers.
-
Transfer the mold to the refrigerator and allow the cups to set for 2-3 hours, or until completely firm. Once set, remove from molds and serve topped with an extra sprinkle of flaky sea salt.
Notes
These Salted Caramel Cups are a wonderful addition to any healthy dessert repertoire. Their simplicity, combined with their indulgent flavor profile, makes them a go-to treat for satisfying sweet cravings the wholesome way. We hope you enjoy making and savoring every bite of this naturally delicious recipe!
Recipe by Michelle, Unbound Wellness. Photos by Eat Love Eats
You’ll also love these related recipes:
- Salted Caramel Pumpkin Blondies
- Chocolate Pumpkin Butter Cups
- Salted Caramel Pumpkin Cheesecake
- Caramel Apple Cookies