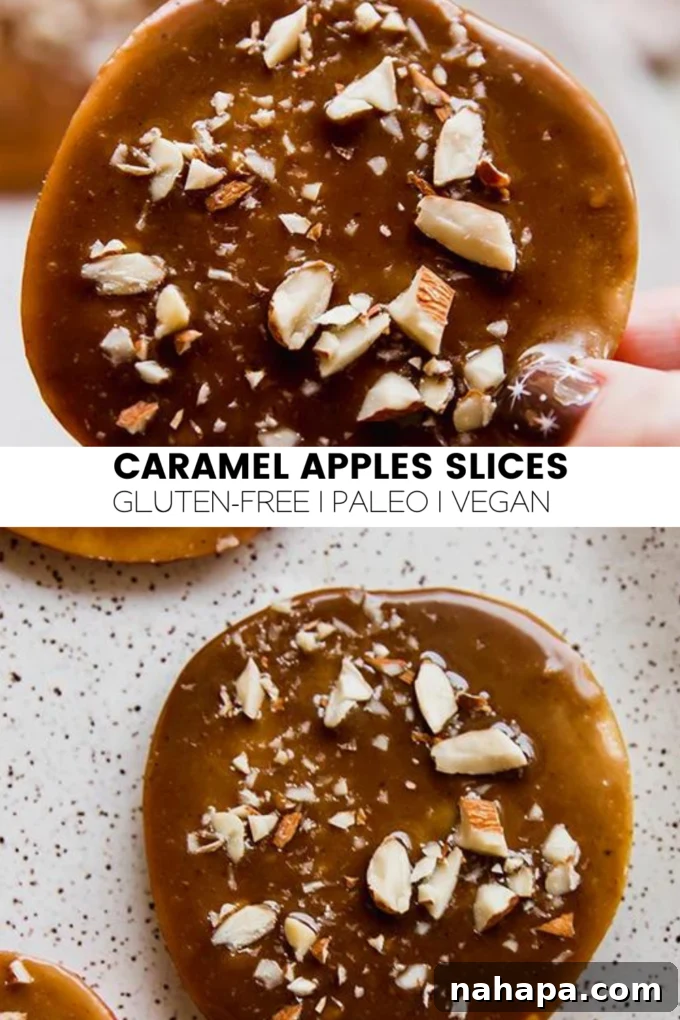
This post contains affiliate links.
Indulge Guilt-Free: Delicious Dairy-Free Caramel Apple Slices with Coconut Sugar
As the leaves begin to turn and the air gets crisp, few things evoke the cozy spirit of autumn quite like a classic caramel apple. However, the traditional treat can often be a messy endeavor, challenging to eat, and laden with dairy and refined sugars that don’t fit everyone’s dietary needs. We’ve reimagined this fall favorite to bring you a truly irresistible alternative: Dairy-Free Caramel Apple Slices, sweetened naturally with coconut sugar. This recipe transforms the beloved classic into an elegant, easy-to-enjoy, and healthier indulgence that doesn’t compromise on flavor.
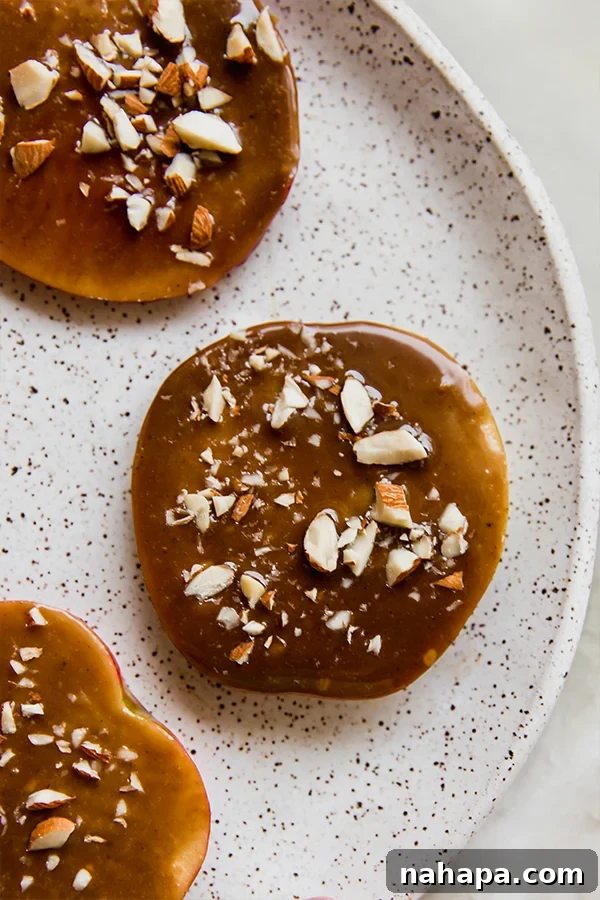
Our dairy-free caramel apple slices are the perfect way to savor the sweet and tangy combination of crisp apples and gooey caramel, all without the guilt. Crafted with rich, full-fat coconut milk and naturally sweet coconut sugar, this caramel is astonishingly creamy and deeply flavorful. It’s an ideal solution for those with food allergies or intolerances, offering a delightful treat that everyone can enjoy. Get ready to experience the joy of caramel apples in a whole new, wonderfully convenient way!
Why You’ll Fall in Love with These Dairy-Free Caramel Apple Slices
While the nostalgia for traditional caramel apples runs deep, they often come with practical downsides—they’re notoriously sticky, challenging to bite into cleanly, and can be an overwhelming sugar rush. Our innovative approach to caramel apples solves these common issues, delivering a superior, more enjoyable experience. Here’s why these dairy-free caramel apple slices are poised to become your new favorite fall dessert:
- Effortless Enjoyment & Less Mess: The biggest complaint about whole caramel apples is how incredibly messy they can be. Biting into a caramel-coated apple often results in sticky fingers and caramel on your face. By slicing the apples beforehand, we eliminate this problem entirely. Each slice is a perfect, manageable bite, making them ideal for children, parties, or simply enjoying without needing a stack of napkins.
- Dairy-Free Indulgence: For individuals navigating dairy allergies, lactose intolerance, or those adhering to a vegan or plant-based lifestyle, finding truly delicious caramel can be a challenge. Our recipe utilizes full-fat coconut milk to create a caramel that is not only completely dairy-free but also incredibly rich, smooth, and luxurious. You won’t miss the dairy, we promise!
- Naturally Sweetened with Coconut Sugar: We prioritize wholesome ingredients, which is why we’ve opted for coconut sugar over refined white or brown sugar. Coconut sugar is a more natural, unrefined sweetener derived from the sap of the coconut palm. It boasts a slightly lower glycemic index compared to table sugar and brings a wonderfully complex, subtle caramel flavor of its own, enhancing the overall depth of the sauce.
- Perfectly Portioned Pleasure: When faced with an entire caramel apple, it’s easy to overindulge. Sliced caramel apples offer built-in portion control. You can enjoy a few decadent slices and feel satisfied, making them a more mindful and balanced dessert choice. This also makes them excellent for sharing or for creating a beautiful dessert platter.
- Authentic and Delicious Flavor: Despite the ingredient swaps, these caramel apple slices taste remarkably like the real deal – if not better! The combination of crisp, juicy apples with the luscious, creamy, and subtly smoky notes of coconut sugar caramel is simply divine. A hint of vanilla and a pinch of salt perfectly balance the sweetness, creating a truly irresistible flavor profile.
Essential Ingredients for Your Healthy Caramel Apple Adventure
Crafting these exceptional dairy-free caramel apple slices requires a carefully selected list of ingredients, each playing a vital role in achieving the perfect balance of flavor, texture, and dietary considerations:
- Apples: The Crisp Canvas. The foundation of any great caramel apple is, of course, the apple itself. Your choice of apple can significantly influence the final taste and texture.
- Honeycrisp: Our top recommendation. Known for its explosive crispness and perfectly balanced sweet-tart flavor, Honeycrisp apples hold their texture beautifully against the soft caramel.
- Fuji: Another excellent choice, offering a delightful crunch and a distinctly sweet flavor that harmonizes wonderfully with the rich caramel.
- Granny Smith: If you prefer a sharper, more tart contrast to the sweetness of the caramel, Granny Smith apples are an ideal pick. Their firm texture also prevents them from becoming mushy too quickly.
- Selecting and Preparing: Always choose firm, unblemished apples. Wash them thoroughly before slicing. Evenly cut slices are key for uniform dipping and a polished presentation. Slice them just before dipping to minimize browning.
- Full-Fat Canned Coconut Milk: The Creamy Cornerstone. This is the secret to our luscious dairy-free caramel. It is imperative to use full-fat canned coconut milk, not the light version or the refrigerated carton coconut beverage. The high-fat content in full-fat coconut milk is essential for achieving that thick, velvety, and genuinely creamy caramel texture. Before opening, make sure to shake the can well to fully incorporate the coconut cream and water.
- Coconut Sugar: The Natural Sweetener. This star ingredient not only provides the perfect sweetness but also contributes to the caramel’s depth of flavor and beautiful golden hue. Coconut sugar is less processed than conventional white sugar and offers a more complex, almost malty taste that complements the caramel perfectly.
- Pure Vanilla Extract: The Aromatic Enhancer. A splash of pure vanilla extract is crucial for elevating the caramel’s flavor profile. It adds a warm, inviting aroma and a subtle depth that makes the caramel truly irresistible, rounding out the sweetness beautifully.
- A Pinch of Sea Salt: The Flavor Balancer. Do not underestimate the power of salt in a sweet recipe! Just a tiny pinch of sea salt enhances all the other flavors, cuts through the richness, and prevents the caramel from tasting overly sweet. It brings out the nuanced notes of the coconut sugar and vanilla, creating a more sophisticated and balanced caramel.
Crafting Your Dairy-Free Coconut Sugar Caramel Apple Slices: A Step-by-Step Guide
Creating these delightful caramel apple slices is a surprisingly simple and rewarding process. Follow these detailed steps to achieve a perfectly gooey, dairy-free caramel and beautifully coated apple slices:
Step 1: Prepare the Irresistible Coconut Milk Caramel
- In a medium-sized, heavy-bottomed saucepan, combine the full-fat canned coconut milk, coconut sugar, and a pinch of salt. Using a heavy-bottomed pan helps distribute heat evenly and prevents scorching.
- Stir the mixture gently over medium heat until the coconut sugar is completely dissolved. Continue stirring to prevent any sugar from sticking to the bottom of the pan.
- Once dissolved, bring the mixture to a gentle boil. As soon as it reaches a boil, reduce the heat immediately to a low simmer.
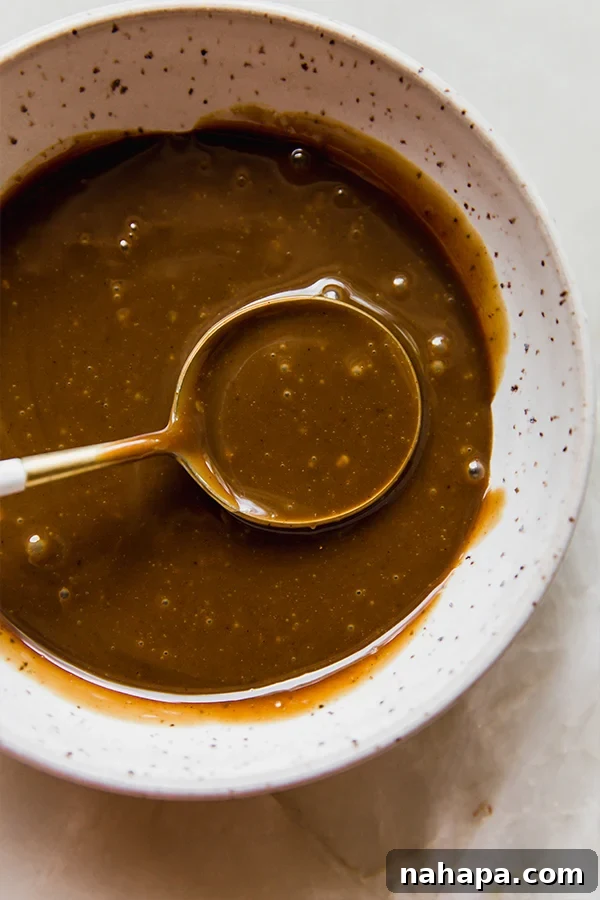
- Continue to simmer the caramel, stirring occasionally, for about 10-15 minutes. The exact time may vary depending on your stovetop and the specific coconut milk. The caramel is ready when it has visibly thickened and coats the back of a spoon. It should have a rich, deep golden-brown color and a glossy appearance. Patience during this simmering stage is crucial for achieving the perfect dippable consistency.
- Remove the saucepan from the heat and stir in the pure vanilla extract. The vanilla will infuse the caramel with a wonderful warmth and aroma.
Step 2: Allow the Caramel to Cool Slightly
- Carefully pour the warm caramel into a shallow bowl or dish. A shallow container makes the dipping process much easier and cleaner.
- It’s tempting to start dipping right away, but resist! Allow the caramel to cool for approximately 10-15 minutes before you begin coating the apples. This crucial cooling period allows the caramel to thicken further, ensuring it adheres better to the apple slices and provides a more even, substantial coating. It also prevents you from burning your fingers!
Step 3: Dip and Decorate Your Apple Slices
- Once the caramel has cooled to a workable, slightly thicker consistency, take an apple slice and dip one side into the luscious caramel. Allow any excess caramel to drip back into the bowl for a clean finish.
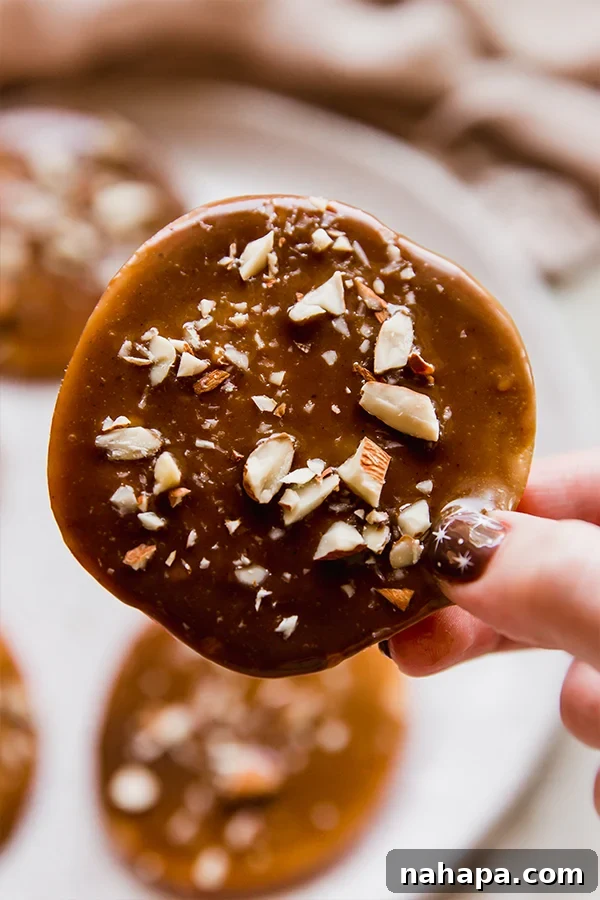
- Immediately after dipping, gently press the caramel-coated side of the apple slice into your chosen toppings, such as crushed almonds, shredded coconut, or mini dairy-free chocolate chips. This ensures the toppings stick securely while the caramel is still soft.
- Place the finished caramel apple slices onto a parchment-lined plate or baking sheet. The parchment paper will prevent the slices from sticking as the caramel sets, making them easy to remove.
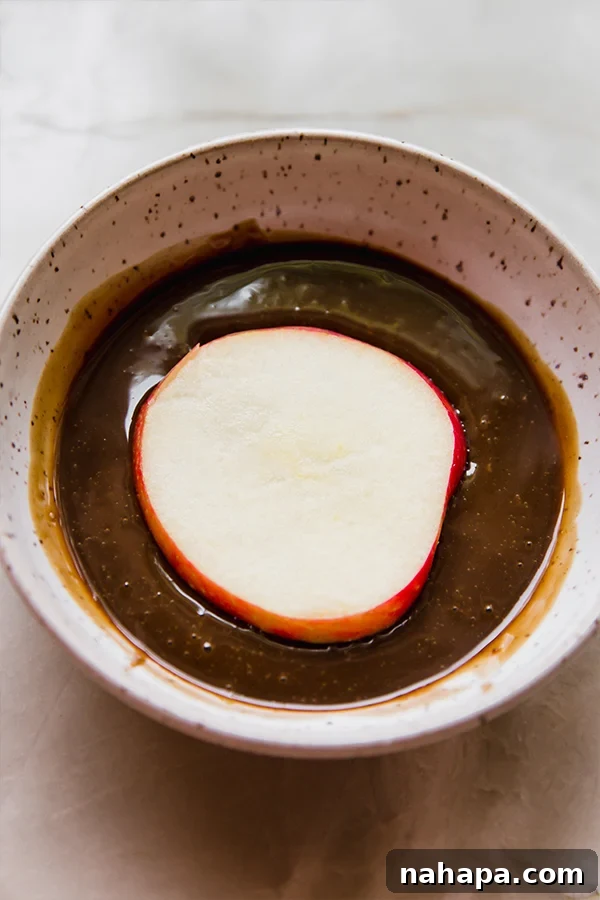
Step 4: Set and Serve
- For the caramel to fully set and achieve the best texture, transfer the plate of dipped apple slices to the refrigerator for about 10-15 minutes. This brief chilling period will firm up the caramel and ensure the toppings are securely adhered.
- Once set, your dairy-free caramel apple slices are ready to be savored! Enjoy them immediately for the freshest taste and crispest apple texture.
Expert Tips & Tricks for Perfect Caramel Apple Slices
Making these dairy-free caramel apple slices is straightforward, but a few expert tips can elevate your results from good to absolutely perfect:
- Mind the Caramel Temperature: The temperature of your caramel is paramount. If it’s too hot, it will be too thin and drip right off the apples. If it’s too cool, it will be too stiff and difficult to dip. The ideal consistency is thick enough to coat the apple but still pourable. Let it cool for about 10-15 minutes in a shallow bowl after cooking. If it gets too stiff during dipping, you can gently warm it for 10-20 seconds in the microwave or over a very low flame, stirring constantly.
- The Strategic Single-Sided Dip: We highly recommend dipping only one side of your apple slices. This technique offers several benefits: it’s significantly less messy, provides a perfect balance of apple and caramel in each bite, and reduces the overall sugar content, making for a lighter treat. Plus, it leaves a clean side for easy handling.
- Choose Your Dipping Tool Wisely: While using your hands can offer precision for dipping and pressing on toppings, a fork or a pair of tongs can keep your hands clean and less sticky. Alternatively, for a truly elegant presentation, you can use a small pastry brush to “paint” a thin, even layer of caramel onto each apple slice.
- Prevent Apple Browning: Apples can brown quickly once sliced. To minimize this, slice your apples just before you are ready to dip them. If you need to prepare them slightly in advance, a quick dip in a mixture of water with a squeeze of lemon juice (or a specialized fruit protector solution) can help. Always pat the apple slices completely dry before dipping, as caramel won’t adhere well to wet surfaces.
- Don’t Skimp on Full-Fat Coconut Milk: As reiterated, the full-fat variety of canned coconut milk is non-negotiable for this recipe. Its rich fat content is what allows the caramel to thicken and achieve its luxurious, creamy texture without any dairy.
- Quality of Apples Matters: A crisp apple is essential for the best experience. Avoid soft or mealy apples, as they won’t provide the delightful textural contrast needed for a truly satisfying caramel apple slice.
Creative Alternate Toppings to Elevate Your Caramel Apple Slices
While a simple dusting of crushed almonds is classic and delicious, these dairy-free caramel apple slices are an incredible canvas for culinary creativity. Don’t hesitate to experiment with a variety of toppings to personalize your treats and add extra flavor and texture:
- Nutty Variations: Beyond almonds, try finely chopped pecans, walnuts, peanuts, pistachios, or even macadamia nuts for different flavor profiles and crunches. Lightly toast them for an enhanced aroma.
- Coconut Delights: Toasted shredded coconut adds a delightful tropical crunch and complements the coconut milk caramel beautifully.
- Chocolatey Goodness: Mini dairy-free chocolate chips (dark chocolate works exceptionally well) are always a crowd-pleaser. For an extra touch, drizzle with melted dairy-free chocolate or a homemade chocolate sauce.
- Fruity & Chewy: Finely diced dried cranberries, raisins, or chopped dried apricots can add a lovely chewiness and a burst of tart-sweet flavor.
- Sweet & Salty Combinations: Crushed pretzels offer a fantastic salty crunch that beautifully contrasts the sweet, smooth caramel. A sprinkle of flaky sea salt also works wonders.
- Festive & Fun: Colorful sprinkles (ensure they are dairy-free if necessary) are perfect for celebrations. Mini marshmallows can add a soft, sweet touch.
- Spiced Warmth: A light dusting of ground cinnamon, nutmeg, or a dash of apple pie spice can further enhance the autumnal flavors, adding an extra layer of warmth.
- Crunchy Grains: Crushed gluten-free granola or crispy puffed rice cereal can provide an interesting texture.
Storage and Make-Ahead Tips for Maximum Freshness
While these dairy-free caramel apple slices are truly at their peak when enjoyed fresh, a little planning can ensure you get the most out of your delicious creations and even prepare components in advance:
- Best When Fresh: For the ultimate experience, with the crispest apple and the most vibrant caramel texture, serve your apple slices within an hour or two of assembly. The contrast between the fresh apple and the set caramel is simply divine.
- Short-Term Refrigeration: If you have leftovers or need to store them for a brief period, arrange the dipped apple slices in a single layer in an airtight container. Refrigerate them for no more than half a day (approximately 4-6 hours). Beyond this timeframe, the apples may start to brown and lose their desirable crispness due to oxidation.
- Minimizing Apple Browning: To help prevent your apple slices from browning, especially if preparing them slightly in advance, you can lightly brush the cut surfaces (before dipping) with a tiny amount of lemon juice or a commercial fruit protector spray. Always ensure the apples are completely dry before applying caramel, as moisture will prevent proper adhesion.
- Make-Ahead Caramel: Your Time-Saving Secret! This is the most effective way to prepare for future cravings or entertaining. The coconut milk caramel can be made up to a week in advance. Store it in an airtight container in the refrigerator. When you’re ready to use it, gently reheat the caramel over very low heat on the stovetop, stirring frequently, until it returns to a smooth, dippable consistency. You can also carefully microwave it in short bursts, stirring well after each burst, until it’s warmed through and smooth. This allows you to quickly assemble fresh caramel apple slices whenever the mood strikes.
- Only Prep What You’ll Eat: To ensure every bite is as fresh and perfect as possible, it’s always recommended to slice and dip only the quantity of apples you intend to consume within the next few hours. This minimizes waste and maximizes enjoyment.
Frequently Asked Questions About Dairy-Free Caramel Apple Slices
Q: Can I use a different type of sugar for the caramel?
A: While coconut sugar is highly recommended for its unique flavor profile and lower glycemic index, you could experiment with a different unrefined sugar like maple sugar for a different flavor. Traditional brown sugar would also work but would reintroduce more processed sugar. Liquid sweeteners like maple syrup or agave are generally not recommended for this caramel recipe, as they can significantly alter the consistency and may not thicken properly.
Q: How can I ensure my caramel doesn’t burn?
A: The key to preventing burned caramel is consistent attention and low heat. Always use a heavy-bottomed pot to ensure even heat distribution. Stir the caramel frequently, especially as it begins to thicken, to prevent it from sticking and scorching at the bottom. Never leave the pot unattended during the simmering process.
Q: My caramel isn’t thickening enough. What should I do?
A: First, double-check that you are using full-fat canned coconut milk. If the caramel is still too thin after simmering for 15 minutes, continue to cook it over low heat, stirring constantly. It can sometimes take up to 20-25 minutes for the caramel to reach the desired thickness, depending on your stovetop’s heat and the specific brand of coconut milk. Remember, it will also thicken further as it cools.
Q: Can I make these dairy-free caramel apple slices ahead of time for an event?
A: For optimal freshness, it’s best to prepare the caramel ahead of time (it stores well in the fridge for up to a week) and then slice and dip the apples just a few hours before your event. If you must assemble them earlier, keep them refrigerated for no more than 4-6 hours, and consider dipping only one side to help maintain the apple’s crispness and prevent excessive browning.
Craving More Healthy & Delicious Apple Treats?
If you’ve delighted in these dairy-free caramel apple slices, you’re sure to love exploring these other wholesome, apple-inspired recipes from our kitchen. They offer creative ways to enjoy the goodness of apples while keeping health and flavor in mind:
- Creamy Caramel Apple Dip: Another fantastic and easy way to enjoy the classic apple and caramel pairing, perfect for sharing.
- Air Fryer Baked Apples: Warm, comforting, and wonderfully spiced baked apples, especially delicious when served with a scoop of dairy-free ice cream.
- Healthy No-Bake Apple “Donuts”: A fun, creative, and healthy snack or dessert idea that’s incredibly simple to put together, appealing to both kids and adults.
Embrace the vibrant flavors of fall with these guilt-free, incredibly tasty dairy-free caramel apple slices. They are a testament that enjoying delicious, satisfying desserts doesn’t mean sacrificing your health goals or dietary preferences!