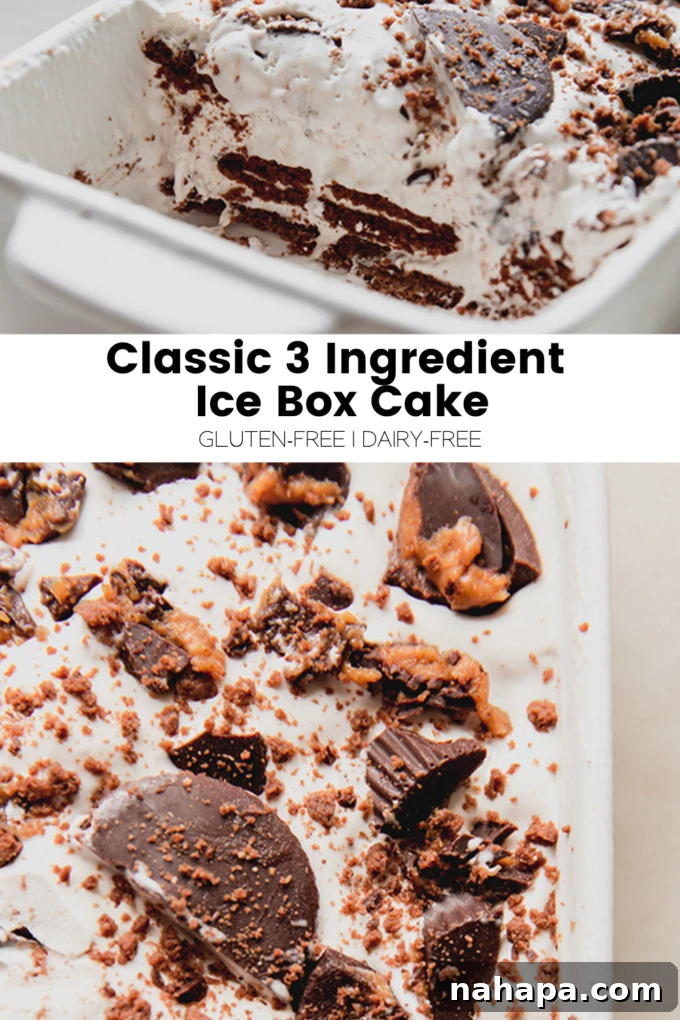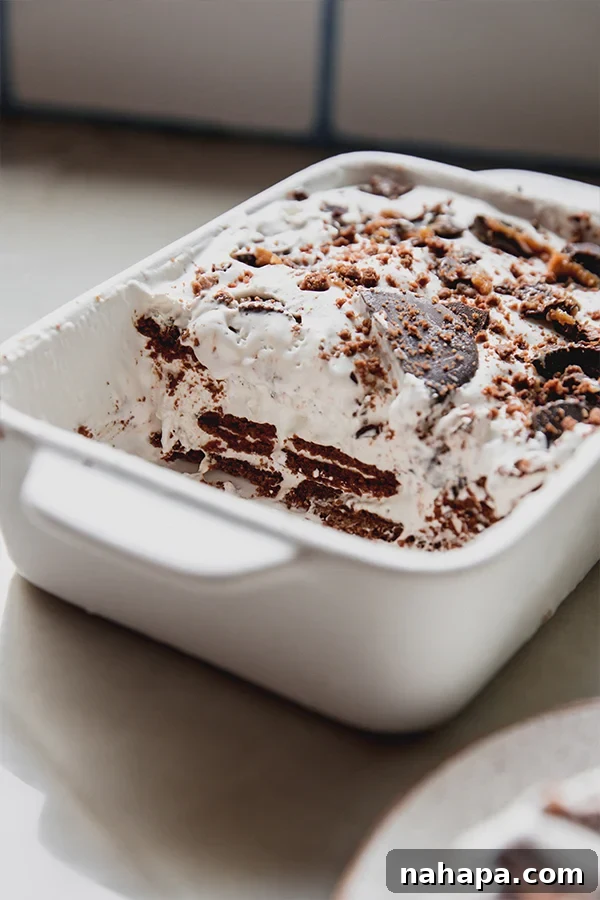
Welcome to the ultimate no-bake dessert that’s as effortless as it is delicious! This classic ice box cake recipe proves you don’t need a hot oven or complicated steps to create a show-stopping treat. With just three core ingredients, you can whip up a dessert that’s not only gluten-free and dairy-free but also incredibly refreshing and perfect for any occasion, especially when the weather warms up.
What Exactly is an Ice Box Cake?
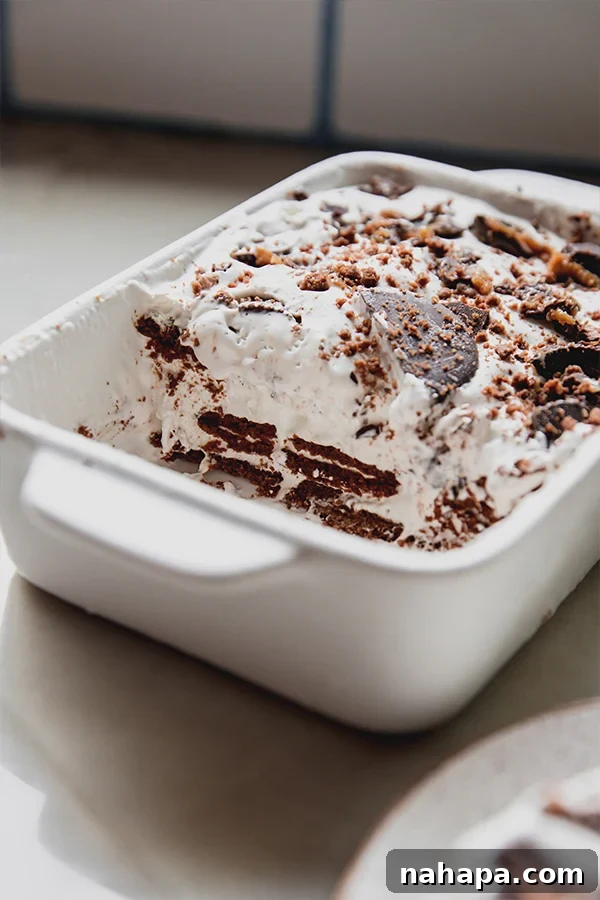
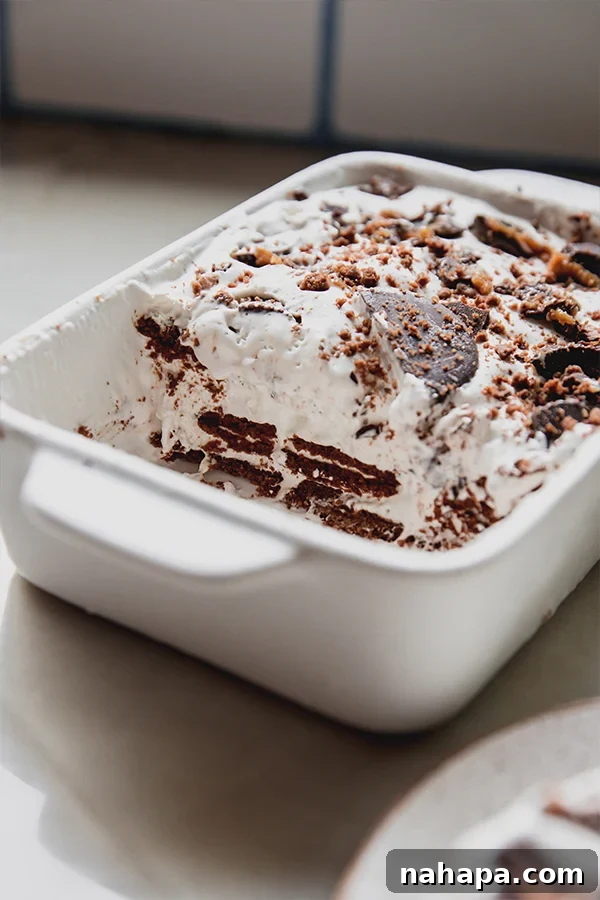
If you’re new to the concept, an icebox cake isn’t really a “cake” in the traditional sense, but rather a magical no-bake layered dessert. It typically involves thin, crisp wafer cookies and generous layers of whipped cream or pudding. The real magic happens during the chilling process: as the cake rests in the refrigerator, the cookies gradually absorb moisture from the cream, transforming into soft, cake-like layers that melt in your mouth. This simple yet brilliant technique results in a dessert that’s rich, creamy, and wonderfully satisfying without ever needing to touch an oven. It’s a nostalgic favorite, often associated with warm spring and summer days, making it the perfect cool treat when you want to avoid heating up your kitchen.
What makes this particular recipe stand out is its commitment to being inclusive and diet-friendly. We’ve simplified it to be naturally gluten-free and dairy-free, ensuring that more people can enjoy this delightful classic. Plus, for those following a stricter dietary protocol like AIP (Autoimmune Protocol), we’ve included simple swaps to make it entirely compliant. Get ready to discover your new favorite easy dessert!
Why This Gluten-Free Dairy-Free Icebox Cake Will Be Your New Favorite
There are countless reasons to fall in love with this incredibly simple icebox cake. Whether you’re a seasoned baker or a complete novice, this recipe is designed for success and pure enjoyment. Here’s why it deserves a spot in your recipe collection:
Effortless Simplicity with Just 3 Ingredients
In a world of complex recipes, sometimes all you crave is something simple yet spectacular. This icebox cake delivers on that promise. With only three core ingredients (or two if you skip the optional topping), you can create a dessert that tastes far more elaborate than it is. It’s the ultimate hack for busy schedules, impromptu gatherings, or simply when you want a delicious treat without a lot of fuss. The beauty of its minimalism means less shopping, less prep, and less cleanup – truly a dream come true for dessert lovers.
The Ultimate Chilled Dessert for Warm Weather
When temperatures rise, the last thing most of us want to do is turn on the oven. That’s where this no-bake wonder shines. Best served straight from the freezer or well-chilled from the fridge, this icebox cake offers a refreshing respite from the heat. Its cold, creamy texture is incredibly satisfying, making it the perfect ending to a backyard BBQ, a light summer meal, or just a relaxing afternoon treat. It’s guaranteed to cool you down and put a smile on your face.
Diet-Friendly Indulgence: Gluten-Free & Dairy-Free
Living with dietary restrictions shouldn’t mean sacrificing delicious desserts. This recipe is thoughtfully crafted to be naturally gluten-free and dairy-free, making it accessible for those with celiac disease, gluten sensitivity, lactose intolerance, or dairy allergies. We’ve carefully selected ingredients that mimic the texture and richness of a traditional icebox cake without any of the common allergens. It’s a wonderful way to enjoy a classic dessert without any compromise on flavor or enjoyment, allowing everyone at the table to indulge safely and happily.
No Oven, No Stress
Forget preheating, baking times, and constantly checking if your cake is done. This dessert requires absolutely no baking, eliminating a significant amount of stress and guesswork. The process is as simple as layering cookies and cream, then letting the fridge do all the hard work. This makes it an ideal project for kids to help with, a foolproof recipe for beginners, or simply a go-to when you need a reliable dessert that won’t add to your kitchen chaos.
Versatile & Adaptable for Any Taste
While the classic version is fantastic, this icebox cake is also incredibly versatile. It serves as a perfect canvas for customization. You can easily switch up the flavors by choosing different types of gluten-free cookies, adding extracts to your whipped cream, or experimenting with various toppings. This adaptability means you can create a unique dessert for every occasion, catering to different preferences and seasonal ingredients, ensuring it never gets boring.
The Simple Ingredients You’ll Need
The magic of this icebox cake truly lies in its simplicity. With just a few high-quality ingredients, you can create a dessert that’s both decadent and remarkably easy. Here’s a closer look at what you’ll need:
1. Gluten-Free Thin Cookies
The foundation of any great icebox cake is its cookies. For this recipe, thin, crisp gluten-free cookies are essential. They provide the structure and, most importantly, soften beautifully into tender, cake-like layers when chilled with the whipped cream. We recommend using Gluten-Free Thin Cookies, which offer a delightful crunch and rich flavor. If you’re feeling adventurous and want to make your own, or if you’re following an AIP diet, you can easily substitute them with homemade AIP Oreo cookies (simply omit the filling for the icebox cake layers). Chocolate, vanilla, or even ginger-flavored thin cookies can all work wonderfully, offering different flavor profiles to your finished cake. Just ensure they are thin enough to soften properly without becoming soggy.
2. Creamy Dairy-Free Whipped Topping
The heart of any icebox cake is its creamy layers, and for a dairy-free version, coconut whipped cream is an absolute star. It offers a rich, decadent texture and a subtle hint of coconut flavor that complements a variety of cookie choices. For convenience, a store-bought coconut whipped cream like CocoWhip is an excellent choice. It’s pre-made, stable, and ready to use, saving you valuable time. If you prefer a homemade touch, or want to ensure no extra additives, this recipe for homemade coconut whipped cream is fantastic. Ensure your canned coconut milk is full-fat and chilled overnight for best results when whipping. For those who might have a coconut allergy, other dairy-free whipped toppings made from oats, soy, or cashews can also be used, though textures may vary slightly.
3. Optional Delights: Toppings & Embellishments
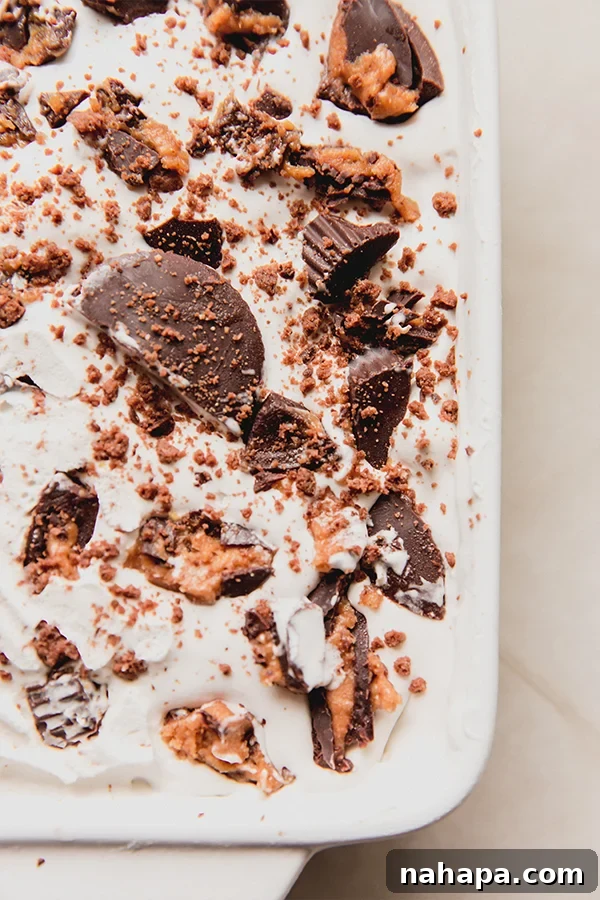
While strictly optional, toppings add an extra layer of flavor, texture, and visual appeal to your icebox cake. We love using Unreal Almond Butter Cups, roughly chopped, for a delicious chocolatey, nutty crunch. They elevate the dessert from simple to extraordinary. But don’t stop there! The possibilities for customization are endless:
- Fresh Berries: Sliced strawberries, raspberries, or blueberries add a burst of freshness and vibrant color.
- Chocolate Shavings or Cacao Nibs: For an extra dose of chocolate decadence.
- Crushed Nuts: Almonds, pecans, or walnuts can provide a nice textural contrast.
- Sprinkles: A fun and festive option, especially for celebrations.
- Citrus Zest: A little orange or lemon zest can brighten the flavors.
- Drizzles: A dairy-free chocolate sauce or caramel sauce can be a lovely finish.
Choose toppings that resonate with your taste buds and enhance the overall experience of your no-bake masterpiece.
Crafting Your No-Bake Ice Box Cake: A Step-by-Step Guide
Making this gluten-free and dairy-free icebox cake is a delightfully simple process that anyone can master. Follow these easy steps to assemble your delicious dessert:
Step 1: Lay the Foundation with Cookies
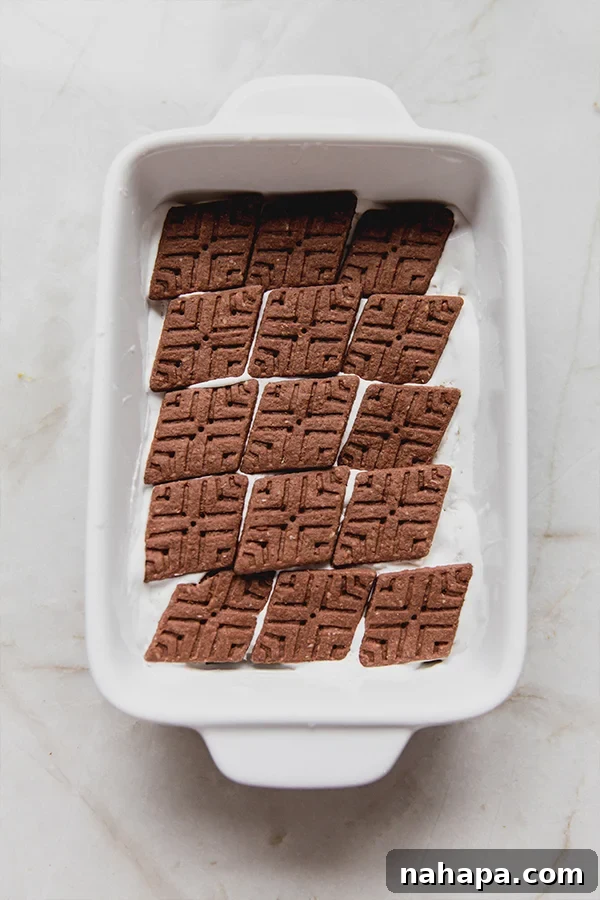
Begin by selecting your cake pan or food container. A small cake pan, such as a 7″x5″ rectangular pan or an 8×8-inch square pan, works perfectly. You could also use a springform pan for an impressive round presentation. Line the very bottom of your chosen pan with a single layer of your gluten-free thin cookies. Arrange them closely together, breaking some if necessary, to cover the entire surface without leaving significant gaps. This forms the sturdy and flavorful base of your cake.
Step 2: Layer on the Creamy Goodness
Once your cookie layer is in place, it’s time for the whipped cream. Spoon 2-3 large dollops of your dairy-free coconut whipped cream over the cookies. Gently and evenly spread the whipped cream with a spatula or the back of a spoon, ensuring it covers the entire cookie layer. Aim for a consistent thickness. Repeat this layering process: add another layer of cookies, followed by another layer of whipped cream. Continue until you have three layers of cookies and three layers of whipped cream, making sure to finish with a final, smooth layer of whipped cream on top. This creates a beautiful, visually appealing cake with distinct layers.
Step 3: Add Your Signature Toppings and Chill
Now for the fun part – customization! If you’re using optional toppings like crushed cookies or chopped almond butter cups, sprinkle them generously over the final layer of whipped cream. Once topped, cover your cake pan tightly with plastic wrap or a lid. This is a crucial step for the magic to happen. Transfer the covered cake to the refrigerator and let it chill for at least 4 hours, or ideally, overnight. This extended chilling time allows the cookies to fully soften and absorb the moisture from the whipped cream, transforming them into a tender, cake-like texture. Don’t rush this step – patience is key for the best results!
Step 4: The Final Chill and Serve
Before you’re ready to serve, transfer the icebox cake from the refrigerator to the freezer for an additional 30-45 minutes. This brief freezing period will firm up the cake, making it easier to slice and ensuring it’s wonderfully cold and refreshing. Once firmed, remove it from the freezer, slice it into generous portions, and serve immediately. Enjoy your perfectly chilled, creamy, and decadent no-bake icebox cake while it’s still cold for the ultimate experience!
Expert Tips and Creative Variations
While this 3-ingredient icebox cake is simple to make, a few extra tips can elevate your creation and help you customize it to perfection:
- Chilling is Crucial: Don’t Rush It! The most important step in making an icebox cake is the chilling time. It’s what transforms crisp cookies into tender, cake-like layers. Aim for at least 4 hours, but overnight is truly best. If you serve it too soon, the cookies will still be firm, and the cake won’t have that signature melt-in-your-mouth texture. The brief freezer chill before serving is also essential for perfect slices and ultimate refreshment.
- Get Creative with Toppings and Fillings: This cake is a fantastic canvas for your culinary imagination. Beyond the almond butter cups, consider adding thinly sliced fresh fruit (strawberries, raspberries, bananas), chocolate syrup drizzles, finely chopped nuts (pistachios, walnuts), or even a sprinkle of mini dairy-free chocolate chips. You can also mix flavor extracts (vanilla bean, almond, peppermint) or a bit of citrus zest into your dairy-free whipped cream for an added dimension of flavor.
- Plan Ahead for Perfection: Since this cake requires significant chilling time, it’s an ideal make-ahead dessert. Prepare it the day before your event, and it will be perfectly set and ready to enjoy when guests arrive. This also helps reduce stress on the day of entertaining.
- Storage & Longevity: Leftover icebox cake can be stored in an airtight container in the refrigerator for up to 3-4 days. For longer storage, you can keep it in the freezer for up to 2 weeks. If frozen solid, allow it to thaw slightly in the fridge for about 15-20 minutes before serving for optimal texture.
- Serving and Presentation Tips: For clean slices, run your knife under hot water and wipe it clean between each cut. Garnish individual slices with a fresh berry or a mint leaf for an elegant touch.
- Different Pan Sizes: While a 7×5 or 8×8-inch pan works well, you can also use a loaf pan for thicker slices, or individual ramekins for single-serving desserts. Adjust cookie quantities as needed for different pan sizes.
Making Your Icebox Cake AIP (Autoimmune Protocol) Friendly
For those following the Autoimmune Protocol, enjoying delicious desserts can sometimes be a challenge. Good news! This icebox cake is incredibly adaptable and can be made fully AIP compliant with just a couple of straightforward swaps. The AIP diet focuses on nutrient-dense foods and eliminates common inflammatory triggers, and these modifications ensure your dessert aligns with those principles.
- AIP Compliant Cookies: Instead of store-bought gluten-free thin cookies, which often contain non-AIP ingredients like almond flour, cornstarch, or cane sugar, use these homemade AIP Oreo cookies. When making them for the icebox cake, simply skip the filling and use only the cookie wafers. These cookies are typically made with compliant flours like tigernut or cassava flour and sweetened with natural alternatives.
- Homemade Whipped Coconut Cream: While some store-bought coconut whipped creams might be dairy-free, they often contain stabilizers, gums, or sweeteners that are not AIP compliant. To ensure complete compliance, use homemade whipped coconut cream. This typically involves chilling a can of full-fat coconut milk overnight, scooping out the thick cream, and whipping it with a natural sweetener like maple syrup or honey, and a touch of vanilla extract (ensure vanilla is alcohol-free or an AIP-compliant brand if strict).
By making these two simple changes, you can transform this delightful no-bake dessert into a treat that perfectly fits your AIP lifestyle. It’s a wonderful way to enjoy something sweet and satisfying without compromising your health goals.
Frequently Asked Questions (FAQ)
What kind of cookies work best for icebox cake?
Thin, crisp cookies are ideal as they soften perfectly into a cake-like texture. Digestive biscuits, graham crackers, or thin wafer cookies (like Nilla wafers, but a gluten-free version) are classic choices. For this gluten-free and dairy-free recipe, we recommend specific gluten-free thin cookies or homemade AIP Oreo cookies for AIP. Avoid thick, chewy cookies as they won’t soften as effectively.
How long does icebox cake need to chill?
For the best results, your icebox cake needs to chill in the refrigerator for at least 4 hours, but ideally overnight (8-12 hours). This extended chilling time is crucial for the cookies to fully absorb the moisture from the whipped cream and achieve that tender, cake-like consistency. Don’t skip or shorten this step!
Can I make this icebox cake ahead of time for a party?
Absolutely! Icebox cakes are fantastic make-ahead desserts. In fact, making it the day before allows it ample time to chill and set, ensuring the perfect texture. Just keep it tightly covered in the refrigerator until about 30-45 minutes before you plan to serve, then transfer it to the freezer for a final firm-up.
What other dairy-free whipped creams can I use?
While coconut whipped cream is our top recommendation for its richness and stability, you can experiment with other dairy-free whipped toppings. Some brands offer oat-based, almond-based, or soy-based whipped creams in aerosol cans or tubs. Be aware that the flavor and texture might vary, and some may contain added sugars or stabilizers that might not suit all dietary preferences.
How do I get clean slices of icebox cake?
To achieve clean, neat slices, make sure your cake is well-chilled, ideally having spent the last 30-45 minutes in the freezer. Before slicing, run a sharp knife under hot water for a few seconds, then quickly wipe it dry. Slice through the cake, and repeat the hot water rinse and wipe for each cut. This technique helps the knife glide smoothly through the creamy layers without dragging.
Other Delicious No-Bake Treats You’ll Love
- Cookie Ice Cream Sandwiches
- No Bake Berry Vanilla Ice Cream Cake
- Lemon Sorbet Cups
The Recipe: Classic 3-Ingredient Gluten-Free Dairy-Free Ice Box Cake
Classic 3 Ingredient Ice Box Cake {Gluten & Dairy Free}
Yield: 6 servings
Prep Time: 20 mins
Author: Michelle
Leave a Review
Pin Recipe
Ingredients
- 1 box gluten-free thin cookies (for homemade, sub these AIP Oreo cookies)
- 1 container coconut whipped cream (sub this recipe for homemade)
- Optional: Unreal almond butter cups, chopped
Instructions
- Using a small cake pan (e.g., a 7″x5″ pan or similar food container), line the bottom with cookies, fully covering the base of the pan.
- Spoon 2-3 large spoonfuls of coconut whipped cream over the cookies, spreading evenly. Repeat with two more layers of cookies and whipped cream, finishing with whipped cream on top.
- Top the cake with a few crushed cookies and chopped almond butter cups if desired. Cover the cake pan and transfer to the fridge for at least 4 hours, or preferably overnight.
- Transfer to the freezer for 30-45 minutes before serving. Remove from the freezer and serve while still cold!
Notes
All nutritional information is an estimation and will vary. Estimations do not include optional ingredients.
Nutritional Information
Serving: 1 serving, Calories: 223kcal, Carbohydrates: 31.9g, Protein: 2g, Fat: 9.8g, Fiber: 0.1g
All nutrition facts are estimated and will vary.
Want to save this for later?
Just drop your name and email below. Then we’ll email it right to your inbox. ✉️
Did you Make this Recipe?
Tag @unboundwellness on Instagram and hashtag #unboundwellness!