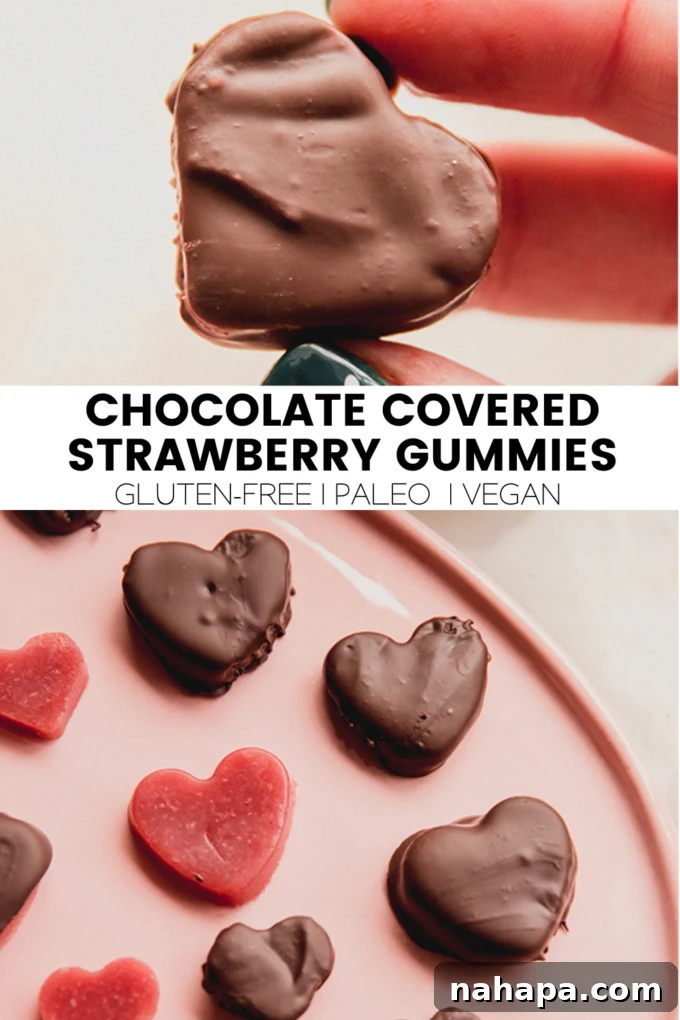
Welcome to a delightful twist on a timeless classic: Chocolate Covered Strawberry Gummies! These aren’t your ordinary chocolate-dipped strawberries; they’re a playful, homemade treat that captures the essence of that beloved combination in a whole new, irresistible form. Perfect for any occasion, from a romantic Valentine’s Day gesture to a fun weekend baking project with the family, these gummies are designed to surprise and delight with every chewy, chocolatey bite.
Chocolate-covered strawberries have long been the quintessential symbol of romance and indulgence. But why not elevate this classic with a touch of whimsy? Our homemade strawberry gummies, infused with vibrant fruit flavors and coated in rich, dairy-free chocolate, offer a refreshing take that’s both unique and utterly delicious. They’re simple to make, incredibly fun to customize, and promise a burst of fresh strawberry goodness with every chew, perfectly complemented by a crisp shell of chocolate.

Why You’ll Fall in Love with These Chocolate Covered Strawberry Gummies
These isn’t just another dessert recipe; it’s an experience! Here’s why these chocolate-dipped strawberry gummies will become a new favorite in your kitchen:
- A Fresh Take on a Classic: Say goodbye to the same old chocolate-covered strawberries! This recipe transforms the traditional treat into a bouncy, flavorful gummy, offering a surprising texture contrast that’s both novel and incredibly satisfying. It’s a creative way to enjoy familiar flavors.
- Perfectly Festive for Any Occasion: With their vibrant pink hue and indulgent chocolate coating, these gummies are ideal for celebrations. They make a charming addition to Valentine’s Day parties, anniversary dinners, baby showers, or simply as a special homemade treat to brighten any day. Their appealing look is sure to impress.
- Naturally Delicious Ingredients: Made with real strawberries and a hint of natural sweetness, these gummies boast a genuine fruit flavor that artificial alternatives can’t match. You control what goes into them, ensuring a wholesome and delicious snack.
- Customizable and Dietary-Friendly: Whether you’re looking for a dairy-free dessert or exploring vegan options, this recipe is incredibly adaptable. With simple swaps like agar-agar for gelatin, you can cater to various dietary preferences without compromising on taste or texture.
- Fun for All Ages to Make: The process of making these gummies is just as enjoyable as eating them! From blending the fruit to carefully dipping each gummy in chocolate, it’s a hands-on activity that’s perfect for involving kids and creating lasting memories in the kitchen.
- Satisfying Texture Combination: The soft, chewy interior of the strawberry gummy pairs exquisitely with the crisp, snappy exterior of the hardened chocolate shell. This delightful contrast in textures makes each bite an exciting experience.
Essential Ingredients for Your Chocolate Covered Strawberry Gummies
Crafting these delectable gummies requires just a few simple, wholesome ingredients. Each component plays a crucial role in achieving the perfect flavor and texture.
- Fresh Strawberries: The star of the show! Use ripe, sweet strawberries for the best flavor. They provide the natural sweetness, vibrant color, and authentic fruity taste that defines these gummies. Hulling them before blending ensures a smooth base.
- Pomegranate Juice: This adds a lovely depth of flavor and enhances the pink color of the gummies. Its slightly tart notes beautifully complement the sweetness of the strawberries. If pomegranate juice isn’t readily available, cherry juice makes an excellent alternative, offering a similar color and tangy profile.
- Gelatin: The key to achieving that signature chewy, bouncy gummy texture. Unflavored gelatin powder is crucial for setting the fruit mixture. For those seeking a vegan alternative, agar-agar powder can be used instead. Agar-agar is derived from seaweed and is a much stronger gelling agent, so a smaller quantity is needed.
- Honey: A natural sweetener that balances the tartness of the fruit and juice. Honey also adds a subtle floral note that enhances the overall flavor profile. If you prefer, maple syrup can be used as a vegan-friendly alternative or simply for a different taste.
- Dairy-Free Chocolate Chips: These chips form the indulgent outer coating. Opt for a high-quality dairy-free brand to ensure a rich, smooth chocolate experience. Dark chocolate chips work wonderfully for a more intense flavor, while semi-sweet can offer a milder profile.
- Coconut Oil: A small amount of coconut oil is melted with the chocolate chips to create a smooth, dippable coating that hardens beautifully at room temperature or in the fridge. It helps to thin the chocolate slightly, making it easier to achieve an even layer without making the chocolate greasy.
Step-by-Step Guide: How to Make Chocolate Covered Strawberry Gummies
Creating these delightful gummies is a straightforward process that yields impressive results. Follow these steps for perfect, bouncy, chocolate-coated treats.
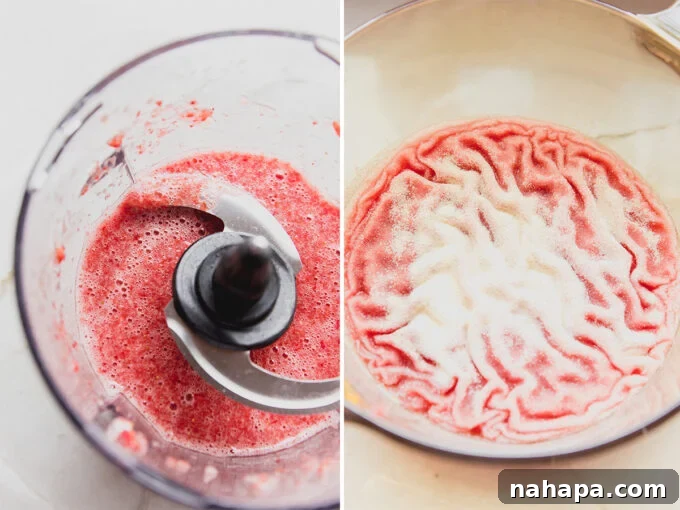
- Prepare the Strawberry Base: Begin by washing and hulling your fresh strawberries. Combine them with the pomegranate juice in a blender or food processor. Blend until the mixture is completely smooth and liquid.
- Strain for Purity: Place a fine-mesh strainer over a medium-sized pot. Pour the blended strawberry mixture through the strainer, using a silicone spatula to press down on the pulp. This step extracts all the juice, leaving behind any fibrous bits, ensuring your gummies have a perfectly smooth texture. You can save the leftover pulp to mix into yogurt or oatmeal for a fiber boost.
- Combine and Bloom Gelatin: Add the honey to the strained fruit juice in the pot and stir until well combined. Evenly sprinkle the gelatin powder over the surface of the strawberry mixture. Let it sit undisturbed for about 2 minutes. This crucial step, known as “blooming,” allows the gelatin granules to absorb liquid, preventing clumps and ensuring a smooth set.
- Gently Heat the Mixture: Transfer the pot to your stove and heat it over low heat. Stir continuously for 3-4 minutes, or until the gelatin has fully dissolved and the mixture is completely liquid. Be careful not to boil the mixture, as excessive heat can reduce the gelling power of the gelatin. You’re looking for a warm, homogenous liquid.
- Fill the Molds and Chill: Once the mixture is smooth, carefully transfer the liquid into your chosen molds. Silicone gummy molds with droppers work best for intricate shapes, but you can also pour the liquid into a large glass storage container and slice squares later. Refrigerate the molds for 4-6 hours, or until the gummies are completely firm and set. The longer they chill, the firmer they will be.
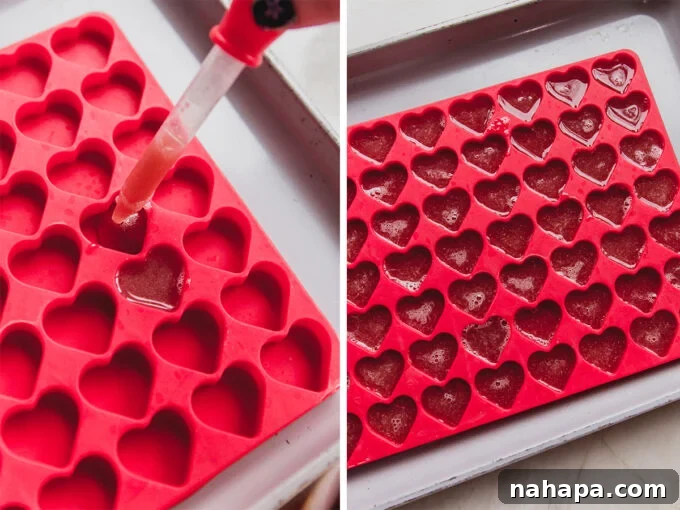
- Prepare for Dipping: Once the gummies are fully set, carefully remove them from their molds. They should pop out easily if using silicone molds. Arrange them on a plate lined with parchment paper, ready for their chocolate bath.
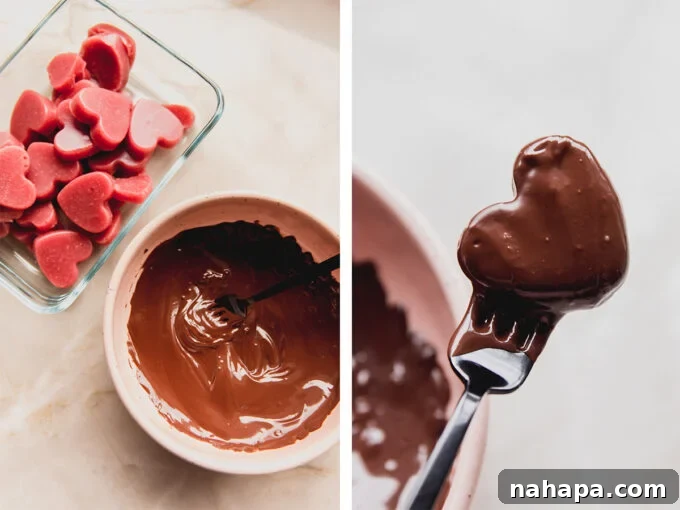
- Melt the Chocolate Coating: In a double boiler or a microwave-safe bowl, combine the dairy-free chocolate chips and coconut oil. Melt the chocolate using a double boiler method for a smooth, even consistency, or microwave in 20-second intervals, stirring well after each, until entirely liquid and smooth. It’s crucial to let the melted chocolate cool slightly before dipping the gummies. If the chocolate is too hot or steaming, it can melt the gummies, ruining their shape and texture.
- Dip and Coat: Carefully dip each gummy into the melted chocolate. You can choose to coat the gummies entirely for a full chocolate experience or just dip one side for a lighter touch and a pretty aesthetic. Use a fork or a toothpick to help you dip and lift them, allowing excess chocolate to drip off.
- Final Chill and Enjoy: Place the chocolate-covered gummies back onto the parchment-lined plate. Transfer them to the fridge for a final chill until the chocolate coating is completely set and firm. Once hardened, they are ready to be enjoyed! For the best taste and texture, serve within a day or two.
Tips & Tricks for Perfect Gummies Every Time
- Mold Versatility: Don’t feel limited to fancy molds! While silicone gummy molds are fantastic for creating fun shapes, you can easily use any glass storage container. Simply pour the liquid gummy mixture into a shallow container, allow it to set, and then slice it into squares or desired shapes. Ensure the container is lightly greased or lined with parchment paper for easy removal.
- Juice Alternatives: Pomegranate juice adds a distinct flavor and a beautiful color, but feel free to experiment with other fruit juices. Cherry juice is an excellent substitute, offering a similar tartness and vibrant hue. You could also try raspberry juice or even a blend of fruit juices for unique flavor combinations. Just ensure the juice is pure and doesn’t contain added sugars that could alter the setting process.
- Temperature Control for Chocolate: The temperature of your melted chocolate is crucial. If it’s too hot, it will melt the gummies upon contact. If it’s too cool, it will be thick and clumpy, resulting in an uneven coating. Aim for a warm, fluid consistency, allowing it to cool slightly after melting before dipping. Test with one gummy first!
- Achieving a Smooth Gummy Texture: Ensure the gelatin is fully dissolved by stirring the mixture over low heat until no granules remain. Straining the fruit juice is also key to preventing a grainy texture in your finished gummies.
- Preventing Sticking: If using non-silicone molds or a glass container, lightly grease it with a neutral oil or line it with parchment paper before pouring the gummy mixture. This will make it much easier to remove the set gummies.
How to Make These Gummies Vegan
Easily adapt this recipe to be entirely plant-based by swapping out gelatin for agar-agar. Agar-agar is a powerful gelling agent derived from seaweed. When substituting, remember that agar-agar is significantly stronger than gelatin. As a general rule, use three times less agar-agar powder than the amount of gelatin called for. For this recipe, which uses 2 tablespoons + 1 teaspoon of gelatin, you would need slightly less than 1 tablespoon of agar-agar powder. Be sure to mix agar-agar into cold liquid and bring it to a boil for a minute or two to activate its gelling properties, then let it cool before pouring into molds. Always check specific brand instructions for best results.
Storage Instructions for Optimal Freshness
These homemade gummies store wonderfully in the refrigerator. Plain gummies, without the chocolate coating, can be kept in an airtight container for 3-4 days. However, once you add the chocolate coating, their shelf life tends to shorten, and the chocolate can sometimes become sticky or bloom (develop a white film) over time, especially in humid conditions.
For the best experience, we recommend only dipping a portion of your gummies in chocolate at a time. Store the plain gummies in the fridge, and then coat them in chocolate just before you plan to serve or enjoy them. This way, you can ensure a fresh, snappy chocolate shell every time. Chocolate-covered gummies are best consumed within a day or two of dipping. Always store them in an airtight container in the refrigerator to maintain their texture and prevent the chocolate from melting.
Serving Suggestions
These chocolate-covered strawberry gummies are a delightful treat on their own, but they can also be part of a larger dessert spread. Serve them chilled as a sweet snack after dinner, or arrange them artfully on a dessert platter for parties. They pair wonderfully with a cup of herbal tea or a light sparkling beverage. For a decadent touch, you could even serve them alongside a scoop of vanilla bean ice cream or a dollop of fresh whipped cream.
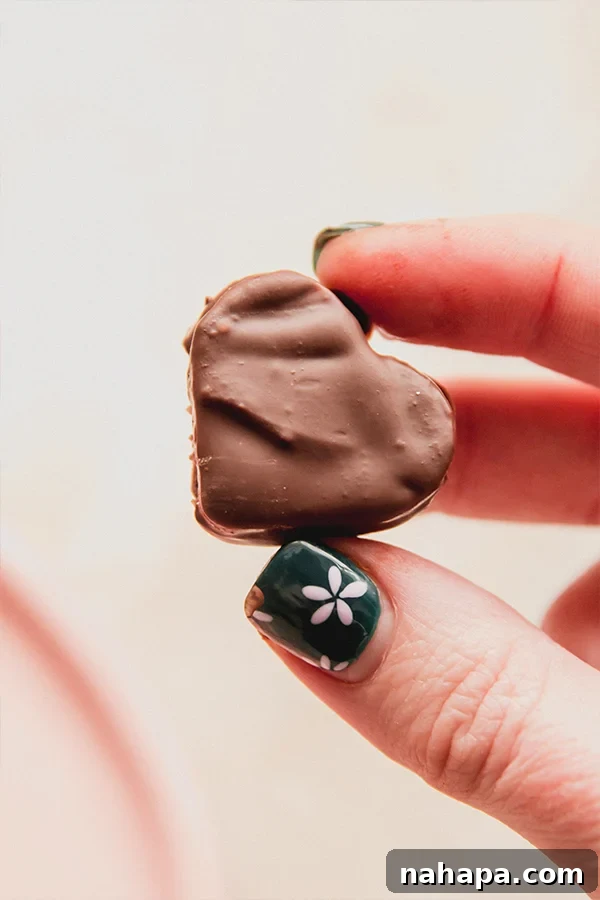
We hope you enjoy making and sharing these unique and delicious Chocolate Covered Strawberry Gummies. They are a testament to how a little creativity in the kitchen can transform simple ingredients into something truly special.
You’ll Also Love These Related Recipes…
- Gluten-Free Strawberry Mini Donuts
- Chocolate Strawberry Crunch Bites
- Strawberry Cacao Cereal Bars
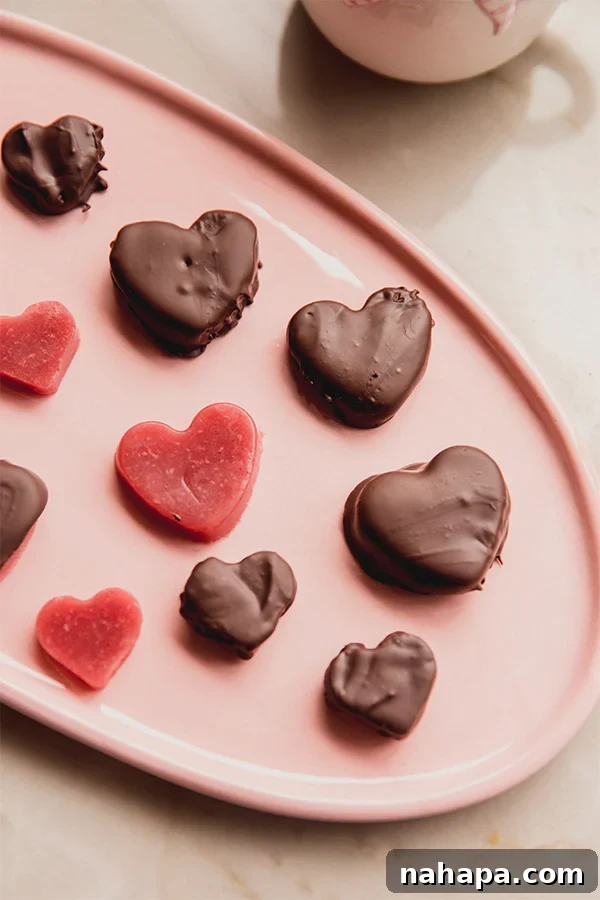
Chocolate Covered Strawberry Gummies
Average Rating: 5 out of 5 stars (from 1 review)
Yield: 8 servings
Prep Time: 5 minutes
Cook Time: 6 hours (includes chilling)
Total Time: 6 hours 5 minutes
Author: Unbound Wellness
Ingredients
- 1 lb strawberries, hulled
- ⅓ cup pomegranate juice (or cherry juice)
- 2 tbsp + 1 tsp gelatin (or just under 1 tbsp agar for vegan)
- 2 tbsp honey (or maple syrup for vegan)
- ½ cup dairy-free chocolate chips
- 1 tsp coconut oil
Instructions
- Add the strawberries & pomegranate juice to a blender or food processor. Blend until fully liquid. Using a fine mesh strainer set over a medium pot, strain out the juice using a silicone spatula to push down the pulp. (You can save the pulp to add to yogurt or oatmeal bowls.)
- Pour the juice into a pot and add the honey. Stir well. Sprinkle the gelatin over the strawberry mixture and lightly mix. Allow to harden for 2 minutes.
- Transfer the pot to the stove and heat over low heat for 3-4 minutes or until fully liquid.
- Use a dropper to carefully transfer the liquid into the mold. Alternatively, you can use a large glass container. Transfer to the fridge for 4-6 hours or until fully set.
- Carefully remove the gummies from the mold and transfer to a parchment lined plate.
- Melt the chocolate and coconut oil in a double boiler method, or in the microwave in 20 second intervals until totally liquid. Allow to cool so the chocolate isn’t too hot and steaming or it will melt the gummies.
- Carefully dip the gummies into the chocolate, either coating the gummies entirely, or just one side.
- Place the gummies on the parchment lined plate and transfer to the fridge until the chocolate is set and serve within the next day or so.
Notes
To make this recipe vegan, swap out gelatin for agar. Agar is a lot stronger than gelatin, so you need to divide the amount of gelatin by three. This comes out to a little bit under 1 tbsp of agar.
Nutrition (estimated per serving)
Calories: 131kcal, Carbohydrates: 19.1g, Protein: 2.9g, Fat: 5.8g, Fiber: 2.2g
All nutrition facts are estimated and will vary.
Did you Make this Recipe?
Tag @unboundwellness on Instagram and hashtag #unboundwellness!