
This post contains affiliate links.
Irresistible Gluten-Free Breadsticks: Your Homemade Olive Garden Experience
There’s nothing quite like the comforting warmth and soft chewiness of a perfectly baked breadstick. For many, the very thought conjures images of endless baskets from popular Italian restaurants, a prelude to a delicious meal. But for those navigating a gluten-free lifestyle, this simple pleasure often remains just a distant memory. Until now!
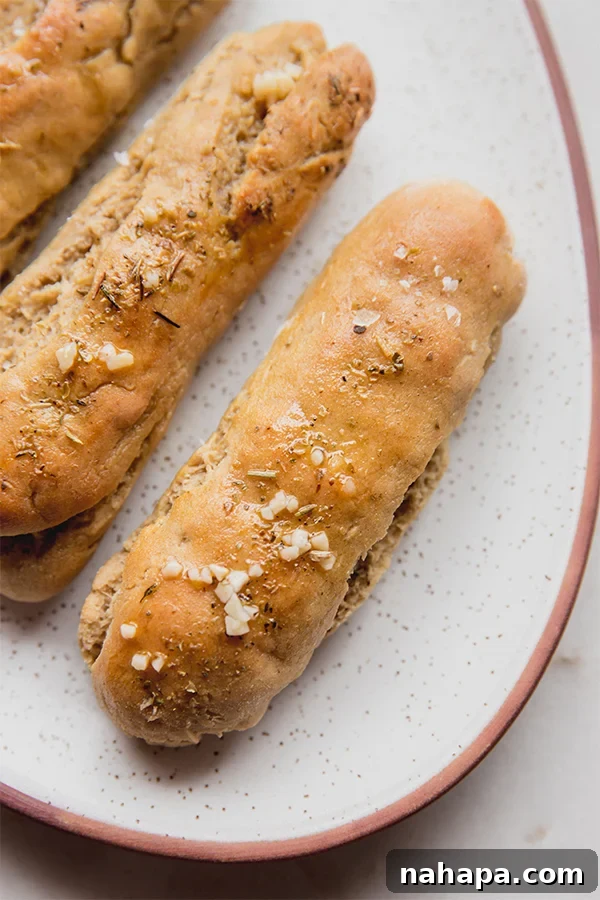
We’ve cracked the code to creating truly irresistible gluten-free breadsticks that rival your favorite restaurant’s, especially those famously pillowy ones from Olive Garden. This recipe is designed to deliver that same delightful texture and flavor, all while being completely gluten-free and easily adaptable for a dairy-free diet. Get ready to impress your family and friends, or simply treat yourself to a basket of these warm, garlicky delights!
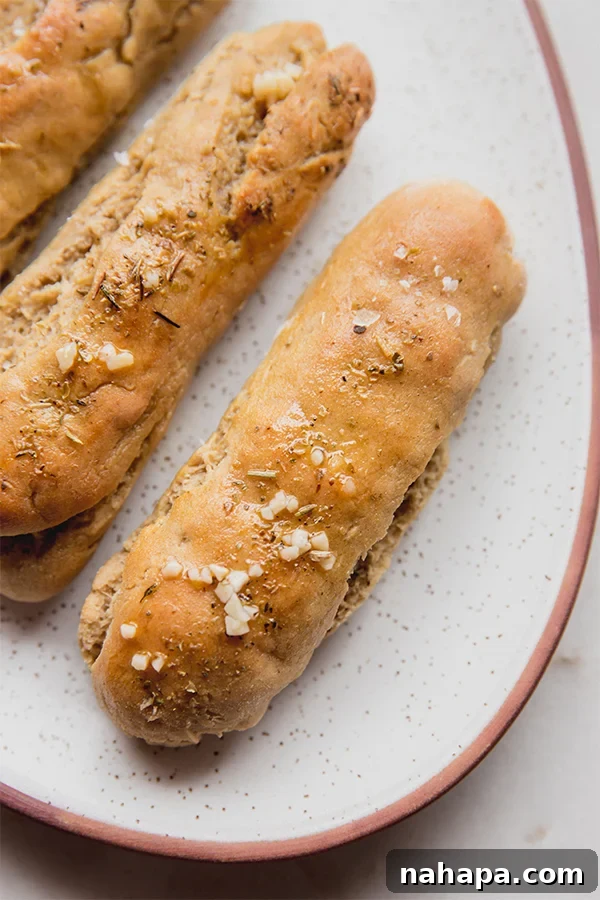
Mastering gluten-free baking can sometimes feel like a culinary challenge, especially when aiming for that elusive light and airy texture typical of traditional bread. Many gluten-free breads can be dense or crumbly, lacking the elasticity and rise of their gluten-containing counterparts. That’s why we’re particularly excited about this recipe; it overcomes these common hurdles, offering a soft, fluffy breadstick that holds its shape and delivers on taste. Whether you’re a seasoned gluten-free baker or new to the game, these breadsticks are surprisingly simple to make and promise a rewarding experience.
Why You’ll Adore These Gluten-Free Breadsticks
These aren’t just *any* gluten-free breadsticks; they’re the ones you’ve been dreaming of. Here’s why this recipe will become a staple in your kitchen:
- Unbelievably Pillowy and Delicious: Achieving that signature soft, light, and airy texture without gluten is a significant accomplishment. This recipe delivers a breadstick that’s tender on the inside with a perfect slight chew, defying all expectations for gluten-free baking.
- Quick and Manageable Dough: Forget lengthy proofing times and complicated kneading processes. This dough comes together quickly and is easy to handle, meaning you can have fresh, warm breadsticks on your table in less time than you might expect. If you prefer to knead by hand, it only requires about 5 minutes of effort.
- Restaurant-Quality Flavor at Home: The combination of the soft dough and the savory garlic-butter topping creates a flavor profile that’s remarkably similar to the popular restaurant version, offering an authentic Italian-American dining experience right from your own kitchen.
- Versatile for Any Meal: Perfect as an appetizer, a side dish with your favorite pasta, or even a light snack. These breadsticks are a wonderful addition to almost any meal.
- Dietary Friendly: Designed to be gluten-free, this recipe is also incredibly easy to adapt for dairy-free and egg-free needs, making it suitable for a wider range of dietary preferences without compromising on taste or texture.
Mastering the Dough: Key Ingredients for Success
The secret to these fantastic gluten-free breadsticks lies in a thoughtful combination of ingredients, each playing a crucial role in achieving the perfect texture and flavor. Here’s a closer look at what you’ll need:
- Gluten-Free Flour Blend: This is the foundation of our breadsticks. While many brands exist, a good quality all-purpose gluten-free flour blend is essential. My favorite blend is Namaste, known for its consistent results in various baked goods. Using a blend ensures you get the right mix of starches and flours to mimic gluten’s structure.
- Almond Flour: To prevent the breadsticks from becoming too dense, we incorporate almond flour. Gluten-free flour alone can sometimes lead to a heavy texture. Almond flour adds a lovely lightness, a subtle richness, and contributes to that buttery, tender crumb we’re aiming for. It truly makes a difference in achieving a more refined and less “gluten-free” tasting product.
- Baking Powder: This acts as an additional leavening agent, working alongside the yeast to give the breadsticks extra lift and a fluffier texture. It helps create those desirable airy pockets within the dough.
- Active Dry Yeast and Warm Water: Yeast is what gives our breadsticks their characteristic rise and yeasty flavor. It’s crucial to use warm water (110F-120F) to activate the yeast properly. Water that is too hot will kill the yeast, and water that is too cold won’t activate it, resulting in flat breadsticks.
- Honey: A small amount of honey serves two purposes: it feeds the yeast, helping it activate and produce carbon dioxide, and it adds a touch of sweetness that balances the savory flavors of the breadsticks.
- Eggs: Eggs contribute to the structure, richness, and binding of the dough, helping to create a tender crumb. They also add a subtle yellow hue. (See FAQ for egg-free options).
- Ghee (Clarified Butter): Ghee adds a rich, buttery flavor and moisture to the dough, enhancing its tenderness. For dairy-free versions, simply swap ghee for olive oil.
- Olive Oil: A touch of olive oil contributes to the dough’s softness and flavor. It also prevents the breadsticks from drying out too quickly.
- Apple Cider Vinegar: A secret weapon in gluten-free baking! Apple cider vinegar reacts with the baking powder to create more leavening power, and it also helps tenderize the dough, giving it a better texture. Don’t worry, you won’t taste it in the final product.
- Almond Milk: Using almond milk (or another dairy-free milk alternative) provides the necessary liquid for the dough without introducing dairy. It helps achieve the right consistency and contributes to a moist breadstick.
- Salt: Essential for flavor balance, salt enhances all the other ingredients and is crucial for a well-rounded taste.
- Italian Seasoning: This aromatic blend of herbs is sprinkled on top of the breadsticks before baking, adding a fragrant, authentic Italian flavor that perfectly complements the garlic butter.
- Garlic (for garlic butter): Freshly minced garlic is the star of the optional, but highly recommended, garlic butter topping. It infuses the warm ghee with an irresistible aroma and punchy flavor.
Crafting Your Breadsticks: A Step-by-Step Guide
Making these gluten-free breadsticks is a straightforward process, even for beginner bakers. Follow these steps carefully for the best results:
Step 1: Activating the Yeast
Begin by preheating your oven to 350°F (175°C). In a large bowl, combine the active dry yeast, warm water (ensure it’s between 110°F and 120°F – a thermometer is helpful!), and honey. Gently stir the mixture until the yeast and honey are fully dissolved. Cover the bowl tightly with a clean dishtowel or plastic wrap and let it sit for 5 to 15 minutes. You’ll know the yeast is active when the top of the mixture becomes foamy and bubbly.
Step 2: Combining Dry and Wet Ingredients
While the yeast is activating, in the bowl of a stand mixer fitted with the paddle attachment, combine the gluten-free flour, almond flour, baking powder, and salt. Mix on low speed until all the dry ingredients are well combined. Once your yeast mixture is foamy, pour it into the stand mixer bowl along with one egg, melted ghee (or olive oil for dairy-free), olive oil, apple cider vinegar, and almond milk.
Set the mixer to medium speed and mix for 4-5 minutes. During this time, the dough will come together and become fully combined, forming a cohesive, slightly sticky dough. Scrape down the sides of the bowl as needed to ensure everything is incorporated.
Step 3: Forming the Perfect Breadsticks
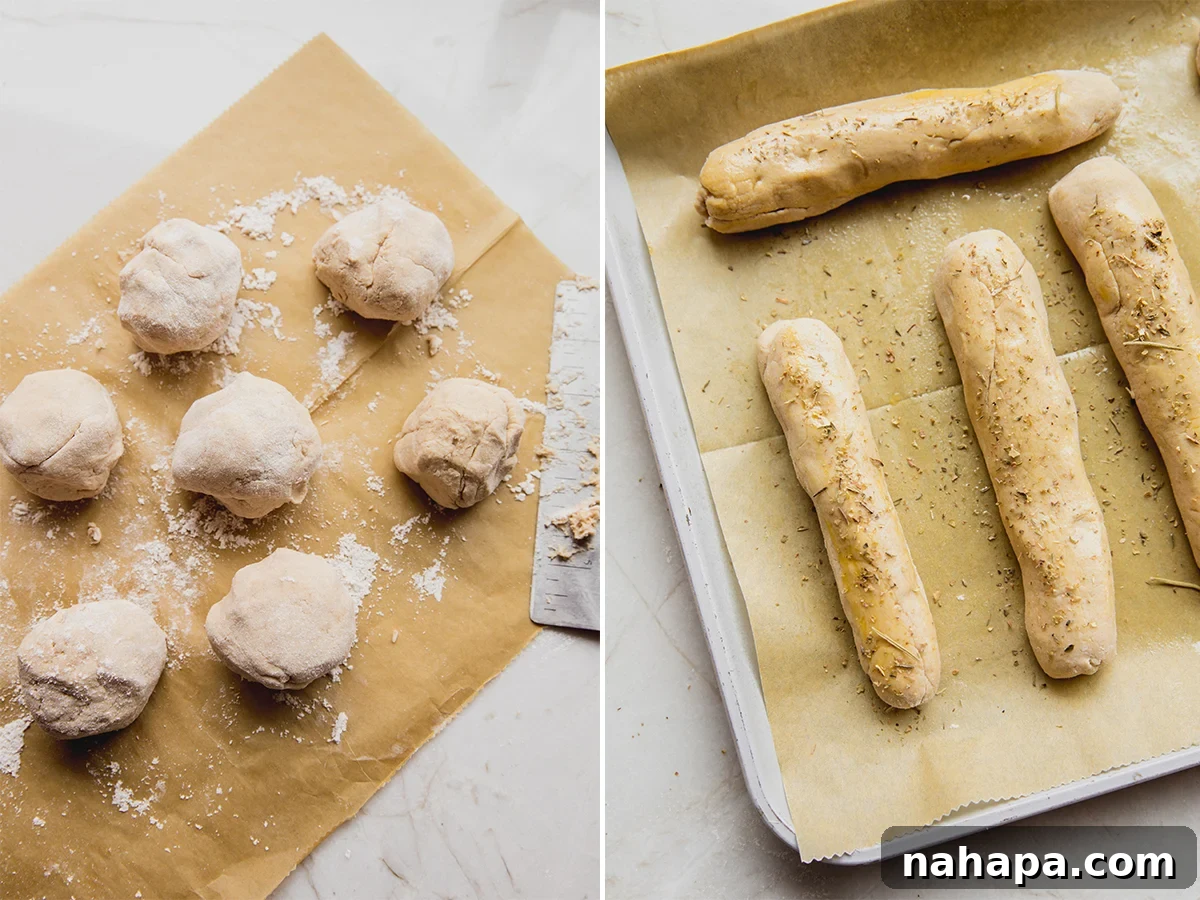
Lightly flour a clean work surface (using a bit of your gluten-free flour blend). Turn the prepared dough out onto the floured surface. The dough should be easy to work with, soft, and slightly wet. Divide the dough into 8 equal portions. Roll each portion into a log, approximately 6-8 inches long, shaping them into classic breadstick forms.
Step 4: Rising, Egg Wash, and Baking
Grease a baking sheet lightly, or line it with parchment paper. Carefully transfer the shaped breadsticks to the prepared baking sheet, leaving some space between each one. Place a clean dishtowel over the baking sheet and allow the breadsticks to rest for 10 minutes. This short proofing time allows them to puff up slightly, contributing to their soft texture.
In a small bowl, whisk the remaining egg to create an egg wash. Lightly brush the tops and sides of the breadsticks with the egg wash. This will help them achieve a beautiful golden-brown color. Sprinkle generously with Italian seasoning. Carefully transfer the baking sheet to your preheated oven and bake for 15-18 minutes, or until the breadsticks are lightly golden brown and cooked through. Baking times can vary by oven, so keep an eye on them. Once baked, remove them from the oven and transfer them to a wire cooling rack.
Step 5: The Signature Garlic Butter Finish
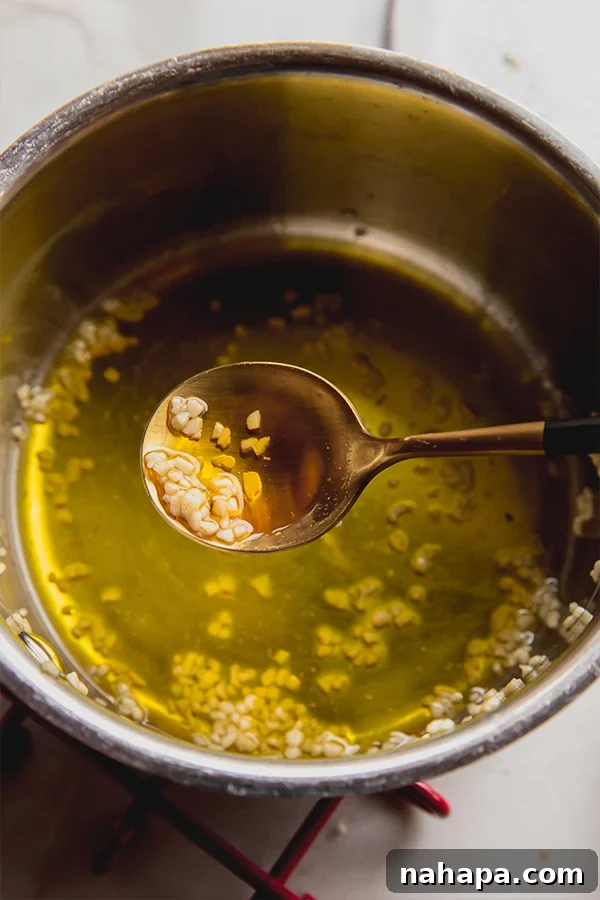
While the breadsticks are cooling slightly, prepare the irresistible garlic butter. In a small saucepan, combine the melted ghee (or olive oil for dairy-free) and minced garlic. Simmer over low heat for 3-4 minutes, or until the garlic is fragrant and slightly softened. Be careful not to burn the garlic. Using a pastry brush, generously brush the warm garlic butter over the freshly baked breadsticks. Serve them warm with your favorite dipping sauce or alongside a delicious meal. Enjoy!
Expert Tips for Gluten-Free Breadstick Perfection
Even with a reliable recipe, a few insider tips can elevate your gluten-free breadsticks from good to absolutely phenomenal. Keep these in mind as you bake:
- Know Your Oven: Every oven is a little different. Mine tends to cook relatively fast and run a bit hotter, so it’s essential to keep a close eye on your breadsticks, especially during the last few minutes of baking. If they need more time to achieve that beautiful golden hue, leave them in a bit longer, checking frequently to prevent over-browning.
- Achieving the Ideal Dough Consistency: Gluten-free dough can sometimes be tricky. This dough should be easy to work with—soft, pliable, and slightly wet. If you find your dough is too sticky to handle, try kneading it for an extra minute or two. This can help develop its structure and make it easier to shape. Avoid adding too much extra flour, as this can lead to dry breadsticks.
- Don’t Rush the Proofing (Even if it’s Short): While this is a “quick dough,” the 10-minute rest is important. It allows the yeast to work its magic one last time, contributing to the breadsticks’ ultimate texture. Ensure they’re covered in a warm, draft-free spot.
- Quality Ingredients Matter: Especially with gluten-free baking, the quality of your flour blend, yeast, and other key ingredients can significantly impact the final product. Opt for fresh yeast and a reputable gluten-free flour blend.
- Serve Warm: Breadsticks, especially gluten-free ones, are always best served warm, straight out of the oven, after being brushed with that delicious garlic butter. The texture and flavor are at their peak when fresh.
Frequently Asked Questions About Gluten-Free Breadsticks
We’ve gathered some common questions to help you customize and perfect your gluten-free breadsticks:
Can I Make These Without a Stand Mixer?
Absolutely! While a stand mixer makes the process a bit easier and ensures thorough mixing, you can certainly knead this dough by hand. Since it’s a quick dough, you should only need to knead it for about 5 minutes or so. Your arms might get a little workout, but the results will be just as delicious. Ensure you knead until the dough is smooth and well combined.
Are There Egg-Free Alternatives?
Yes, you can easily adapt this recipe to be egg-free! For the egg in the dough, you can swap it for a “flax egg” by combining 1 tablespoon of ground flaxseed meal with 3 tablespoons of water and letting it sit for 5-10 minutes until it forms a gel. As for the egg wash, you can simply skip it. While skipping the egg wash means your breadsticks might be slightly less golden brown and might not have the same sheen, they will still bake beautifully and taste fantastic.
Can I Make These Dairy-Free?
Yes, making these breadsticks dairy-free is very simple! The recipe already uses almond milk, so the only other dairy component is the ghee. To make them fully dairy-free, simply replace the ghee in the dough and in the garlic butter topping with an equal amount of olive oil or a plant-based butter alternative. The rich garlic flavor will still shine through!
How Should I Store and Reheat Leftover Gluten-Free Breadsticks?
Leftover gluten-free breadsticks are best stored in an airtight container at room temperature for up to 2-3 days. For longer storage, you can freeze them for up to a month. To reheat, it’s best to warm them in an oven or toaster oven at 300°F (150°C) for 5-10 minutes, or until heated through and slightly crispy on the outside. Microwaving is generally not recommended as it can make gluten-free bread products tough or gummy.
What Are Some Perfect Pairings and Serving Suggestions?
These versatile breadsticks can accompany a wide variety of dishes! They are, of course, a quintessential companion to any Italian meal, such as pasta with marinara sauce, lasagna, or a hearty minestrone soup. They also pair wonderfully with a fresh green salad or as an appetizer with your favorite dips like marinara sauce, pesto, or even a creamy hummus. Don’t limit yourself to dinner; they make a fantastic addition to brunch spreads as well!
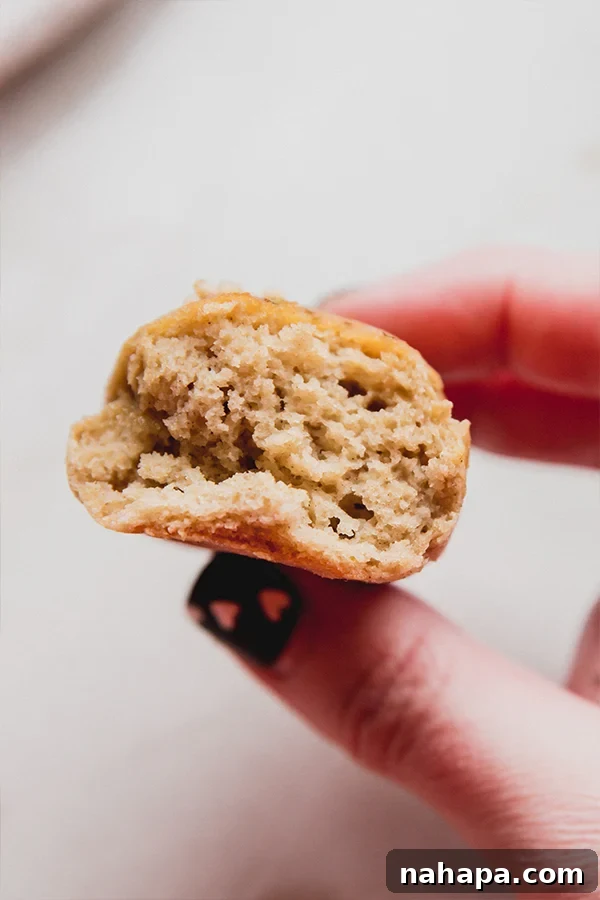
Gluten-Free Italian Breadsticks Recipe
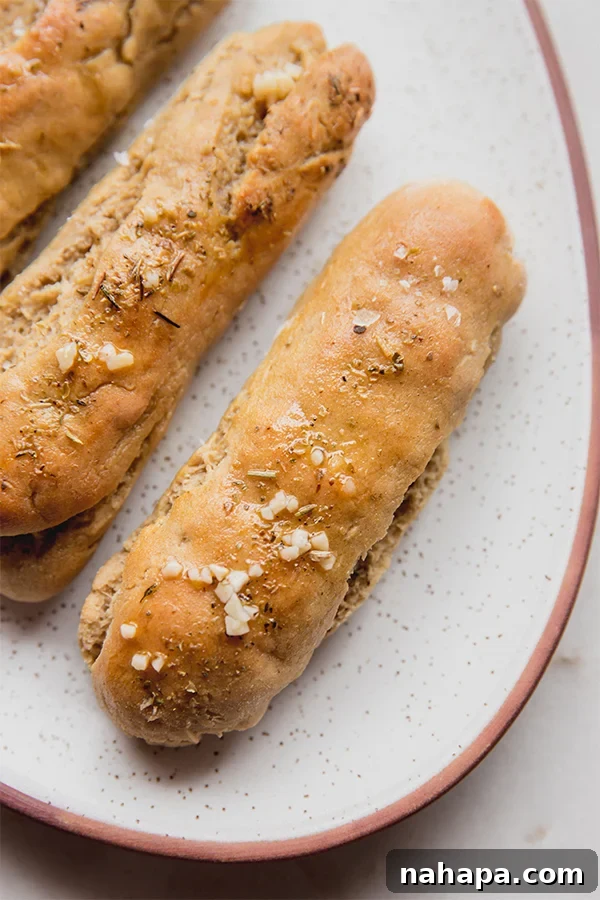
These gluten-free breadsticks are pillowy, soft, and bursting with garlic flavor, reminiscent of your favorite restaurant-style breadsticks!
Yield: 8 breadsticks
Author: Michelle
Ingredients
- 1 tbsp active dry yeast
- 1 tbsp honey
- ½ cup water, 110F-120F
- 2 cups gluten-free flour blend (like Namaste)
- ½ cup almond flour
- 2 tsp baking powder
- ½ tsp salt
- 2 eggs, divided (one for dough, one for egg wash; see notes for egg-free)
- 2 tbsp ghee, melted (sub olive oil for dairy-free)
- 1 tbsp olive oil
- 1 tbsp apple cider vinegar
- ½ cup almond milk (sub another dairy-free milk)
- 2 tsp Italian seasoning
For the garlic butter (optional)
- 2 tbsp ghee, melted (sub olive oil for dairy-free)
- 4 cloves garlic, minced
Instructions
- Preheat the oven to 350°F (175°C).
- In a large bowl, add the yeast, warm water (110F-120F), and honey. Gently combine to dissolve the yeast. Tightly cover the yeast mixture and allow it to sit for 5-15 minutes until it is foamy and bubbly.
- In the bowl of a stand mixer with the paddle attachment, mix the gluten-free flour, almond flour, baking powder, and salt together until combined.
- Pour in the yeast mixture, one egg, melted ghee, olive oil, apple cider vinegar, and almond milk. Set the mixer to medium speed and mix for 4-5 minutes, or until the dough is fully combined and cohesive.
- Lightly flour a clean surface and transfer the prepared dough. Divide the dough into 8 even balls, then gently roll each ball into a log, shaping them like breadsticks (about 6-8 inches long).
- Transfer the shaped breadsticks to a lightly greased or parchment-lined baking sheet. Place a clean dishtowel over the baking sheet and allow them to sit for 10 minutes to lightly proof.
- Whisk the second egg in a small bowl to create an egg wash. Lightly brush the breadsticks with the egg wash, then sprinkle generously with Italian seasoning.
- Transfer the baking sheet to the preheated oven and bake for 15-18 minutes, or until the breadsticks are lightly golden brown. Once done, transfer them to a cooling rack.
- To make the garlic butter (if using), add the melted ghee and minced garlic to a small saucepan. Simmer over low heat for 3-4 minutes, or until the garlic is fragrant. Brush this warm garlic butter generously on top of the baked breadsticks and serve warm, perhaps with a side of marinara for dipping. Enjoy!
Notes
For an egg-free version, you can swap the egg in the dough with 1 tbsp ground flaxseed mixed with 3 tbsp water (allow to sit until gel-like). You can skip the egg wash for the topping, though the breadsticks may be slightly less golden. All nutrition facts are estimated and will vary based on ingredients and preparation.
Nutrition Facts (Estimated per Breadstick)
- Calories: 248 kcal
- Carbohydrates: 35.7g
- Protein: 5.4g
- Fat: 7.4g
- Fiber: 1.9g
All nutrition facts are estimated and will vary.
Did you Make this Recipe?
Tag @unboundwellness on Instagram and hashtag #unboundwellness! We’d love to see your creations!
More Gluten-Free Favorites You’ll Love
If you enjoyed these gluten-free breadsticks, be sure to check out some of our other popular gluten-free recipes that are sure to become new household favorites:
- Cauliflower Breadsticks: A fantastic low-carb alternative for when you’re craving something savory and dippable.
- Easy Gluten Free Garlic Bread: The perfect companion to any Italian meal, packed with flavor.
- No Knead Gluten Free Bread: Simple, rustic, and incredibly satisfying, this bread requires minimal effort for maximum reward.
Happy baking!