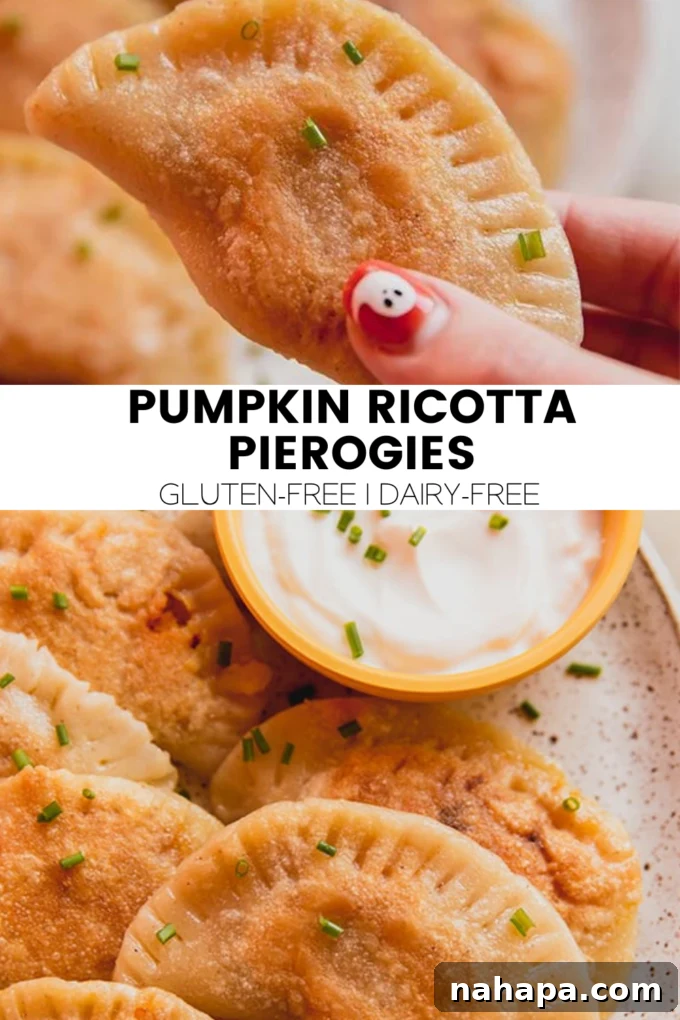
Transform your holiday season with these exquisite homemade pumpkin ricotta pierogies! This recipe offers a delightful gluten-free and dairy-free alternative that truly captures the authentic, heartwarming flavors of traditional pierogies, ensuring everyone can enjoy this festive dish without compromise.
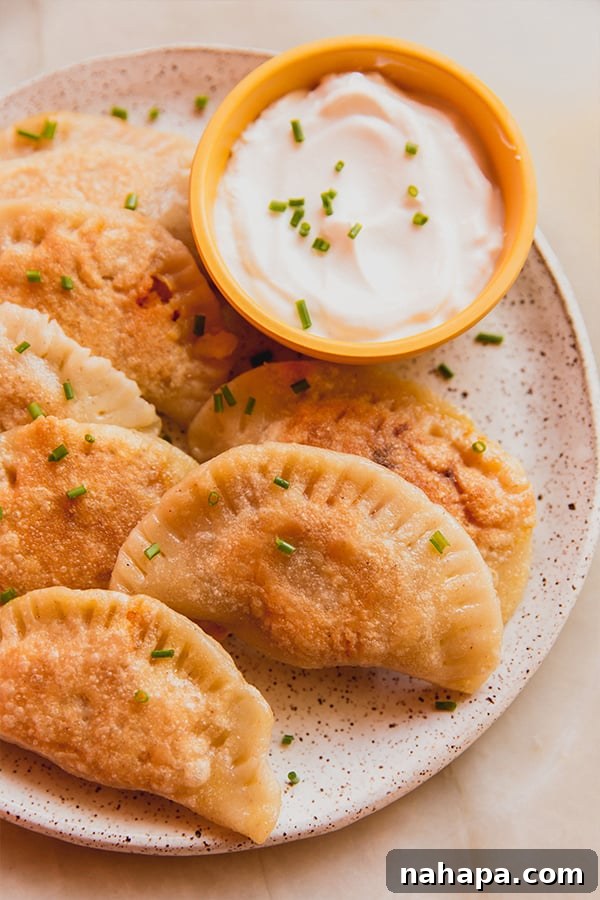
Embracing Tradition with a Modern Twist: Homemade Pumpkin Ricotta Pierogies
Pierogies hold a special place in many hearts, often evoking cherished memories of family gatherings and holiday feasts. For me, they bring back fond recollections of my paternal Polish grandma, whose pierogies were legendary. Her skill in crafting these delicate potato dumplings was unparalleled, a culinary legacy passed down through generations. If you’ve never had the pleasure of tasting pierogies, imagine a soft, pillowy dumpling, typically made with a dough of flour, egg, and sour cream, enfolding a rich and savory filling. While traditional fillings often feature potatoes, onions, and cheese, the beauty of pierogies lies in their versatility, allowing for endless creative variations. They are, without a doubt, a delicious and perfect addition to any holiday table.
For years, I embarked on a personal quest to perfect my own pierogi recipe, one that would honor tradition while catering to contemporary dietary needs. After numerous attempts and refinements, I am thrilled to share a recipe that finally hits all the right notes! This particular rendition is not only gluten-free and dairy-free, making it accessible to more people, but it also features a unique, non-traditional filling. The combination of pumpkin and ricotta offers a delightful autumn twist, making these pierogies an ideal choice for Thanksgiving or any fall celebration. The result is a dish that is both comforting and innovative, a true testament to the enduring appeal of homemade dumplings.
The Art of Crafting Gluten-Free, Dairy-Free Pierogies
Adapting traditional recipes to be gluten-free and dairy-free can often be a challenge, requiring careful selection of ingredients and precise techniques to maintain the desired texture and flavor. However, with the right approach, it’s entirely possible to create dishes that are just as satisfying, if not more so, than their classic counterparts. This recipe for pumpkin ricotta pierogies is a prime example, meticulously developed to ensure that every bite is rich, tender, and incredibly flavorful, proving that dietary restrictions don’t have to mean sacrificing taste or authenticity.
The success of these pierogies lies in a thoughtfully curated blend of flours and binders, combined with dairy-free alternatives that mimic the creaminess and richness of traditional ingredients. The goal was to achieve a dough that is pliable and easy to work with, yet sturdy enough to hold its delightful filling, and a filling that is both indulgent and perfectly seasoned for the fall season. By focusing on quality ingredients and a detailed step-by-step process, this recipe empowers you to create holiday magic in your own kitchen.
Key Ingredients for Exceptional Pumpkin Ricotta Pierogies
Each ingredient in this recipe plays a vital role in achieving the perfect balance of flavor and texture for both the dough and the filling. Let’s delve into the specifics of what makes these pierogies truly special:
- Rice Flour and Chickpea Flour: These two flours form the foundation of our gluten-free dough. Rice flour provides a delicate texture, while chickpea flour adds a subtle nutty flavor and contributes to the dough’s structure. Extensive testing has shown this combination to be superior for achieving a tender, yet resilient pierogi dough. Experimenting with other flour blends for this specific recipe has not yielded comparable results, so sticking to this pairing is highly recommended for success.
- Arrowroot Starch: This is a critical component for both the dough’s texture and for preventing sticking during preparation. In gluten-free baking, arrowroot starch acts as a binder and helps create a soft, pliable dough that’s easy to roll. Furthermore, it’s essential to generously coat your work surface and rolling pin with arrowroot starch to ensure the dough handles beautifully without tearing or clinging.
- Psyllium Husk: A true hero in gluten-free baking, psyllium husk is a fiber-rich ingredient that acts as a powerful binder and provides elasticity to the dough, mimicking the role of gluten. It helps to create a cohesive structure, preventing the dough from becoming crumbly and making it easier to shape and seal the pierogies.
- Coconut Yogurt: To achieve a dairy-free yet creamy dough, unsweetened coconut yogurt is an excellent choice. It adds moisture, a subtle tang, and richness to the dough, contributing to its tender texture. For optimal results, I highly recommend using a high-quality, plain coconut yogurt brand like Culina.
- Egg: The egg is crucial for binding the dough ingredients and providing structure and richness. While I strongly advocate for its inclusion for the best texture, I understand that some dietary needs require an egg-free option. Please refer to the dedicated section below for recommended substitutions.
- Avocado Oil and Salt: Avocado oil adds a touch of healthy fat to the dough, enhancing its pliability and contributing to a golden crispness when pan-fried. Salt, of course, is essential for seasoning, bringing out the inherent flavors of all the ingredients.
- Yellow Onion, Salt, Pumpkin Puree, Dairy-Free Ricotta, and Dried Sage: These ingredients combine to create the incredibly flavorful, non-traditional filling that defines this recipe. Sautéed yellow onion provides a sweet, aromatic base, while pumpkin puree offers a creamy, earthy sweetness that screams autumn. Dairy-free ricotta (Kite Hill is a fantastic brand) ensures a rich, creamy texture without any dairy, and dried sage infuses the filling with a warm, herbaceous, and distinctly autumnal aroma. While this pumpkin and sage combination is divine for fall, you are welcome to explore more traditional potato or sweet potato fillings if you prefer.
- Chives and Dairy-Free Sour Cream: These are the perfect accompaniments for serving your freshly made pierogies. Fresh chives add a vibrant burst of oniony flavor and a touch of color, while a dollop of dairy-free sour cream (coconut yogurt works surprisingly well here) provides a cool, tangy counterpoint that perfectly complements the rich filling.
Step-by-Step Guide to Crafting Perfect Pumpkin Ricotta Pierogies
Making homemade pierogies might seem daunting at first, but by following these detailed steps, you’ll find the process enjoyable and incredibly rewarding. Precision and patience are key to achieving delectable results.
Creating the Tender Pierogi Dough
- In a large mixing bowl, thoroughly whisk together all the dry ingredients for the dough: rice flour, arrowroot starch, chickpea flour, psyllium husk, and salt. Ensure they are well combined to distribute the binders evenly.
- Next, add the wet ingredients: coconut yogurt, egg, warm water, and avocado oil to the dry mixture. Stir with a sturdy spoon until a shaggy dough begins to form.
- Transfer the dough to a clean, lightly floured surface (using arrowroot starch) and knead it gently with your hands for about a minute. This helps to fully integrate all components and develop a smooth, pliable texture.
- Form the dough into a ball, cover it loosely with plastic wrap or a damp cloth, and place it in the refrigerator for at least 30 minutes. This resting period is crucial, allowing the flours to hydrate and the psyllium husk to work its magic, resulting in a more manageable dough.
Preparing the Aromatic Pumpkin Ricotta Filling
- While the dough rests, prepare the filling. Heat two teaspoons of avocado oil in a sauté pan over medium heat. Add the diced yellow onion and a light sprinkle of salt. Sauté, stirring occasionally, until the onions become soft, translucent, and slightly caramelized, about 8-10 minutes. This slow cooking brings out their natural sweetness.
- Remove the sautéed onions from the heat and transfer them to a bowl. Add the pumpkin puree, dairy-free ricotta, and dried sage. Mix all the ingredients thoroughly until well combined. Taste the filling and adjust the seasoning with additional salt if needed. Set the filling aside to cool slightly.
Assembling Your Delicious Pierogies
- Once the dough has rested, generously dust a clean, flat work surface with arrowroot starch. Also, lightly dust your rolling pin to prevent sticking.
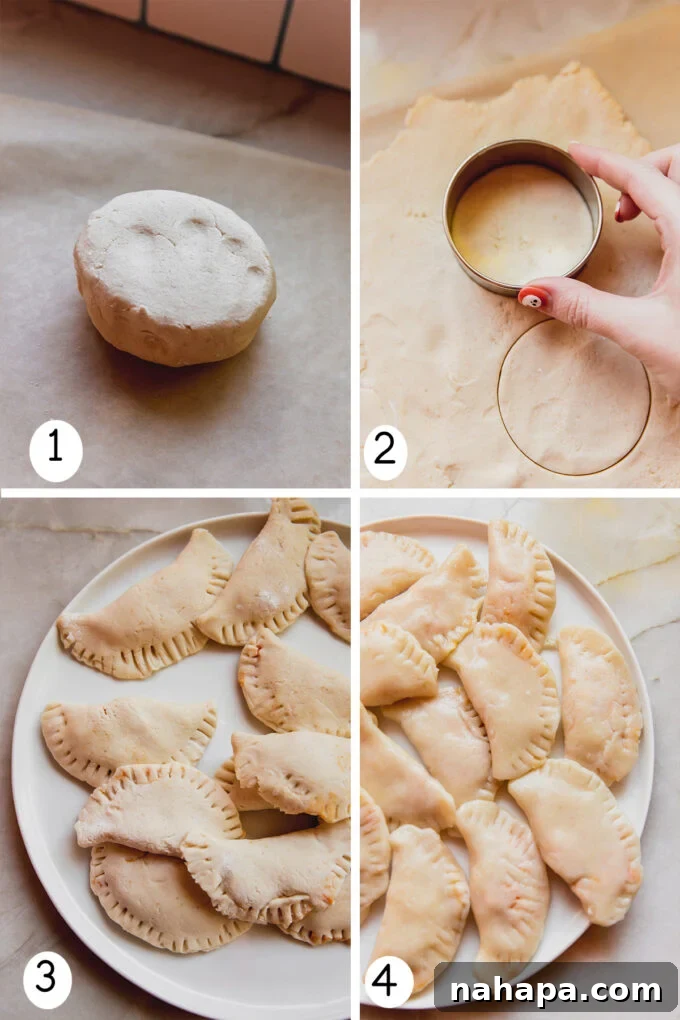
- Take the dough out of the fridge and roll it out into a thin, even layer, aiming for approximately ¼ inch thickness. The dough should be thin enough to cook through easily but thick enough not to tear when filled.
- Using a biscuit cutter or the rim of a small glass (around 2.5-3 inches in diameter), cut out circular shapes from the rolled-out dough. You should yield approximately 16 larger pierogies or about 20 smaller ones, depending on the cutter size. Gather any dough scraps, gently re-knead them, and re-roll to cut out additional circles until all the dough is used.
- Now, it’s time to fill and seal the pierogies. Take one dough circle at a time and spoon about 2-3 teaspoons of the pumpkin ricotta filling into the center. Be careful not to overfill.
- Moisten the edges of one half of the dough circle with a tiny bit of water using your fingertip. Fold the dough over the filling to create a half-moon shape. Gently press the edges together to seal the pierogi securely, ensuring no filling leaks out.
- For an extra secure seal and an aesthetically pleasing finish, use the tines of a fork to crimp the edges of the pierogi on both sides. Place the sealed pierogi on a clean plate lightly dusted with arrowroot starch and repeat the process for all remaining dough circles and filling.
Cooking and Serving Your Homemade Delights
- Bring a large pot of well-salted water to a rolling boil. Carefully drop the pierogies into the boiling water in two batches to avoid overcrowding, which can lower the water temperature and make them stick. Gently stir them occasionally to prevent them from adhering to the bottom of the pot.
- The pierogies are cooked when they float to the surface, typically after 2-4 minutes. Once they float, use a slotted spoon to carefully remove them from the water and place them on a plate.
- For the ultimate flavor and texture, pan-fry the boiled pierogies. Heat a large skillet over medium heat and add a tablespoon or two of avocado oil or dairy-free butter.
- Once the oil is hot, carefully add the boiled pierogies in batches. Fry them for a few minutes on each side, or until they are beautifully golden brown and crisp. This step adds an incredible depth of flavor and a delightful textural contrast.
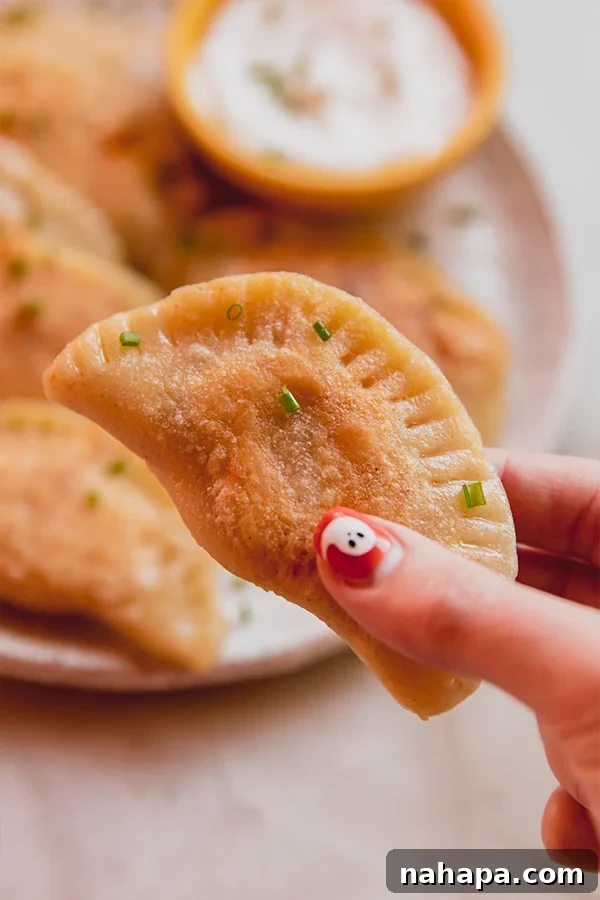
- Serve the hot, pan-fried pierogies immediately. Garnish generously with freshly chopped chives and offer a side of your favorite dairy-free sour cream alternative (coconut yogurt works wonderfully) for dipping. Enjoy the fruits of your labor!
Expert Tips and Creative Variations for Perfect Pierogies
Achieving pierogi perfection often comes down to a few key techniques and knowing how to adapt the recipe to your preferences. Here are some essential tips and creative ideas to elevate your homemade pierogies:
- Generous Flour dusting for Dough Handling: The gluten-free dough, while pliable, can be slightly stickier than traditional wheat-based dough. To prevent frustration and ensure smooth rolling, be very generous with arrowroot starch when flouring your work surface and rolling pin. Don’t hesitate to add more starch as needed during the rolling process to prevent any sticking. This simple step makes a world of difference in managing the dough.
- Customize Your Filling to Your Heart’s Content: While the pumpkin ricotta filling is specifically designed for a delightful Thanksgiving and fall experience, pierogies are incredibly versatile. Feel free to explore other delicious fillings. For a more traditional taste, opt for a classic mashed potato filling, perhaps with sautéed onions or a hint of garlic. Sweet potato filling offers another wonderful autumnal option. Other savory ideas include mushroom and sauerkraut, or even a mix of caramelized onions and plant-based cheese for a rich umami flavor. The possibilities are truly endless, allowing you to tailor the pierogies to any season or preference.
- Freezing for Future Feasts: Pierogies are excellent for meal prep! You can freeze them raw or cooked.
- To freeze raw pierogies: Place the shaped, uncooked pierogies in a single layer on a parchment-lined baking sheet. Freeze until solid (about 1-2 hours). Once frozen, transfer them to an airtight freezer-safe bag or container. They can be stored for up to 3 months. When ready to cook, boil them directly from frozen, adding a few extra minutes to the cooking time.
- To freeze cooked pierogies: After boiling and pan-frying, allow the pierogies to cool completely. Arrange them in a single layer on a baking sheet and freeze until solid. Then transfer to a freezer-safe container. Reheat in a pan with a little oil until warmed through and crispy.
- Reheating Instructions: Leftover pierogies are a treat! For best results, reheat pan-fried pierogies in a lightly oiled skillet over medium heat until warmed through and crispy on the outside. You can also bake them in the oven at 375°F (190°C) for 10-15 minutes, or until heated through.
Perfect Pairings: What to Serve with Your Pierogies
The right accompaniments can elevate your pierogi experience from great to truly unforgettable. Here are some classic and creative serving suggestions:
- Creamy Dairy-Free Sour Cream: A dollop of cool, tangy sour cream is a quintessential pierogi accompaniment. To keep this recipe dairy-free, I wholeheartedly recommend using coconut yogurt. I know it might sound unconventional at first, but its subtle tang and creamy texture, when paired with the savory pierogies, creates a harmonious flavor profile that tastes incredibly “right.” Of course, feel free to use any other store-bought dairy-free sour cream alternative of your choice.
- Fresh Chives: A sprinkle of freshly chopped chives adds a vibrant burst of color and a delicate oniony freshness. The mild, aromatic flavor of chives perfectly complements the rich filling and creamy topping. Don’t skip this simple yet impactful garnish.
- Rich Caramelized Onions: For an extra layer of sweetness and savory depth, caramelized onions are an absolute must for pierogies. To make them, simply slice yellow onions thinly and sauté them slowly in a pan with a little oil or dairy-free butter over low-medium heat for 20-30 minutes, stirring occasionally, until they turn a deep golden-brown and become wonderfully sweet and tender. Their rich, jammy texture and sweet flavor provide a luxurious counterpoint to the pierogies.
- Crispy Plant-Based “Bacon” Bits: If you enjoy a smoky, salty crunch, consider adding some store-bought crispy plant-based bacon bits or finely chopped, pan-fried mushroom “bacon” as a garnish.
- Melted Dairy-Free Butter: A drizzle of melted dairy-free butter over the hot pierogies before serving adds a touch of richness and helps to carry the flavors.
- A Simple Green Salad: To balance the richness of the pierogies, a light and refreshing green salad with a simple vinaigrette can be a wonderful addition, providing a fresh contrast.
Making Your Pierogies Completely Egg-Free
While eggs provide an optimal texture and structure for these pierogies, I understand that an egg-free option is essential for some. For the best results, I still highly recommend using the egg version, as it inherently yields the most authentic and satisfying texture. However, if you are strictly egg-free, there’s a workable alternative:
- Psyllium Husk and Water Adjustment: To create an egg-free dough, I suggest adding an extra teaspoon of psyllium husk to the dry ingredients and an additional ¼ cup of warm water to the wet ingredients. The increased psyllium husk will act as a stronger binder, while the extra water will help achieve the right dough consistency.
- Expect Slight Texture Differences: Please note that while this substitution is the best swap for this particular recipe, the texture of the pierogies will not be exactly the same as with an egg. The egg-free version might be slightly less tender or rich, but it will still be delicious and hold together well. You can also explore other commercial egg replacers if you have a favorite, though the psyllium husk and water method is specifically formulated for this recipe.
Explore More Gluten-Free & Dairy-Free Delights
If you’ve enjoyed making these pumpkin ricotta pierogies, you’ll love exploring other recipes designed for delicious, healthy, and allergy-friendly eating. Dive into more culinary adventures with these fantastic options:
- Cabbage Roll Dumplings: A Hearty and Flavorful Classic Made Easy
- Rice Paper Dumpling “Wonton” Soup: Light, Fresh, and Comforting
- Asian Chicken Poppers: A Zesty and Crowd-Pleasing Appetizer
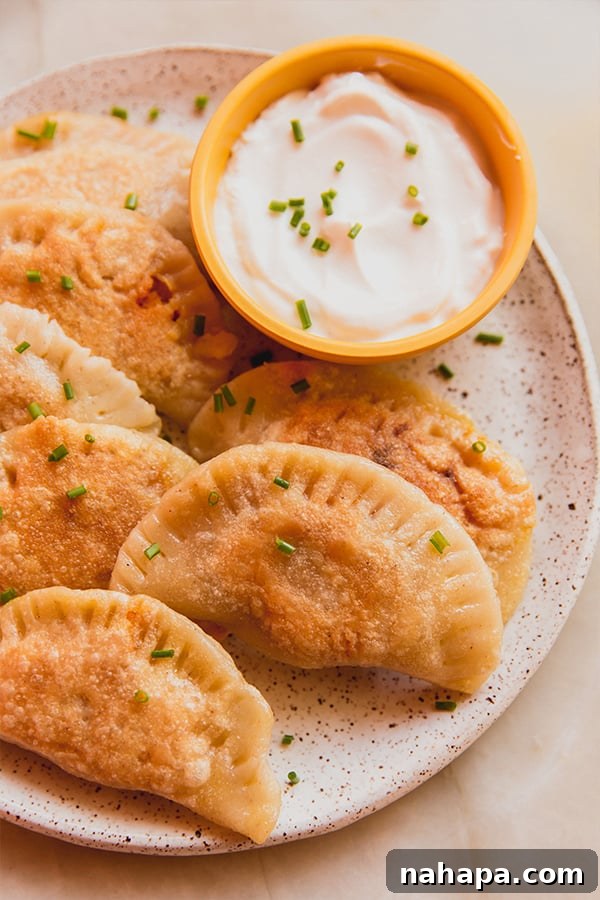
Pumpkin Ricotta Pierogies (Gluten and Dairy-Free)
16 pierogies
These homemade pumpkin ricotta pierogies are about to up level your entire holiday season! This version is gluten and dairy-free, but tastes like the real thing.
Leave a Review
Pin Recipe
Ingredients
For the Pierogi Dough
- 1 ¼ cup rice flour
- ¾ cup arrowroot starch
- 2 tbsp chickpea flour
- 1 tsp psyllium husk
- ½ tsp salt
- ½ cup warm water
- ⅓ cup coconut yogurt
- 1 egg
- 1 tbsp avocado oil
For the Filling
- 2 tsp avocado oil
- ½ yellow onion, diced
- Salt to taste
- ½ cup pumpkin puree
- ⅓ cup dairy-free ricotta (I use Kite Hill)
- 1 ½ tsp dried sage
To Serve
- 1 tbsp chives, chopped
- ½ cup dairy-free sour cream (I use coconut yogurt)
Instructions
- To make the dough, combine the dry ingredients (rice flour, arrowroot starch, chickpea flour, psyllium husk, salt) in a large bowl and whisk well. Add the yogurt, egg, water, and oil and stir until a dough forms. Use your hands to knead the dough for about a minute to fully combine. Set the dough in the fridge for 30 minutes to set.
- Using a pan, heat 2 tsp avocado oil over medium heat. Sauté the diced yellow onion and lightly salt. The onion should be soft and translucent. Add to a bowl and combine with the pumpkin puree, dairy-free ricotta, dried sage, and extra salt to taste. Set aside.
- Dust a clean surface with plenty of arrowroot starch, and dust a rolling pin as well. Roll out the dough into a thin layer, about ¼” thick. Use a biscuit cutter (or a cup) to cut out the pierogi circles. You should have about 16 larger pierogies, or 20 smaller.
- Working with one piece of dough at a time, spoon about 2-3 tsp worth of the filling into the center of the dough. Fold over into a half moon, sealing the dough with your finger. Crimp the dough with a fork on both sides. Set aside on a clean plate (dusted with arrowroot starch) and repeat for all of the dough and filling.
- Bring a pot of well-salted water to a boil and boil the pierogies in two batches, stirring to prevent sticking. Remove from the pot once they float (approx. 2-4 minutes).
- Using a large pan, add some oil to the base of the pan over medium heat. Fry the pierogies in two batches for a few minutes on each side or until crisp and golden brown. Set aside.
- Serve the pierogies topped with chives and with a side of your dairy-free sour cream of choice.
Notes
- All nutritional information is an estimation and will vary. Estimations do not include optional ingredients.
Serving: 1 pierogi
,
Calories: 108 kcal
,
Carbohydrates: 17.4 g
,
Protein: 2 g
,
Fat: 3.2 g
,
Fiber: 1 g
Tag @unboundwellness on Instagram and hashtag #unboundwellness!