This post contains affiliate links.
Indulge in the Perfect Gluten-Free White Chocolate Raspberry Cake
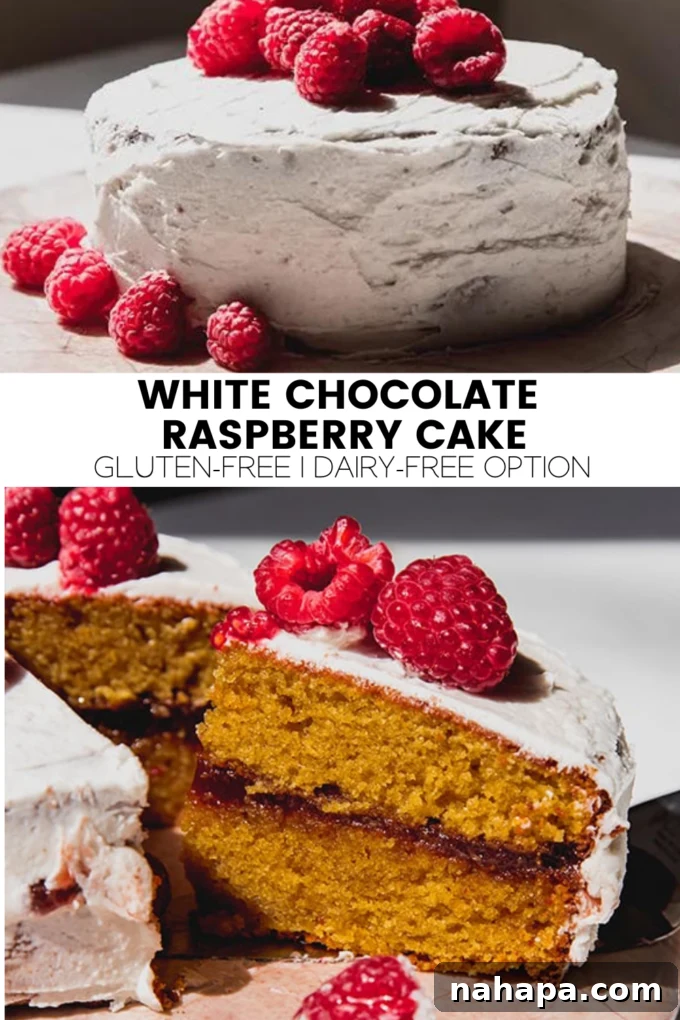
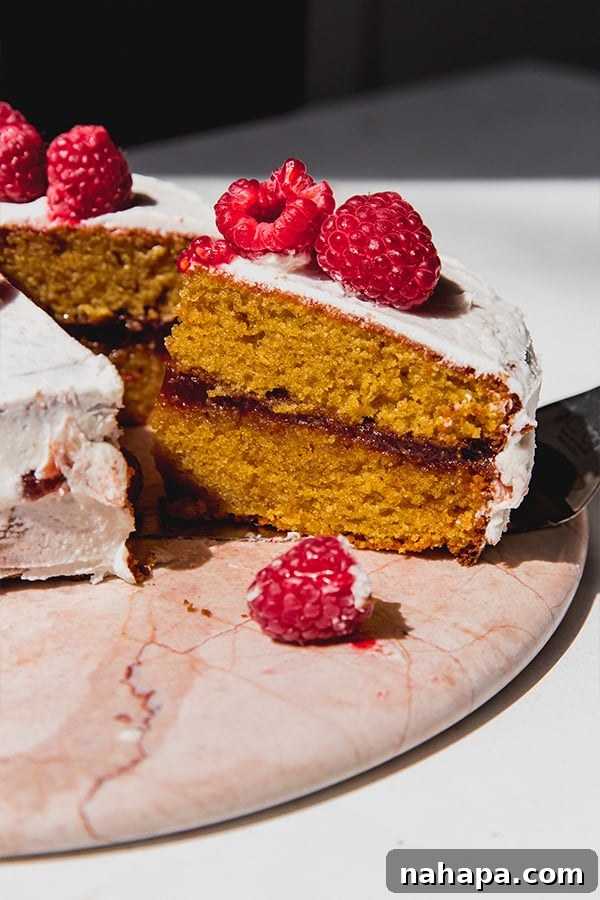
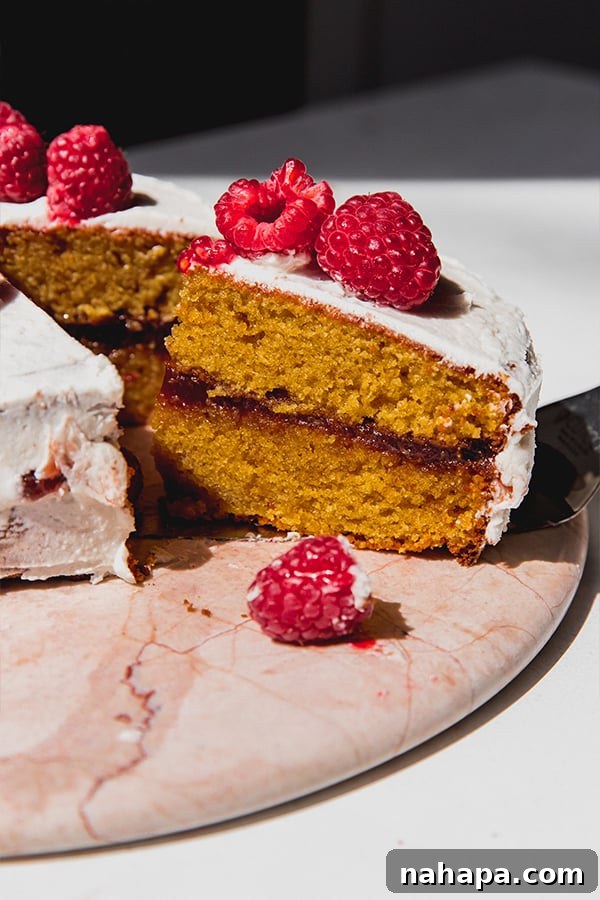
Prepare to be enchanted by this exquisite gluten-free white chocolate raspberry cake, a culinary masterpiece perfectly suited for any special occasion, especially as a dazzling spring dessert or an elegant Easter centerpiece. This delightful creation boasts a wonderfully moist almond flour cake base, generously layered with a vibrant raspberry filling, and crowned with a silky, smooth vanilla icing. It’s a symphony of flavors and textures that promises to impress even the most discerning palates, all while catering to dietary needs.
If you’ve been on a quest for the ultimate gluten-free cake, your search ends here. My journey to develop this recipe unexpectedly began with a desire to create a white chocolate brownie. However, through a series of delicious experiments, I stumbled upon what has become the most incredible white chocolate cake imaginable. It’s fluffy, beautifully layered, and possesses that irresistible homemade charm everyone craves. What makes this recipe truly special is not just its incredible taste, but also its thoughtful composition. Beyond being entirely gluten-free, it’s also grain-free and thoughtfully crafted with dairy-free white chocolate, making it a versatile option for many dietary preferences.
Why This White Chocolate Raspberry Cake Will Become Your New Favorite
This cake isn’t just a dessert; it’s an experience. Here’s why you’ll fall head over heels for this white chocolate raspberry creation:
- A Triumph in Gluten-Free Baking: Crafting truly delicious gluten-free baked goods can often be a challenge, but this recipe defies expectations. The almond flour base creates a cake that is exceptionally fluffy, moist, and tender – qualities often hard to achieve without gluten. You won’t miss traditional flour for a second!
- The Epitome of Springtime Delight: As the seasons transition and vibrant flavors emerge, a fruity dessert like this one feels utterly perfect. The rich, sweet notes of white chocolate are beautifully balanced by the bright, tangy burst of fresh raspberries. This harmonious flavor pairing makes it an ideal treat for Easter brunches, spring celebrations, or simply to welcome warmer days.
- Naturally Grain and Dairy-Free Friendly: For those managing specific dietary needs, this cake offers a fantastic solution. By using almond flour and dairy-free white chocolate, we ensure it’s not only gluten-free but also grain-free and easily adaptable for a dairy-free lifestyle without compromising on taste or texture.
- Elegantly Simple to Create: Don’t let the sophisticated appearance fool you; this layered cake is surprisingly straightforward to assemble. With clear, step-by-step instructions, even novice bakers can achieve a show-stopping dessert that looks professionally made.
- A Flavor Profile That Pleases Everyone: The classic combination of sweet white chocolate and tart raspberries is universally loved. It’s comforting yet sophisticated, making it a crowd-pleaser for any gathering.
Essential Ingredients for Your White Chocolate Raspberry Cake
The secret to this cake’s success lies in its high-quality, thoughtfully selected ingredients. Here’s a detailed look at what you’ll need:
- White Chocolate: For a truly dairy-free option, I highly recommend using Enjoy Life chocolate chips. These melt beautifully and provide that creamy, sweet white chocolate flavor without any dairy. If dairy is not a concern, feel free to use your favorite high-quality white chocolate bar or chips.
- Ghee or Coconut Oil: Ghee adds a rich, buttery depth of flavor. However, if you need a strictly dairy-free alternative, unrefined coconut oil works perfectly and contributes to the cake’s moist texture. Ensure it’s melted and slightly cooled before incorporating.
- Eggs & Egg Yolks: Eggs are crucial for the structure, moisture, and binding of this almond flour cake. The addition of extra egg yolks contributes to an exceptionally rich and tender crumb. I have not experimented with egg substitutes for this particular recipe, as the specific protein structure provided by eggs is key to its success. For an egg-free alternative, you might explore recipes like my coconut flour banana cake.
- Vanilla Extract: A staple in baking, pure vanilla extract enhances all the other flavors, adding warmth and sweetness to both the cake and the overall profile.
- Baking Soda: This leavening agent works with the acidic components in the cake (even subtle ones) to create a light and airy texture, ensuring your cake rises beautifully.
- Golden Coconut Sugar: I prefer using golden coconut sugar as a natural sweetener. It offers a caramel-like note and a slightly lower glycemic index compared to refined sugars. Its fine texture blends seamlessly into the batter.
- Almond Flour: This is the foundation of our gluten-free cake. Blanched, superfine almond flour provides a delicate texture and a slightly nutty flavor that complements the white chocolate and raspberry. Due to its unique properties, I haven’t found a direct substitute that yields the same results for this specific recipe. It’s essential for the cake’s structure and moisture.
- Arrowroot Starch: Also known as arrowroot powder, this acts as a thickener and helps lighten the texture of the almond flour, preventing the cake from becoming too dense. Tapioca starch (or tapioca flour) is a suitable substitute if arrowroot is unavailable.
- Raspberry Jam: A good quality raspberry jam is vital for the vibrant filling. I find this particular raspberry jam to be perfect for its balance of sweetness and tartness, making it an excellent contrast to the rich cake.
- Vanilla Icing: For a convenient and delicious dairy-free option, I use this specific vanilla icing. Alternatively, you can prepare a homemade dairy-free vanilla buttercream using powdered sugar, dairy-free butter, vanilla extract, and a splash of plant-based milk.
- Fresh Raspberries: While optional, a scattering of fresh raspberries on top adds a beautiful pop of color, a burst of fresh flavor, and an elegant touch to the finished cake.
How to Bake Your White Chocolate Raspberry Cake: A Step-by-Step Guide
Creating this show-stopping cake is simpler than you might think. Follow these detailed steps for a perfect bake every time:
- Preparation is Key: Begin by preheating your oven to 350°F (175°C). Lightly grease two round 6-inch cake pans with your preferred baking spray or a little ghee/coconut oil, then line the bottoms with parchment paper. This crucial step ensures your cakes release easily without sticking. Set them aside while you prepare the batter.
- Melt the White Chocolate Base: In a heatproof glass bowl, combine the white chocolate chips and ghee (or coconut oil). Gently melt them together using a double boiler method, or by microwaving in 20-second intervals, stirring thoroughly after each interval, until the mixture is smooth and fully melted. It’s important not to overheat the white chocolate. Once melted, allow the mixture to cool for about 5 minutes. This prevents the eggs from scrambling when added.
- Combine Wet Ingredients: To the cooled white chocolate mixture, add the eggs, egg yolks, vanilla extract, and golden coconut sugar. Whisk vigorously until all ingredients are well combined and the mixture is light and frothy. The sugar should be mostly dissolved, contributing to a smooth batter.
- Mix Dry Ingredients: In a separate medium bowl, whisk together the almond flour, arrowroot starch, and baking soda. Ensure these dry ingredients are thoroughly combined to distribute the leavening agent evenly, which is essential for a consistent rise.
- Fold Wet into Dry: Gradually add the dry ingredient mixture into the wet ingredients, stirring gently with a spatula or wooden spoon until just combined. Be careful not to overmix, as this can lead to a tough cake. A few lumps are perfectly fine.
- Bake to Golden Perfection: Divide the cake batter evenly between your two prepared 6-inch cake pans. Gently tap the pans on the counter a couple of times to release any air bubbles. Transfer them to the preheated oven and bake for 18-22 minutes. The cakes are done when they are golden brown on top, spring back slightly when gently pressed, and a toothpick inserted into the center comes out clean.
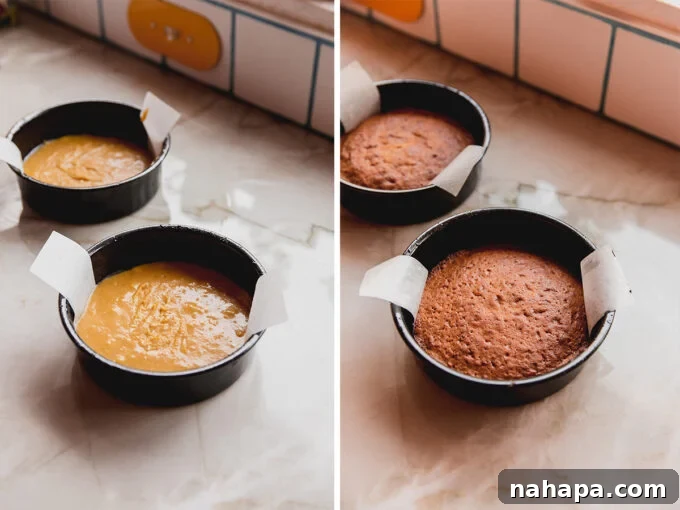
- Cool Completely: Once baked, remove the cakes from the oven and let them cool in their pans on a wire rack for about 5-10 minutes. This allows them to firm up slightly. Then, carefully invert them onto the cooling rack to cool completely. Cooling thoroughly is crucial; attempting to frost warm cakes will result in melted icing and a messy presentation.
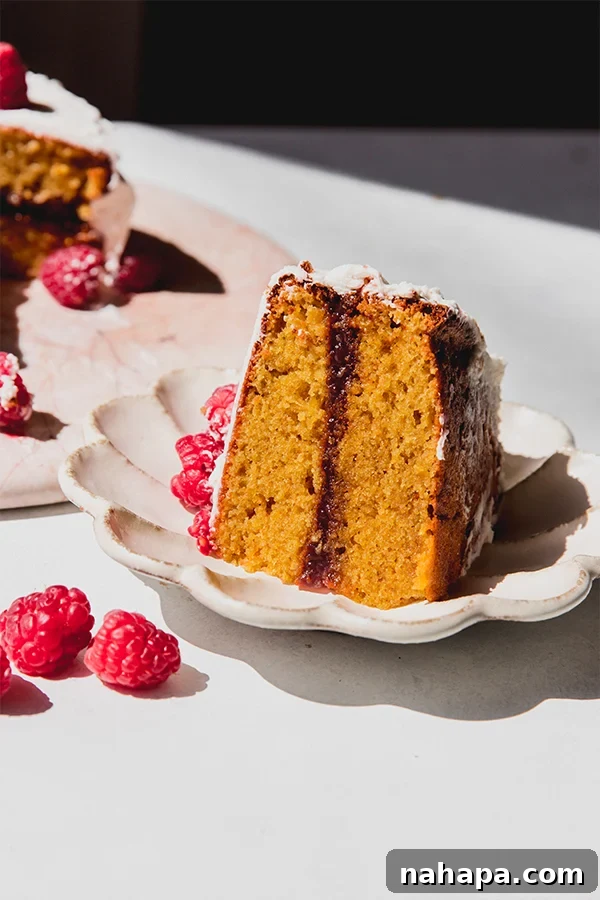
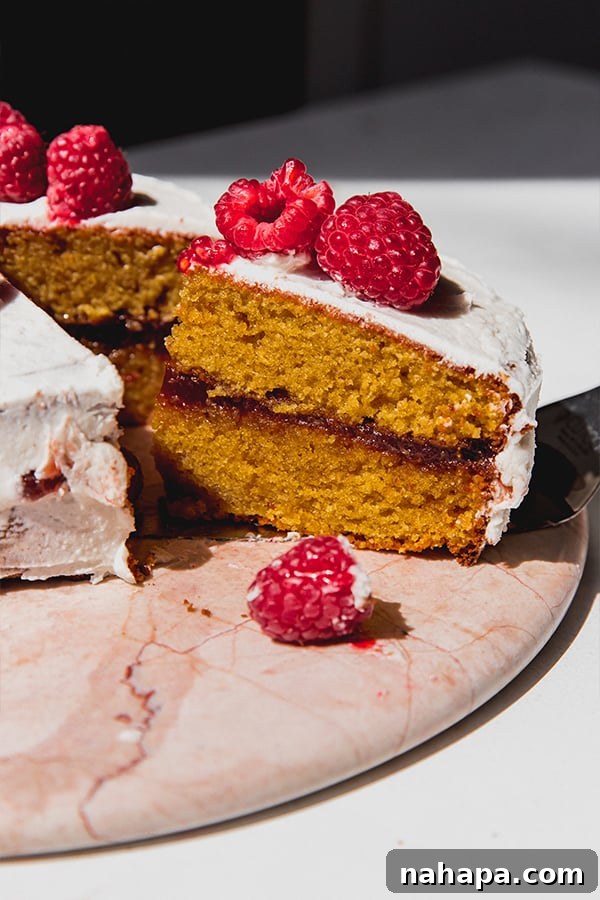
- Assemble and Frost Your Masterpiece: Once the cakes are entirely cool, place one cake layer onto your desired serving plate or cake stand. Spread the raspberry jam evenly over the top of this layer, extending almost to the edges. Carefully place the second cake layer on top. Apply a thin, initial layer of vanilla icing over the entire cake – this is your “crumb coat” which traps any loose crumbs. Transfer the cake to the fridge for about 5 minutes to allow this crumb coat to set. Remove from the fridge, then apply a generous second layer of icing, smoothing it out for a beautiful finish.
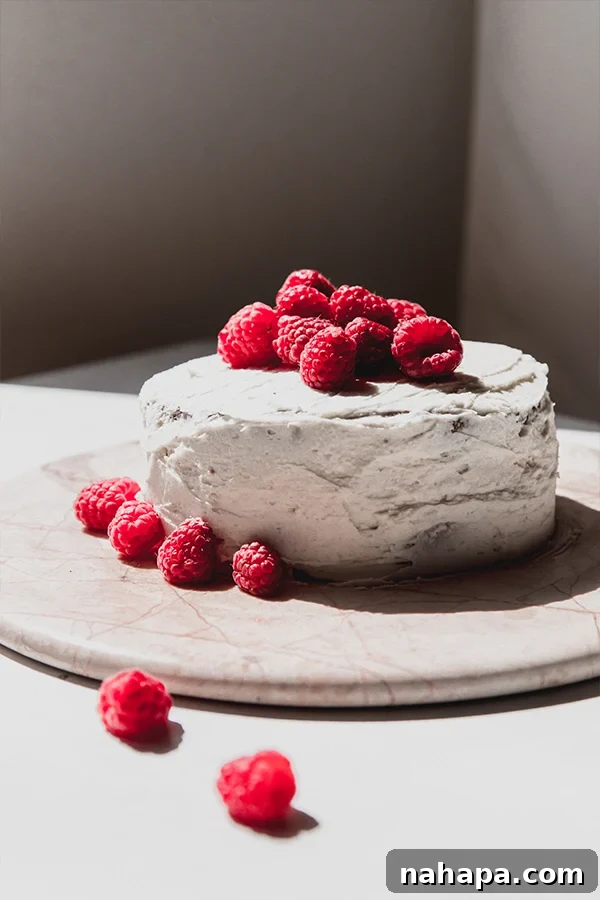
- Garnish and Serve: For an extra touch of elegance and fresh flavor, top your beautifully iced cake with fresh raspberries. Slice and serve immediately, or store it for later enjoyment!
Tips & Tricks for a Flawless Gluten-Free White Chocolate Raspberry Cake
Achieving cake perfection often comes down to a few key techniques. Here are some expert tips to ensure your white chocolate raspberry cake is absolutely flawless:
- Adjusting Cake Size and Shape: This recipe is designed for two 6-inch round pans, creating a lovely layered cake. If you prefer a larger cake, you can adapt the recipe for a single 8 or 9-inch round pan, or even a square pan. However, be mindful that baking times will vary significantly. Keep a close eye on the cake while it bakes, using the toothpick test to prevent over or under-baking. You might also need to adjust the amount of filling and icing.
- Experiment with Fillings: While raspberry jam is a classic and delicious choice, don’t hesitate to get creative with your filling! Strawberry jam, cherry jam, or even a homemade berry compote would be wonderful alternatives. For an extra indulgent twist, consider a lemon curd or a white chocolate ganache as a filling.
- Room Temperature Ingredients: For the best results, ensure your eggs and ghee (or coconut oil) are at room temperature. This helps them emulsify better with the other ingredients, resulting in a smoother, more uniform batter and a finer cake crumb.
- Don’t Overmix: When combining the wet and dry ingredients, mix only until just combined. Overmixing can develop the starches in the almond flour (though less than wheat flour), potentially leading to a slightly tougher cake.
- Perfectly Cooled Cakes: Patience is a virtue when it comes to cooling. Make sure your cake layers are completely cool before applying the jam and icing. Even slightly warm cakes will cause the icing to melt and slide off, making assembly difficult.
- Crumb Coat for a Smooth Finish: The initial thin layer of icing (the “crumb coat”) is essential for a professional-looking cake. It seals in any loose crumbs, ensuring your final layer of icing is smooth and blemish-free. Don’t skip the brief chilling step after the crumb coat!
- Storage and Shelf Life: This cake is best stored in an airtight container in the refrigerator. It will stay fresh and delicious for 3-4 days. Allow it to come to room temperature for about 15-30 minutes before serving for optimal flavor and texture.
Frequently Asked Questions About This Gluten-Free Cake
Can you make this cake egg-free?
I haven’t attempted to make this particular white chocolate raspberry cake without eggs, and honestly, it would be quite challenging to replicate the structure and moisture that eggs provide in this specific recipe. The eggs are fundamental to its fluffy, tender crumb. However, if you’re seeking a delicious egg-free dessert, I highly recommend trying my coconut flour banana cake, which is specifically designed to be egg-free and utterly delightful.
Can you make this cake without almond flour?
This recipe relies heavily on the unique properties of almond flour for its gluten-free structure, moisture, and delicate flavor. I haven’t tested this specific cake with any other flour substitutes, as different flours absorb liquids and behave very differently. Substituting almond flour would likely require significant adjustments to the liquid ratios and potentially other ingredients, which might result in a completely different outcome. If you do experiment with alternative gluten-free flours, please let me know your results!
How do I know when the cake is fully baked?
The best way to check for doneness is the classic toothpick test. Insert a clean toothpick into the center of the cake layers. If it comes out clean or with a few moist crumbs attached (but no wet batter), your cakes are ready! The edges should also be lightly golden and the cake should spring back when gently pressed.
Can I make this cake ahead of time?
Absolutely! You can bake the cake layers a day or two in advance. Once completely cooled, wrap them tightly in plastic wrap and store them at room temperature or in the refrigerator. You can also assemble and ice the entire cake a day ahead. Store it covered in the refrigerator, and bring it to room temperature for about 30 minutes before serving.
Can this cake be frozen?
Yes, both the individual cake layers and the frosted cake can be frozen. To freeze layers, ensure they are completely cool, then wrap them tightly in plastic wrap and then in aluminum foil. They can be frozen for up to 1 month. Thaw in the refrigerator overnight before frosting. To freeze a frosted cake, flash freeze it uncovered for an hour to set the icing, then wrap tightly in plastic wrap and foil. Thaw in the refrigerator.
More Delicious Gluten-Free Recipes You’ll Love
If you’ve enjoyed this delightful cake, be sure to explore these other fantastic recipes:
- Raspberry Chocolate Chip Muffins
- Paleo Chocolate Cake
- Applesauce Pound Cake
White Chocolate Raspberry Cake (Gluten Free)
Pin Recipe
Ingredients
- For the cake
- ½ cup white chocolate, I use Enjoy Life chocolate chips for dairy free
- 3 tbsp ghee, sub coconut oil
- 2 eggs, room temperature
- 2 egg yolks
- 1 tsp vanilla extract
- ⅓ cup golden coconut sugar
- 1 cup almond flour
- 2 tbsp arrowroot starch
- ½ tsp baking soda
- For the filling/icing
- 3 tbsp raspberry jam, I use this
- Vanilla icing, I use this for dairy free
- Fresh raspberries
Instructions
- Preheat the oven to 350 F (175 C) and grease two round 6” cake pans. Line the bottoms with parchment paper. Set aside.
- Combine the white chocolate and ghee (or coconut oil) in a glass bowl. Melt over a double boiler, or in 20-second intervals in the microwave, stirring until melted and smooth. Allow to cool for 5 minutes.
- Add the eggs and egg yolks to the cooled white chocolate mixture and whisk well. Then, add the vanilla extract and coconut sugar, whisking vigorously until fully combined.
- In a separate bowl, combine the almond flour, arrowroot starch, and baking soda. Whisk these dry ingredients well to ensure even distribution, then add them to the bowl with the wet ingredients. Stir gently until just combined; do not overmix.
- Pour half of the batter into each of the prepared baking pans. Transfer to the preheated oven and bake for 18-22 minutes, or until the cakes are baked through and a toothpick inserted into the center comes out clean.
- Remove from the oven and allow to cool in the pans for 5-10 minutes before carefully transferring them to a wire rack to cool completely.
- Once completely cool, place one cake layer onto a large plate or cake stand. Spread the raspberry jam evenly over the top. Carefully place the second cake layer on top and spread a thin layer of vanilla icing (crumb coat). Transfer the cake to the fridge to allow the first layer of icing to set for 5 minutes. Remove from the fridge and add another thin, smooth layer of icing. Top with fresh raspberries, slice, and enjoy!
Notes
Calories: 358kcal,
Carbohydrates: 38.8g,
Protein: 5.4g,
Fat: 16.3g,
Fiber: 1.9g
Did you Make this Recipe?
Tag @unboundwellness on Instagram and hashtag #unboundwellness!
We hope you enjoy baking and savoring every delicious bite of this gluten-free white chocolate raspberry cake. Its enchanting flavors and elegant presentation make it perfect for any celebration, or simply to brighten an ordinary day. Happy baking!