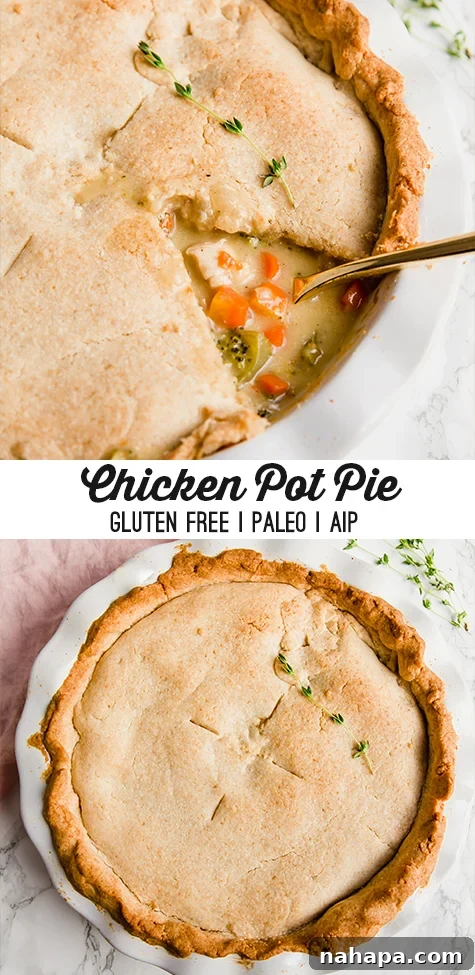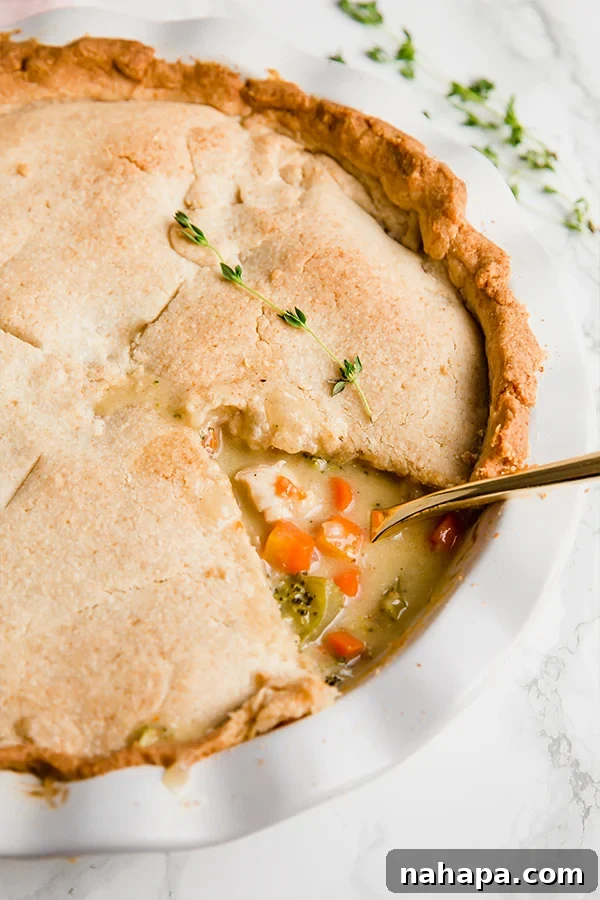
There are few dishes as universally comforting and satisfying as a classic chicken pot pie. The aroma of a golden, flaky crust combined with a rich, creamy filling loaded with tender chicken and hearty vegetables instantly evokes warmth and home. But for those navigating the complexities of gluten, dairy, or specific dietary protocols like Paleo and AIP (Autoimmune Protocol), enjoying this beloved comfort food often feels like an impossible dream. Until now.
Get ready to rediscover the joy of chicken pot pie with this incredible recipe that delivers all the authentic taste and texture you crave, without any of the gluten or dairy. This isn’t just a “good for being paleo” pot pie; it’s genuinely delicious, robust, and deeply satisfying, proving that dietary restrictions don’t have to mean sacrificing flavor or comfort. Crafted meticulously from scratch, this recipe is a testament to healthy eating never having to be boring or bland.
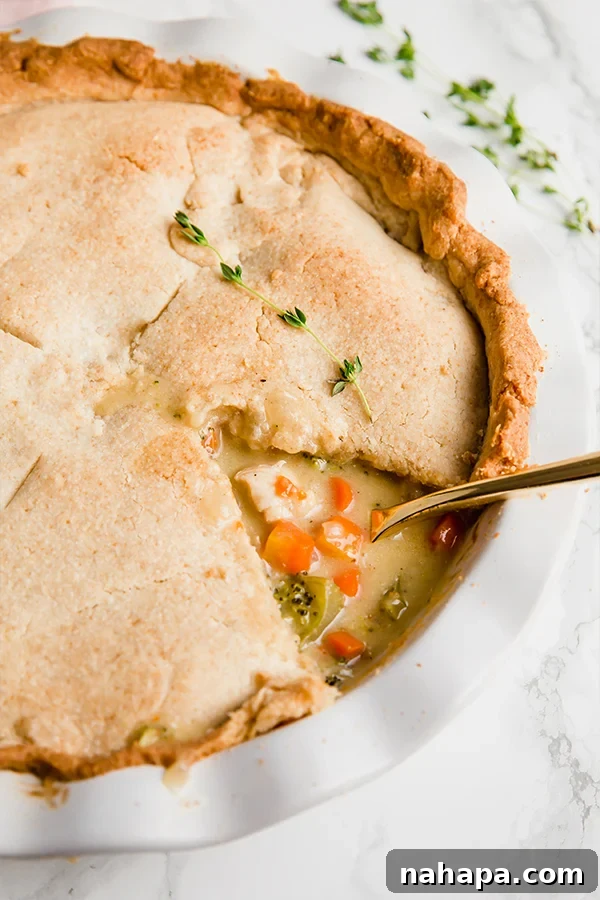
What is Chicken Pot Pie?
Chicken pot pie is a quintessential American comfort food, deeply embedded in culinary tradition. At its heart, it’s a savory dish composed of succulent pieces of chicken and a medley of vegetables, all suspended in a thick, creamy sauce and crowned with a pastry crust. It’s the kind of meal that wraps you in a warm hug, perfect for chilly evenings or when you simply need a hearty, nourishing dish to lift your spirits. Traditionally, it features a buttery, flaky crust and a cream-based sauce, often relying on wheat flour for thickening and dairy products for richness.
While many recipes opt for pre-made crusts for convenience, this particular recipe takes the artisanal route, guiding you through the process of creating a paleo and AIP-compliant crust from scratch. This dedication to homemade quality ensures that every component of your pot pie is free from grains, gluten, and dairy, making it not just a healthier alternative but a truly wholesome, handcrafted meal.
A Personal Journey to the Perfect Pot Pie
Growing up with a Hungarian mother, my childhood meals were a delicious journey through European cuisine, primarily featuring Italian dishes. Classic American comfort foods, like chicken pot pie, were rarely on our dinner table. My encounters with such dishes usually happened at fast-food joints or restaurants. So, when it came to recreating a perfect chicken pot pie, I turned to my husband, a true connoisseur of this iconic dish.
He once survived on chicken pot pies during a particularly challenging period of my morning sickness, making his palate an undeniable authority on what constitutes a truly great pot pie. His seal of approval was crucial, and when he tasted this homemade, paleo, and AIP-friendly version, his reaction was priceless. He didn’t just say it was “good for a paleo pot pie”; he declared it was “just as good as the real deal!” That glowing endorsement speaks volumes and filled me with immense satisfaction. It proved that healthy, restricted-diet versions of classic dishes don’t have to compromise on the authentic flavor and comforting essence we all love.
Why You’ll Love This Healthy Chicken Pot Pie
This recipe isn’t just a workaround for dietary restrictions; it’s a celebration of flavor and wholesome ingredients. Here’s why this Paleo AIP Chicken Pot Pie will become a new favorite in your kitchen:
- **Uncompromising Flavor:** You won’t miss the gluten or dairy. The carefully selected ingredients and balanced seasonings ensure a rich, savory, and incredibly satisfying taste that stands up to any traditional pot pie.
- **Dietary Inclusivity:** Perfect for those following Paleo or AIP diets, as well as anyone seeking delicious gluten-free and dairy-free options. It caters to multiple dietary needs without sacrificing enjoyment.
- **Wholesome Ingredients:** Made with fresh chicken, vibrant vegetables, and a creamy, dairy-free sauce thickened naturally with arrowroot starch. The crust uses nutrient-dense cassava and coconut flours, free from grains and artificial additives.
- **Comfort Food Reimagined:** It brings back the nostalgic warmth and comforting experience of a classic chicken pot pie, reimagined with healthier, cleaner ingredients. It’s truly soul-soothing food.
- **Homemade with Love:** Every component, from the tender chicken and savory vegetables to the flaky crust, is made from scratch. This not only enhances the flavor but also gives you complete control over the quality of your ingredients.
Mastering the Paleo AIP Chicken Pot Pie: A Step-by-Step Guide
Creating this delicious pot pie is a rewarding process. We’ll break it down into two main components: the incredibly flavorful filling and the perfectly tender, grain-free crust.
Crafting the Creamy, Flavorful Filling
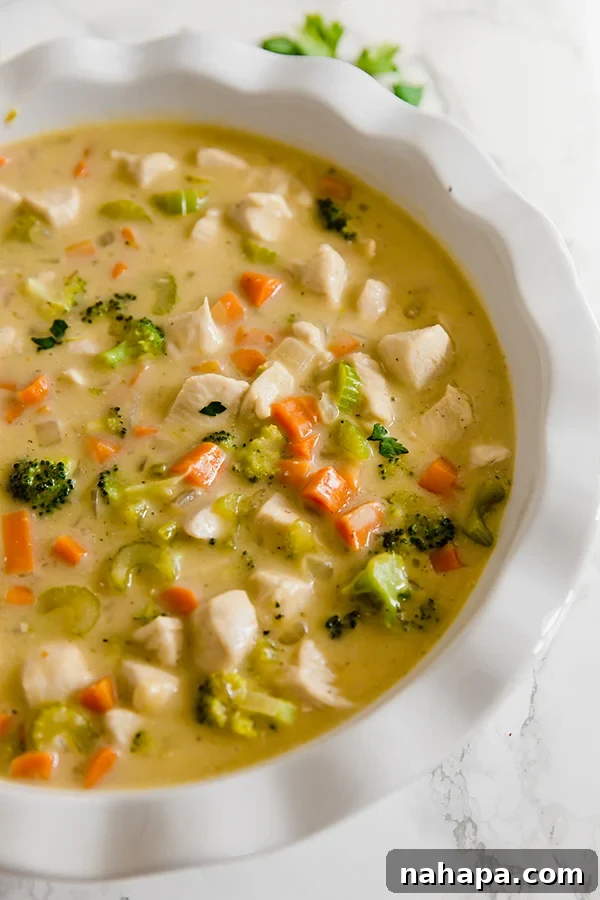
The heart of any great pot pie is its filling. This version is rich, savory, and packed with tender chicken and a colorful array of vegetables, all swimming in a luscious, dairy-free sauce.
- Begin by heating coconut oil in a large, deep skillet over medium heat. Coconut oil is an excellent choice for sautéing in AIP and Paleo cooking, offering a mild flavor and high heat tolerance.
- Add your cubed chicken breast (or thigh for extra flavor) to the skillet, seasoning it lightly with a portion of the sea salt. Sauté the chicken until it’s fully cooked through and golden brown. Cooking it thoroughly at this stage ensures it’s tender and perfectly seasoned within the pie. Once cooked, set the chicken aside, reserving any drippings in the pan.
- If needed, add a touch more coconut oil to the skillet. Then, add the diced yellow onion. Sauté it gently for about 4-5 minutes until it becomes translucent and fragrant, forming a sweet base for the vegetables.
- Next, introduce the minced garlic, chopped celery, diced carrots, and broccoli florets to the skillet. Continue to sauté for another 4-5 minutes, allowing the vegetables to soften slightly but still retain a pleasant bite. They should be “fork tender,” meaning they can be easily pierced but aren’t mushy.
- Sprinkle the arrowroot starch over the sautéed vegetables and stir thoroughly to coat them evenly. Arrowroot starch is a fantastic grain-free thickener that will give our sauce its characteristic creamy consistency without any gluten.
- Pour in the chicken broth and coconut milk. The chicken broth provides a savory depth, while full-fat coconut milk contributes a dairy-free creaminess that mimics traditional pot pie sauce beautifully. Add the remaining seasonings – dried thyme and dried sage – which are essential for that classic savory pot pie flavor profile. Stir everything to combine fully.
- Bring the mixture to a low simmer for 3-4 minutes, stirring occasionally. You’ll notice the sauce begin to thicken as the arrowroot starch activates.
- Finally, return the cooked chicken to the thickened sauce and stir to ensure every piece is coated in the delicious, creamy mixture.
- Carefully pour this luscious filling into a lightly greased 9-inch pie pan. Set it aside while you prepare the crust.
Perfecting Your Paleo Pie Crust
A pot pie isn’t complete without its golden, flaky crust. This grain-free version is surprisingly easy to work with and bakes up beautifully, providing the perfect counterpoint to the rich filling.
- Preheat your oven to 400°F (200°C). A hot oven is key to achieving a beautifully golden and crisp crust.
- In a large mixing bowl, combine the dry ingredients for the crust: cassava flour, coconut flour, a pinch of sea salt, and gelatin. Cassava flour provides structure and a texture similar to wheat flour, while coconut flour adds absorbency and a subtle sweetness. Gelatin helps with the elasticity and pliability of the dough, making it easier to roll and giving the crust a desirable texture.
- Add the cold palm shortening to the dry ingredients. Use a pastry blender or your fingertips to “cut in” the shortening until the mixture resembles coarse crumbs. Palm shortening acts similarly to butter in traditional crusts, providing flakiness without the dairy.
- Gradually pour in the water, mixing continuously until a cohesive dough forms. Be careful not to overmix; just bring it together until it’s pliable.
- Lightly flour a clean work surface with cassava flour. Transfer the dough onto this surface. Lightly flour your rolling pin as well. Roll the dough into a large circle, ensuring it’s about ½ to ¾ inch larger than your pie pan. This extra margin will allow you to crimp the edges nicely. If the dough tends to stick, try rolling it between two sheets of parchment paper for easier handling. Roll until the dough has an even thickness.
- Carefully transfer the rolled dough onto your pie pan. You might need to flour your hands slightly to prevent sticking. Gently press the dough into the pan, ensuring it covers the sides. If any tears occur, simply pinch them together with your fingers to seal. Pinch the edges of the dough to create a decorative crimp around the rim of the pie pan.
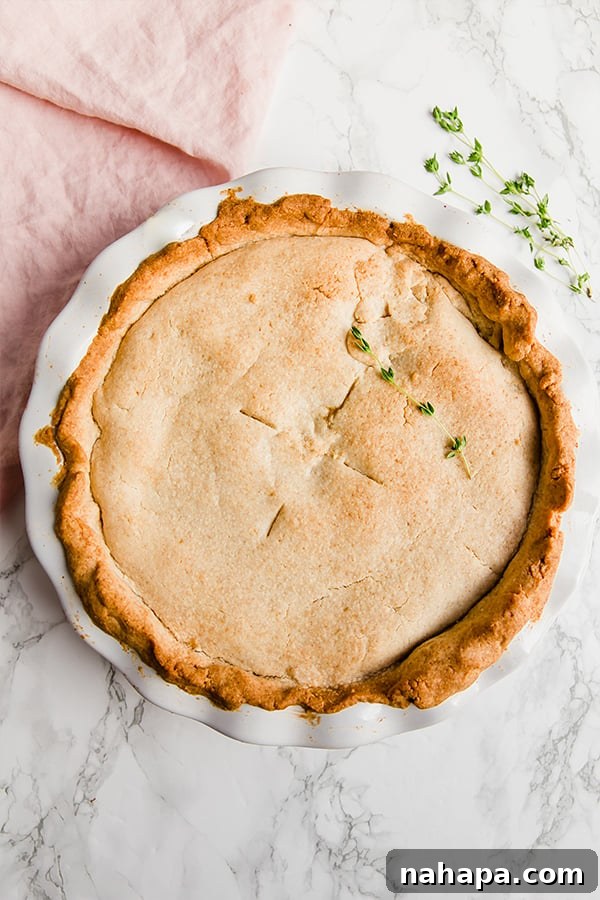
- Using a sharp knife, score 3-4 small slits or create a simple design on the top of the pie crust. These vents are crucial for allowing steam to escape during baking, preventing the crust from becoming soggy and ensuring even cooking.
- Transfer the pie pan to the preheated oven and bake for 20-25 minutes, or until the crust turns a beautiful golden brown. Keep an eye on it to prevent over-browning.
- Once baked, carefully remove the chicken pot pie from the oven. Allow it to cool for a few minutes before slicing and serving. This cooling time allows the filling to set further, making for cleaner slices.
Ingredient Deep Dive & Smart Swaps
Understanding the role of each ingredient in this Paleo AIP Chicken Pot Pie recipe will help you achieve the best results and make informed decisions about substitutions.
Key Ingredients You’ll Need:
- **Chicken Breast:** This recipe calls for 1 lb of cubed chicken breast, offering a lean protein source.
- **Substitution:** You can easily use boneless, skinless chicken thighs for a richer flavor profile or pre-cooked rotisserie chicken (ensure it’s AIP-compliant with no non-compliant seasonings) for a quicker prep time. Any mildly seasoned cooked chicken will work beautifully.
- **Carrots, Broccoli, and Onion:** This trio provides essential nutrients, color, and texture to the filling.
- **Substitution/Additions:** Feel free to get creative with other AIP-friendly vegetables. Parsnips, diced sweet potato, cauliflower florets, or even chopped kale or spinach (added at the end) would be excellent additions. Peas are often found in traditional pot pies but are not AIP-compliant, so avoid them if strictly following the protocol.
- **Chicken Broth, Coconut Milk, and Arrowroot Starch:** These are the foundational components of our creamy, dairy-free sauce.
- **Chicken Broth:** Opt for a high-quality, unsalted or low-sodium chicken broth, or homemade bone broth for added nutritional benefits.
- **Coconut Milk:** Use full-fat canned coconut milk (look for brands with minimal additives, ideally just coconut and water) for maximum creaminess. Do not use refrigerated coconut beverage, as it’s too thin.
- **Arrowroot Starch:** This is our grain-free thickening agent. It provides a smooth, glossy texture to the sauce. There are no direct AIP-compliant substitutions that will yield the exact same results. Tapioca starch can sometimes be used interchangeably with arrowroot in certain recipes, but I have not tested it for this specific pot pie.
- **Cassava Flour, Coconut Flour, and Palm Shortening:** These are the crucial ingredients for our distinctive grain-free, dairy-free pie crust.
- **Cassava Flour:** This starchy flour is a fantastic gluten-free and grain-free alternative to wheat flour, offering a similar texture and binding capability. I have not successfully tried other flours for the crust and cannot recommend a swap that would yield the same results for this specific recipe.
- **Coconut Flour:** Known for its high absorbency, coconut flour adds structure and helps bind the dough. Its absorbency varies by brand, so add it gradually (3-4 tbsp) to ensure your dough isn’t overly dry (see notes in the recipe card).
- **Palm Shortening:** This is the key to a flaky, dairy-free crust, acting as a direct swap for butter. I haven’t tested coconut oil in the crust and don’t believe it would hold up as well or provide the same flakiness due to its lower melting point. Lard (if AIP-compliant for you and sourced well) would likely be the next best option if you cannot use palm shortening, though I have not tested it personally for this recipe.
- **Gelatin:** Unflavored gelatin is added to the crust to improve its pliability and texture, making it easier to work with and giving it a more appealing mouthfeel.
Pro Tips for Your Best Pot Pie Yet
- **Prep Ahead:** You can prepare the filling a day in advance and store it in the refrigerator. This makes assembly on baking day much quicker. The dough can also be made ahead, wrapped tightly, and refrigerated for up to 2 days, or frozen for longer. Thaw in the fridge before rolling.
- **Consistency is Key for the Crust:** Cassava flour can be a bit tricky. Ensure your dough is pliable but not sticky. If it’s too crumbly, add a tiny bit more water, a teaspoon at a time. If it’s too sticky, dust with a little more cassava flour.
- **Evenly Sautéed Vegetables:** Don’t rush the sautéing process for the vegetables. Allowing them to lightly soften and develop flavor will greatly enhance the final taste of your pot pie.
- **Vent Your Crust:** Those small slits on top aren’t just for aesthetics! They release steam, preventing a puffy, uneven crust and ensuring the filling cooks evenly.
- **Golden Brown Perfection:** Keep an eye on the crust during the last few minutes of baking. You want it beautifully golden brown, indicating a perfectly cooked, flaky texture. If it’s browning too quickly, you can lightly tent it with aluminum foil.
- **Serving Temperature:** While tempting to dive in immediately, letting the pot pie cool for 10-15 minutes after baking allows the filling to set. This makes for cleaner slices and a more enjoyable eating experience.
Storage & Reheating Instructions
This Paleo AIP Chicken Pot Pie is wonderful for meal prepping or enjoying leftovers.
- **Storage:** Once cooled, cover any leftover pot pie tightly with plastic wrap or aluminum foil and refrigerate for up to 3-4 days.
- **Freezing:** For longer storage, individual slices or the entire baked pot pie (fully cooled) can be wrapped tightly in plastic wrap and then in aluminum foil, then frozen for up to 2-3 months. Thaw in the refrigerator overnight before reheating.
- **Reheating:** To reheat, place individual slices in the microwave until warmed through, or for a crispier crust, reheat in an oven preheated to 300-325°F (150-160°C) for 15-20 minutes, or until heated through. If reheating from frozen, it may take longer.
Paleo Chicken Pot Pie (AIP)
This chicken pot pie tastes just like the real thing without any of the gluten or dairy! This recipe is paleo and AIP-friendly.
- Yield: 6 servings
- Prep Time: 20 mins
- Cook Time: 45 mins
Ingredients
For the filling
- 2 tbsp coconut oil
- 1 lb chicken breast, cubed
- 1 tsp sea salt, divided
- 1 yellow onion, diced
- 2 cloves garlic, minced
- 1 cup carrots, diced
- 1 cup broccoli florets
- ½ cup celery, chopped
- 2 tbsp arrowroot starch
- 1 ½ cup chicken broth
- ½ cup coconut milk
- 2 tsp dried thyme
- 1 tsp dried sage
For the crust
- 1 ¼ cup + 2 tbsp cassava flour
- 3-4 tbsp coconut flour, see notes
- 1 tbsp gelatin
- ¼ tsp sea salt
- ⅓ + 1/4 cup palm shortening
- ¼ cup + 2 tbsp water
Instructions
For the filling
- Using a large deep skillet, heat the coconut oil over medium heat.
- Add the chicken and lightly salt. Sauté until cooked through to an internal temperature of 165°F. Set aside.
- Add more oil if needed and sauté the onion for 4-5 minutes or until lightly translucent. Add the garlic, celery, carrots, and broccoli and sauté for another 4-5 minutes or until the vegetables are lightly fork tender. Add the arrowroot starch and stir to coat.
- Pour in the chicken broth, coconut milk, and seasonings (thyme and sage). Stir to fully combine and bring to a low simmer for 3-4 minutes, allowing the sauce to thicken. Add the chicken back to the mixture and stir to coat.
- Pour the mixture into a lightly greased pie pan (about a 9″ pie pan) and set aside.
For the crust
- Preheat the oven to 400°F (200°C).
- Using a large mixing bowl, combine the cassava flour, coconut flour, salt, and gelatin. Cut in the palm shortening and mix well. Pour in the water and mix well to combine until a dough forms.
- Flour a clean surface with cassava flour and add the dough to the surface. Flour a rolling pin and roll the dough into a large circle that’s about ½-¾” larger than your pie pan. You can also roll the dough between two pieces of parchment paper if it’s sticking. Roll until even.
- Flour your hands if needed and very carefully transfer the dough onto the pie pan. Pinch any tears in the pie crust, and pinch the sides to cover the pie pan. Use a knife to score about 3-4 small lines into the top of the pie crust.
- Transfer to the oven and bake for 20-25 minutes or until the crust is lightly golden brown. Carefully remove from the oven and allow to cool before serving.
Notes
All nutritional information are estimations and will vary. Estimations do not include optional ingredients.
I find that all coconut flours have different absorbency levels, and some result in a more dry crust than others. Add coconut flour 1 tbsp at a time to ensure that the coconut flour is not overly dry and doesn’t dry out your crust.
Nutrition Information (Estimated Per Serving)
- Serving: 1 serving
- Calories: 523 kcal
- Carbohydrates: 28.1g
- Protein: 26.3g
- Fat: 35.2g
- Fiber: 12.5g
All nutrition facts are estimated and will vary.
You’ll also love these delicious recipes…
- Chicken Divan (AIP Friendly)
- Healthy Broccoli Cheese Casserole (Dairy-Free)
- Chicken Bacon Ranch Casserole (Paleo & AIP)